
While working on any application, you’ll eventually need to some long running tasks, like image processing, passing data through an ML pipeline, or sending out notifications. They might be too heavy to run on the user’s device directly, so the required data is sent over to backend servers to perform the task and return the result to the user.

Traditionally, you will need to build and manage the backend server, which is a very tedious process. But with the help of Cloud Functions, you can avoid this hassle and let Firebase handle it for you.
Cloud Functions is a service provided by Firebase that lets you run backend tasks on a serverless framework in response to events triggered by any other Firebase service or HTTPS requests.
In this article, you will learn to write and deploy your backend functions to Firebase and use Flutter to trigger them. This post contains the following sections:
The Replay is a weekly newsletter for dev and engineering leaders.
Delivered once a week, it's your curated guide to the most important conversations around frontend dev, emerging AI tools, and the state of modern software.
There are three major types of Cloud Functions:
GET, POST, PUT, DELETE, and OPTIONSAll three of these types of Cloud Functions will be covered in this article.
To get access to the Cloud Functions service, you need to create a new Firebase project.
Follow the steps below:
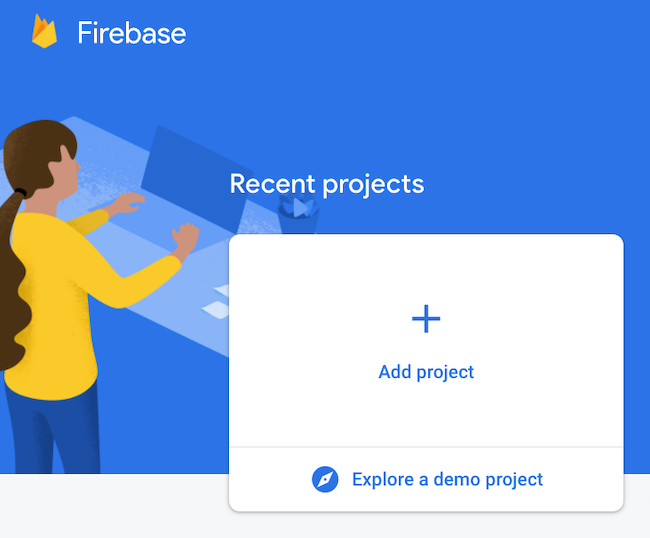
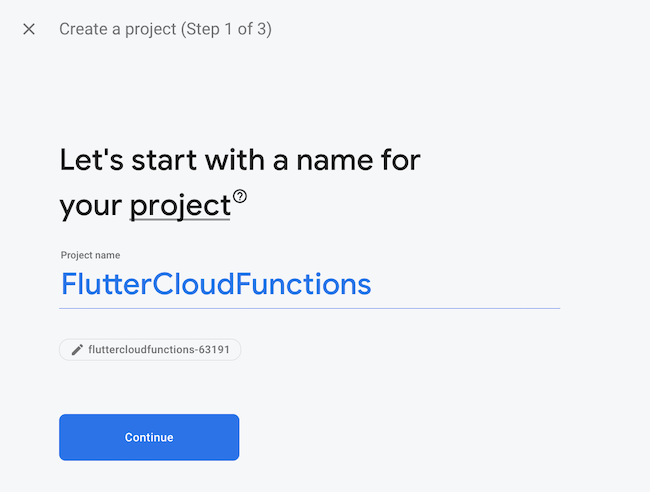
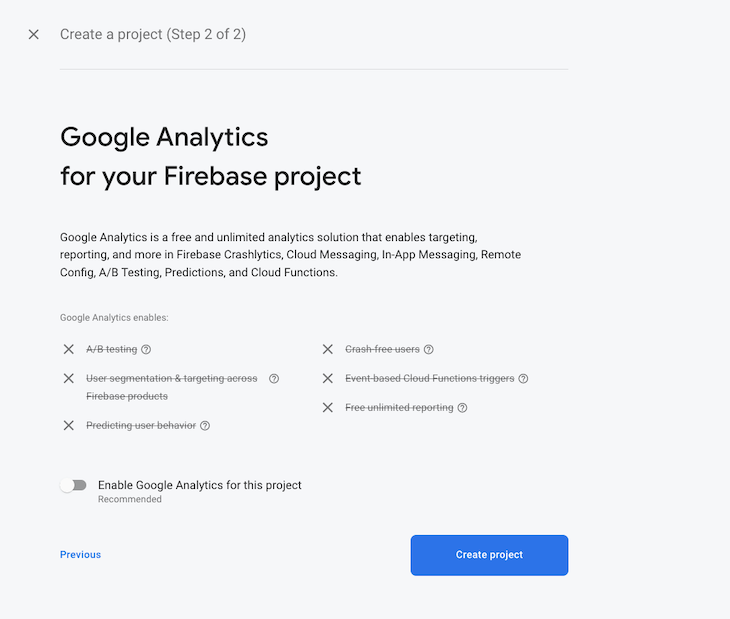
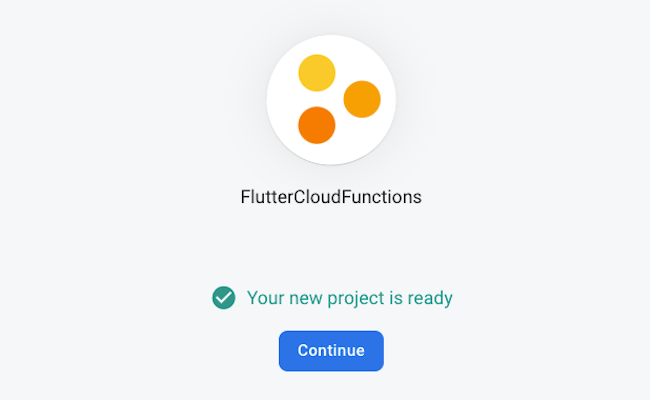
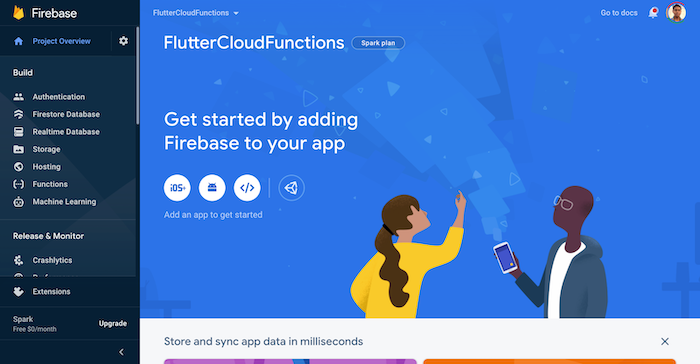
This will take you to the Project Overview page. You will get access to all Firebase services from this page, including Cloud Functions.
You can use the following command to create a new Flutter project:
flutter create flutter_cloud_functions
Open the project using your favorite IDE; I’ll be using VS Code:
code flutter_cloud_functions
By default, Flutter creates a demo counter app project.
Navigate to the lib/main.dart file and replace the entire code with the following:
import 'package:flutter/material.dart';
void main() {
  runApp(const MyApp());
}
class MyApp extends StatelessWidget {
  const MyApp({Key? key}) : super(key: key);
  @override
  Widget build(BuildContext context) {
    return const MaterialApp(
      title: 'Flutter Cloud Functions',
      home: HomePage(),
    );
  }
}
class HomePage extends StatelessWidget {
  const HomePage({Key? key}) : super(key: key);
  @override
  Widget build(BuildContext context) {
    return Scaffold(
      body: Container(),
    );
  }
}
This is just a simple starting code, we’ll be adding Cloud Function calls inside this app once the functions are deployed to Firebase.
The Firebase Command Line Interface (CLI) Tools help in managing and deploying various Firebase service configurations using the command line. Here, we’ll only discuss the Cloud Functions service.
Install the Firebase CLI following the steps below:
npm install -g firebase-tools
firebase login
When you run the above command, a link will be generated. Open that link in your browser and complete the verification.
cd flutter_cloud_functions
firebase init functions
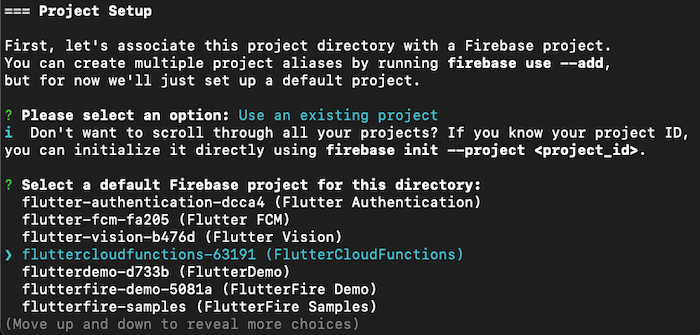
What language would you like to use to write Cloud Functions? — you can choose between JavaScript and TypeScript. In this article, we’ll be using JavaScript to write the functions.Do you want to use ESLint to catch probable bugs and enforce style? — YesDo you want to install dependencies with npm now? — Yes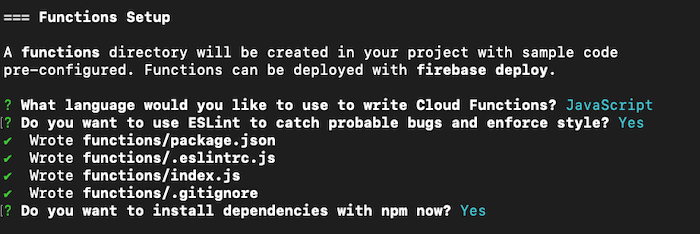
Wait for the Firebase initialization to complete. Now, you’ll notice that a new folder called functions will be created inside your Flutter project.
If you navigate to the functions folder, you’ll find the following contents:
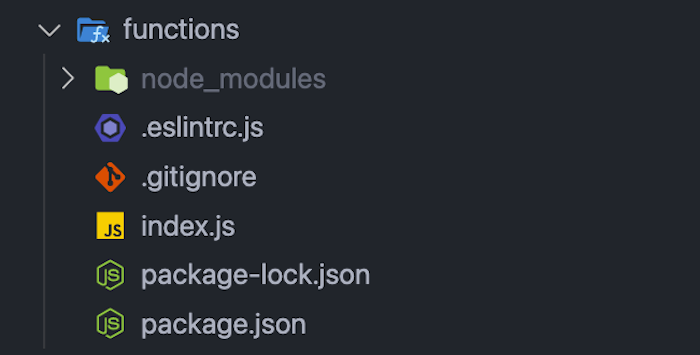
The Node dependencies will be present inside the package.json file, and index.js is the file where you need to define the Cloud Functions.
It’s time to start writing your first function, we’ll write a function to send an email using Twilio’s SendGrid Email API, which is free to use to send up to 100 emails per day.
You’ll need to install the SendGrid helper library as a node dependency, run the following command from the functions folder:
cd functions
npm install --save @sendgrid/mail
This will install and add the dependency to the package.json file.
Open the index.js file, follow the steps below:
const sgMail = require('@sendgrid/mail')
sgMail.setApiKey(functions.config().sendgrid.key);
const msg = {
to: "[email protected]", // Change to your recipient
from: "[email protected]", // Change to your sender
subject: "Welcome to your account",
text: "This is your first email triggered by Cloud Functions",
};
onRequest HTTPS function called sendEmailToUser:
exports.sendEmailToUser = functions.https.onRequest((req, res) => {
sgMail
.send(msg)
.then((response) => {
console.log(response[0].statusCode);
console.log(response[0].headers);
})
.catch((error) => {
console.error(Unable to send email. Error: ${error}); throw new functions.https.HttpsError("aborted", "Unable to send email"); }); });
The entire index.js file will look like this:
const functions = require("firebase-functions");
const sgMail = require("@sendgrid/mail");

sgMail.setApiKey(functions.config().sendgrid.key);

const msg = {
  to: "[email protected]", // Change to your recipient
  from: "[email protected]", // Change to your sender
  subject: "Welcome to your account",
  text: "This is your first email triggered by Cloud Functions",
};

exports.sendEmailToUser = functions.https.onRequest((req, res) => {
  sgMail
      .send(msg)
      .then((response) => {
        console.log(response[0].statusCode);
        console.log(response[0].headers);
      })
      .catch((error) => {
        console.error(`Unable to send email. Error: ${error}`);
        throw new functions.https.HttpsError("aborted", "Unable to send email");
      });
});
Before you start deploying the Cloud Function, you’ll need to perform a few steps to generate the required credentials, verify the sender’s email, and upgrade your Firebase project.
You’ll need a SendGrid API key while deploying the Cloud Function. Create an API Key by following the steps below:
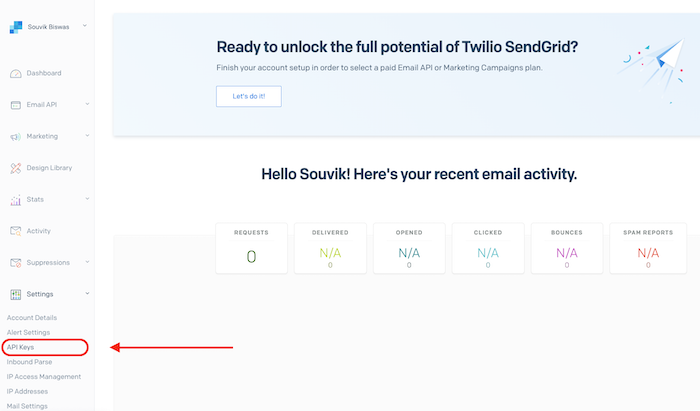
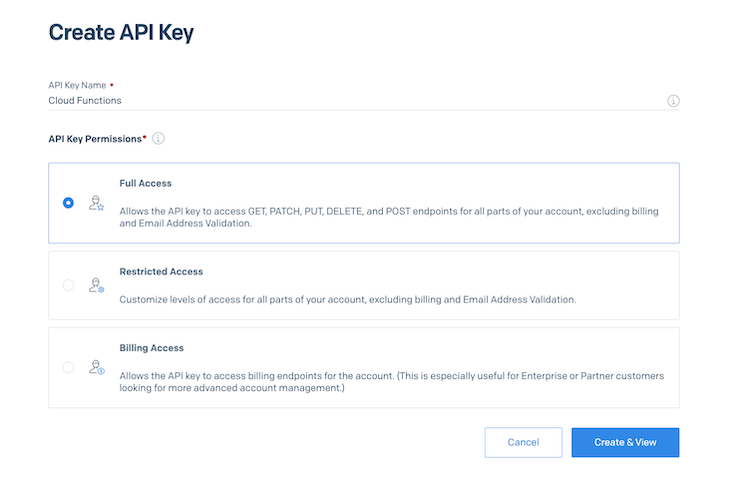
These steps will generate an API key. Copy the key and store it in a safe place (it won’t be visible again).
In order to use a sender’s email to send an email using SendGrid API, you’ll need to verify that email address first.
Follow the steps below to verify an email:
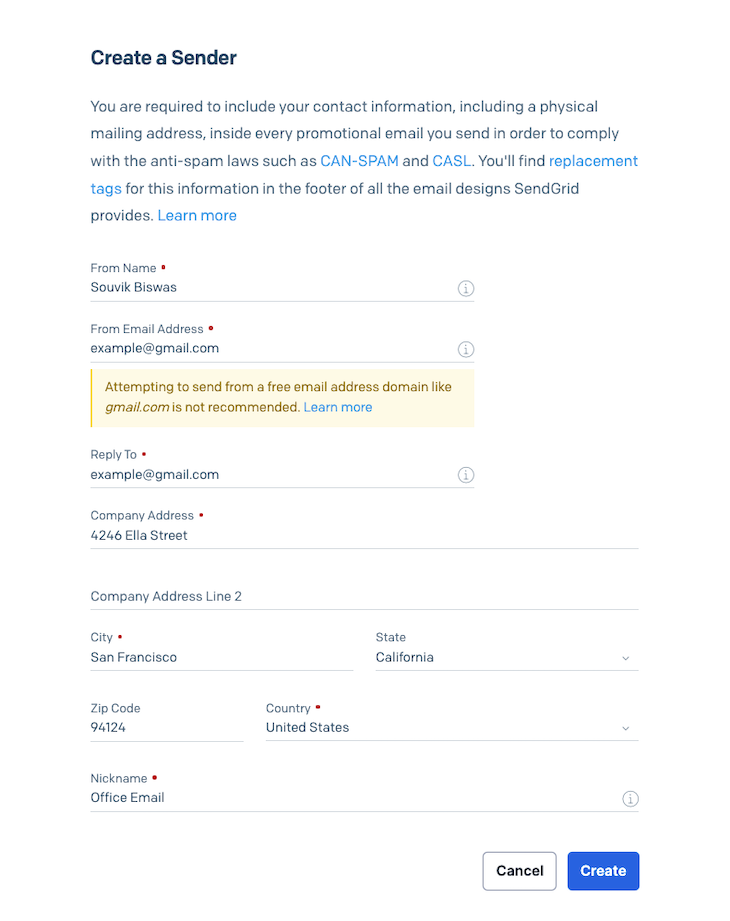
To use the Cloud Functions service, you need to upgrade your Firebase project to the Blaze Plan (every Firebase project uses the Spark Plan by default).
Follow the steps below to upgrade to the Blaze Plan:
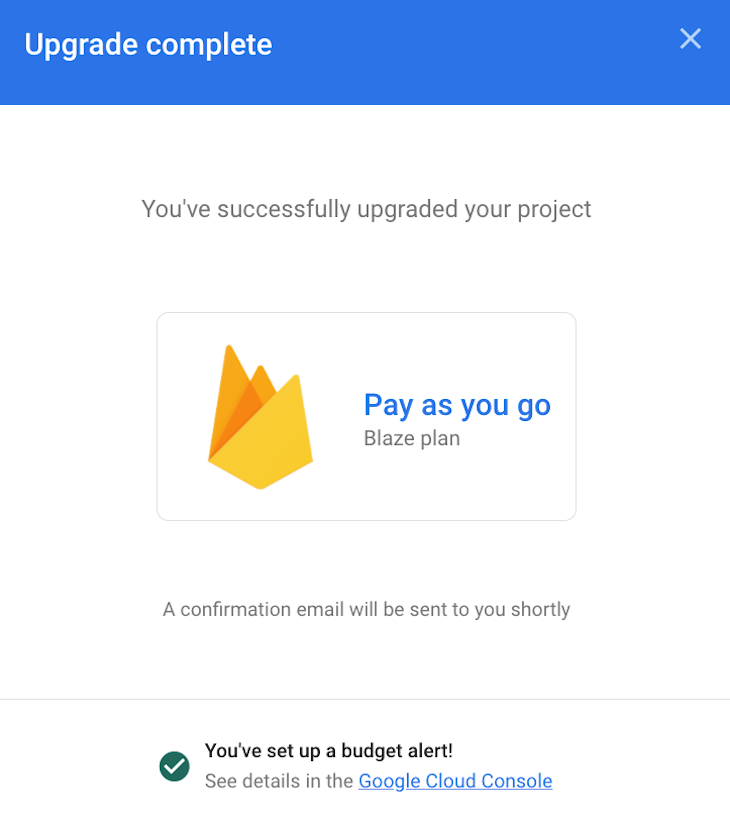
To deploy the function, follow the steps below:
functions folder.firebase functions:config:set sendgrid.key=""Replace <api_key> with the key that you had generated earlier.
firebase deploy --only functionsWait for the deployment process to complete. You will see something like this on the console:
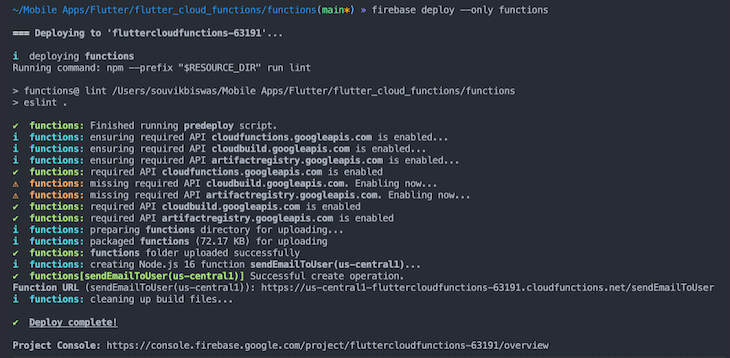
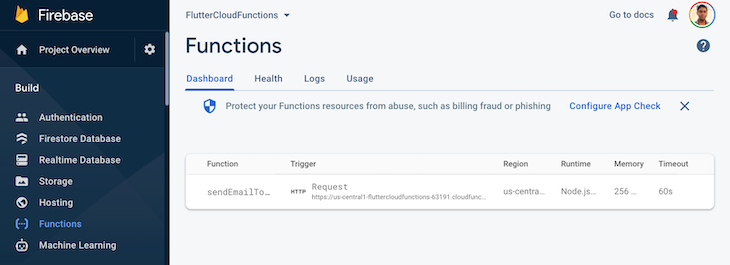
Once the deployment is complete, navigate to the Firebase Dashboard and go to the Functions page from the lefthand menu. You’ll be able to view the deployed function:
You can emulate the HTTPS function that we just defined using the Cloud Functions emulator that comes along with the Firebase CLI.
As we passed the SendGrid API Key as a configuration variable, you first need to run the following command to get the custom config in your local environment (run it from the functions directory):
firebase functions:config:get > .runtimeconfig.json
Run the emulator for Cloud Functions using the following command:
firebase emulators:start --only functions
This command will generate a URL for loading the emulator UI and get the Cloud Function logs inside the console.
As it’s an HTTPS function, you can trigger it either using a curl request or just by loading up the generated URL from your browser. The URL for triggering the function will look similar to this:
http://localhost:5001/fluttercloudfunctions-63191/us-central1/sendEmailToUser
Once the function is triggered, you should see the logs printed to the console:

The email will also be sent to the provided recipient’s email address:

To use any Firebase service inside your Flutter app, you need to configure and initialize Firebase inside your project. FlutterFire now supports Dart-only initialization.
First, install the firebase_core plugin inside your Flutter project using:
flutter pub add firebase_core
For using Dart-only initialization, you need to install the following CLI tools:
Install the FlutterFire CLI using:
dart pub global activate flutterfire_cli
Run the following command to configure FlutterFire CLI:
flutterfire configure
Select the platforms for which you want to generate the configurations; it will automatically create and register the platform configurations to Firebase:
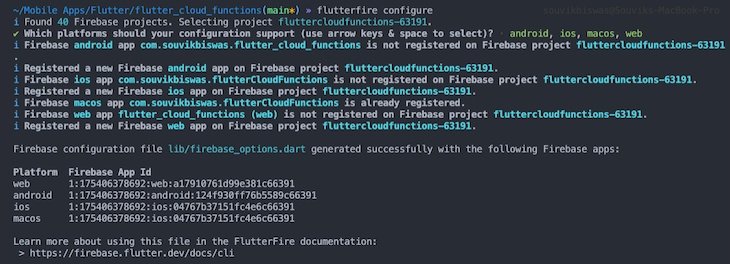
You’ll find all of your configurations inside the lib/firebase_options.dart file.
Next, you need to initialize Firebase inside your main.dart file. Add the following inside the main() function:
import 'package:firebase_core/firebase_core.dart';

import 'firebase_options.dart';

void main() async {
  WidgetsFlutterBinding.ensureInitialized();
  await Firebase.initializeApp(
    options: DefaultFirebaseOptions.currentPlatform,
  );
  runApp(const MyApp());
}
Install the cloud_functions plugin to your Flutter project using:
flutter pub add cloud_functions
Update the HomePage class to be a StatefulWidget:
import 'package:flutter/material.dart';
class HomePage extends StatefulWidget {
  const HomePage({Key? key}) : super(key: key);
  @override
  State<HomePage> createState() => _HomePageState();
}
class _HomePageState extends State<HomePage> {
  @override
  Widget build(BuildContext context) {
    return Scaffold(
      appBar: AppBar(
        title: const Text('Cloud Functions'),
      ),
      body: Container(),
    );
  }
}
Instantiate the Cloud Functions:
import 'package:cloud_functions/cloud_functions.dart';

class _HomePageState extends State<HomePage> {
  final functions = FirebaseFunctions.instance;
  // ...
}
To make a Cloud Function callable from the Flutter app, you need to refactor the function to convert the HTTPS function to a callable function.
Instead of using onRequest:
exports.sendEmailToUser = functions.https.onRequest((_, __) => {
   // ...
});
Use onCall and also return a String as the response to the call:
exports.sendEmailToUser = functions.https.onCall((_, __) => {
   // ...

   return `Email sent successfully to ${msg.to}`;
});
If you don’t return anything while using await to call this function, the processing would run infinitely and would result in a timeout error.
Re-deploy the function by running:
firebase deploy --only functions
Go back to the HomePage widget, initialize a new boolean variable for tracking when the email sending is in process:
bool _isSending = false;
Add a new method for triggering the Cloud Function called sendEmail:
Future<void> sendEmail() async {
  setState(() => _isSending = true);

  final callable = functions.httpsCallable('sendEmailToUser');
  final results = await callable();

  setState(() => _isSending = false);

  debugPrint(results.data);
}
Here, httpsCallable method is used for getting a reference to the callable HTTPS trigger by passing the name. Then, the callable() method is used to trigger the function.
Add a button inside the Scaffold to call the sendEmail() method:
@override
Widget build(BuildContext context) {
  return Scaffold(
    appBar: AppBar(
      title: const Text('Cloud Functions'),
    ),
    body: Center(
      child: _isSending
          ? const CircularProgressIndicator()
          : ElevatedButton(
              onPressed: () async => await sendEmail(),
              child: const Padding(
                padding: EdgeInsets.all(8.0),
                child: Text(
                  'Send Email',
                  style: TextStyle(fontSize: 24),
                ),
              ),
            ),
    ),
  );
}
When the function is processing, a CircularProgressIndicator widget will display in the UI.
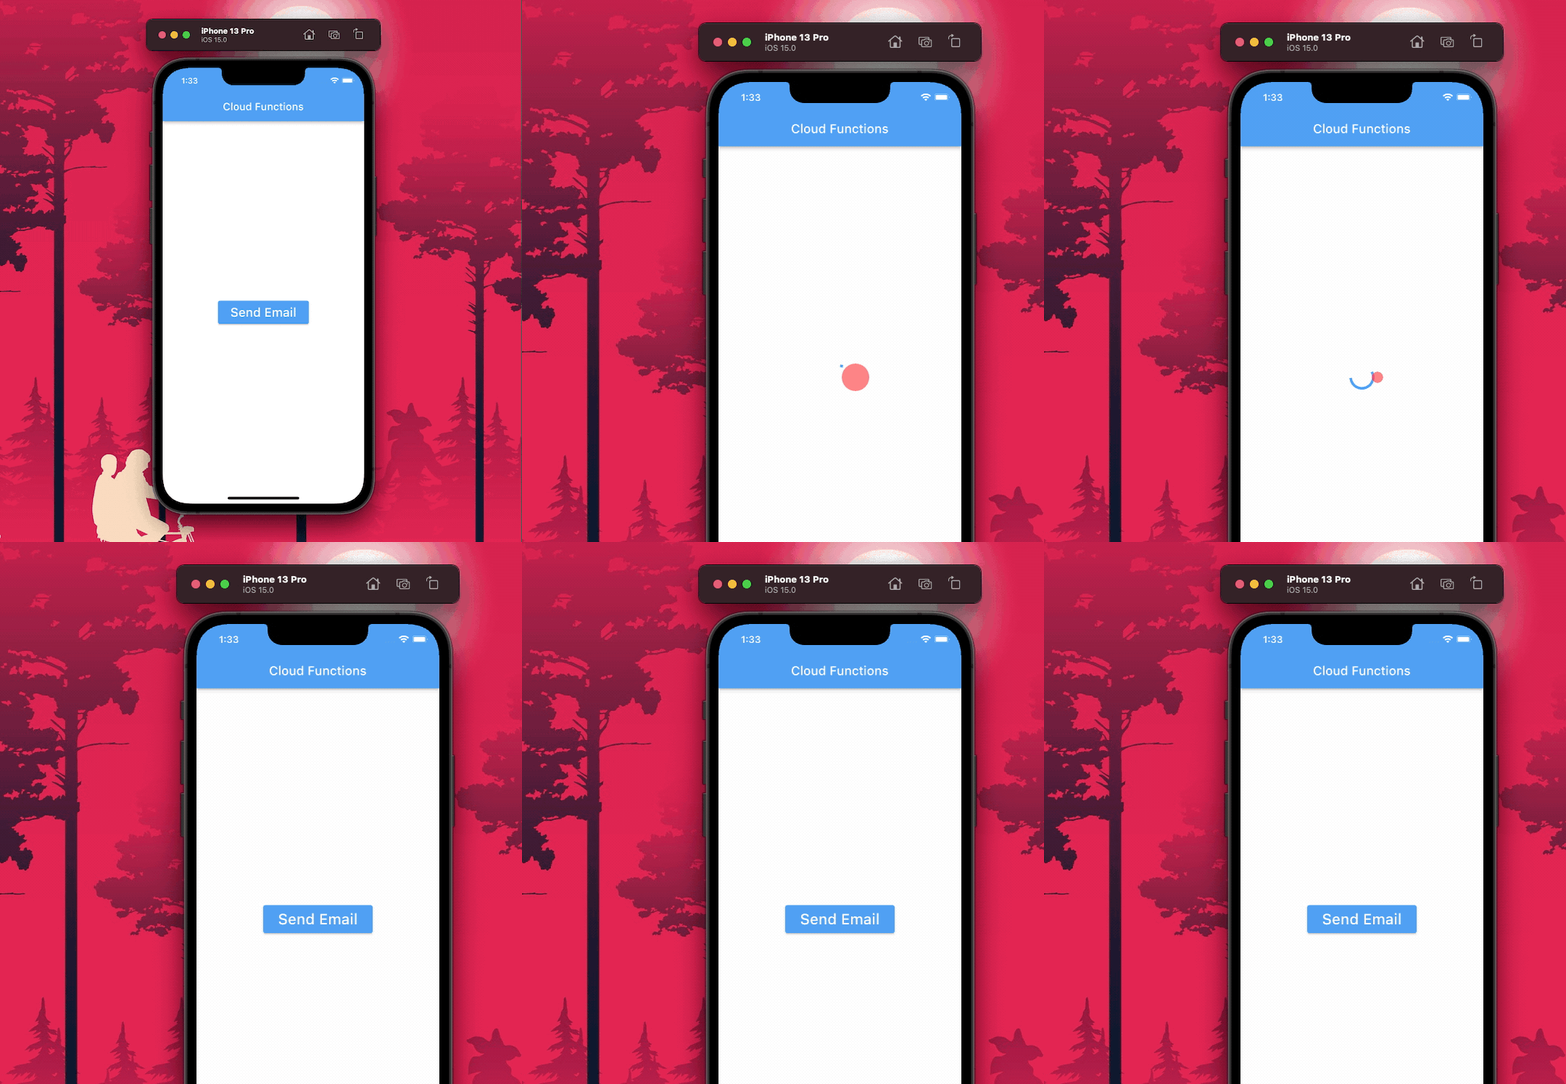
Once the email sending process is complete, you will also notice the following printed to the console:
flutter: Email sent successfully to [email protected]
Usually, welcome emails are sent as soon as a user signs up for an app. This can be implemented easily using Firebase Authentication triggers, which can be used inside Cloud Functions.
You’ll need to use the onCreate event handler inside the function to trigger it automatically once a new user successfully signs up.
exports.sendWelcomeEmail = functions.auth.user().onCreate((user) => {
  const email = user.email; // Get email from authenticated user
  const displayName = user.displayName; // Get name from authenticated user

  const msg = {
    to: email,
    from: "[email protected]", // Change to your verified sender email
    subject: "Welcome to your account",
    text: `Hi ${displayName}, thanks for signing up!`,
  };

  sgMail
      .send(msg)
      .then((response) => {
        console.log(response[0].statusCode);
        console.log(response[0].headers);
      })
      .catch((error) => {
        console.error(`Unable to send email. Error: ${error}`);
        throw new functions.https.HttpsError("aborted", "Unable to send email");
      });

  return `Email sent successfully to ${msg.to}`;
});
You can get some of the basic user information from the authenticated user object:
const email = user.email;
const displayName = user.displayName;
Before you deploy this function, make sure you have enabled Firebase Authentication from the console.
Re-deploy the functions using:
firebase deploy --only functions
Now, you don’t need to explicitly call the function inside your Flutter app. Once a user is authenticated inside your app, an email will be sent to the address used for signing up.
You can learn more about setting up Firebase Authentication in Flutter from here.
Firebase Cloud Functions make it much simpler to run long-running or computation-intensive tasks on its server without having to deal with maintaining your own server infrastructure.
This article covers all the different types of Cloud Functions that you can run on Firebase, and how to integrate them with your Flutter app. If you’re already using a Firebase service, like Authentication, inside your app, you can take advantage of background functions without having to make any additions to your app.
Thank you for reading the article! If you have any suggestions or questions about the article or my examples, feel free to connect with me on Twitter or LinkedIn. You can find the sample project used in this article in my GitHub repository.
Install LogRocket via npm or script tag. LogRocket.init() must be called client-side, not
server-side
$ npm i --save logrocket

// Code:

import LogRocket from 'logrocket';
LogRocket.init('app/id');
// Add to your HTML:

<script src="https://cdn.lr-ingest.com/LogRocket.min.js"></script>
<script>window.LogRocket && window.LogRocket.init('app/id');</script>

@container scroll-state: Replace JS scroll listeners nowCSS @container scroll-state lets you build sticky headers, snapping carousels, and scroll indicators without JavaScript. Here’s how to replace scroll listeners with clean, declarative state queries.

Explore 10 Web APIs that replace common JavaScript libraries and reduce npm dependencies, bundle size, and performance overhead.

Russ Miles, a software development expert and educator, joins the show to unpack why “developer productivity” platforms so often disappoint.

Discover what’s new in The Replay, LogRocket’s newsletter for dev and engineering leaders, in the February 18th issue.
Would you be interested in joining LogRocket's developer community?
Join LogRocket’s Content Advisory Board. You’ll help inform the type of content we create and get access to exclusive meetups, social accreditation, and swag.
Sign up now