
Last month I dived back into the foreign exchange market and noticed a little gap in how lot sizes are calculated and how slow that can be. To be sincere, as a developer, I didn’t even bother looking for an existing tool online, cause if it’s free, then there will be so many ads, and I’m not the biggest fan of ads. I spun up a position-size calculator in Next.js and shipped it.

If I were to document how to use the app, Remotion would be the first that crossed my mind, cause with it I can write the videos in React, render them to MP4 from my terminal, and the whole thing will take less time than one screen recording session used to. When the design changes a week later, I will change two lines of mock data and re-render.
In this article, I’ll walk through the actual build: how I adapted an existing Next.js app for Remotion, built three production demo videos, and used Remotion’s AI agent integration to generate a fourth composition from a natural-language prompt. I’ll also address the setup cost head-on, because it’s real and you should know about it before you commit.
Remotion treats video as a React application. You write JSX, use useCurrentFrame() to get the current frame number, animate values with interpolate() and spring(), and compose scenes with <Sequence>. The output is a real PNG and MP4 rendered via headless Chrome and FFmpeg.
If you’ve used React, you already know 80% of what you need. The remaining 20% is these three APIs:
useCurrentFrame(): This returns the current frame number. This is your clockinterpolate(frame, inputRange, outputRange): This maps frame numbers to values. This is how you animate<Sequence from={60} durationInFrames={150}>: This wraps a section of your composition in a time window. This is how you choreographRemotion Studio gives you a browser-based preview with timeline scrubbing and hot reload. You see your video update as you write code, the same way you see a React app update in dev mode.
Remotion is not new, but most React devs still don’t know it exists because every existing article is either a docs walkthrough or a showcase of fancy animations. Nobody has taken a real product demo workflow and documented how Remotion replaces the screen recorder with code.
That’s what this piece does.
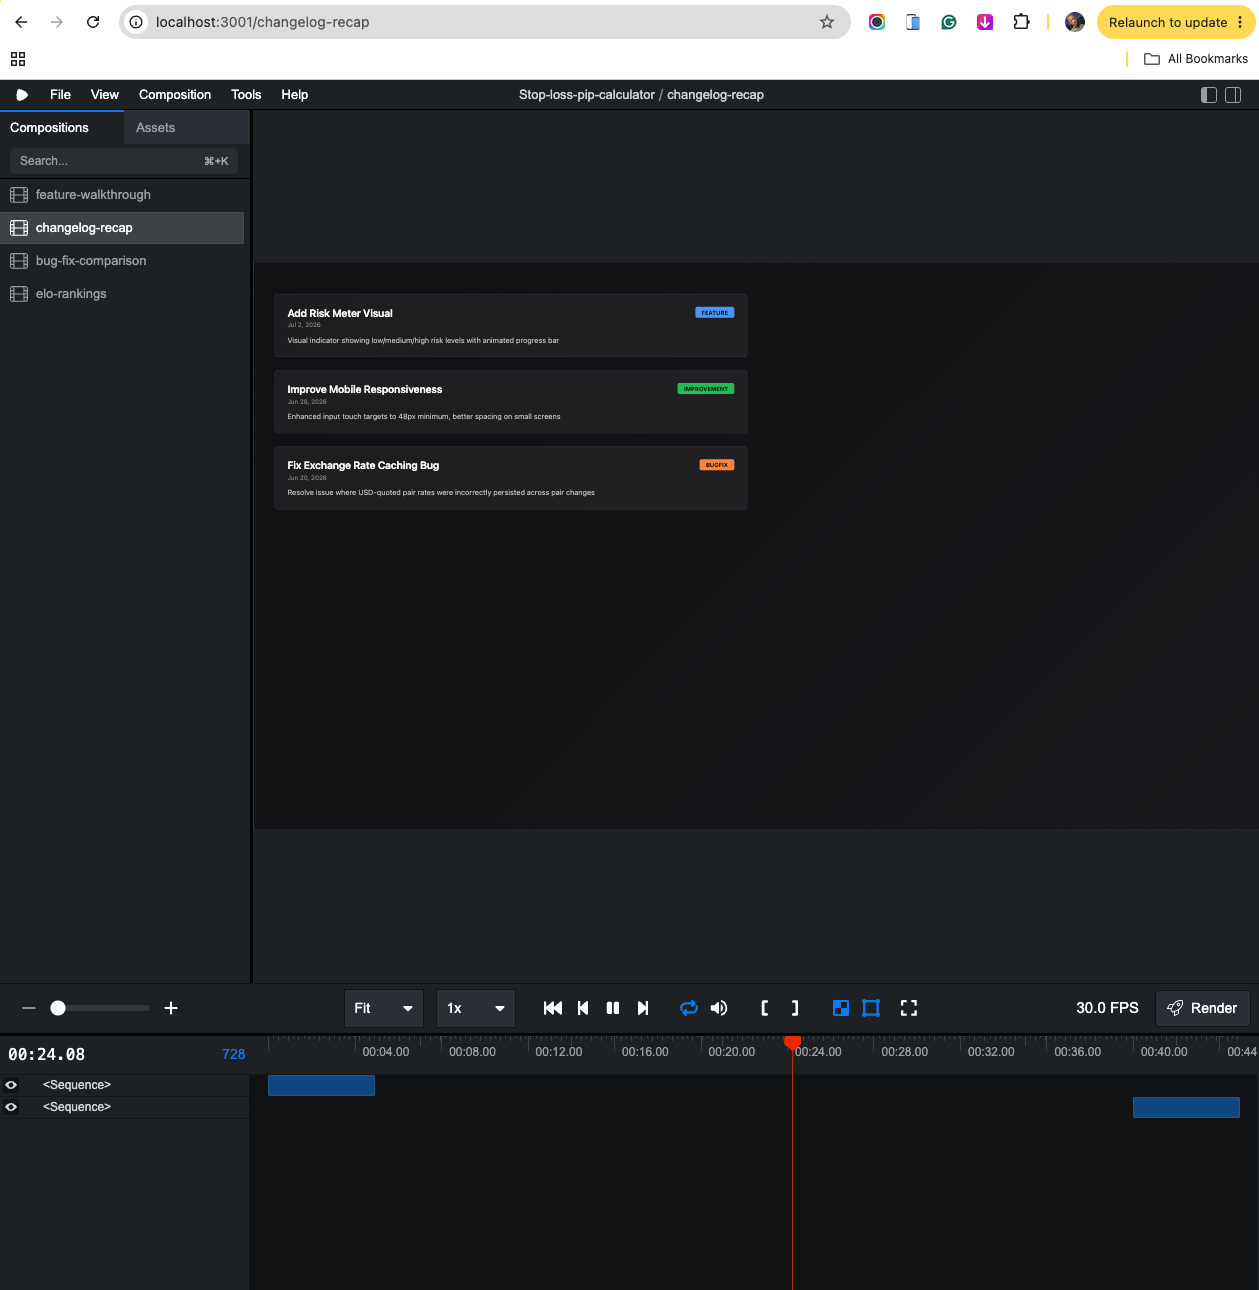
One command to render a video sounds clean, but getting there requires adapting your app components for Remotion’s rendering environment. Here’s what that actually looks like.
Remotion renders each frame as a static React component. That means there are no useState, useEffect, event listeners, browser APIs like localStorage, and Next. js-specific features like useRouter. Your components need to read everything from props.
For my calculator app, this meant creating adapted versions of four components. The original Calculator component had reactive state management, keyboard listeners, and localStorage for history tracking. The Remotion version, RemotionCalculator, strips all of that and reads input values directly from props:
// Original: manages its own state
const Calculator = () => {
  const [accountSize, setAccountSize] = useState(10000);
  const [riskPercent, setRiskPercent] = useState(2);
  // ... event handlers, localStorage, etc.
};

// Remotion version: pure component, reads from props
const RemotionCalculator = ({
  accountSize,
  riskPercent,
  stopLoss,
  pair,
}: CalculatorProps) => {
  const result = calculate(accountSize, riskPercent, stopLoss, pair);
  // ... render with result, no state needed
};
The ResultsCard, PairSelector, and RiskQuickSelect components needed similar treatment. Total adaptation time: about 15 minutes. The shared calculation logic in lib/calculate.ts worked in both environments without changes, which is exactly why keeping business logic in pure functions pays off.
Screen recording uses your live app. Remotion uses mock data passed as props. For each demo video, I created a mock file with the exact values I wanted to show:
// remotion/mocks/featureWalkthroughMocks.ts
export const calculatorStates = {
  initial: { accountSize: 0, riskPercent: 0, stopLoss: 0, pair: 'EUR/USD' },
  filled: { accountSize: 10000, riskPercent: 3, stopLoss: 50, pair: 'EUR/USD' },
};
Three mock files, 90 lines total. The upside is that changing one JSON object produces a different video without touching the composition code.
This is the part that replaces mouse clicks. I built a useActionTimeline hook that scripts UI interactions frame-by-frame:
// "At frame 150, start filling the account size field"
// "At frame 300, start filling the risk percentage"
// "At frame 450, start filling the stop loss"
const timeline = [
  { startFrame: 150, endFrame: 300, field: 'accountSize', from: 0, to: 10000 },
  { startFrame: 300, endFrame: 450, field: 'riskPercent', from: 0, to: 3 },
  { startFrame: 450, endFrame: 600, field: 'stopLoss', from: 0, to: 50 },
];
This is deterministic and reproducible. “At frame X, do Y” beats “click the input and hope the timing matches” every time. The hook is 65 lines and reusable across every composition.
| Setup task | Time | Reusable? |
|---|---|---|
| Adapted 4 components | 15 min | Yes, across all videos |
| Created mock data (3 files) | 10 min | Yes, swap data for new videos |
| Built action timeline hook | 15 min | Yes, universal pattern |
| Remotion install + config | 45 min | Yes, one-time |
| Total | ~85 min | All reusable |
The first video costs you. Every video after that is just a new composition file with different mock data and a different timeline. That’s the trade-off.
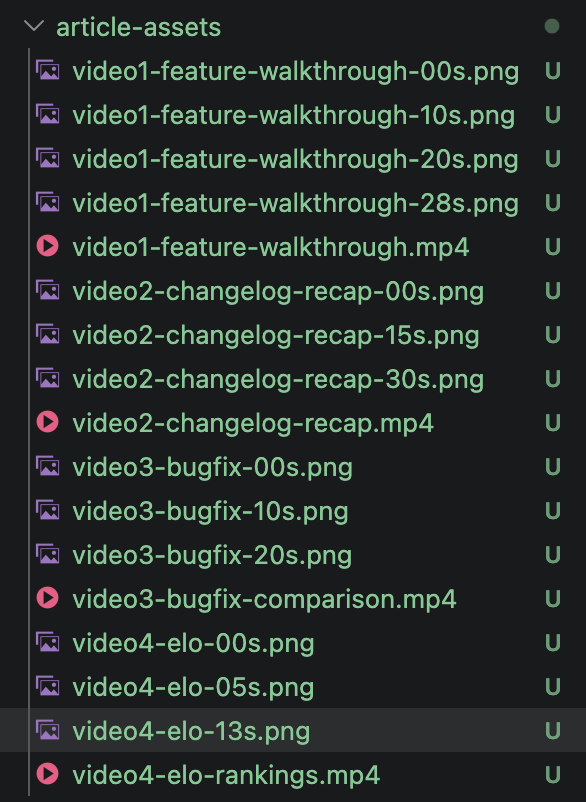
I built these three compositions for a forex position-size calculator app running on Next.js 15 with TypeScript and Tailwind CSS. Every composition reuses the same adapted components and mock data layer from the setup phase.
This is the core demo. It shows a user filling in the calculator fields step-by-step, with animated highlights and a results card that fades in at the end.
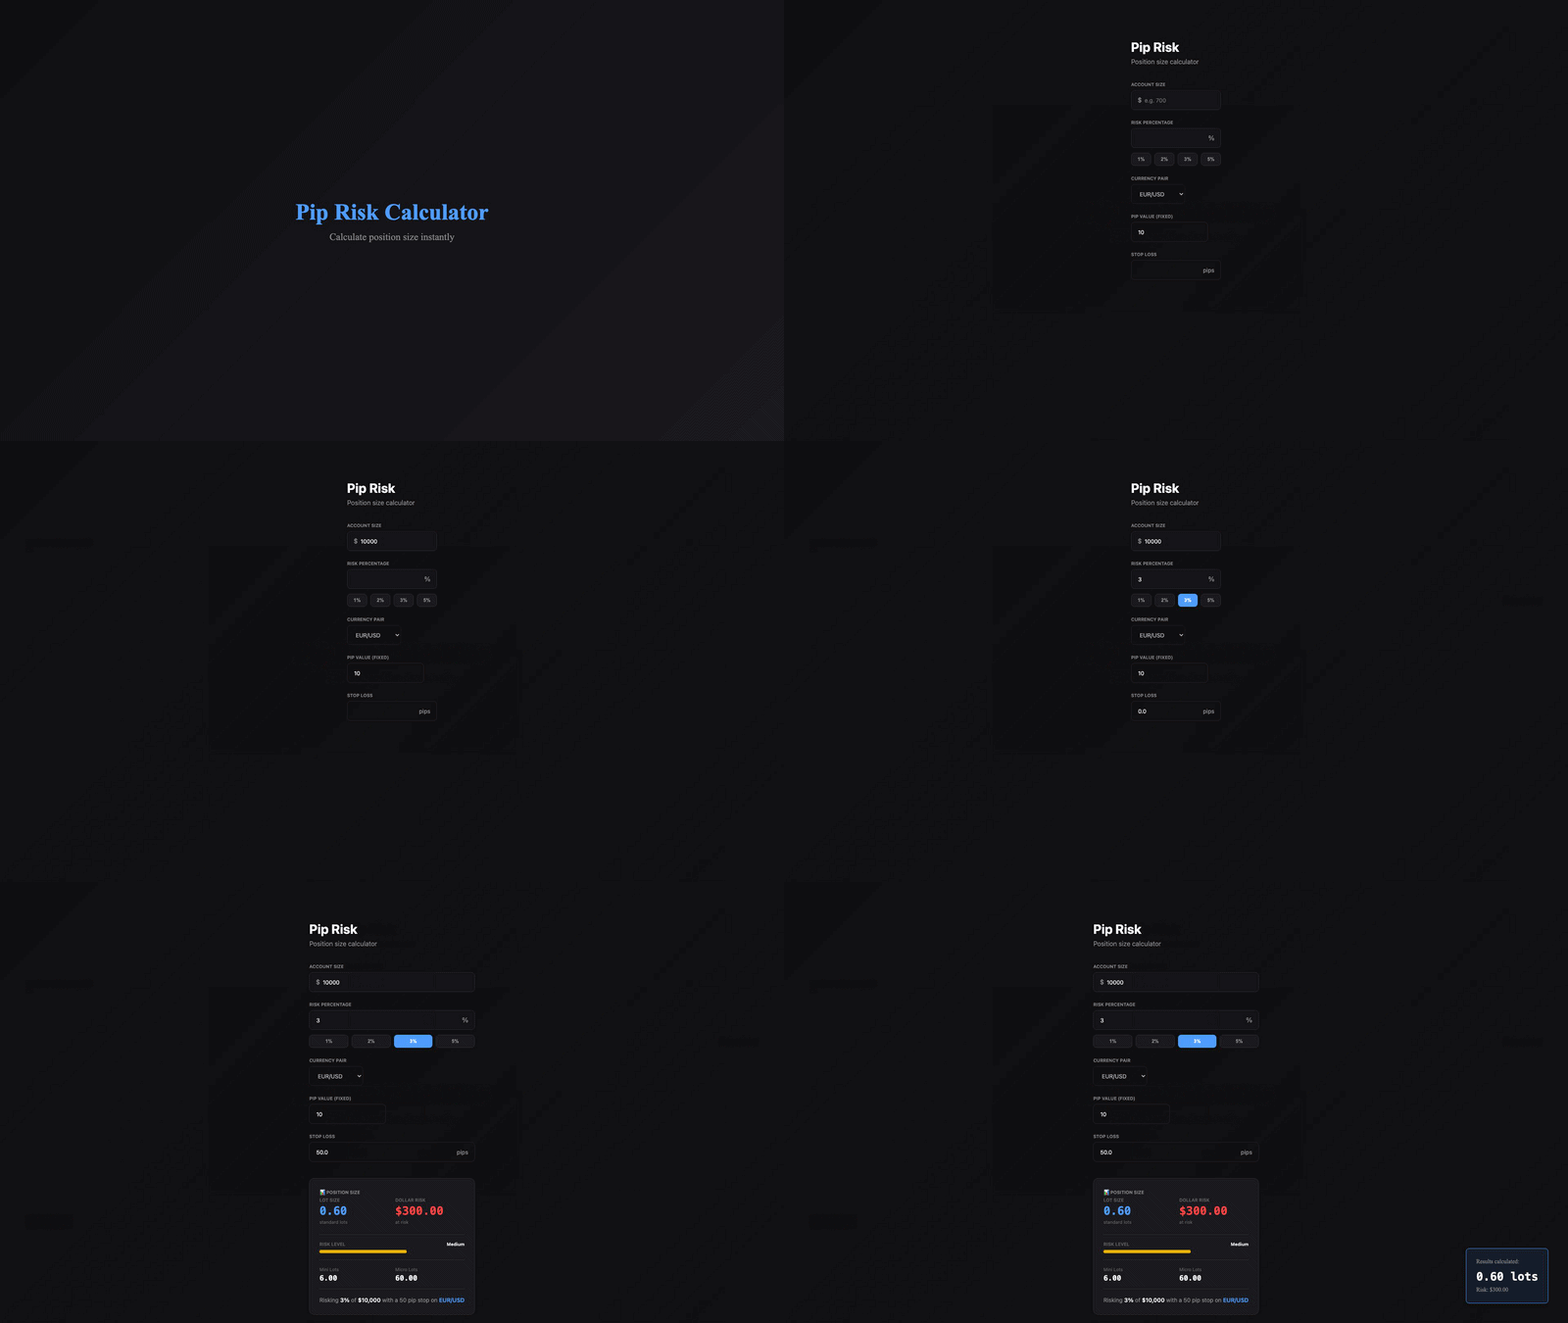
The composition breaks down into frame-based phases:
const FeatureWalkthrough = () => {
  const frame = useCurrentFrame();

  // Phase 1: Title card (frames 0-150)
  const titleOpacity = interpolate(frame, [0, 60], [0, 1], {
    extrapolateRight: 'clamp',
  });

  // Phase 2: Account size fills (frames 150-300)
  const accountSize = interpolate(frame, [150, 300], [0, 10000], {
    extrapolateLeft: 'clamp',
    extrapolateRight: 'clamp',
    easing: Easing.inOut(Easing.cubic),
  });

  // Phase 3: Results reveal (frames 600-750)
  const resultsOpacity = interpolate(frame, [600, 680], [0, 1], {
    extrapolateLeft: 'clamp',
    extrapolateRight: 'clamp',
  });

  return (
    <AbsoluteFill style={{ backgroundColor: '#0a0a0a' }}>
      <Sequence from={0} durationInFrames={150}>
        <TitleCard opacity={titleOpacity} />
      </Sequence>
      <Sequence from={150} durationInFrames={600}>
        <RemotionCalculator
          accountSize={Math.round(accountSize)}
          riskPercent={riskPercent}
          stopLoss={stopLoss}
          pair="EUR/USD"
        />
      </Sequence>
      <Sequence from={600} durationInFrames={300}>
        <RemotionResultsCard opacity={resultsOpacity} />
      </Sequence>
    </AbsoluteFill>
  );
};
The input values animate using Easing.inOut(Easing.cubic) for a natural feel. The results card fades in with a spring animation. Callout labels appear at strategic frames to guide the viewer’s attention. Total: 238 lines of code.
What was easier than expected: <Sequence> components handle timing so cleanly that I didn’t need to manually calculate frame ranges. You just say “start at frame 150, run for 600 frames” and nest your component inside.
What was harder than expected: Remotion’s bundler doesn’t recognize Next.js @/ path aliases. I had to change all imports to relative paths. Took 5 minutes, but felt like a gotcha that should be documented, or is it just me?.

This composition reads five changelog entries from a mock data file and renders each as an animated card with staggered timing.
// The data drives the video. Change entries, get a different video
const changelogEntries = [
  { date: 'Jul 2, 2026', title: 'Add Risk Meter Visual', category: 'feature' },
  { date: 'Jun 28, 2026', title: 'Improve Mobile Responsiveness', category: 'improvement' },
  { date: 'Jun 20, 2026', title: 'Fix Exchange Rate Caching Bug', category: 'bugfix' },
  // ... 2 more entries
];
Each card slides in from the left with an opacity transition, staggered by 150 frames (5 seconds per entry). Category tags are color-coded: blue for features, green for improvements, orange for bug fixes. A title slide opens the video, and a “See you next month” slide closes it. 166 lines total.
The point of this composition isn’t technical complexity. It’s the workflow: update a JSON file with this month’s changes, run npx remotion render, and you have a changelog video monthly

Side-by-side comparison. Left panel shows the “broken” version with input overflow on mobile viewports. Right panel shows the fixed version with proper responsive padding. Both animate in sync, same inputs, same timing, different layouts.
The synchronized animation is the part that no screen recording could produce without manual video editing. In Remotion, both sides use the same interpolate() calls with the same frame ranges, so they’re perfectly in sync by definition. 173 lines.
npx remotion render remotion/index.ts feature-walkthrough output/feature-walkthrough.mp4
npx remotion render remotion/index.ts changelog-recap output/changelog-recap.mp4
npx remotion render remotion/index.ts bug-fix-comparison output/bug-fix-comparison.mp4
Total rendering time: 2 minutes 40 seconds for 120 seconds of video. Total file size: 7.6 MB.
In January 2026, Remotion launched Agent Skills, a set of 28 modular rule files that teach AI coding agents like Claude Code how to write correct Remotion code. The skill hit 150,000 installs on skills.sh within eight weeks, making it the most-installed skill not made by a platform company. The demo video got 6 million views on X within 48 hours.
The practical shift: instead of learning Remotion’s API from scratch, you describe what you want in plain English, and your AI agent writes the composition. The skill covers component patterns, transition types, animation primitives, and audio integration.
I tested this in a completely different project, my AI dev tool power rankings app. I installed Remotion, loaded the agent skills, and gave Claude Code a single prompt to generate a 25-second video with two sections: AI model rankings by WebDev Arena Elo, then a cross-fade transition into AI tool rankings. Both sections use real data from the June 2026 power rankings article.
The prompt was roughly this:
“Create a 25-second animated video for the June 2026 AI Dev Tool Power Rankings. Section 1: AI Model Rankings by Elo — Claude Opus 4.7 (1567), Qwen 3.7 Max (1541), Claude Opus 4.6 (1538), Claude Sonnet 4.6 (1523), GPT-5.5 (1505). Section 2: AI Tool Rankings — OpenCode #1, Cursor #2, Claude Code #3, Windsurf #4, Antigravity #5. Gold bar for #1, blue-gray for the rest. Staggered animations, cross-fade transition between sections, dark theme.”
Claude Code generated AiPowerRankings.tsx (207 lines) in about 7 minutes. It compiled and rendered without errors on the first pass. All 750 frames, zero fixes.

What makes this interesting is what Claude Code had to figure out on its own. The prompt didn’t specify font sizes, padding, bar height, transition duration, or how to handle independent animation timing across two sections. Claude Code chose 48px titles, 36px bar heights, 24px gaps, spring() with damping of 0.8 for the bar animations, and a 30-frame cross-fade using absolute positioning with opacity interpolation. It also built a reusable Section component that renders both halves of the video from different data arrays, so adding a third section (benchmarks, for example) would be one more component call.
What a human would tweak: transition speed (30 frames might be too slow or too fast depending on preference), bar height consistency if embedding alongside other videos, and whether the emoji movement indicators (🆕, ⬇️, ↔️) render cleanly at export resolution.
My honest take: For data-driven compositions with straightforward animations, AI generation is faster than writing by hand. 7 minutes from prompt to rendered MP4 with two animated sections and a cross-fade transition. But for complex multi-scene choreography or pixel-perfect brand compliance, you’d still want manual control. The real win is the monthly update cycle: when the July 2026 rankings drop, I change 10 lines of data in two arrays and re-render. The video stays current with the written article.
| Composition | Duration | Render time | File size | Lines of code |
|---|---|---|---|---|
| Feature Walkthrough | 30s | ~40s | 1.5 MB | 257 |
| Changelog Recap | 45s | ~55s | 3.8 MB | 164 |
| Bug Fix Comparison | 30s | ~40s | 1.5 MB | 199 |
| AI Power Rankings | 25s | ~2.5 min | 1.7 MB | 207 |
| Total | 130s | ~4 min | 8.5 MB | 827 |
Local rendering is free but uses your CPU. Remotion Lambda on AWS is faster but costs real money at scale.
This matters, and most articles skip it. Remotion is not MIT licensed. The current terms:
| Video | Remotion | Screen recording | Winner |
|---|---|---|---|
| First video | ~35 min (setup + code + render) | ~20 min (record, edit, export) | Screen recording |
| Second video | ~15 min (new composition + render) | ~45 min (record, sync, edit) | Remotion (3×) |
| Third video | ~20 min | ~30 min | Remotion |
| Fifth video (data change only) | ~10 min | ~30 min (full re-record) | Remotion (3×) |
The ROI curve crosses after the second video. By the fifth, Remotion is consistently three times faster because you’re reusing components and compositions. The compounding advantage is that screen recordings become stale the moment your UI changes. Remotion videos are code; they stay current.
Remotion replaces the videos you produce repeatedly, not the ones you capture once and throw away. Screen recording wins for one-off internal demos where polish doesn’t matter, user-testing sessions where you need real user interaction, anything involving live external services you can’t mock (OAuth flows, third-party integrations), and quick Loom-style walkthroughs for async team communication.
The question to ask: “Will I need to produce this video again?” If yes, Remotion. If no, screen recording.
tsconfig.json path mapping. Fix: use relative imports in your Remotion components[email protected])Config.setFramerate doesn’t exist in v4. Fix: use composition-level defaults and check your package.json version before copying from docsEasing.out(Easing.cubic) or similar. Linear is rarely the right choice for UI animationsRemotion turns video production into a frontend development task, but this is something that will help technical writers with frontend skills. The three demos I built- feature walkthrough, changelog recap, bug fix comparison, plus the AI-generated power rankings video- total 130 seconds of video from 827 lines of composition code. All four compositions rendered in under 4 minutes.
The setup cost is a bit too much: 85 minutes of component adaptation, mock data creation, and configuration before the first video exists. But that cost is amortized across every video you produce after that. By the second composition, you’re faster than screen recording. By the fifth, you’re three times faster. What’s your take on remotion? What do you think I may have missed out? I would love to hear from you.
Install LogRocket via npm or script tag. LogRocket.init() must be called client-side, not
server-side
$ npm i --save logrocket

// Code:

import LogRocket from 'logrocket';
LogRocket.init('app/id');
// Add to your HTML:

<script src="https://cdn.lr-ingest.com/LogRocket.min.js"></script>
<script>window.LogRocket && window.LogRocket.init('app/id');</script>
Tailwind CSS component libraries provide pre-built components to streamline the process of developing aesthetic, user-friendly interfaces.

Jev is a TypeSafe AI decision model that classifies messages using typed questions. Learn how to use it for routing to reduce unnecessary LLM calls.

Vibe coding makes building apps faster, but speed without engineering can create serious failures. Here are five real-world examples and practical checks to help you ship AI-generated code safely.
Compare React ViewTransition and Motion across four animation patterns. The native build saved ~38.6kB of gzipped JS, but required 179 more lines of CSS.
Hey there, want to help make our blog better?
Join LogRocket’s Content Advisory Board. You’ll help inform the type of content we create and get access to exclusive meetups, social accreditation, and swag.
Sign up now

 Learn more →



