
In this guide, we’ll explore some React top-level APIs that could revolutionize the way you write components in your application.

You might be wondering, “What’s wrong with the way I write components now?” Allow me to go over some pain points I’ve faced when writing React components. Maybe some of them will sound familiar to you.
As we all know, React is component-based library, meaning it has a hierarchy and everything is a component. You’re likely to run into a situation where a component is rerendering unnecessarily and causing your application to lag. Furthermore, you’ll quickly find that a big chunk of your application runs on multiple different types of logic, further slowing your app’s performance and eroding the user experience.
Consider another scenario in which you need to render a modal in your application. You’ve set it to position: absolute and z-index, but one of the parent elements has either position: relative or z-index, which will affect the positioning of the modal.
There are myriad ways to tackle problems like these, but the seven React top-level APIs we’re about to explore could shift your perspective on how to approach the common roadblocks you encounter when writing React components.
The Replay is a weekly newsletter for dev and engineering leaders.
Delivered once a week, it's your curated guide to the most important conversations around frontend dev, emerging AI tools, and the state of modern software.
React.memoReact renders components by comparing the previous render result with the current one. If there’s a difference, it will update the V-DOM and rerender the component. The comparison is already really fast, but you can boost the performance even further by using higher-order components such as React.memo.
Let’s look at a simple use case that you’re likely encounter in your projects.
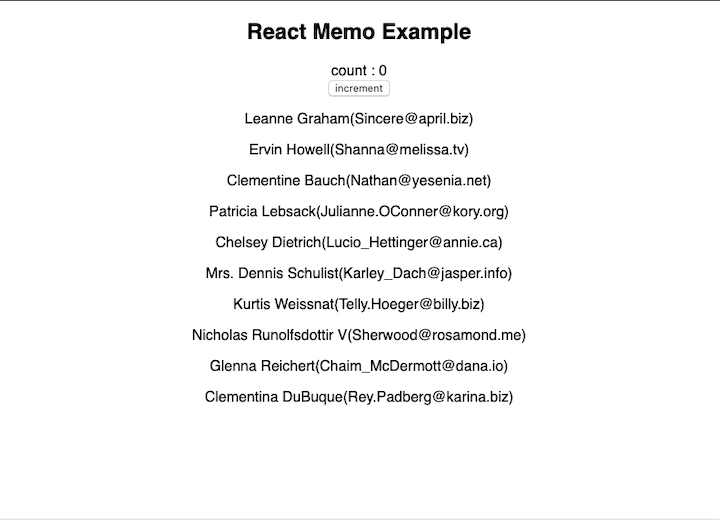
Here we have a button and another component that renders the list of users. Whenever you click a button, the count is incremented. This can be any action or calculation. It’s important to note, however, that there is no relation between the action and the user data that is rendered.
What will happen when a user clicks the button?
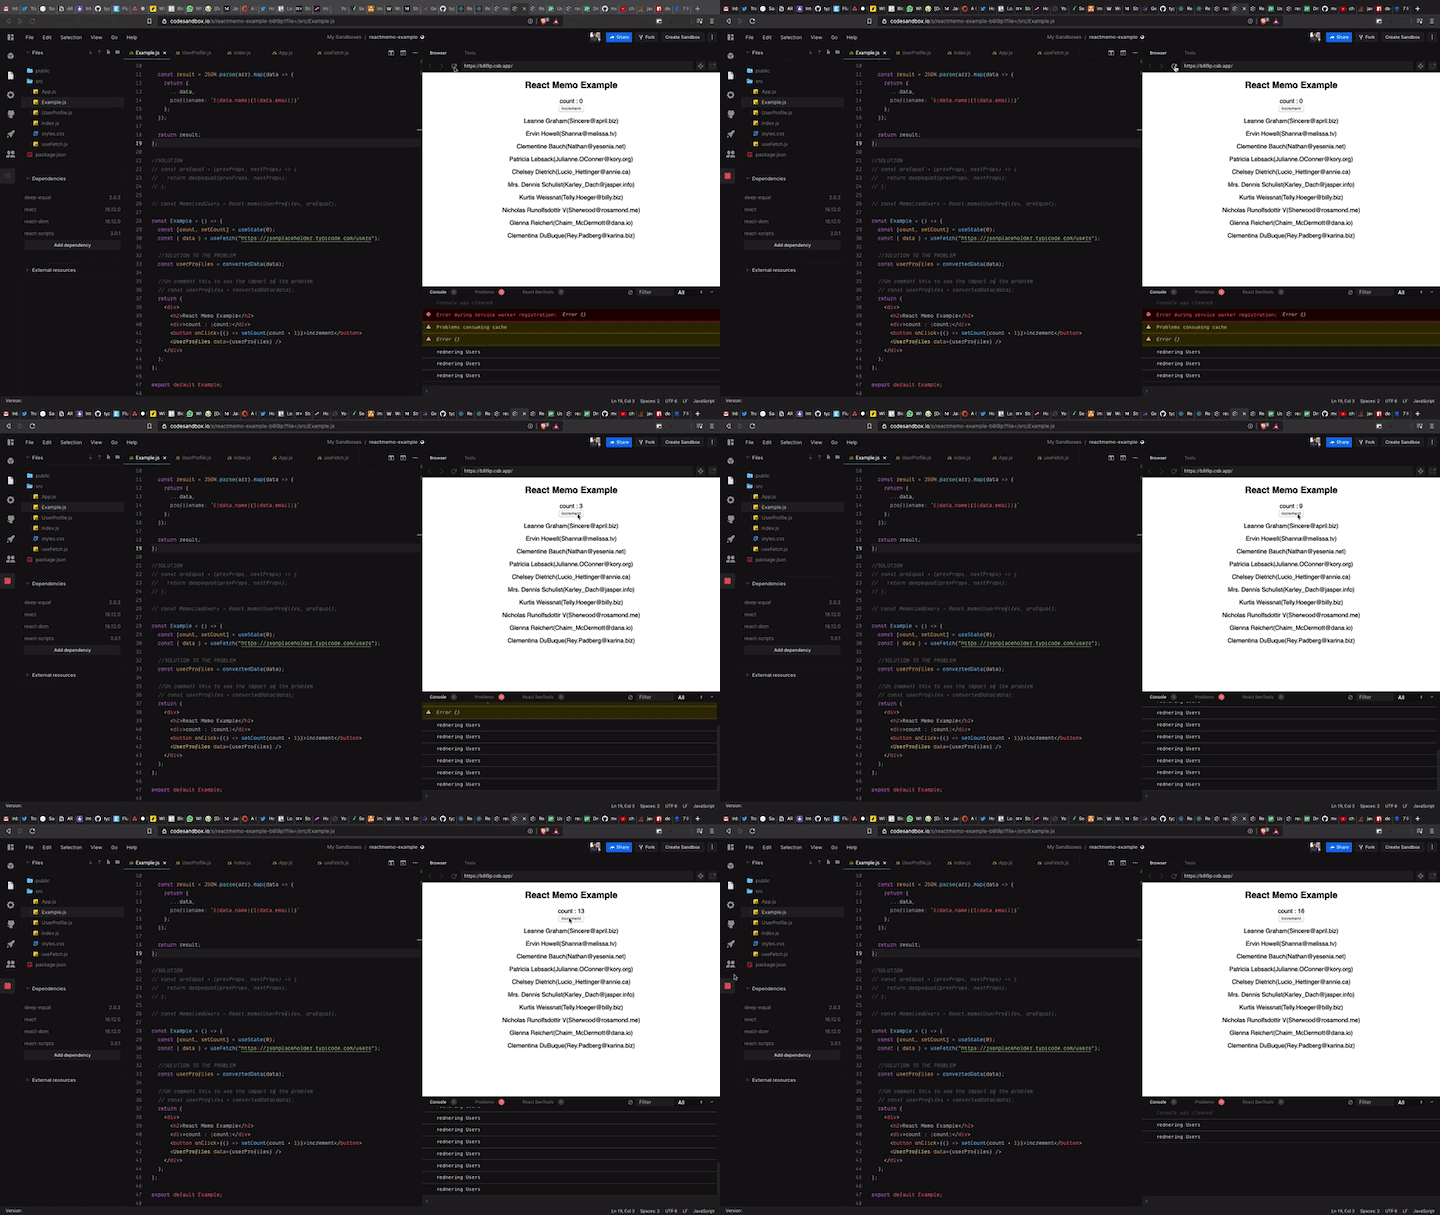
As you can see, it rerenders the user data again.
Every time the parent rerenders, all the children in the application rerender as well. This won’t be a huge problem until your application grows to a certain level of complexity. Once you reach the topping point, you’ll start to notice a dip in performance.
React.memo helps address this problem by memorizing the result of the component and only rerendering if the prop changes. If the props are the same, it will return the previous result instead of rerendering the component.
Wrap your child component with React.memo.
const MemoizedUsers = React.memo(UserProfiles);
You can also pass a custom function to check whether the props are equal. Usually, React does the shallow comparison.
Let’s pass a custom function to check the deep comparison.
import deepequal from "deep-equal";

const areEqual = (prevProps, nextProps) => {
  return deepequal(prevProps, nextProps);
};

const MemoizedUsers = React.memo(UserProfiles, areEqual);
Check out the complete solution below.
reactmemo-example
reactmemo-example by ganeshmani using deep-equal, react, react-dom, react-scripts
React.lazy and SuspenseThis feature in React is in the experimental stage, but it’s still valuable to learn about this concept so you understand how to address problems it is designed to solve in the near future.
Let’s say you have a page with a bunch of components. Some need to be rendered very quickly while lower-priority components can be loaded later.
You can achieve it by lazy loading the secondary components.
Let’s look at an example. Say our application has two components: Main and SidePage. The Main component is where the user interacts. SidePage includes some charts that are not relevant to the app’s primary functionality.
We can solve the problem by dynamically importing the SidePage component into the application, which basically splits the code. Our mail application logic will be in the primary chunk and the lazy loaded component will be compiled in the second chunk of the JS file.
Let’s see them in action. Our main component will contain the following code.
import React from "react";
import styled from "styled-components";
const Container = styled.div`
  grid-area: MainContainer;
`;
const MainComponent = () => {
  return (
    <Container>
      <h4>Main Component</h4>
    </Container>
  );
};
export default MainComponent;
The secondary component contains the following.
import React from "react";
import styled from "styled-components";
import useFetch from "./useFetch";
const Container = styled.div`
  grid-area: ${props => props.name};
`;
const Lists = styled.ul`
  height: 100vh;
  overflow-y: scroll;
  list-style: none;
`;
const ListItem = styled.li`
  padding: 5px;
  box-shadow: 0 10px 6px -6px #777;
`;
const SecondaryComponent = ({ name }) => {
  const { response, error } = useFetch(
    "https://jsonplaceholder.typicode.com/posts",
    {}
  );
  return (
    <Container name={name}>
      <Lists>
        {response && response.map(item => <ListItem>{item.title}</ListItem>)}
      </Lists>
    </Container>
  );
};
export default SecondaryComponent;
Here, we’re using the useFetch hooks to fetch some data from the API and load it in our SidePage component.
useFetch.jsimport React from "react";
const useFetch = (url, options) => {
const [response, setResponse] = React.useState(null);
const [error, setError] = React.useState(null);
React.useEffect(() => {
const fetchData = async () => {
try {
const res = await fetch(url, options);
const json = await res.json();
setResponse(json);
} catch (error) {
setError(error);
}
};
fetchData();
}, []);
return { response, error };
};
export default useFetch;
Now lazy load the SidePage component in App.js.
import React, { lazy, Suspense } from "react";
import styled from "styled-components";
import MainComponent from "./Maincomponent";
import "./styles.css";
const Container = styled.div`
  height: 100vh;
  display: grid;
  max-width: 1440px;
  width: 1440px;
  justify-items: center;
  grid-template-columns: 0.5fr 2fr 0.5fr;
  grid-template-areas: 1fr;
  grid-template-areas: "LeftPane MainContainer RightPane";
`;
export default function App() {
  const SecondaryComponent = lazy(() => import("./SecondaryComponent"));
  return (
    <Container>
      <Suspense fallback={<h1>Loading…</h1>}>
        <SecondaryComponent name={"LeftPane"} />
      </Suspense>
      <MainComponent />
      {/* <SecondaryComponent name={"RightPane"} /> */}
    </Container>
  );
}
In the above code, we’re dynamically importing the SidePage component using:
const SecondaryComponent = lazy(() => import("./SecondaryComponent"));
After that, we use Suspense to render the lazy loaded component.
<Suspense fallback={<h1>Loading…</h1>}>
        <SecondaryComponent name={"LeftPane"} />
</Suspense>
React Suspense is a higher-order component that will wait until the component renders. The fallback we provided will render until the dynamically imported component is ready to be rendered.
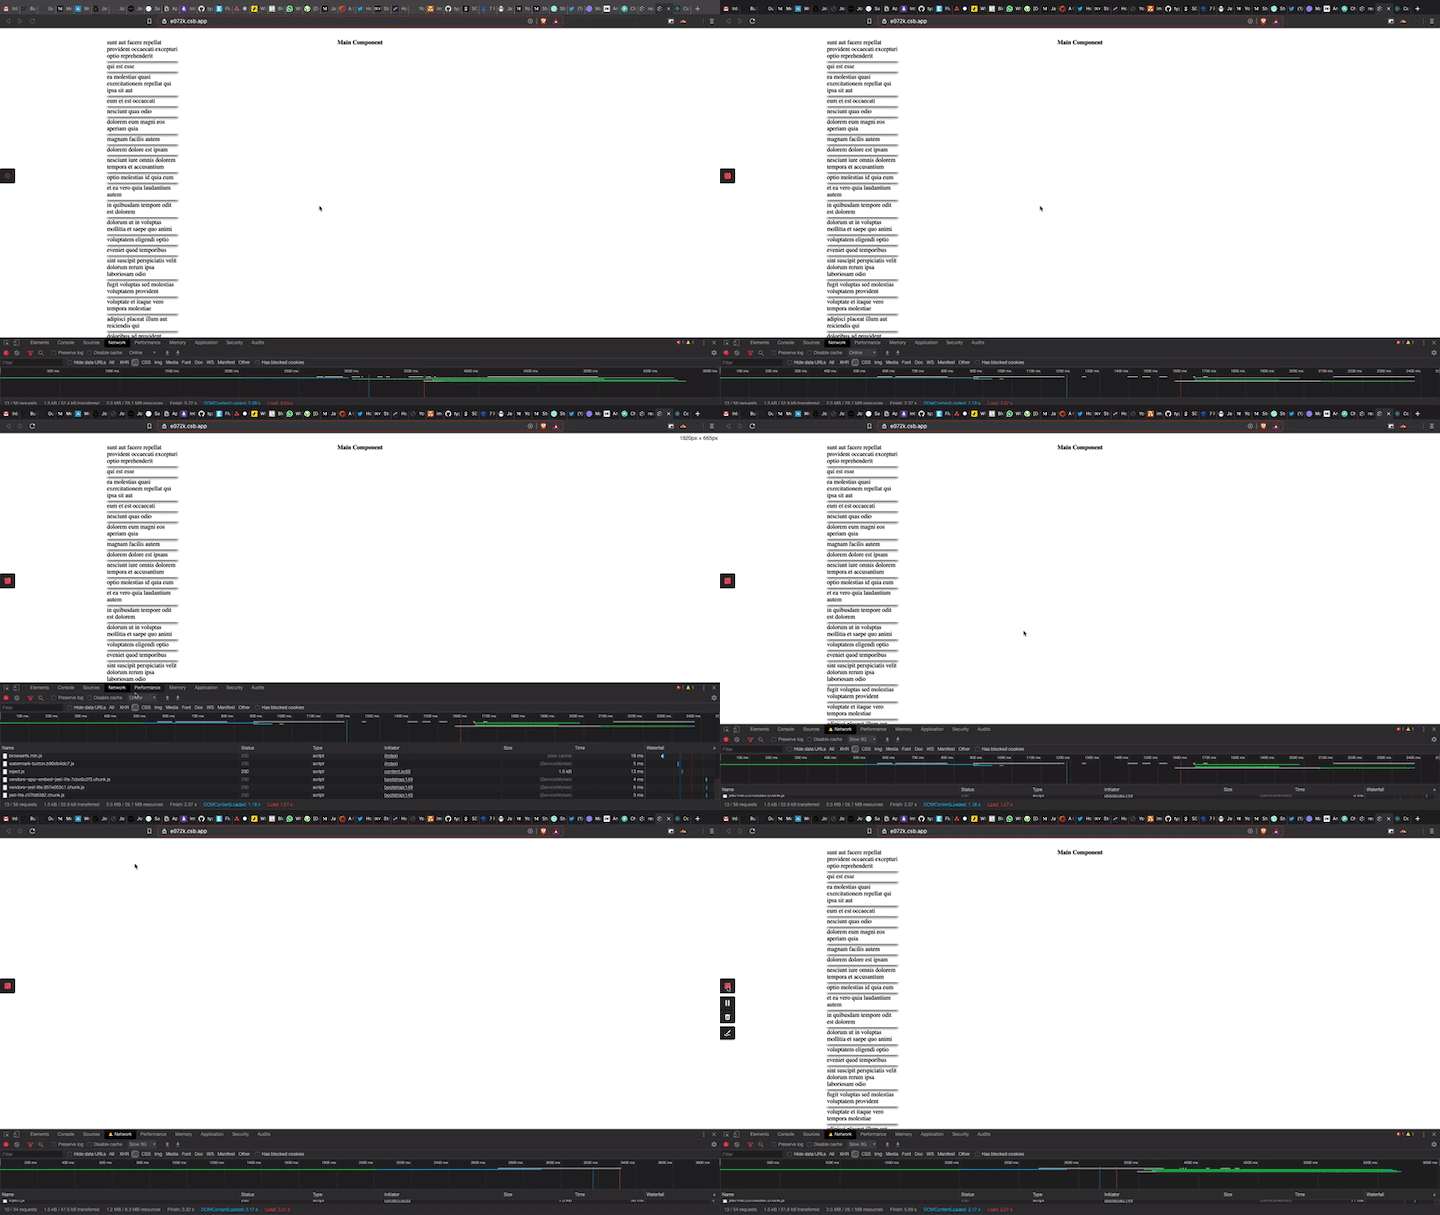
View the full code in CodeSandbox.
React.forwardRefReact refs offer a way to access the DOM element in React components. Usually, React parent and child components interacts through props. To change the child component, props are modified, which rerenders the components.
But there are some situations where you need to change the DOM element without getting those into the React lifecycle. Examples include auto-focusing an element; accessing an element’s properties, such as width and height; and binding an external third-party library, like below.
import React, { useRef, useEffect } from "react"

export default function App() {
  const inputRef = useRef(null)

  return (
    <div className="App">
      <input type="text" ref={inputRef} placeholder="Enter Element" />
    </div>
  )
}
Now let’s walk through how to forward refs in React. In the above example, we referenced the DOM element that’s rendered in the component. What if we want to ref an element in a child component? Could we pass the ref as a prop?
Unfortunately, that won’t work in a React component. We need to forward the ref from parent to child to access the child DOM element.
Let’s implement forwardRef. The above example includes a custom input component that forwards the ref.
import React, { forwardRef } from "react";
const Input = ({ type, value, placeholder }, ref) => {
  return (
    <div>
      <input type={type} ref={ref} value={value} placeholder={placeholder} />
    </div>
  );
};
export default forwardRef(Input);
Here, we’re wrapping our Input component with forwardRef. The Input function will have props and a ref. The ref can be bind with an element that we want to access.
import React, { useRef, useEffect } from "react";
import "./styles.css";
import Input from "./Input";
export default function App() {
  const inputRef = useRef(null);
  useEffect(() => {
    if (inputRef) {
      console.log("inputRef", inputRef);
      inputRef.current.value = 123;
    }
  }, [inputRef]);
  return (
    <div className="App">
      <Input type="text" ref={inputRef} placeholder="Enter Element" />
    </div>
  );
}
react-forward-refs
react-forward-refs by ganeshmani using react, react-dom, react-scripts
createPortalFinally, let’s explore portals, why we need them, and how to implement one in React.
Let’s say you need to render a modal in your application. You’ve specified position: absolute and z-index. But one of the parent element has either position: relative or z-index, which will affect the positioning of modal.
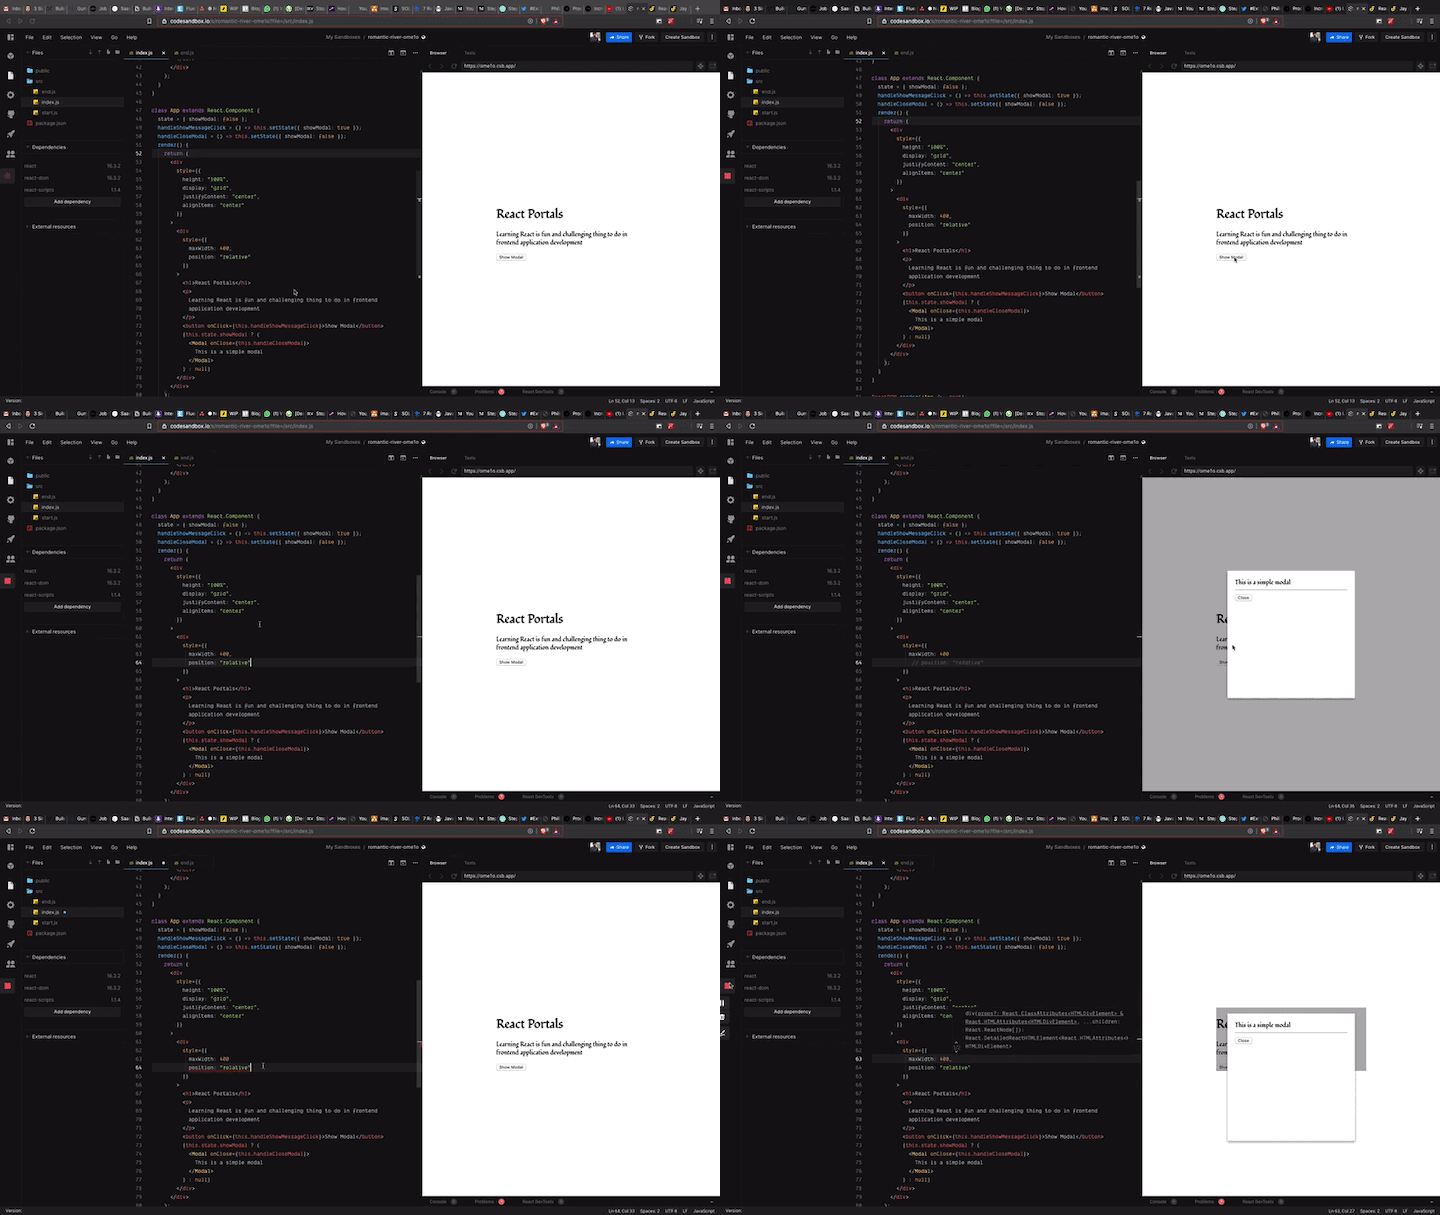
The modal component renders in the position relative to the position of its parent component. If we remove the position:relative, everything should work fine. But we can’t be sure because we might need to use it in our app somewhere down the line.
In React, we can solve this problem by using createPortal. Basically, we take our modal DOM element outside of our application root element and render our component with the help of createPortal.
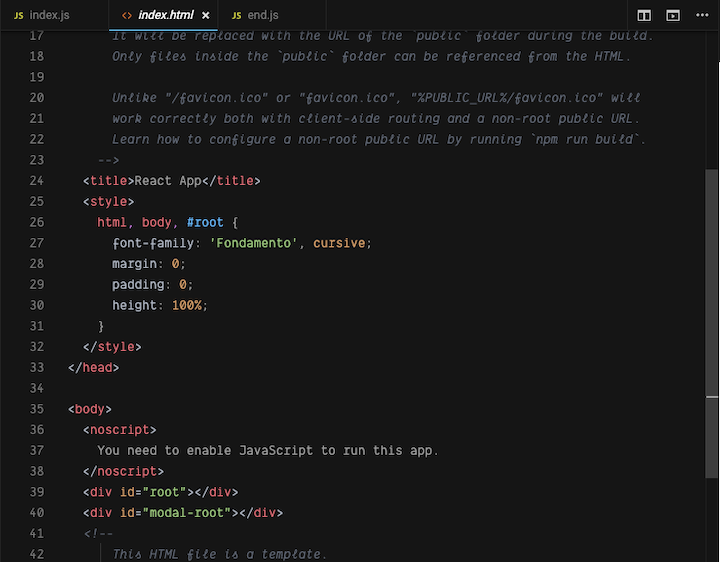
After that, create a div element and append it inside the modal root div element.
el = document.createElement("div");

componentDidMount() {
    modalRoot.appendChild(this.el);
}

componentWillUnmount() {
    modalRoot.removeChild(this.el);
}


render() {
    return ReactDOM.createPortal(
       //component comes here,
      this.el
    );
  }
romantic-river-ome1o
00254q4n6p by kentcdodds using react, react-dom, react-scripts
These top-level API’s will help you to write your React components more efficiently, and knowing when and how to use them is crucial to your development cycle.
We went over some of the most important components in this guide, but there are plenty of other higher-order components and top-level APIs to explore. Check out the official docs to learn more.
Install LogRocket via npm or script tag. LogRocket.init() must be called client-side, not
server-side
$ npm i --save logrocket

// Code:

import LogRocket from 'logrocket';
LogRocket.init('app/id');
// Add to your HTML:

<script src="https://cdn.lr-ingest.com/LogRocket.min.js"></script>
<script>window.LogRocket && window.LogRocket.init('app/id');</script>

@container scroll-state: Replace JS scroll listeners nowCSS @container scroll-state lets you build sticky headers, snapping carousels, and scroll indicators without JavaScript. Here’s how to replace scroll listeners with clean, declarative state queries.

Explore 10 Web APIs that replace common JavaScript libraries and reduce npm dependencies, bundle size, and performance overhead.

Russ Miles, a software development expert and educator, joins the show to unpack why “developer productivity” platforms so often disappoint.

Discover what’s new in The Replay, LogRocket’s newsletter for dev and engineering leaders, in the February 18th issue.
Would you be interested in joining LogRocket's developer community?
Join LogRocket’s Content Advisory Board. You’ll help inform the type of content we create and get access to exclusive meetups, social accreditation, and swag.
Sign up now
One Reply to "React top-level APIs that could change the way you write components"
Great post! Clear and easy to read and understand.