Editor’s note: This post was last updated on 16 September 2022 to include additional information about the render props pattern.

Render props are an advanced pattern for sharing logic across components. A component, usually called a container component, can delegate how a UI looks to other presentation components and implement only the business logic. Therefore, we can implement cross-cutting concerns as components by using render prop patterns.
The overall purposes of using render props are:
There are several reasons why developers enjoy using render props. For one, they read and update with local component states, and they are useful in cases where we you want to reuse component logic and separate component states from the UI.
When we want to share the same behavior among different components, the render props pattern enables us to minimize code repetitions. We can isolate part of the JSX and inject some state without introducing side effects to components.
However, using render props comes with its own set of issues. However, some of these issues appear only when we dig deeper into our code or scale a project.
To increase the DRYness of our codebase, we often implement many small, granular components so that each component deals with a single concern. However, this often leaves developers with many wrapper components nested deeply inside one another.
If we increase the number of wrapper components, the component size and complexity increase while the reusability of the wrapper component might decrease. Andrew Clark perfectly summed up the issue on Twitter.
thisSince the wrapper components deal with state or lifecycle methods, they use class components. With class components, we must bind this properly, otherwise, we risk losing the this context inside functions. Unfortunately, the syntax for binding all methods looks unattractive and is often a burden for developers.
Classes include a good amount of boilerplate code, which is awful for us to write every time we convert a functional component into a class component.
Apparently, classes are hard to optimize with build tools, as well. This incurs a double penalty because it leads to neither a good developer experience nor a good user experience. The React team is even thinking of moving class components support to a separate package in the future.
Using a render prop can negate the advantage that comes from using PureComponent if we create a function assigned inside the render method. The shallow prop comparison always returns false for new props, and, in this case, each render generates a new value for the render prop. For more details, refer to the React docs.
Many of these problems are not entirely the fault of the render props pattern. Until recently, React did not provide a way of using state or lifecycle methods without involving classes. Therefore, we must use classes in container components to implement the render props pattern.
However, with the introduction of the React Hooks API, all of that changes. React Hooks let us use state and lifecycle Hooks inside functional components with only a few lines of code. What’s better is that we can implement our own custom Hooks, giving us an easy and powerful primitive for sharing logic across components. Therefore, we don’t need classes or a render props pattern to share code between components.
Before jumping into that, let’s first get a good look at how React Hooks can be used.
In short, React Hooks let you use state and other features within functional components without having to write a class component. However, the best way to learn more about something is by using it.
So, to use React Hooks, we’ll build a component that shows information by default and lets us update that information by clicking a button:

In the image above, the component shows information in a field, and we can update the information by pressing the button to the right of the field.
What we can observe from this example is that the component has two types of states. One state controls the input field and the other toggles between the viewer and the editor. Let’s see how we can implement this with React Hooks:
import React, { useState } from "react";

function EditableItem({ label, initialValue }) {
  const [value, setValue] = useState(initialValue);
  const [editorVisible, setEditorVisible] = useState(false);

  const toggleEditor = () => setEditorVisible(!editorVisible);

  return (
    <main>
      {editorVisible ? (
        <label>
          {label}
          <input
            type="text"
            value={value}
            onChange={event => setValue(event.target.value)}
          />
        </label>
      ) : (
        <span>{value}</span>
      )}
      <button onClick={toggleEditor}>{editorVisible ? "Done" : "Edit"}</button>
    </main>
  );
}
Let’s break down the code above. We defined the EditableItem functional component, which takes a few props, label and initialValue for showing the label above the input field, and the initialValue prop for showing the default info.
We set up a value state to track the value of the input field, and we set up an editorVisible state to track the editing state. In the markup, we change the label of the button based on the value of editorVisible. By default, the value variable will be assigned the initialValue prop data.
Since we want to show the viewer by default, we must initially set the editorVisible value as false. Therefore, we pass false while calling useState.
To toggle between the viewer and editor, we must define the toggleEditor function, which sets the editorVisible state to its opposite when calling the function. We want to call this function whenever the user clicks on the button, so we assign it as the button’s onClick prop.
That’s how easy using React Hooks can be, but it doesn’t stop here. Hooks have one more trick, custom Hooks.
According to the React docs, custom Hooks in React are mechanisms that reuse stateful logic. In our use case, we can see that the editorVisible state is a toggler, and toggling is a common use case in our UIs. If we want to share the toggling logic across components, we can define a Toggler component and use the render props pattern to share the toggling method.
But, wouldn’t it be easier if we could just use a function instead of messing with components? We can do so with a custom React Hook. With custom Hooks, we can extract the toggling logic from the EditableItem component into a separate function. We’ll call this function useToggle because it is recommended to start the name of a custom Hook with use. The useToggle custom Hook looks like the following code:
import React, { useState } from "react";

function useToggle(initialValue) {
  const [toggleValue, setToggleValue] = useState(initialValue);
  const toggler = () => setToggleValue(!toggleValue);

  return [toggleValue, toggler];
}
In the code above, we did the following:
useState Hooktoggler function that set the toggleValue to the opposite of its current valuetoggleValue reads the current state, and toggler toggles the toggleValue stateAlthough in modern browsers, creating functions at each render is not slow, we can avoid delays altogether by memoizing the toggler function. For this purpose, the useCallback Hook comes in handy:
import React, { useState, useCallback } from "react";

function useToggle(initialValue) {
  const [toggleValue, setToggleValue] = useState(initialValue);
  const toggler = useCallback(() => setToggleValue(!toggleValue));

  return [toggleValue, toggler];
}
Custom Hooks are used just like any other Hook. Therefore, using useToggle in our EditableItem component is as easy as this:
import React, { useState } from "react";

import useToggle from 'useToggle.js';

function EditableItem({ label, initialValue }) {
  const [value, setValue] = useState(initialValue);
  const [editorVisible, toggleEditorVisible] = useToggle(false);

  return (
    <main>
      {editorVisible ? (
        <label>
          {label}
          <input
            type="text"
            value={value}
            onChange={event => setValue(event.target.value)}
          />
        </label>
      ) : (
        <span>{value}</span>
      )}
      <button onClick={toggleEditorVisible}>
        {editorVisible ? "Done" : "Edit"}
      </button>
    </main>
  );
}
Now, let’s see how render props fare in comparison to React Hooks:
class Toggler extends Component {
  constructor(props) {
    super(props);
    this.state = {
      toggleValue: props.initialValue
    };
    this.toggler = this.toggler.bind(this);
  }

  toggler() {
    this.setState(prevState => ({
      toggleValue: !prevState.toggleValue
    }));
  }
  render() {
    return this.props.children(this.state.toggleValue, this.toggler);
  }
}

class EditableItem extends Component {
  constructor(props) {
    super(props);
    this.state = {
      value: props.initialValue
    };
  }

  setValue(newValue) {
    this.setState({
      value: newValue
    });
  }

  render() {
    return (
      <Toggler initialValue={false}>
        {(editorVisible, toggleEditorVisible) => (
          <main>
            {editorVisible ? (
              <label>
                {this.props.label}
                <input
                  type="text"
                  value={this.state.value}
                  onChange={event => this.setValue(event.target.value)}
                />
              </label>
            ) : (
              <span>{this.state.value}</span>
            )}
            <button onClick={toggleEditorVisible}>
              {editorVisible ? "Done" : "Edit"}
            </button>
          </main>
        )}
      </Toggler>
    );
  }
}
Without a doubt, reusing code between components is easier with custom Hooks and requires less code. We can then reuse the code with the render props pattern:
function useToggle(initialValue) {
  const [toggleValue, setToggleValue] = useState(initialValue);
  const toggler = useCallback(() => setToggleValue(!toggleValue));

  return [toggleValue, toggler];
}

function EditableItem({ label, initialValue }) {
  const [value, setValue] = useState(initialValue);
  const [editorVisible, toggleEditorVisible] = useToggle(false);

  return (
    <main>
      {editorVisible ? (
        <label>
          {label}
          <input
            type="text"
            value={value}
            onChange={event => setValue(event.target.value)}
          />
        </label>
      ) : (
        <span>{value}</span>
      )}
      <button onClick={toggleEditorVisible}>
        {editorVisible ? "Done" : "Edit"}
      </button>
    </main>
  );
}
Next, we’ll learn how to consume context data with React Hooks instead of using the render props pattern.
Just like we have the useState Hook for state, we have useContext for consuming context data. Again, let’s learn how to use it in a practical scenario.
A common requirement is to have user details available across components. This is a great use case for context Hooks:
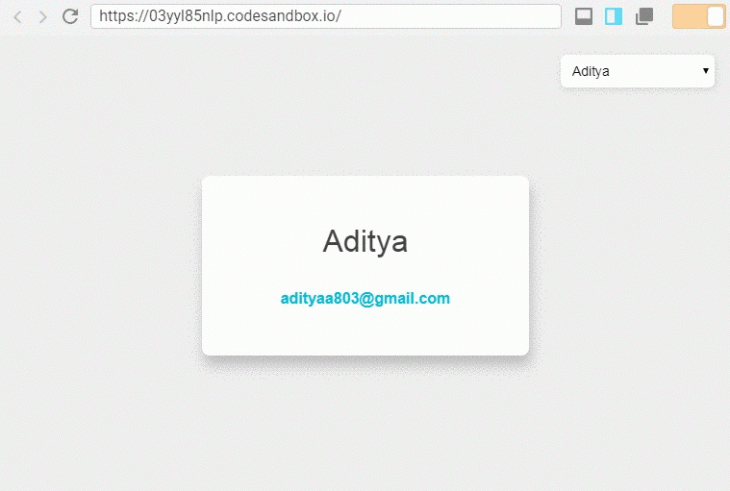
The image above demonstrates using context Hooks to share user information across components, seen by selecting different users in a dropdown menu.
In this example, we have two components, UserProfile and ChangeProfile. The UserProfile component shows user details, and the ChangeProfile component switches between users.
Switching between users is only applicable for our demo. In real world projects, instead of the select menu, we would update user details based on who logs in.
Implementing this looks like the following:
import React, { createContext, useState, useContext } from "react";
const UserContext = createContext();

function UserProfile() {
  const { user } = useContext(UserContext);
  const emailLink = `mailto:${user.email}`;
  return (
    <section>
      <h3>{user.name}</h3>
      <a href={emailLink} title={emailLink}>
        {user.email}
      </a>
    </section>
  );
}

function ChangeProfile() {
  const profiles = [
    {
      name: "Aditya",
      email: "[email protected]",
    },
    {
      name: "Arnold",
      email: "[email protected]",
    },
  ];
  const { user, setUser } = useContext(UserContext);
  const updateUser = (event) => {
    const profile = profiles[event.target.value];
    setUser(profile);
  };
  return (
    <select onChange={updateUser}>
      {profiles.map((profile, index) => (
        <option value={index} key={profile.email}>
          {profile.name}
        </option>
      ))}
    </select>
  );
}

function User({ children }) {
  const [user, setUser] = useState({
    name: "Aditya",
    email: "[email protected]",
  });
  const value = { user, setUser };
  return <UserContext.Provider value={value}>{children}</UserContext.Provider>;
}

export default function App() {
  return (
    <div className="App">
      <User>
        <ChangeProfile />
        <UserProfile />
      </User>
    </div>
  );
}
In the code above, we did the following:
UserContext that will pass the user’s name and email to every other componentUserProfile component that displays the user’s detailsChangeProfile component that renders a list. When a user selects a profile, we update the context with the setUser methodUser component for storing the user’s data and providing it through the UserContext for its children components, UserProfile and ChangeProfile, to accessThis example shows how using context is very simple with React custom Hooks.
Another common use case for the render props pattern is for implementing slots in their components:
function Card({ title, body, action}) {
  return (
    <section className='card'>
      <nav className='header'>
        {title()}
      </nav>
      <main className='main'>
        {body()}
      </main>
      <footer className='footer'>
        {action()}
      </footer>
    </section>
  )
}

function App() {
  return (
    <Card
      title={() => (
        <h2>Card Title</h2>
      )}
      body={() => (
        <div>
          <p>
            Some Content
          </p>
          <a href="/link">Some Link</a>
        </div>
      )}
      action={() => (
        <button onClick={() => console.log('clicked')}>Some Action</button>
      )}
    />
  )
}
For a simpler way that doesn’t need functions as props, we can assign JSX as a component prop as follows:
function Card({ title, body, action }) {
  return (
    <section className="card">
      <nav className="header">{title}</nav>
      <main className="main">{body}</main>
      <footer className="footer">{action}</footer>
    </section>
  );
}

function App() {
  return (
    <Card
      title={<h2>Card Title</h2>}
      body={
        <div>
          <p>Some Content</p>
          <a href="/link">Some Link</a>
        </div>
      }
      action={
        <button onClick={() => console.log("clicked")}>Some Action</button>
      }
    />
  );
}
Using the render props pattern here would be a mistake because it’s intended to share data between components. So, in this case, we should avoid using render props.
In my opinion, the render props pattern wasn’t intended for the above use cases, but the React community used it because there was no other option. It’s great that the React team took note and made something we all love to use.
React Hooks and render props can co-exist because they solve the same problem of moving state away from your components. It’s clear that the future of React is very bright and the React team’s focus is crystal clear.
I hope you enjoyed this article. If you like my work, please follow me on Twitter and Medium or subscribe to my newsletter.
Install LogRocket via npm or script tag. LogRocket.init() must be called client-side, not
server-side
$ npm i --save logrocket

// Code:

import LogRocket from 'logrocket';
LogRocket.init('app/id');
// Add to your HTML:

<script src="https://cdn.lr-ingest.com/LogRocket.min.js"></script>
<script>window.LogRocket && window.LogRocket.init('app/id');</script>

Discover how React Fiber works under the hood. Learn how React builds the DOM, handles concurrent rendering, and works alongside React 19 features and the new React Compiler.

Learn how to use Skybridge, an open-source React framework, to build and deploy cross-platform AI apps and interactive UI widgets for ChatGPT, Claude, and MCP clients from a single codebase.

Learn how to set up Meilisearch, index documents, and build keyword, semantic, and hybrid search with AI-powered retrieval.

Compare pnpm and npm across security defaults, disk usage, dependency strictness, and workspace policy to decide which package manager fits your project.
Hey there, want to help make our blog better?
Join LogRocket’s Content Advisory Board. You’ll help inform the type of content we create and get access to exclusive meetups, social accreditation, and swag.
Sign up now

