The Replay is a weekly newsletter for dev and engineering leaders.
Delivered once a week, it's your curated guide to the most important conversations around frontend dev, emerging AI tools, and the state of modern software.
The Angular framework makes it straightforward to determine the direction dependency flows through an application, thereby making debugging seamlessly easy.

Angular allows dependencies provided through the injector of a parent component to be shared among its child components by injecting them into the constructors of the child components.
To understand this better, let’s consider a practical approach to parent-to-child dependency injection.
To follow along with this tutorial, you should have:
Run the following command to create a new Angular application:
ng new phone-book
CD into a phone book directory and run the below command in the terminal to create a module for the proper structure of our app:
ng generate module contacts
Create app/contacts/contact.model.ts:
//app/contacts/contact.model.ts
export interface Contact {
  id: number;
  name: string;
  phone_no: string;
}
The above snippet uses the TypeScript interface. It creates a model to validate data that will be returned from the product’s service.
Run the below command to create a contact service:
ng generate service contacts/contact
Update contact.service.ts:
//app/contacts/contact.service.ts
import { Injectable } from '@angular/core';
import { Contact } from './contact.model';
@Injectable({
  providedIn: 'root'
})
export class ContactService {
  constructor() { }
  getContacts(): Contact[] {
    return [
      { id: 1, name: 'Peter', phone_no: '09033940948' },
      { id: 2, name: 'Sam', phone_no: '07033945948'},
      { id: 3, name: 'Bryce', phone_no: '08033740948' },
      { id: 4, name: 'Lee', phone_no: '090339409321' },
      { id: 5, name: 'Albert', phone_no: '09066894948'  }
    ];
  }
}
The providedIn property creates a provider for the service. In this case, providedIn: 'root' specifies that Angular should provide the service in the root injector (i.e., make it available in the entire application).
Now, ContactService can be injected anywhere in our application.
Update contact-list.component.ts:
//app/contacts/contact-list.component.ts
import { Component, OnInit } from '@angular/core';
import { Contact } from '../contact.model';
import { ContactService } from '../contact.service';
@Component({
  selector: 'app-contact-list',
  templateUrl: './contact-list.component.html',
  styleUrls: ['./contact-list.component.css'],
  providers: [ContactService]
})
export class ContactListComponent implements OnInit {
  contacts: Contact[];
  constructor(private contactService: ContactService) { }
  ngOnInit(): void {
    this.contacts = this.contactService.getContacts();
  }
}
The above snippet instantiates the ContactService private property using the new keyword in the component’s constructor, calls the getContacts method of contactService inside the ngOnInit method, and assigns the return value to the contacts property.
Update contact-list.component.html:
//app/contacts/contact-list.component.html
<h3>My Contact List</h3>
<ul>
  <li *ngFor="let contact of contacts">
    {{contact.name}}
  </li>
</ul>
<app-recent-contact></app-recent-contact>
The above snippet uses the ngFor directive to display the list of contacts and also accepts RecentContact as its direct child component.
Update app/contacts/recent-contact.component.ts:
//app/contacts/recent-contact.component.ts
import { Component, OnInit } from '@angular/core';
import { ContactService } from '../contact.service';
import { Contact } from '../contact.model';
@Component({
  selector: 'app-recent-contact',
  templateUrl: './recent-contact.component.html',
  styleUrls: ['./recent-contact.component.css']
})
export class RecentContactComponent implements OnInit {
  contacts: Contact[];
  constructor(private contactService: ContactService) { }
  ngOnInit(): void {
    this.contacts = this.contactService.getContacts();
  }
}
RecentContactComponent, being a direct child component to ContactListComponent, has access to the ContactListComponent provided dependency even without actually providing it through the providers property of the @component decorator.
Update app/contacts/recent-contact.component.html:
//app/contacts/recent-contact.component.html
<h3>My Recent Contacts</h3>
<ul>
  <li *ngFor="let contact of contacts | slice:0:3">
    {{contact.name}}
  </li>
</ul>
Here, we apply the SlicePipe to the ngFor statement to display the last three contacts only.
Running the application with the ng serve command, we should have a list of all the contacts and recent contacts rendered in the browser.
Overriding dependencies in Angular requires two key properties:
provide — this points to the dependency that you wish to overrideuseClass — this points to the new dependency, which will override the existing dependency in the providers propertyIt follows a simple format:
@Component({
 providers: [
  { provide: Service, useClass : FakeService }
 ]
})
There are cases when you want to override the default resolution of your construct.
These are some typical cases:
The latter is achieved by creating a new dependency out of the existing dependency using the extend keyword.
Let’s consider a practical approach to the latter case by creating a new service called RecentContactService that would extend ContactService and filter out data using the slice array method rather than using the pipe in the template.
Update recent-contact.service.ts:
//app/contacts/recent-contact.service.ts
import { Injectable } from '@angular/core';
import { ContactService } from './contact.service';
import { Contact } from './contact.model';
@Injectable({
  providedIn: 'root'
})
export class RecentContactService extends ContactService {
  constructor() {
    super();
  }
  getContacts(): Contact[] {
    return super.getContacts().slice(Math.max(super.getContacts().length - 3, 0))
  }
}
Here, the getContacts method returns the last three items from the resulting array from ContactService.
Now, we can add this new service (dependency) to the providers property of RecentContactComponent
Update recent-contact.component.ts:
//app/contact/recent-contact.component.ts
...
import { RecentContactService } from '../recent-contact.service';
@Component({
  selector: 'app-recent-contact',
  templateUrl: './recent-contact.component.html',
  styleUrls: ['./recent-contact.component.css'],
  providers: [{
    provide: ContactService,
    useClass: RecentContactService
  }]
})
export class RecentContactComponent implements OnInit {
  contacts: Contact[];
  constructor(private recentContactService: RecentContactService) {}
  ngOnInit(): void {
    this.contacts = this.recentContactService.getContacts();
  }
}
Here, the useClass property allows Angular to override our previous dependency (ContactService) with our new dependency (RecentContactService).
In a case where the dependency we want to override is a string, the useValue syntax will be handy.
Say our app has a DBconfig file:
//app/db.config.ts
export interface DBConfig {
  name: string;
  version: number;
}
export const databaseSettings: DBConfig = {
  name: 'MongoDB',
  version: 2.0
};
In order to make the database configurations accessible in our application, we need to provide an InjectionToken object:
//app/db.config.ts
import { InjectionToken } from '@angular/core';
export const DB_CONFIG = new InjectionToken<DBConfig>('db.config');
...
Now, our component can access the database config using the @Inject decorator:
//app/app.component.ts
import { Component, Inject } from '@angular/core';
import { DB_CONFIG, databaseSettings, DBConfig } from './db.config';
@Component({
  selector: 'app-root',
  templateUrl: './app.component.html',
  styleUrls: ['./app.component.css'],
  providers: [{
    provide: DB_CONFIG,
    useValue: databaseSettings
  }]
})
export class AppComponent {
  name: string;
  version: number;
  constructor(@Inject(DB_CONFIG) config: DBConfig) {
    this.name = config.name;
    this.version = config.version;
  }
}


//app/app.component.html
<h4>This app uses {{name}} Database v. {{version}}</h4>
<app-contact-list></app-contact-list>
The useFactory keyword allows Angular to decide what dependency to inject into a construct at runtime:
import { RecentContactService } from './recent-contact.service';
import { ContactService } from './contact.service';
export function contactFactory(isRecent: boolean) {
  return () => {
    if (isRecent) {
      return new RecentContactService();
    }
    return new ContactService();
  };
}
The above snippet is a factory that returns either RecentContactService or ContactService depending on the Boolean condition.
Now, we can modify RecentContactComponent‘s providers property as follows:
...
 providers: [{
    provide: ContactService,
    useClass: contactFactory(true)
  }]
...
With this, we can override any dependency as many times as possible. It is even easier as we only have to add the new dependencies to the contactFactory, adjust the conditions, and finally adjust the useClass property of the corresponding component of the new dependencies.
If any of these dependencies inject other dependencies into their constructor with the previous implementation of the contactFactory, Angular will throw an error.
Assuming both RecentContactService and ContactService are dependent on the AuthService dependency, we will have to adjust the contactFactory as follows:
export function contactFactory(isRecent: boolean) {
  return (auth: AuthService) => {
    if (isRecent) {
      return new RecentContactService();
    }
    return new ContactService();
  };
}
Then, we have to add the AuthService dependency to the deps property of the providers
object in RecentContactComponent as follows:
...
 providers: [{
    ...
    deps: [AuthService]
  }]
...
Working on a large-scale Angular application requires a good understanding of how dependency injection works. Knowledge of how and when to override dependency in Angular is essential when working on large-scale Angular applications because it helps you avoid unnecessary code duplication in your application.
The source code for this article is available on GitHub.
Debugging Angular applications can be difficult, especially when users experience issues that are difficult to reproduce. If you’re interested in monitoring and tracking Angular state and actions for all of your users in production, try LogRocket.
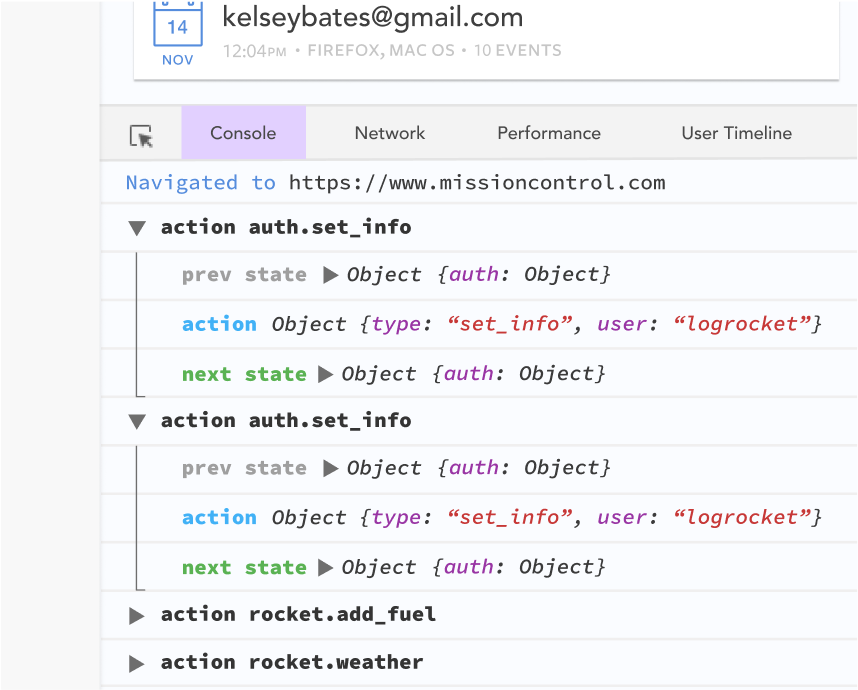
LogRocket lets you replay user sessions, eliminating guesswork by showing exactly what users experienced. It captures console logs, errors, network requests, and pixel-perfect DOM recordings—compatible with all frameworks.
With Galileo AI, you can instantly identify and explain user struggles with automated monitoring of your entire product experience.
The LogRocket NgRx plugin logs Angular state and actions to the LogRocket console, giving you context around what led to an error, and what state the application was in when an issue occurred.
Modernize how you debug your Angular apps — start monitoring for free.

AI-generated tests can speed up React testing, but they also create hidden risks. Here’s what broke in a real app.re

Why the future of DX might come from the web platform itself, not more tools or frameworks.

A hands-on test of Claude Code Review across real PRs, breaking down what it flagged, what slipped through, and how the pipeline actually performs in practice.

CSS art once made frontend feel playful and accessible. Here’s why it faded as the web became more practical and prestige-driven.
Would you be interested in joining LogRocket's developer community?
Join LogRocket’s Content Advisory Board. You’ll help inform the type of content we create and get access to exclusive meetups, social accreditation, and swag.
Sign up now

