In software development, there are several proposed patterns for handling dependency injection. Angular enforces the constructor injection pattern, which uses the constructor to pass in the dependencies of a class as parameters of the constructor.

Angular has its own built-in dependency injection (DI) framework that provides dependencies to classes upon instantiation. This is an important feature for building scalable web applications in Angular.
In this tutorial, we’ll show you how dependency injection works in Angular by walking through some practical examples. We’ll also review some best practices and go over a few different approaches to handling dependency injection in an Angular app.
To follow along, you should have the following:
According to Angular’s official documentation, dependency injection is “a design pattern in which a class requests dependencies from external sources rather than creating them.”
In a nutshell, Angular dependency injection aims to decouple the implementation of services from components. This eases testing, overriding, and altering of services without affecting the components dependent on these services.
Most times you will come across some angular tutorials or codebases that handle dependency injection this way:
ng generate service products/product
The above command creates a new Angular service along with other accompanying files.
//app/products/product.model.ts
export interface Product {
  id: number;
  name: string;
}
The above snippet uses the TypeScript interface to create a model to validate data returned from the products service.
//app/products/product.service.ts
import { Injectable } from '@angular/core';
import { Product } from './product.model';
@Injectable({
  providedIn: 'root'
})
export class ProductService {
  constructor() { }
  getProducts(): Product[] {
    return [
      { id: 1, name: 'Nike' },
      { id: 2, name: 'Balenciaga' },
      { id: 3, name: 'Gucci' },
      { id: 4, name: 'Addidas' },
    ];
  }
}
The providedIn property creates a provider for the service. In this case, providedIn: 'root' specifies that Angular should provide the service in the root injector (i.e., make it available in the entire application).
Now, ProductService can be injected anywhere in our application:
//app/products/product-list/product-list.component.ts
import { Component, OnInit } from '@angular/core';
import { Product } from '../product.model';
import { ProductService } from '../product.service';
@Component({
  selector: 'app-product-list',
  templateUrl: './product-list.component.html',
  styleUrls: ['./product-list.component.css'],
  providers: [ProductService]
})
export class ProductListComponent implements OnInit {
  products: Product[];
  private productService: ProductService;
  constructor() {
    this.productService = new ProductService();
  }
  ngOnInit(): void {
    this.products = this.productService.getProducts();
  }
}
The above snippet instantiates the productService private property using the new keyword in the component’s constructor, calls the getProducts method of productService inside the ngOnInit method, and assigns the return value to the products property.
//app/products/product-list/product-list.component.html
<h3>Our products</h3>
<ul>
  <li *ngFor="let product of products">
    <p>(S/N: {{product.id}}) {{product.name}} </p>
  </li>
</ul>
The above snippet uses the ngFor directive to display the list of products.
If you run the application using the ng serve command, everything should work well.
Although we successfully decoupled our component from the product logic via Angular service, which is the major aim of DI, this approach still has two major drawbacks. The first is that a new service is created each time the ProductListComponent is rendered. This could negatively impact the application’s performance in a situation where a singleton service is expected.
Secondly, if we change the constructor of ProductService to accommodate another dependency, we’ll also need to change the implementation of the ProductListComponent constructor. This means the component is still tightly coupled to the implementation of the service, which can make testing the service very difficult.
The best practice for handling dependency injection in Angular is as follows.
Update product-list.component.ts as shown below:
//app/products/product-list/product-list.component.ts
...
export class ProductListComponent implements OnInit {
  products: Product[];
  constructor(private productService: ProductService) { }
  ngOnInit(): void {
    this.products = this.productService.getProducts();
}
This way, the component does not need to know how to instantiate the service. Instead, it receives the dependency and injects it through its constructor. This approach make it easier to test the service.
When handling dependency injection in an Angular app, you can either take an application-based or a component-based approach. Let’s zoom in on the differences.
The Angular DI framework makes dependencies available across the entire application by providing an injector that keeps a list of all dependencies the application needs. When a component or service wants to use a dependency, the injector first checks whether it has already created an instance of that dependency. If not, it creates a new one, returns it to the component, and reserves a copy for further use so that the next time the same dependency is requested, it returns the reserved dependency rather than creating a new one.
There are hierarchies associated with injectors in an Angular application. Whenever an Angular component defines a token in its constructor, the injector searches for a type that matches that token in the pool of registered providers. If no match is found, it delegates the search on the parent component’s provider up through the component injector tree. If it finds the dependency, it stops and returns an instance of it to the component that requested it.
If the provider lookup finishes with no match, it returns to the injector of the component that requested the provider and searches through the injectors of all the parent modules up the module injector hierarchy until it reaches the root injector. If no match is found, Angular throws an exception. Otherwise, it returns an instance of the dependency on the component.
We already walked through some practical code snippets for this approach. Feel free to refer to the previous section if you’d like to review.
This approach is known for injecting the dependencies directly into the component tree using the @Component decorator’s providers property to register services with a component injector. This approach is commonly used in Angular applications.
When sharing dependencies across children components, the dependencies are shared across all the children components of the component that provides the dependencies. They are readily available for injection into constructors of the children components, causing each child component to reuse the same instance of the service from the parent component.
Let’s say we want to display a list of recently added products. Obviously, the model for displaying a list of recently added products is the same for displaying all products. Hence, we can share the products dependency (service) across the ProductListComponent and RecentProductComponent components.
Create a new component named recent-products inside the products module with the following command:
ng generate component products/recentProducts --module=products
Update recent-products.component.ts as follows:
import { Component, OnInit } from '@angular/core';
import { ProductService } from '../product.service';
import { Product } from '../product.model';
@Component({
  selector: 'app-recent-products',
  templateUrl: './recent-products.component.html',
  styleUrls: ['./recent-products.component.css']
})
export class RecentProductsComponent implements OnInit {
  products: Product[];
  constructor(private productService: ProductService) { }
  ngOnInit(): void {
    this.products = this.productService.getHeroes();
  }
}
Here, we inject ProductService into the constructor of RecentProductsComponent without actually providing it through the providers property of the @component decorator, as we did for ProductListComponent.
How do we account for the missing providers property of the @component decorator? Without this, the RecentProductsComponent will not know how to create an instance of ProductService.
Update ProductListComponent template as follows:
//app/products/product-list/product-list.component.html
<h3>Our products</h3>
<ul>
  <li *ngFor="let product of products">
    <p>(S/N: {{product.id}}) {{product.name}} </p>
  </li>
</ul>
<app-recent-products></app-recent-products>
We will answer the previous question by making the RecentProductComponent a direct child to the ProductListComponent, giving RecentProductComponent access to all the dependences provided by ProductListComponent.
Update recent-products.component.html as follows:
//app/products/recent-products/recent-products.component.html
<h3>Recent Products</h3>
<ul>
  <li *ngFor="let product of products | slice:0:5">
    {{product.name}}
  </li>
</ul>
Here, we apply the slice pipe to the ngFor statement to display the first five products only.
When you run the application with the ng serve command, you should see a list of all the products and recent products rendered in the browser.
In this tutorial, we established a basic understanding of Angular dependency injection. We walked through several practical examples to demonstrate how dependencies are shared across children components as well as the entire application. We also reviewed some best practices for implementing dependency injection in your next Angular application.
Debugging Angular applications can be difficult, especially when users experience issues that are difficult to reproduce. If you’re interested in monitoring and tracking Angular state and actions for all of your users in production, try LogRocket.
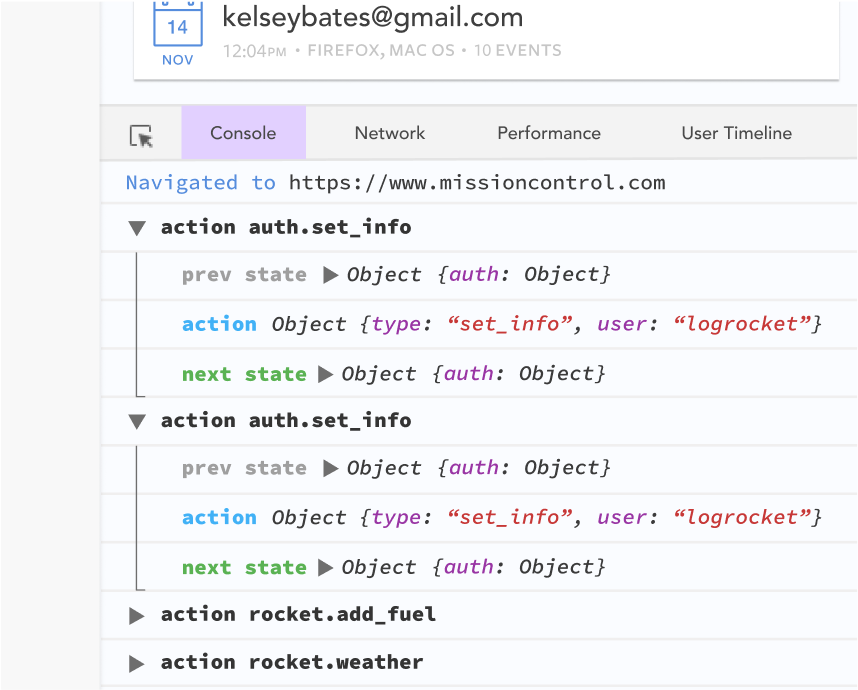
LogRocket lets you replay user sessions, eliminating guesswork by showing exactly what users experienced. It captures console logs, errors, network requests, and pixel-perfect DOM recordings—compatible with all frameworks.
With Galileo AI, you can instantly identify and explain user struggles with automated monitoring of your entire product experience.
The LogRocket NgRx plugin logs Angular state and actions to the LogRocket console, giving you context around what led to an error, and what state the application was in when an issue occurred.
Modernize how you debug your Angular apps — start monitoring for free.
Would you be interested in joining LogRocket's developer community?
Join LogRocket’s Content Advisory Board. You’ll help inform the type of content we create and get access to exclusive meetups, social accreditation, and swag.
Sign up now
A breakdown of the wrapper and container CSS classes, how they’re used in real-world code, and when it makes sense to use one over the other.

This guide walks you through creating a web UI for an AI agent that browses, clicks, and extracts info from websites powered by Stagehand and Gemini.

This guide explores how to use Anthropic’s Claude 4 models, including Opus 4 and Sonnet 4, to build AI-powered applications.

Which AI frontend dev tool reigns supreme in July 2025? Check out our power rankings and use our interactive comparison tool to find out.


One Reply to "How dependency injection works in Angular"
Nice article