When you open a website, there’s a good chance you’ll see a prompt requesting permission to display notifications. You might have also noticed that some websites load faster on subsequent visits due to caching. These are just a few examples of how building progressive web apps (PWAs) into your website can help enhance the user experience.

In this tutorial, we’ll show you how to implement notifications, caching, and messages in a PWA. We’ll cover the following.
If you’re not familiar with PWAs, I recommended starting here.
You can find the initial code for this project on GitHub.
The Replay is a weekly newsletter for dev and engineering leaders.
Delivered once a week, it's your curated guide to the most important conversations around frontend dev, emerging AI tools, and the state of modern software.
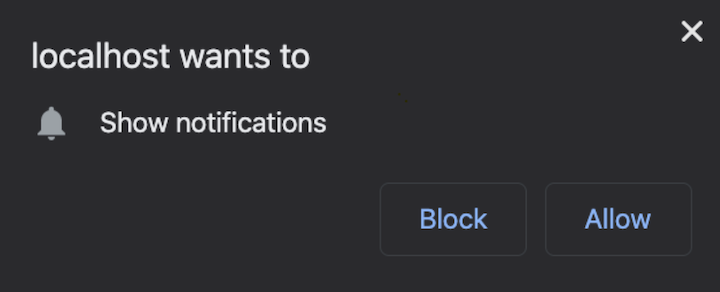
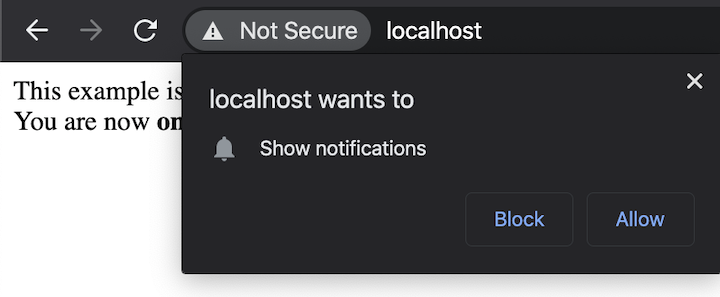
A typical request to allow notifications looks something like this:

Such requests, while sometimes annoying, can also be useful. For instance, enabling notifications would allow a user to navigate to other browser tabs while waiting for an event to happen on a website, such as receiving a message in a chat.
We see it everywhere nowadays, likely because it’s super easy to implement.
Start by requesting access. Create a file named notifications.js in the public/js folder and add it to your page.
public/index.html:
<html>
  <head>
    <link rel="manifest" href="/js/pwa.webmanifest">
    <link rel="apple-touch-icon" href="/images/apple-touch.png">
    <meta name="viewport" content="width=device-width, initial-scale=1">
    <meta name="theme-color" content="#764ABC"/>
  </head>
  <body>
    <div>
      <span>This example is for the article of progressive web apps written for LogRocket</span>
      <br>
      <span>You are now</span> <span><b class="page-status">online</b></span>
    </div>
    <script src="/js/notifications.js"></script>
    <script src="/js/pwa.js"></script>
    <script src="/js/status.js"></script>
  </body>
</html>
public/js/notifications.js:
document.addEventListener('DOMContentLoaded', init, false)
function init() {
  if ('Notification' in window) {
    Notification.requestPermission(result =>  {
      if (result === 'granted') {
        console.log('Acess granted! :)')
      } else if (result === 'denied') {
        console.log('Access denied :(')
      } else {
        console.log('Request ignored :/')
      }
    })
  }
}
If the browser has notifications enabled, it will request permission to display notifications in the future when the user opens the same website, even if the tab is not selected or the browser is minimized.
While we’re requesting access to the user immediately after entering the page, the recommended practice is to request access only after a user interaction, such as the press of a button.

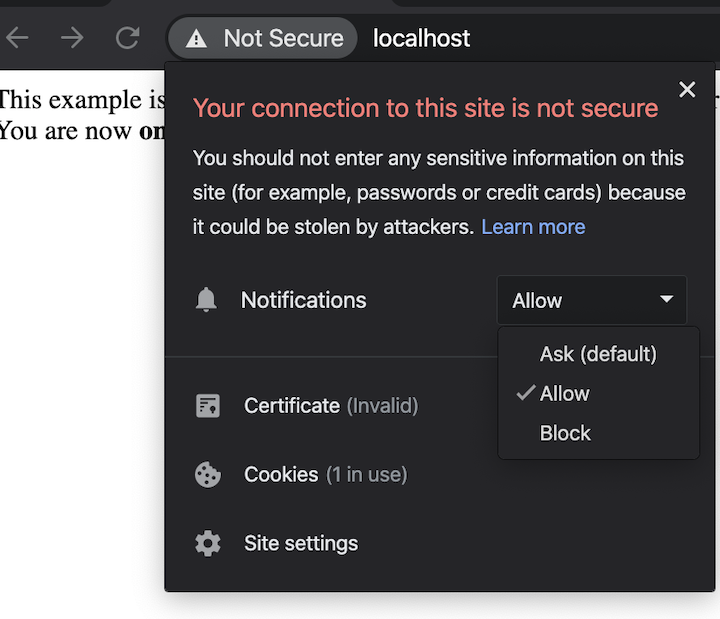
If the user selects “Block,” they can always allow notifications later by clicking to the left of the URL and selecting either “Ask” or “Allow” — at least, that’s how it behaves in Chrome.

Assuming that the notification is accepted, nothing will show. That’s because we didn’t call the function to trigger a notification.
Create a new route in the server called /notification to return the current time of the server. We’ll also request the front end to that route every second so we can see it working even if we minimize the browser or switch tabs.
Note: If you want live updates, you should use WebSockets instead of a setTimeout. This example is for simplicity’s sake.
server.js:
const express = require('express')
const path = require('path')
const fs = require('fs')
const https = require('https')

const httpPort = 80
const httpsPort = 443

const key = fs.readFileSync('./certs/localhost.key')
const cert = fs.readFileSync('./certs/localhost.crt')

const app = express()
const server = https.createServer({key: key, cert: cert }, app)

app.use((req, res, next) => {
  if (!req.secure) {
    return res.redirect('https://' + req.headers.host + req.url)
  }
  next()
})
app.use(express.static(path.join(__dirname, 'public')))

app.get('/', function(req, res) {
  res.sendFile(path.join(__dirname, 'public/index.html'))
})

app.get('/notification', function(req, res) {
  const date = new Date()
  const message = {
    date: date.toLocaleString()
  }
  res.send(message)
})

app.listen(httpPort, function () {
  console.log(`Listening on port ${httpPort}!`)
})

server.listen(httpsPort, function () {
  console.log(`Listening on port ${httpsPort}!`)
})
public/js/notifications.js:
document.addEventListener('DOMContentLoaded', init, false)

function init() {
  if ('Notification' in window) {
    Notification.requestPermission(result =>  {
      if (result === 'granted') {
        console.log('Acess granted! :)')
        showServerTimeNotification()
      } else if (result === 'denied') {
        console.log('Access denied :(')
      } else {
        console.log('Request ignored :/')
      }
    })
  }

  function showServerTimeNotification() {
    if ('serviceWorker' in navigator) {
      navigator.serviceWorker.ready.then(registration => {
        setInterval(() => {
          fetch('/notification')
            .then(res => res.json())
            .then((response) => {
              const title = 'Server time'
              const options = {
                body: `Right now it's ${response.date}`,
              }
              registration.showNotification(title, options)
            })
        }, 1000)
      })
    }
  }
}
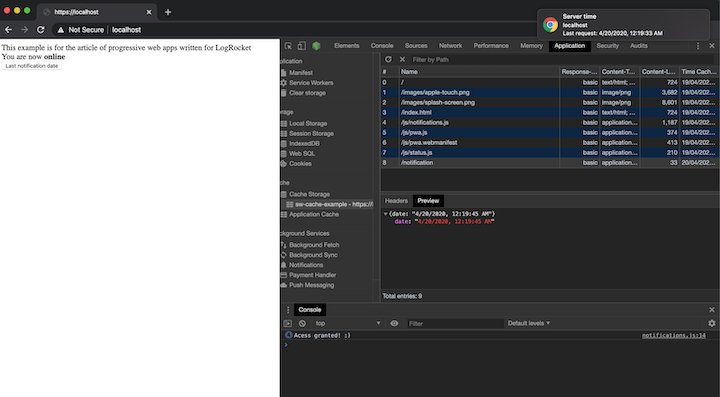
We should now have a notification now showing every second with the current time of the server, like so:

To get into more detail as far as the code, we must first check whether the service worker is working before proceeding to show the notification. You don’t need to be in the same file as the service worker since navigator.serviceWorker.ready is triggered once the status of the service worker changes.
What makes the service worker open is registration.showNotification(title, options), which is self-explanatory. It has many options so you can customize the look and behavior. For example, you can remove the sound and vibration in a phone with a silent, or add a custom icon or image, to name a few. The one we’re using is the body, which represents the message that shows up.
Head to MDN for a full list of options.
You might be wondering how you can cache files and requests without having to manually update them in the service-worker.js file.
Let’s use the notifications we just coded to demonstrate how to implement a cache system that:
- Returns the cached data if the request already exists
- Requests to update the current cache
- Executes the request and saves to the cache in case `no``-``cache` is found
This type of caching, where you’re constantly fetching the previous records, is known as stale-while-revalidate. This is useful for information that changes rarely, such as a list of countries or a user avatar image.
Let’s create a button that, when pressed, shows a notification of the last time the server was accessed and the cached data while simultaneously caching the request — regardless of whether it’s defined in the service-worker.js file.
This will work even if offline. Start by changing the notifications to only show when a button is pressed.
public/index.html:
<html>
  <head>
    <link rel="manifest" href="/js/pwa.webmanifest">
    <link rel="apple-touch-icon" href="/images/apple-touch.png">
    <meta name="viewport" content="width=device-width, initial-scale=1">
    <meta name="theme-color" content="#764ABC"/>
  </head>
  <body>
    <div>
      <span>This example is for the article of progressive web apps written for LogRocket</span>
      <br>
      <span>You are now</span> <span><b class="page-status">online</b></span>
    </div>
    <div>
      <button class="btn-notifications">Last notification date</button>
    </div>
    <script src="/js/notifications.js"></script>
    <script src="/js/pwa.js"></script>
    <script src="/js/status.js"></script>
  </body>
</html>
public/js/notifications.js
document.addEventListener('DOMContentLoaded', init, false)

function init() {
  const notificationsBtn = document.querySelector('.btn-notifications')

  notificationsBtn.addEventListener('click', () => {
    requestPermission()
  })

  function requestPermission() {
    if ('Notification' in window) {
      Notification.requestPermission(result =>  {
        if (result === 'granted') {
          console.log('Acess granted! :)')
          showServerTimeNotification()
        } else if (result === 'denied') {
          console.log('Access denied :(')
        } else {
          console.log('Request ignored :/')
        }
      })
    } else {
      alert('Your browser does not support notifications')
    }
  }

  function showServerTimeNotification() {
    if ('serviceWorker' in navigator) {
      navigator.serviceWorker.ready.then(registration => {
        fetch('/notification')
          .then(res => res.json())
          .then((response) => {
            const title = 'Server time'
            const options = {
              body: `Last request: ${response.date}`,
            }
            registration.showNotification(title, options)
          })
      })
    }
  }
}
With this change, the users won’t get a bothersome request to enable notifications the moment they enter the website. This increases user conversion and makes users less likely to navigate away from your website.
However, this code is not enough since our goal is to use the cache to show the last saved date of the last request, not the current server date. For that, we’ll need to update the service worker to the following.
public/js/service-worker.js (this is only needed to update the fetch event).
// ...

self.addEventListener('fetch', function(event) {
  event.respondWith(async function() {
    const cache = await caches.open(CACHE_NAME)
    const cacheMatch = await cache.match(event.request)

    if (navigator.onLine) {
      const request = fetch(event.request)

      event.waitUntil(async function() {
        const response = await request
        await cache.put(event.request, await response.clone())
      }())

      return cacheMatch || request
    }

    return cacheMatch // this will be undefined when offline if there are no matches
  }())
})

// ...
Unlike the last example, now we’re checking whether the request we’re making is cached. If it isn’t, we make the usual request and return the response.
The cache is updated after every successful request because of the following section.
if (navigator.onLine) {
  const request = fetch(event.request)

  event.waitUntil(async function() {
    const response = await request
    await cache.put(event.request, await response.clone())
  }())

  return cacheMatch || request
}

return cacheMatch
This checks whether the browser is connected to the internet to avoid spamming a request that leads nowhere. The waitUntil is there to tell the service worker not to be replaced until a response has been found for the request. The clone is so we can read the response of the request again in case it was already read.
By pressing the button, we should now be caching our requests, even if they’re not on the list of requests to the cache.

Be careful with this type of implementation; you don’t want to fill the user’s browser cache. If you prefer the safer approach, you can still keep this type of cache and change the condition to update only if it’s present in the cache.
if (navigator.onLine && cacheMatch) {
  event.waitUntil(async function() {
    const response = await request
    await cache.put(event.request, await response.clone())
  }())
}
Lastly, let’s go over how to communicate with the service worker or make the service worker communicate with the client. This is useful if you need to call service worker methods like skipWaiting.
To make the client communicate to the service worker, we’ll need to post a message from the client side and receive it with the message event on the service worker side.
public/js/notifications.js:
document.addEventListener('DOMContentLoaded', init, false)

function init() {
  const notificationsBtn = document.querySelector('.btn-notifications')

  navigator.serviceWorker.controller.postMessage('Hello service worker!')

  notificationsBtn.addEventListener('click', () => {
    requestPermission()
  })

  // ...
}
public/js/service-worker.js:
// ...

self.addEventListener('message', function(event) {
  console.log('Message received ->', event.data)
})

// ...
There are multiple ways to do reverse communication. We’ll use the Clients interface that is available in the service worker to send a message back.
public/js/service-worker.js:
self.addEventListener('message', function(event) {
  console.log('Message received from client ->', event.data)

  self.clients.matchAll().then(clients => {
    clients.forEach(client => client.postMessage('Hello from SW!'));
  })
})
public/js/notifications.js:
document.addEventListener('DOMContentLoaded', init, false)

function init() {
  const notificationsBtn = document.querySelector('.btn-notifications')

  navigator.serviceWorker.controller.postMessage('Hello service worker!')

  navigator.serviceWorker.onmessage = (event) => {
    console.log('Message received from SW ->', event.data)
  }

  notificationsBtn.addEventListener('click', () => {
    requestPermission()
  })

  // ...
}
Most recent browsers — basically anything besides IE and iOS Safari — have support for the topics discussed in this article, but always be sure to check a tool such as MDN and Can I Use.
These kinds of notifications work if the website is open. Some notifications use the more recent Push API, which is still in the experimental phase and will work even if the browser is closed.
As for caching, stale-while-revalidate is just one of many examples. For example, we could have never hit the server again, decided to update the cache after a certain period of time, or updated only on a specific event. The most appropriate method depends on the scenario.
Communication between the service worker and the client can also be achieved with the Broadcast Channel API or MessageChannel interface.
You can reference the final code of this tutorial on GitHub.
Install LogRocket via npm or script tag. LogRocket.init() must be called client-side, not
server-side
$ npm i --save logrocket

// Code:

import LogRocket from 'logrocket';
LogRocket.init('app/id');
// Add to your HTML:

<script src="https://cdn.lr-ingest.com/LogRocket.min.js"></script>
<script>window.LogRocket && window.LogRocket.init('app/id');</script>

@container scroll-state: Replace JS scroll listeners nowCSS @container scroll-state lets you build sticky headers, snapping carousels, and scroll indicators without JavaScript. Here’s how to replace scroll listeners with clean, declarative state queries.

Russ Miles, a software development expert and educator, joins the show to unpack why “developer productivity” platforms so often disappoint.

Discover what’s new in The Replay, LogRocket’s newsletter for dev and engineering leaders, in the February 18th issue.

Learn how to recreate Claude Skills–style workflows in GitHub Copilot using custom instruction files and smarter context management.
Would you be interested in joining LogRocket's developer community?
Join LogRocket’s Content Advisory Board. You’ll help inform the type of content we create and get access to exclusive meetups, social accreditation, and swag.
Sign up now