Response streaming is one of the simplest but most effective ways to improve the user experience in AI-powered applications. Instead of making users wait for a lengthy and fully generated response, you can stream the output token by token and display it as it’s being produced.

This is the same effect you see when using ChatGPT or Gemini, where the text appears gradually, almost as if the AI is typing in real time. It makes your app feel faster and more interactive.
In this tutorial, you’ll learn how to stream AI-generated responses in a Next.js app using the Vercel AI SDK. We’ll start with real-time text streaming, add a smooth typing effect to make it feel more natural, and then extend it to include the model’s reasoning. You’ll see how this works across various AI providers, including OpenAI, Gemini, and Anthropic. We’ll also cover how to handle edge cases, such as network interruptions, and when streaming is actually worth using.
The Replay is a weekly newsletter for dev and engineering leaders.
Delivered once a week, it's your curated guide to the most important conversations around frontend dev, emerging AI tools, and the state of modern software.
To follow along, you’ll need:
Gemini is recommended for this tutorial because you can quickly create a free API key without needing to enter credit card details. However, if you already have an OpenAI, Claude, or Grok key, you can easily adapt the code for those providers.
Once you have your API key ready, let’s take a quick look at what actually happens behind the scenes when an AI response is streamed.
When you send a message to a large language model (LLM), it doesn’t always wait to finish the entire response before sending something back. Instead, most models stream the output in small pieces as it is generated, and it’s all made possible through a protocol called Server-Sent Events (SSE).
With SSE, your backend receives a continuous stream of data events like this:
data: {"delta": "Hello"}
data: {"delta": " there"}
data: {"delta": "!"}
data: [DONE]
Each delta represents a small chunk of text generated by the model. You can collect these chunks, append them together, and forward them to your frontend in real time, so the user sees the text appear gradually instead of waiting for the full response.
While each AI provider has its own approach to handling streaming, the core pattern remains the same. The Vercel AI SDK builds on this idea and removes all the complicated parts. Instead of writing custom logic for each provider’s streaming format, it gives you a unified SDK that works everywhere. You write your streaming code once, and it runs seamlessly with OpenAI, Gemini, Anthropic, and others.
With that covered, let’s set up the project and start building our own streaming chat app.
Let’s start by creating a new Next.js application by running the following command:
npx create-next-app ai-app
During setup, ensure that you select the App Router mode and Tailwind CSS. You can select other configuration options according to your preference.
Next, install the necessary dependencies by running the command below:
npm install ai @ai-sdk/react @ai-sdk/google @ai-sdk/openai zod
This command will install the core AI SDK, its React hooks, provider adapters for Gemini and OpenAI, and Zod for validation.
Create a new .env file in your project root directory and add your Gemini or OpenAI API key as shown below:
OPENAI_API_KEY=YOUR_OPENAI_KEY
GOOGLE_GENERATIVE_AI_API_KEY=YOUR_GEMINI_KEY
To add a streaming API route, create a new api/chat/route.ts file inside the default /app directory and paste the following code into it:
import { google } from "@ai-sdk/google";
import { streamText, UIMessage, convertToModelMessages } from "ai";

export const maxDuration = 30;

export async function POST(req: Request) {
  const { messages }: { messages: UIMessage[] } = await req.json();

  const result = streamText({
    model: google("gemini-2.5-flash"),
    messages: convertToModelMessages(messages),
  });

  return result.toUIMessageStreamResponse();
}
This route exposes a POST endpoint that receives the chat history from the client as JSON. Inside the handler, the streamText function sends that history to the model and starts receiving chunks of the response as they’re generated. Instead of waiting for the full output, it immediately begins streaming those chunks back to the browser as an HTTP stream.
The call to toUIMessageStreamResponse() is what makes this stream compatible with the React side. It converts the raw event data received from the provider into a structured format that the frontend can understand and render in real-time.
If you’re using OpenAI instead of Gemini, you need to import the OpenAI adapter and change the model in the streamText() function as shown below:
import { openai } from "@ai-sdk/openai";
const result = streamText({
  model: openai("gpt-4o"), // ←
  ...
});
Other providers like Anthropic or Grok also work the same way once you install their adapter. For more details, refer to the AI SDK documentation.
To proceed, open the default app/page.js file and replace its content with the following code:
"use client";

import { useChat } from "@ai-sdk/react";
import { useState, useEffect } from "react";

export default function Chat() {
  const [input, setInput] = useState("");
  const { messages, sendMessage } = useChat();
  return (
    <div className="flex flex-col w-full max-w-md py-24 mx-auto stretch">
      {messages.map((message) => (
        <div key={message.id} className="whitespace-pre-wrap">
          {message.role === "user" ? (
            <div className="text-right">You: </div>
          ) : (
            <div className="text-left">AI: </div>
          )}
          {message.parts.map((part, i) => {
            switch (part.type) {
              case "text":
                return (
                  <div
                    className={`${
                      message.role === "user" ? "text-right" : "text-left"
                    }`}
                    key={`${message.id}-${i}`}
                  >
                    {part.text}
                  </div>
                );
            }
          })}
        </div>
      ))}

      <form
        onSubmit={(e) => {
          e.preventDefault();
          sendMessage({ text: input });
          setInput("");
        }}
      >
        <input
          className="fixed bottom-0 w-full max-w-md p-2 mb-8 border border-zinc-300 rounded shadow-xl"
          value={input}
          placeholder="Say something..."
          onChange={(e) => setInput(e.currentTarget.value)}
        />
      </form>
    </div>
  );
}
This code creates the chat interface and connects it to the streaming API route. The useChat() hook from @ai-sdk/react manages all the chat state. It stores messages and handles sending new ones to the /api/chat endpoint we created earlier. When the user submits a message, the hook automatically streams the model’s response back and updates the UI in real time.
With this setup done, you already have a fully functional AI chat. To see it in action, start your development server with:
npm run dev
Then open http://localhost:3000 in your browser. Type something into the input box and hit Enter. The AI’s response will start coming in as it’s generated:
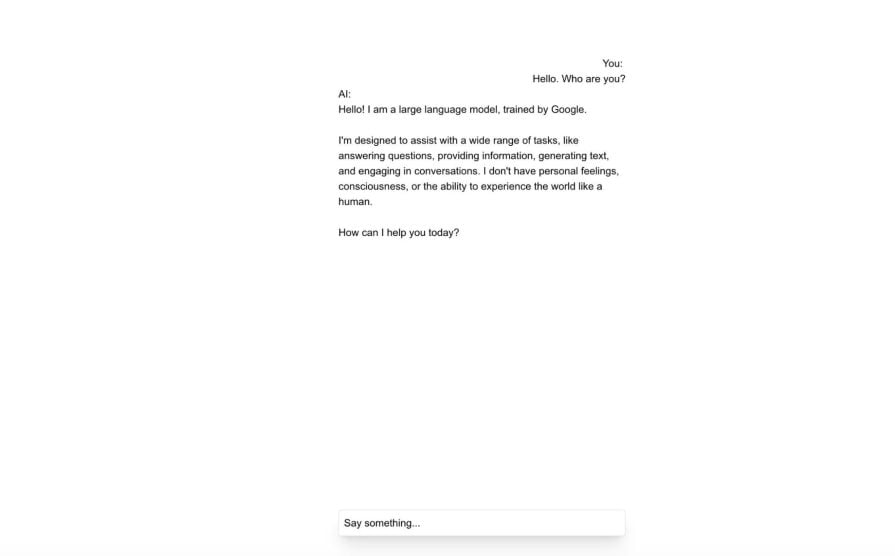
The streaming is already working under the hood, but it’s not yet noticeable. In the next step, we’ll add a smooth typing effect to make the streaming feel more natural and dynamic.
To proceed, create a new file app/components/StreamingText.js and paste the code below:
"use client";

import { useState, useEffect } from "react";

export default function StreamingText({
  text,
  isStreaming = false,
  speed = 50,
}) {
  const [displayedText, setDisplayedText] = useState("");
  const [currentIndex, setCurrentIndex] = useState(0);

  useEffect(() => {
    if (text !== displayedText + text.slice(currentIndex)) {
      setDisplayedText("");
      setCurrentIndex(0);
    }
  }, [text]);

  useEffect(() => {
    if (currentIndex < text.length) {
      const timer = setTimeout(() => {
        setDisplayedText((prev) => prev + text[currentIndex]);
        setCurrentIndex((prev) => prev + 1);
      }, speed);

      return () => clearTimeout(timer);
    }
  }, [currentIndex, text, speed]);

  return (
    <span className="inline-block">
      {displayedText}
      {isStreaming && currentIndex < text.length && (
        <span className="typing-cursor">|</span>
      )}
    </span>
  );
}
This component keeps track of two things: the portion of text that’s already displayed and the current index of the next character to show. Whenever the text changes (for example, when a new message starts streaming), it resets the index and begins revealing the text one character at a time based on the defined speed value. While the AI is still generating text, it also shows a simple blinking cursor to make the typing effect more noticeable.
Next, open the default app/global.css file and add the animation for the cursor:
@keyframes typing-cursor {
  0%,
  50% {
    opacity: 1;
  }
  51%,
  100% {
    opacity: 0;
  }
}

.typing-cursor {
  animation: typing-cursor 1s infinite;
}
Now, open app/page.js and replace its content with the code below:
"use client";

import { useChat } from "@ai-sdk/react";
import { useState, useEffect } from "react";
import StreamingText from "./components/StreamingText";

export default function Chat() {
  const [input, setInput] = useState("");
  const { messages, sendMessage, status } = useChat();

  return (
    <div className="flex flex-col w-full max-w-md py-24 mx-auto stretch">
      {messages.map((message) => (
        <div key={message.id} className="whitespace-pre-wrap">
          {message.role === "user" ? (
            <div className="text-right">You: </div>
          ) : (
            <div className="text-left">AI: </div>
          )}
          {message.parts.map((part, i) => {
            switch (part.type) {
              case "text":
                return (
                  <div
                    className={`${
                      message.role === "user" ? "text-right" : "text-left"
                    }`}
                    key={`${message.id}-${i}`}
                  >
                    {message.role === "assistant" ? (
                      <StreamingText
                        text={part.text}
                        isStreaming={
                          status === "in_progress" &&
                          messages[messages.length - 1]?.id === message.id
                        }
                      />
                    ) : (
                      part.text
                    )}
                  </div>
                );
            }
          })}
        </div>
      ))}

      <form
        onSubmit={(e) => {
          e.preventDefault();
          sendMessage({ text: input });
          setInput("");
        }}
      >
        <input
          className="fixed dark:bg-zinc-900 bottom-0 w-full max-w-md p-2 mb-8 border border-zinc-300 dark:border-zinc-800 rounded shadow-xl"
          value={input}
          placeholder="Say something..."
          onChange={(e) => setInput(e.currentTarget.value)}
        />
      </form>
    </div>
  );
}
Here, we’re updating the message rendering logic to use the StreamingText component for the AI’s latest response. The check:
status === "in_progress" && messages[messages.length - 1]?.id === message.id
ensures that only the most recent AI message shows the typing animation while it’s streaming. Older messages are rendered instantly, so the chat history remains fast and smooth.
Once you save your changes and reload the browser, send a new message to the AI. This time, the response will appear as a live typing animation instead of a static block of text:
Our setup keeps things clean and scalable. The typing effect is fully contained within its own component, which means you can easily reuse or disable it without touching your core logic. The streaming still occurs through the Vercel AI SDK; the <StreamingText /> component only determines how the stream appears to the user.
Now that we’ve improved the streaming experience, let’s take it a step further by showing not just what the model says, but also how it thinks.
Reasoning is one of the major advancements that make newer AI models far more capable than the older ones. Instead of jumping straight to an answer, they can think through a problem and correct themselves before responding. While this reasoning shouldn’t be mixed with the final response, exposing it can be useful for debugging and transparency in how the AI reached its conclusion.
With just a few changes, the Vercel AI SDK enables us to stream reasoning alongside the response stream, allowing us to expand our current chat interface to display both in real-time while maintaining a clean and user-friendly main response.
To proceed, open the api/chat/route.ts and update the streamText() method to match the one below:
 const result = streamText({
    model: google("gemini-2.5-flash"),
    messages: convertToModelMessages(messages),
    providerOptions: {
      google: {
        thinkingConfig: {
          thinkingBudget: 8192,
          includeThoughts: true,
        },
      },
    },
  });
This update instructs the provider to generate reasoning and include it in the stream. We also specify a thinking budget, which is the number of thinking tokens the model can use when generating a response.
Next, open app/page.js and add the following state and effect to control when reasoning is expanded:
 const [reasoningExpandedById, setReasoningExpandedById] = useState({});

  useEffect(() => {
    const lastMessage = messages[messages.length - 1];
    if (!lastMessage || lastMessage.role !== "assistant") return;

    const hasReasoning = Array.isArray(lastMessage.parts)
      ? lastMessage.parts.some((p) => p.type === "reasoning")
      : false;

    if (!hasReasoning) return;

    setReasoningExpandedById((prev) => {
      const current = !!prev[lastMessage.id];
      const isStreaming =
        status === "in_progress" &&
        lastMessage.id === messages[messages.length - 1]?.id;
      if (isStreaming && !current) {
        return { ...prev, [lastMessage.id]: true };
      }
      if (!isStreaming && current) {
        return { ...prev, [lastMessage.id]: false };
      }
      return prev;
    });
  }, [messages, status]);
This update does three things. First, it tracks a per-message toggle, allowing the reader to show or hide the model’s reasoning. Second, it auto-expands reasoning while the latest assistant message is still streaming, because that is when it is most informative. Third, it collapses reasoning when the stream finishes, so the transcript stays tidy.
Finally, update the message renderer to handle a reasoning part type. Add the snippet below at the end of the text switch-case:
case "reasoning":
  return (
    <div
      key={`${message.id}-${i}`}
      className={`${
        message.role === "user" ? "text-right" : "text-left"
      }`}
    >
      {reasoningExpandedById[message.id] ? (
        <div className="mt-1">
          <div className="text-sm text-zinc-500 dark:text-zinc-400">
            {part.text}
          </div>
          <button
            type="button"
            className="mt-1 text-xs text-zinc-400 dark:text-zinc-500 hover:underline"
            onClick={() =>
              setReasoningExpandedById((prev) => ({
                ...prev,
                [message.id]: false,
              }))
            }
          >
            Hide reasoning
          </button>
        </div>
      ) : (
        <button
          type="button"
          className="mt-1 text-xs text-zinc-400 dark:text-zinc-500 hover:underline"
          onClick={() =>
            setReasoningExpandedById((prev) => ({
              ...prev,
              [message.id]: true,
            }))
          }
        >
          Show reasoning
        </button>
      )}
    </div>
  );
This renders a small block under the assistant’s message with either a "Show reasoning" or "Hide reasoning" button. When expanded, it prints the streamed thoughts in a lighter, smaller font so they feel secondary to the final answer.
With all these updates, your final app/page.js file should resemble the one in this GitHub file.
Start the app and send a prompt. You should see the final answer stream as usual, and you can reveal the model’s reasoning while it is being generated, as shown below:

It’s normal for certain errors to occur while the AI is generating a response, such as internet disruption, hitting the model’s token limit, or the provider timing out. Vercel AI SDK provides built-in error handling to deal with these cases gracefully.
On the client, you can access the error value directly from the useChat() hook. When something goes wrong, this value contains a descriptive message about what happened:
const { messages, sendMessage, status, error } = useChat();

return (
  <div>
    {error && (
      <div className="text-sm text-red-500 mb-2">
        {error.message || "Something went wrong. Please try again."}
      </div>
    )}
  </div>
);
This provides clear feedback instead of silently failing when something unexpected occurs during the streaming process.
Streaming changes how people experience AI. It makes responses feel natural and real-time, rather than static. However, that doesn’t mean it’s a good fit for all types of AI-native applications.
Streaming AI responses, especially with the type effect, work best when the user benefits from seeing the AI think or create in real-time. For example, in chatbots or personal assistants, it keeps the conversation flowing instead of showing a loading spinner. In AI coding tools, it helps users see code as it’s being written, so they can follow along or stop early. In creative tools, such as story or blog generators, it gives the feeling of co-writing with the AI, rather than waiting for a block of text to appear.
However, streaming isn’t worth it when users only care about the final result. For example, if your app generates structured data, such as JSON or SQL, performs summarization, or fetches factual answers, streaming adds unnecessary complexity. It’s simpler and faster to show the complete response once it’s ready.
A simple way to think about it is to stream when real-time feedback improves the experience and skip it when it doesn’t add any real benefit.
In this tutorial, we explored how to stream AI responses in Next.js using the Vercel AI SDK. You learned how to add real-time streaming with a typing effect, display the model’s reasoning separately, handle errors gracefully, and decide when streaming actually makes sense.
From here, you can extend your app with features such as a toggle to turn reasoning on or off, rendering markdown as formatted HTML, or even adding support for additional AI providers. You can also find the full source code for this tutorial on GitHub.
Thanks for reading!
Debugging Next applications can be difficult, especially when users experience issues that are difficult to reproduce. If you’re interested in monitoring and tracking state, automatically surfacing JavaScript errors, and tracking slow network requests and component load time, try LogRocket.
LogRocket captures console logs, errors, network requests, and pixel-perfect DOM recordings from user sessions and lets you replay them as users saw it, eliminating guesswork around why bugs happen — compatible with all frameworks.
LogRocket's Galileo AI watches sessions for you, instantly identifying and explaining user struggles with automated monitoring of your entire product experience.
The LogRocket Redux middleware package adds an extra layer of visibility into your user sessions. LogRocket logs all actions and state from your Redux stores.


Modernize how you debug your Next.js apps — start monitoring for free.

Why the future of DX might come from the web platform itself, not more tools or frameworks.

A hands-on test of Claude Code Review across real PRs, breaking down what it flagged, what slipped through, and how the pipeline actually performs in practice.

CSS art once made frontend feel playful and accessible. Here’s why it faded as the web became more practical and prestige-driven.

Learn how inline props break React.memo, trigger unnecessary re-renders, and hurt React performance — plus how to fix them.
Hey there, want to help make our blog better?
Join LogRocket’s Content Advisory Board. You’ll help inform the type of content we create and get access to exclusive meetups, social accreditation, and swag.
Sign up now

