
Mobile applications normally have multiple screens that the user can interact with to access different functionalities on the app. The biggest challenge when developing a mobile app is figuring out how to bundle the screens together and providing the easiest way for the user to navigate and interact with these screens.

Most mobile applications will have a combination of navigators nested together to provide the best possible experience for navigating through the screens which improves the user experience on the app itself.
The Replay is a weekly newsletter for dev and engineering leaders.
Delivered once a week, it's your curated guide to the most important conversations around frontend dev, emerging AI tools, and the state of modern software.
To follow along with this article, you should have:
When developing using React Native there are several options for navigation libraries you can use to implement the desired navigation you want on the app. Some of them include React Navigation, react-native-router-flux, and react-native-navigation.
In this blog, we will use React Navigation to implement the different navigators. React Navigation is easy to use, with a big community to help with issues along the base, and very detailed documentation. On top of all this, it is the recommended navigation library in the React Native docs.
To begin, we will need to set up the app where we will implement the navigation in. If you don’t have React Native set up please visit the React Native getting started docs and once you have that set up pick up from here.
Set up a React Native app using react-native init:
npx react-native init NestedNavigation
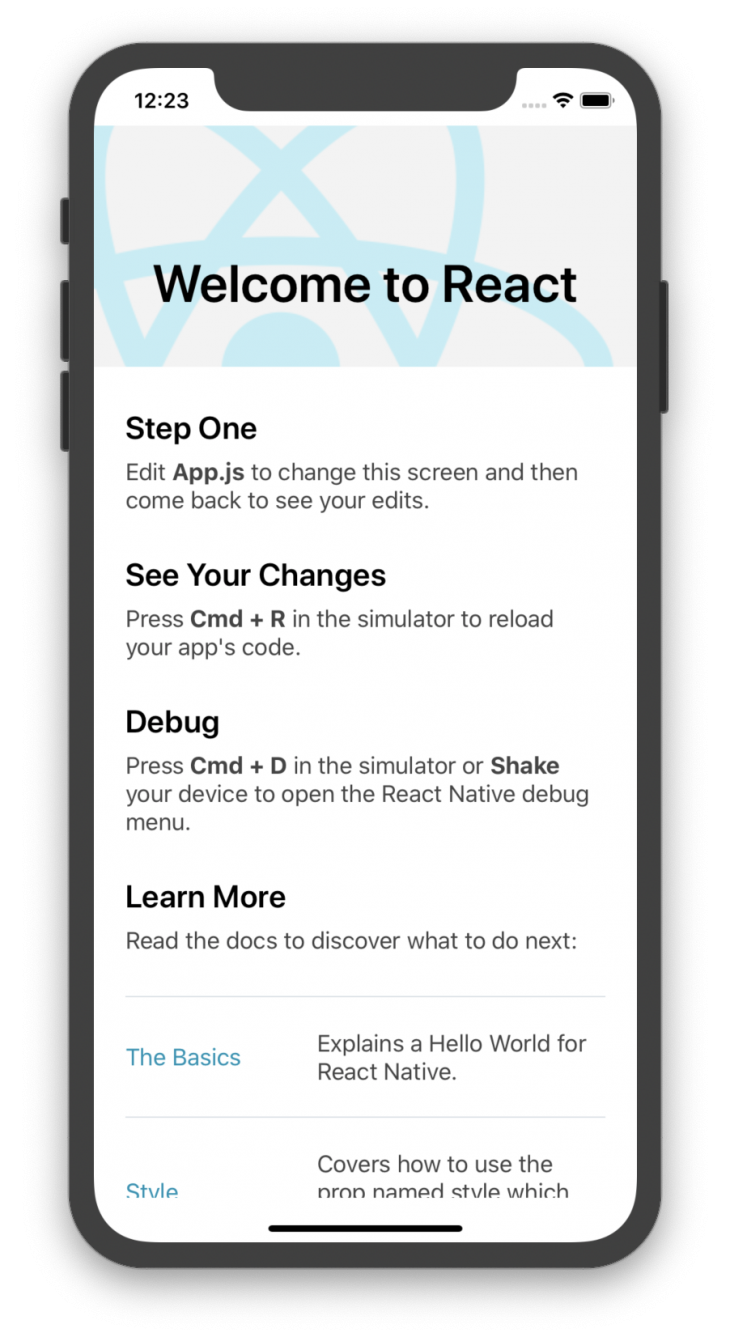
This should set up a React Native project under the folder NestedNavigation . Make sure that runs properly on your simulator or device for either platform (iOS or Android). You should have the React Native welcome screen displaying, like this:
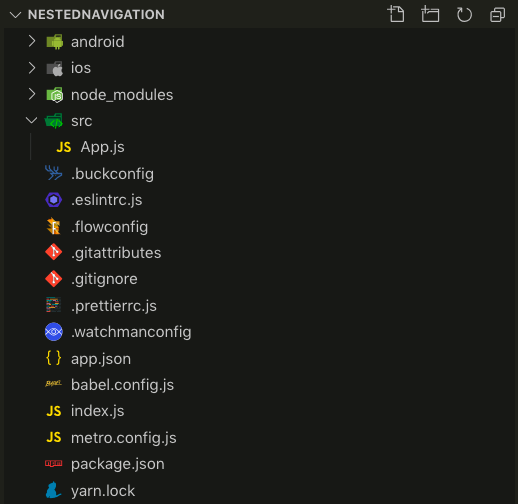
Let’s move around a few files to get the app ready for some coding. Let’s create a src folder where most of our code will reside. Then move the App.js file into the created src folder, updating the file structure to look something like this:
Update the import path for App.js on index.js to include the updated folder name and reload your app:
// index.js
import { AppRegistry } from 'react-native'
import App from './src/App'
import { name as appName } from './app.json'

AppRegistry.registerComponent(appName, () => App)
Now, when your app reloads you should be able to see the welcome screen that is shown previously in this section.
For the setup, let’s install React Navigation which we will use for the navigation. Please visit the React Navigation v4 getting started page for the full details on setup. Here is a short walkthrough of the setup.
Install React Navigation v4 and it’s dependencies as shown below:
yarn add [email protected]

yarn add react-native-reanimated react-native-gesture-handler react-native-screens react-native-safe-area-context @react-native-community/masked-view
For iOS be sure to install the pods:
cd ios; pod install; cd ..
For Android, we will need to make a few changes on MainActivity.java. Add the following lines:
...
import com.facebook.react.ReactActivityDelegate;
import com.facebook.react.ReactRootView;
import com.swmansion.gesturehandler.react.RNGestureHandlerEnabledRootView;

public class MainActivity extends ReactActivity {
  ...
  @Override
  protected ReactActivityDelegate createReactActivityDelegate() {
    return new ReactActivityDelegate(this, getMainComponentName()) {
      @Override
      protected ReactRootView createRootView() {
        return new RNGestureHandlerEnabledRootView(MainActivity.this);
      }
    };
  }
}
After the platform setup, we’ll finish up with importing the gesture handler to index.js:
  // index.js
    import 'react-native-gesture-handler';
Now, run the app to confirm that setup was successful. You should see the “Welcome to React” screen again.
Before we get on adding the navigators, let’s have an overview of the navigation we will be seeking to implement. We will begin with a switch navigator for switching between application screens and authentication screens. Then we’ll have a drawer navigator which will then contain the tab navigator and stack navigator.
We are going to begin by setting up the switch navigator. This navigator, as the name suggests, switches between different screens( e.g. switching between the loading screen to either login screen or home screen). This navigator doesn’t handle back action and displays only one screen at a time which makes it ideal for authentication flows. We will add three screens for our switch navigator:
Create a components folder in src directory and create the screens mentioned above (AuthLoading.js, Login.js, and Home.js). Let’s add some simple code for the screens we’ve created. Copy the code below to each file and be sure to update the class names, display text, and exports to match each file:
// AuthLoading.js / Login.js / Home.js
import React from 'react'
import { StyleSheet, View, Text } from 'react-native'

class AuthLoading extends React.Component {
  render() {
    return (
      <View style={styles.container}>
        <Text>AuthLoading Screen</Text>
      </View>
    )
  }
}

const styles = StyleSheet.create({
  container: {
    flex: 1,
    alignItems: 'center',
    justifyContent: 'center',
  },
})

export default AuthLoading
Finally, we can get our switch navigator up and running.
Let’s jump on to App.js delete everything on there and replace it with this, then I’ll explain what magic we are trying to pull here:
// App.js
import React from 'react'
import { SafeAreaView, StyleSheet } from 'react-native'
import { createAppContainer, createStackNavigator } from 'react-navigation'

import Login from './components/Login'
import AuthLoading from './components/AuthLoading'
import Home from './components/Home'

const switchNavigator = createSwitchNavigator(
  {
    AuthLoading,
    Login,
    Home,
  },
  {
    initialRouteName: 'AuthLoading',
  },
)

const AppNavigator = createAppContainer(switchNavigator)

class App extends React.Component {
  render() {
    return (
      <SafeAreaView style={styles.container}>
        <AppNavigator />
      </SafeAreaView>
    )
  }
}

const styles = StyleSheet.create({
  container: {
    flex: 1,
  },
})

export default App
We start with the usual, imports from react, react-native, and react-navigation. As seen above we import createSwitchNavigator used to set up the switch navigator and createAppContainer which is used as the root navigator in React Navigation.
Then we finalize the imports by adding the screens we want to use in the navigator (as seen in the set up for switch navigator). In the navigator configurations for the switch navigator, we set AuthLoading as the initial route, since it’s the first screen we want to load before switching to either the login or home screen depending on authentication status.
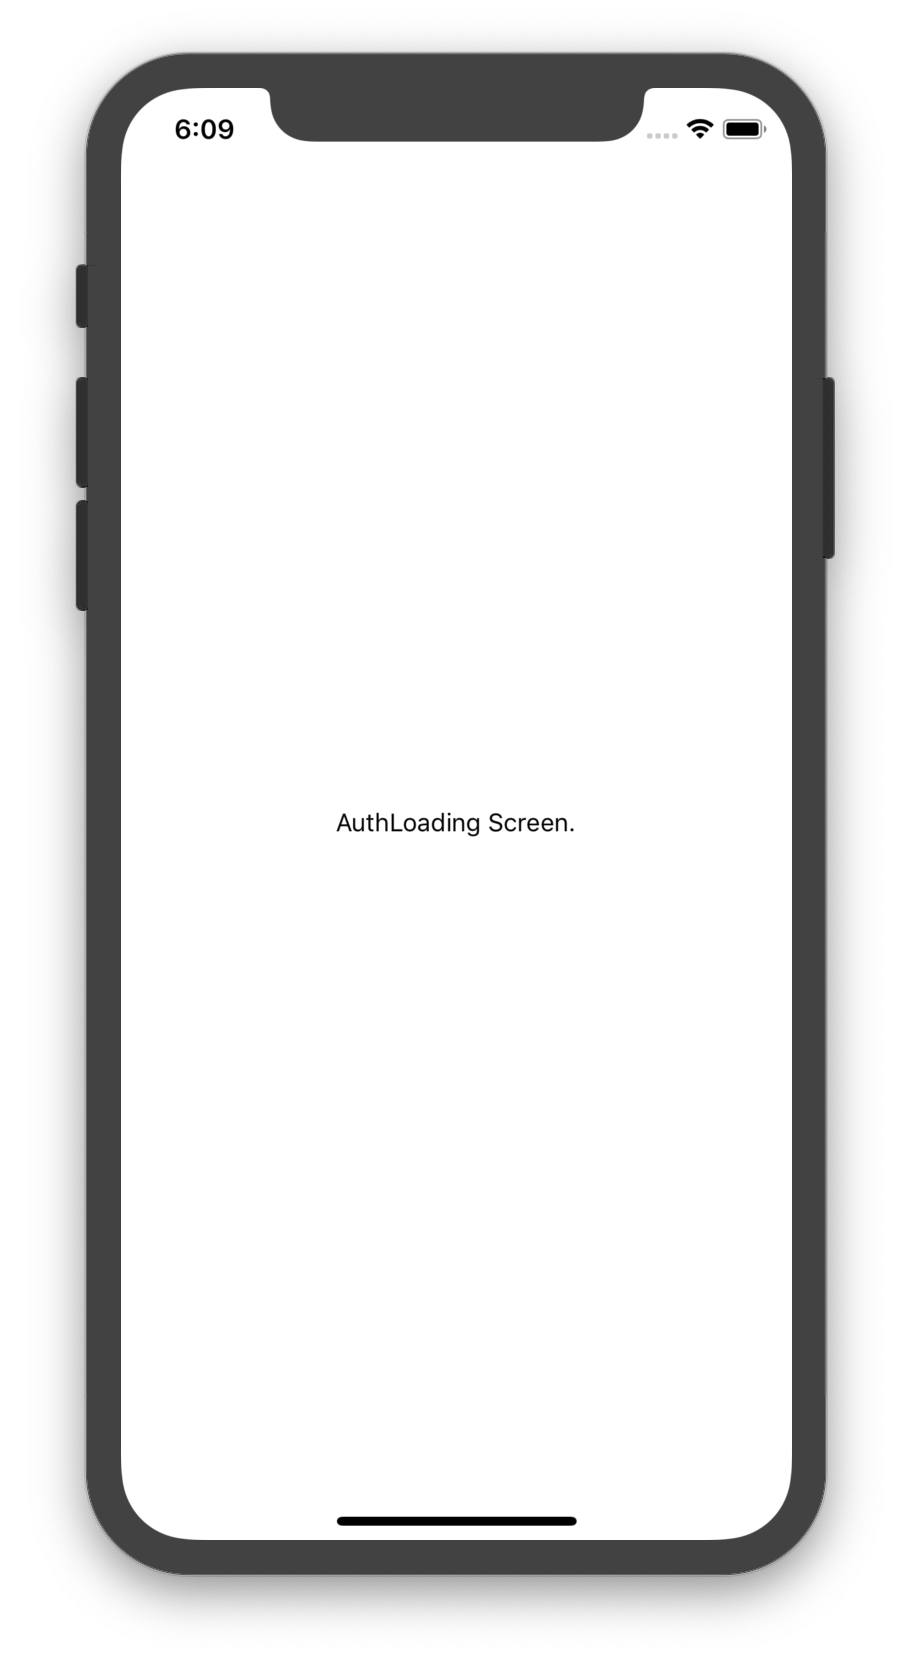
When we reload the app right now, it should display the AuthLoading screen as seen below without any navigation to either the login or home screens:
With this working, let’s give the AuthLoading screen the power to switch between the other two screens depending on the authentication status. Since this isn’t a blog about authentication in React Native, we are going to hack our way around this:
// AuthLoading.js
...
import { ActivityIndicator, StyleSheet, View, Text } from 'react-native'


class AuthLoading extends React.Component {
  constructor(props) {
    super(props)

    this.state = {
      loggedIn: false,
    }
  }

  checkLoggedInStatus = () => {
    if (this.state.loggedIn) {
      return this.props.navigation.navigate('Home')
    }

    return this.props.navigation.navigate('Login')
  }

  componentDidMount() {
    this.checkLoggedInStatus()
  }

...

        <Text>AuthLoading Screen</Text>
        <ActivityIndicator />
...
We are going to add a state to store our virtual logged in status, which can either be true or false depending on whether or not the user is logged in. Then we will create a function checkLoggedInStatus that checks the user status and either navigates us to the home screen or login screen as needed. Then in our componentDidMount we will call a function so that it’s run every time AuthLoading is mounted. As a bonus, we also added an ActivityIndicator to show loading status before switching the app.
Feel free to play around with this by toggling the logged-in status and checking which screen is rendered.
Finally, let’s add a login button in Login screen to mimic a login and navigate the user to the home screen:
// Login.js
...
import { StyleSheet, View, Text, TouchableOpacity } from 'react-native'

class Login extends React.Component {
  render() {
    return (
      <View style={styles.container}>
        <Text>Login Screen.</Text>
        <TouchableOpacity
          style={styles.loginButton}
          onPress={() => this.props.navigation.navigate('Home')}>
          <Text>Login</Text>
        </TouchableOpacity>
      </View>
    )
  }
}

const styles = StyleSheet.create({
  loginButton: {
    height: 30,
    width: '40%',
    margin: 5,
    borderWidth: 1,
    borderRadius: 5,
    alignItems: 'center',
    justifyContent: 'center',
  },

...
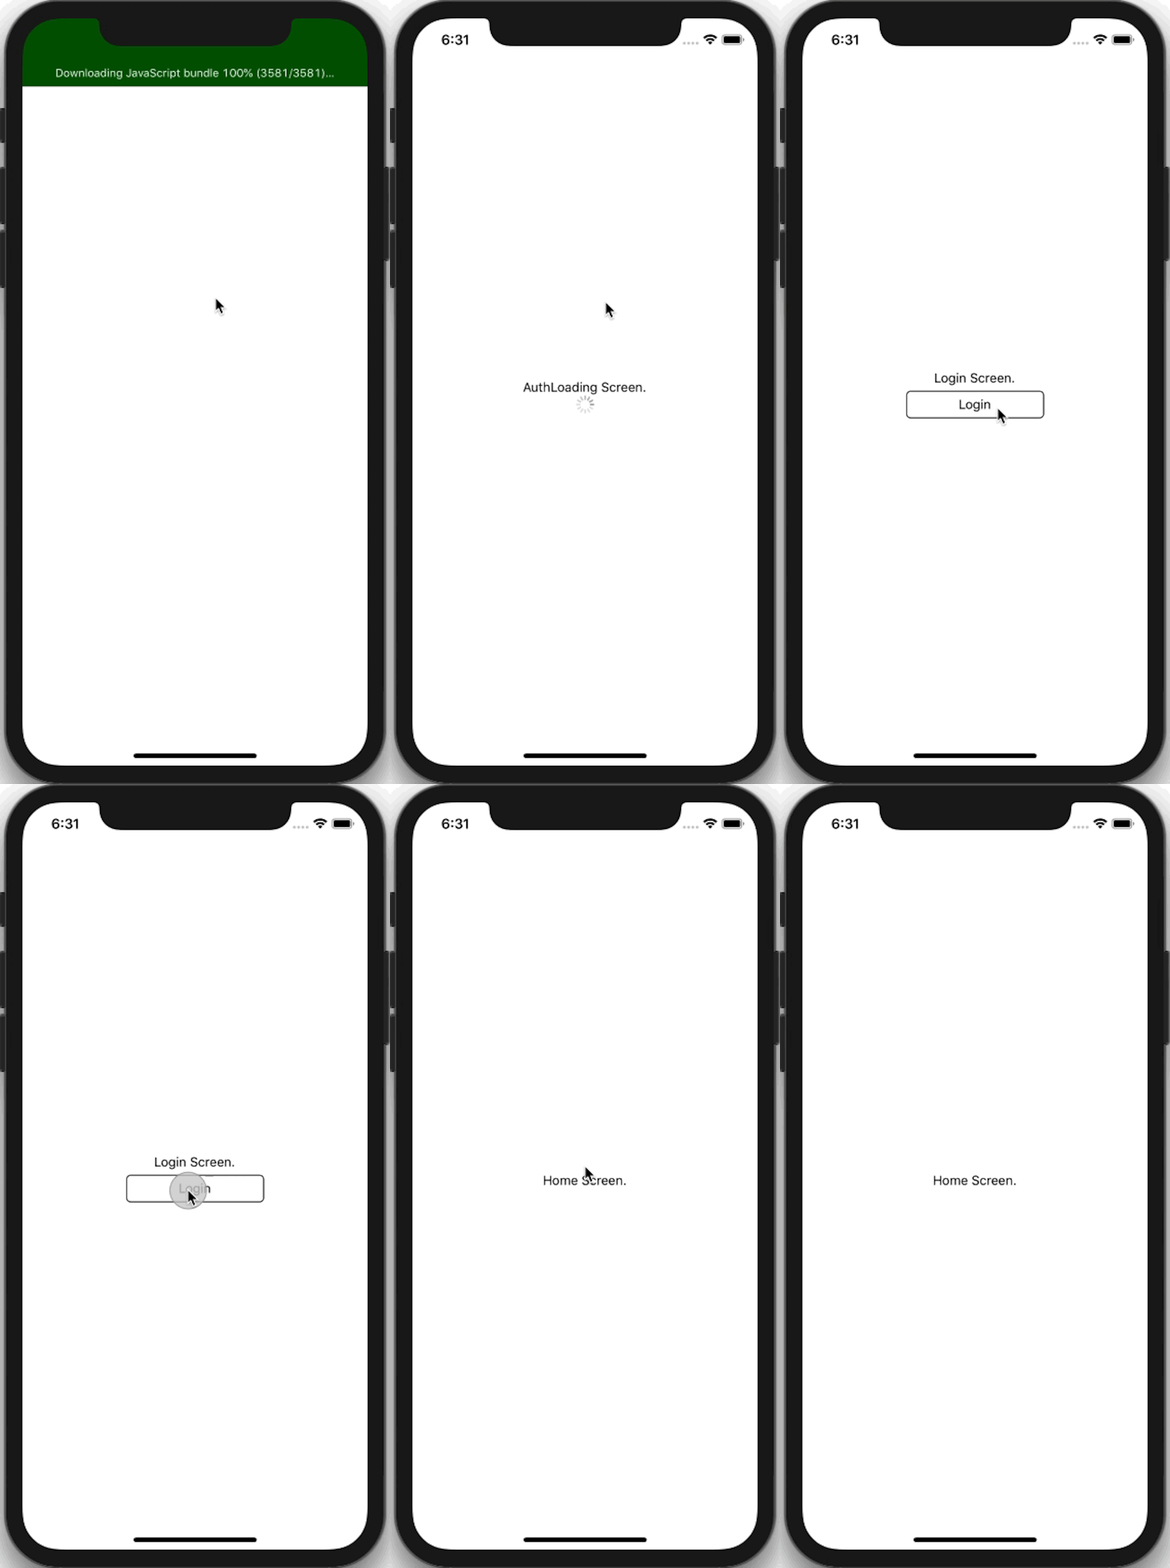
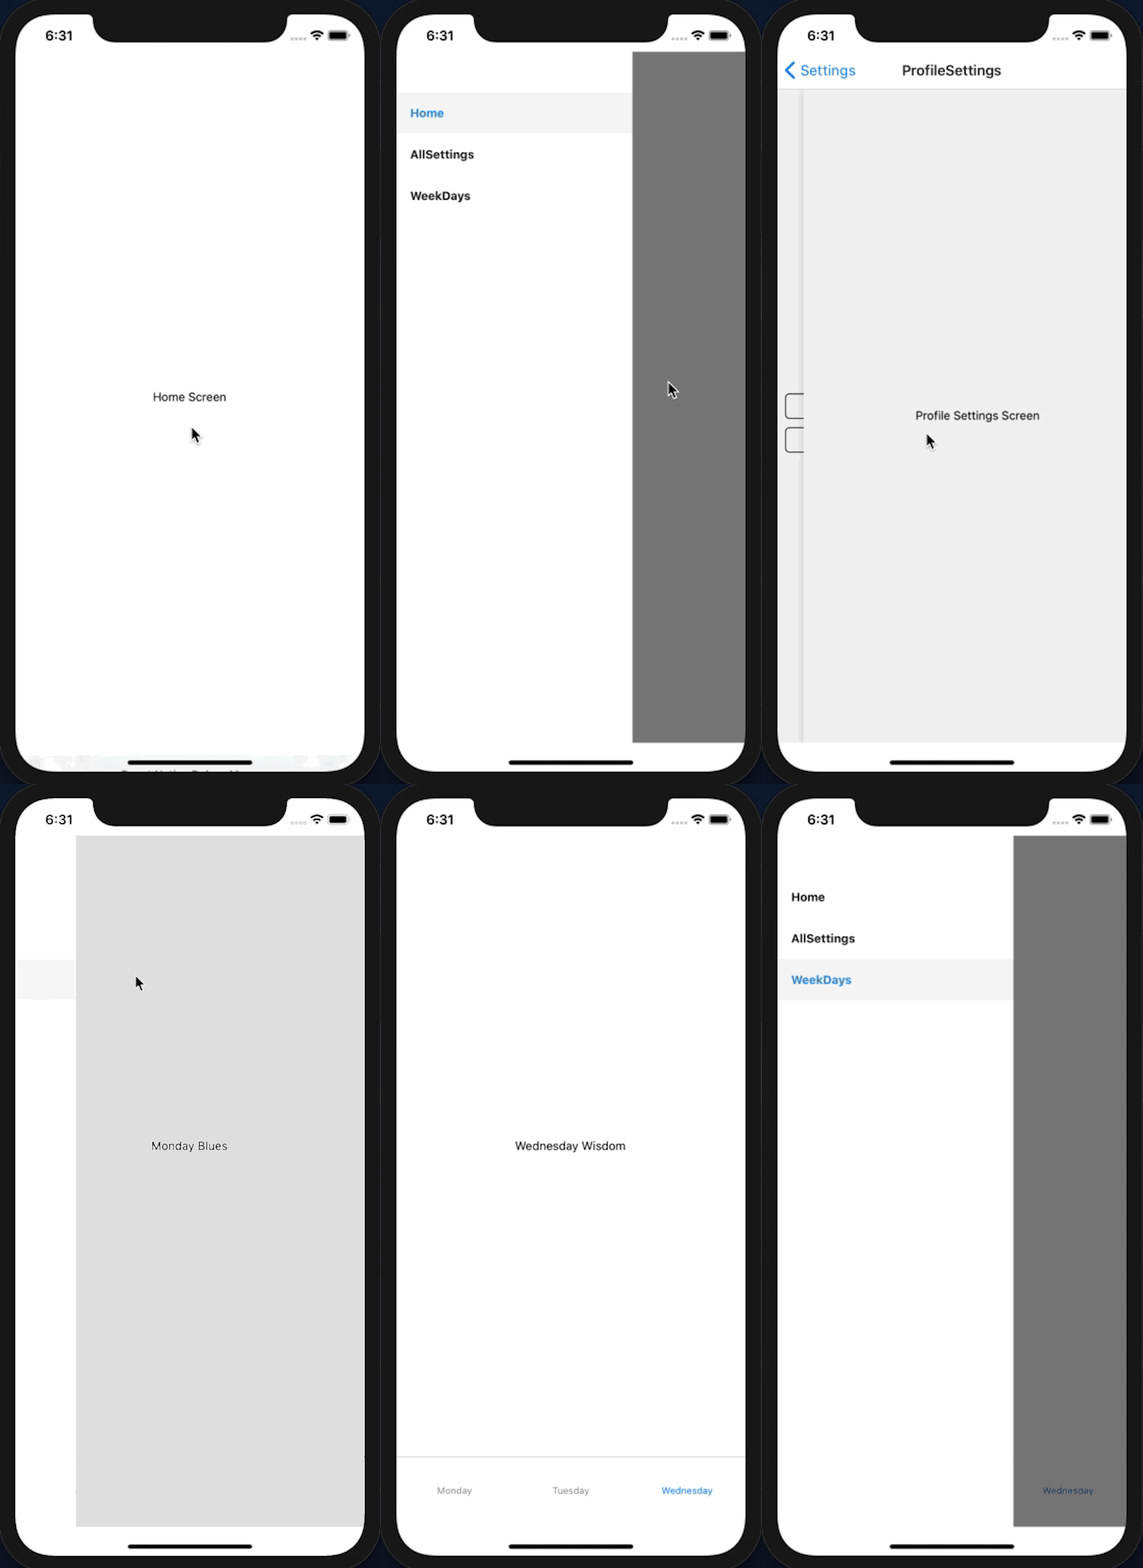
We create a login screen that will be displayed when the user is not logged in and added a login button that mimics the user login and navigates the user to the home screen after successful login. With all this done, we should have a smooth switch navigator working and producing some navigation as seen below, checking the logged-in status and navigating to the login screen then home screen after logging in:
Drawer navigators provide users with very easy and intuitive navigation. Pulling the side menu either from the left or right to view more options and navigate between screens. When using the drawer navigator it has to be the base navigator for the rest of the app, hence why we are covering it first.
Let’s get to it. Let’s install the necessary requirements for the navigator:
yarn add react-navigation-drawer
Now let’s jump onto App.js and spin up the drawer navigator, this will require a few updates on this file to import the drawer navigator and set it up:
// App.js
...
import { createDrawerNavigator } from 'react-navigation-drawer' // import drawer nav

const DrawerNavigator = createDrawerNavigator(
  {
    Home, // move Home screen to drawer
  },
)

const switchNavigator = createSwitchNavigator(
  {
    AuthLoading,
    Login,
    DrawerNavigator, // change this to DrawerNavigator
  },
  {
    initialRouteName: 'AuthLoading',
  },
)

...
We import the createDrawerNavigator function and set up our DrawerNavigator with the home screen in it. We will add more screens to that later, of course, but for the initial setup let’s just go with the one for now and get the navigator up.
With the home screen moved into the drawer navigator, we replace it on the switch navigator with the newly created DrawerNavigator so that after the authentication flow the app navigates to the drawer navigator. Remember to update checkLoggedInStatus function on AuthLoading.js to navigate to the updated route name DrawerNavigator :
// AuthLoading.js
...

  checkLoggedInStatus = () => {
    if (this.state.loggedIn) {
      return this.props.navigation.navigate('DrawerNavigator')
    }
    return this.props.navigation.navigate('Login')
  }
With this setup, reload the app and it should navigate to the drawer navigator and open the home screen with the side menu ready to go. Swiping from the left should open it up and display the side menu with only the home screen option though.
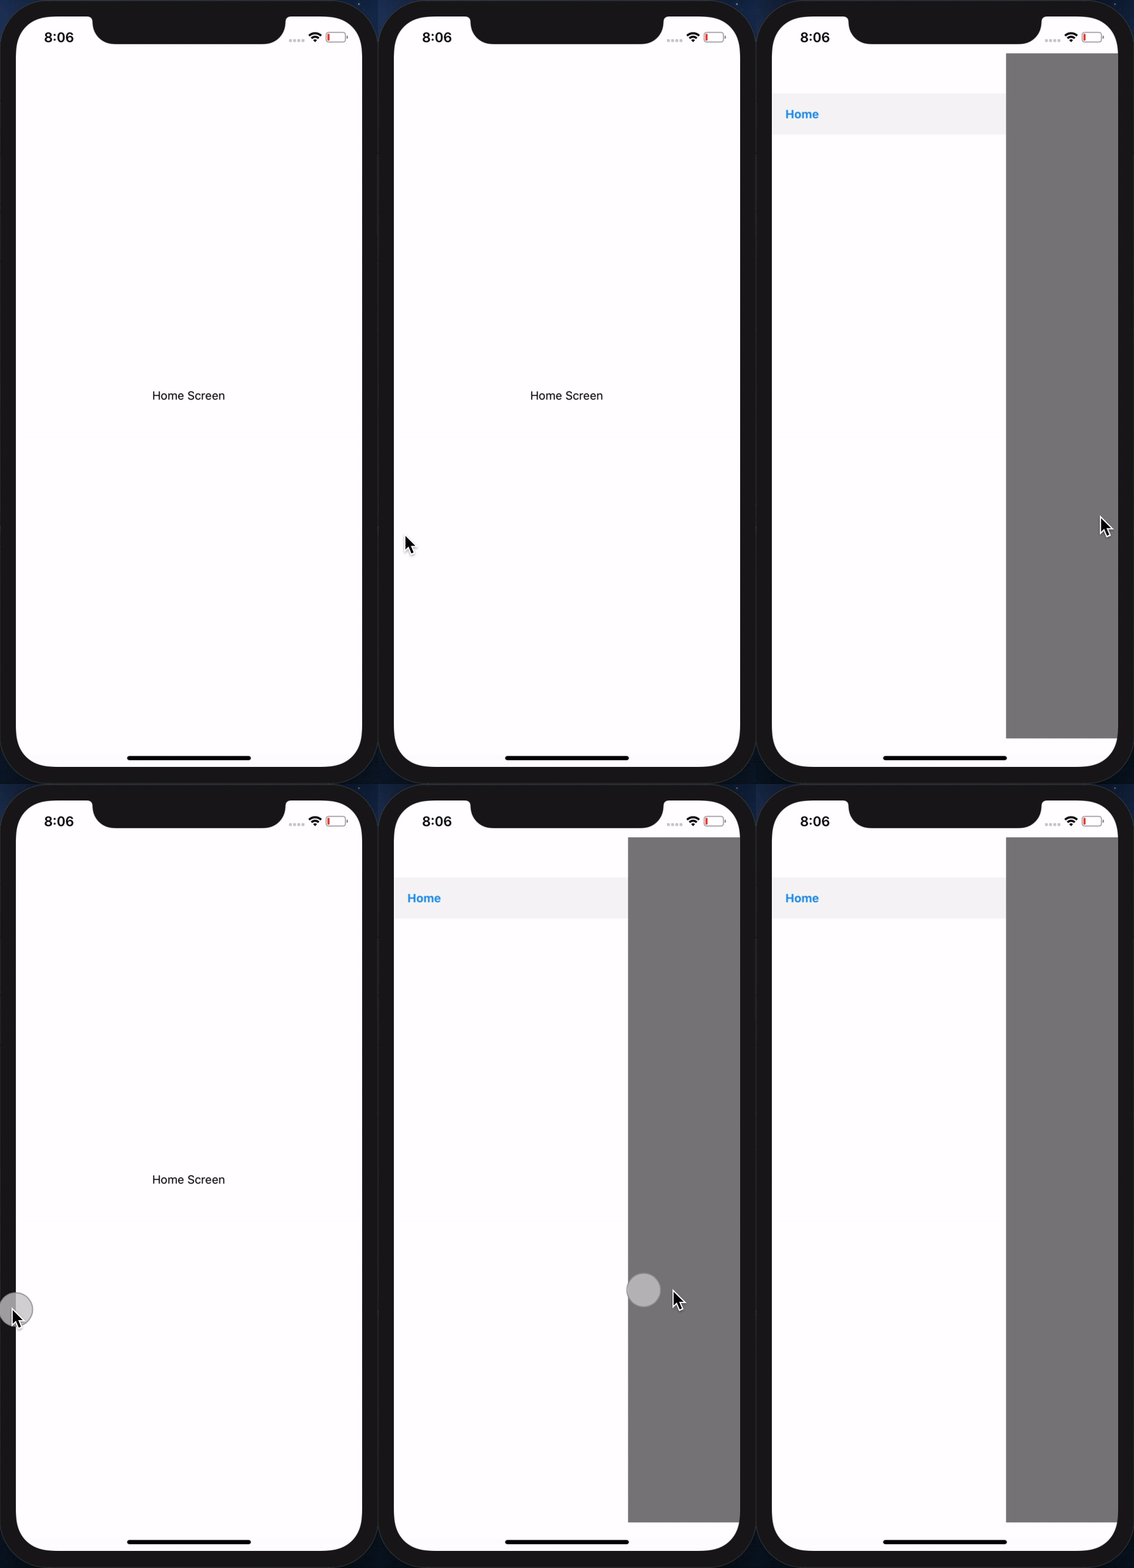
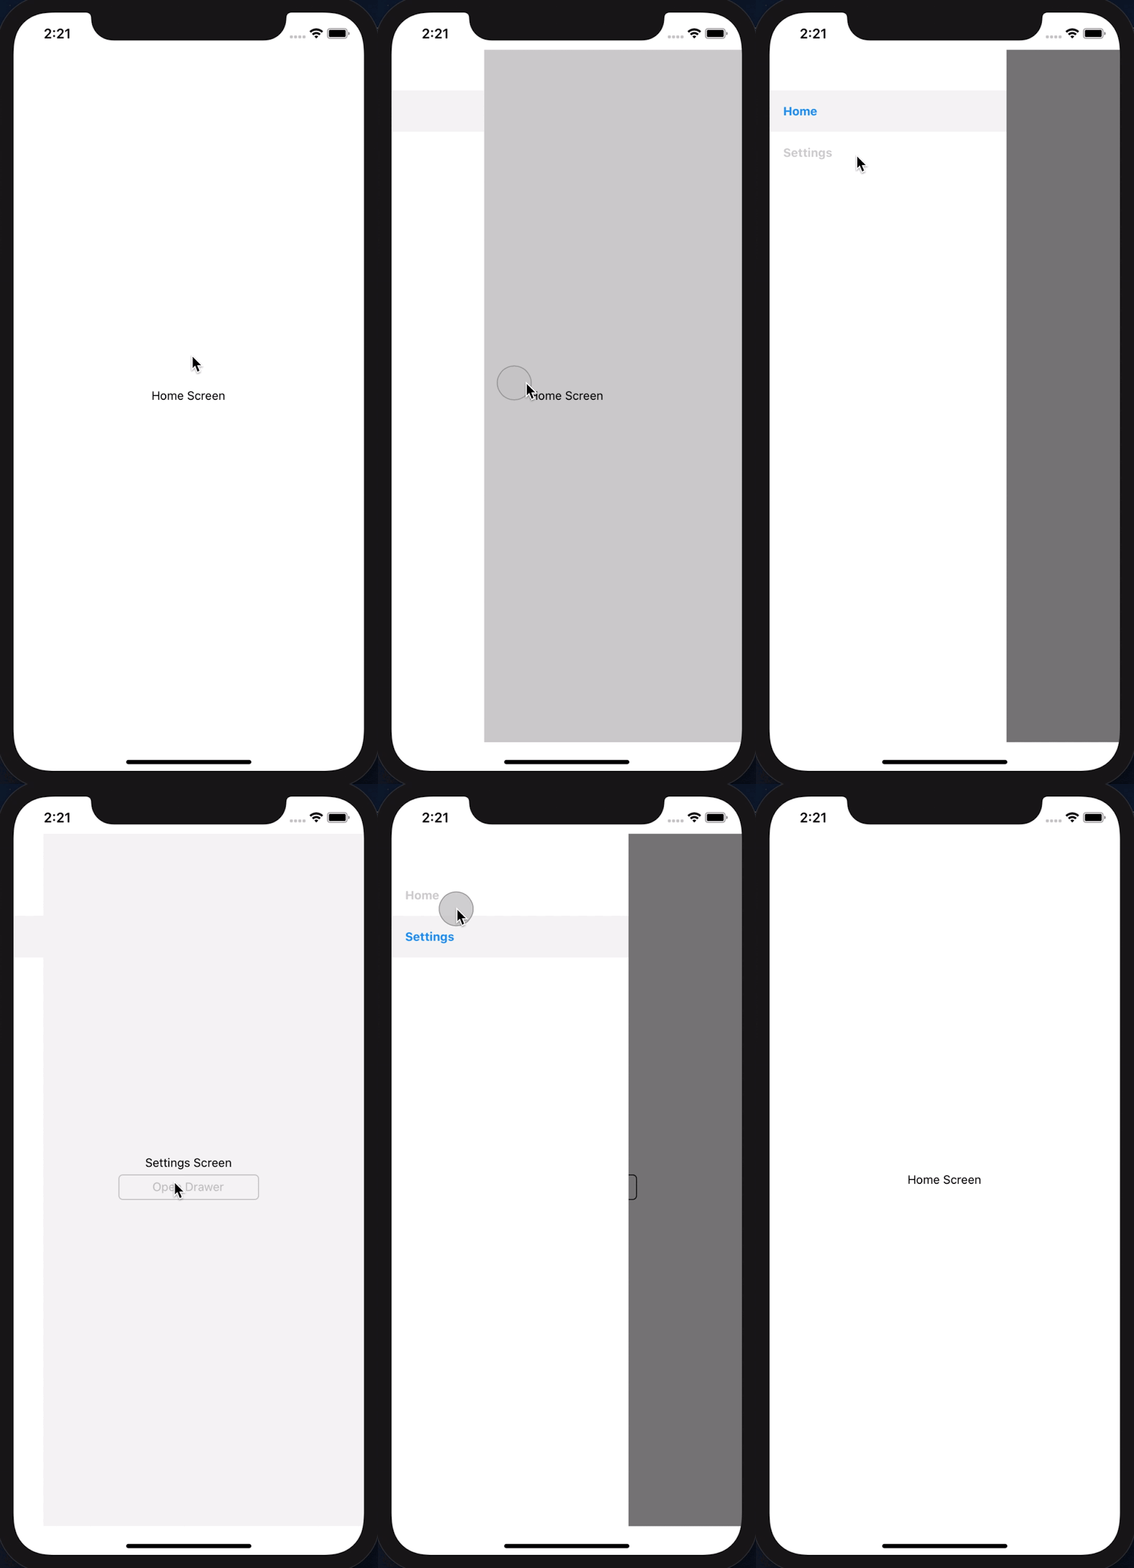
So let’s add another screen to be able to demonstrate navigation between different screens. In the components folder, create Settings.js file and copy the contents of Login.js into it, update the class names and make the followings updates to it:
// Settings.js
...

class Settings extends React.Component {
  render() {
    return (
      <View style={styles.container}>
        <Text>Settings Screen</Text>

        <TouchableOpacity
          style={styles.loginButton}
          onPress={() => this.props.navigation.openDrawer()}>
          <Text>Open Drawer</Text>
        </TouchableOpacity>
      </View>
    )
  }
}

...
export default Settings
As you noticed we addedopenDrawer() function that will open the drawer without the need to swipe from the left. Now to have view settings screen let’s add it to the DrawerNavigator in App.js:
// App.js
...
import Settings from './components/Settings'

const DrawerNavigator = createDrawerNavigator(
  {
    Home,
    Settings,
  },
  {
    initialRouteName: 'Home'
  }
)

...
We also set the initialRouteName in the drawer navigator configs so that the drawer navigator displays the home screen first. With this done our drawer navigation is good to go. Let’s reload our app and see where we are at.
You can further customize the side menu to your liking, but we won’t cover that in this post.
Tab navigator uses a tab bar located on either the top or bottom of the screen that lets you switch between different routes. Screens on tab navigators don’t get mounted until they are focused. This navigator provides nice navigation for switching between content on the screen (for example, in WhatsApp when you switch between chats, status, and calls or on Twitter when you switch between home, search, notifications, and messages).
In React Navigation, there are a few options to set up your tab navigator, you can use either createBottomTabNavigator (default), createMaterialBottomTabNavigator, or createMaterialTopTabNavigator. As the name suggests the last two are material-design themed tabs located at the bottom or top respectively. In this walkthrough, we will use the default option (createBottomTabNavigator).
We will, of course, start by installing the required dependencies:
yarn add react-navigation-tabs
For simplicity, we will create one file WeekDays.js in our components folder which will contain three-tab components for Monday, Tuesday, and Wednesday which we will use in our App.js to set up the tab navigator:
// WeekDays.js
import React from 'react'
import { StyleSheet, View, Text } from 'react-native'

export class Monday extends React.Component {
  render() {
    return (
      <View style={styles.container}>
        <Text>Monday Blues</Text>
      </View>
    )
  }
}
export class Tuesday extends React.Component {
  render() {
    return (
      <View style={styles.container}>
        <Text>Tuesday Thoughts</Text>
      </View>
    )
  }
}
export class Wednesday extends React.Component {
  render() {
    return (
      <View style={styles.container}>
        <Text>Wednesday Wisdom</Text>
      </View>
    )
  }
}
const styles = StyleSheet.create({
  container: {
    flex: 1,
    alignItems: 'center',
    justifyContent: 'center',
  },
})
With the tab screens ready to go, it’s time to create the tab navigator, let’s jump into the App.js screen and get that going:
// App.js
...
import { createBottomTabNavigator } from 'react-navigation-tabs'
import { Monday, Tuesday, Wednesday } from './components/TabScreens'

const WeekDays = createBottomTabNavigator(
  {
    Monday,
    Tuesday,
    Wednesday,
  }
)

const DrawerNavigator = createDrawerNavigator(
  {
    Home,
    Settings,
    WeekDays, // add bottom navigator here
  },
  ...
)

...
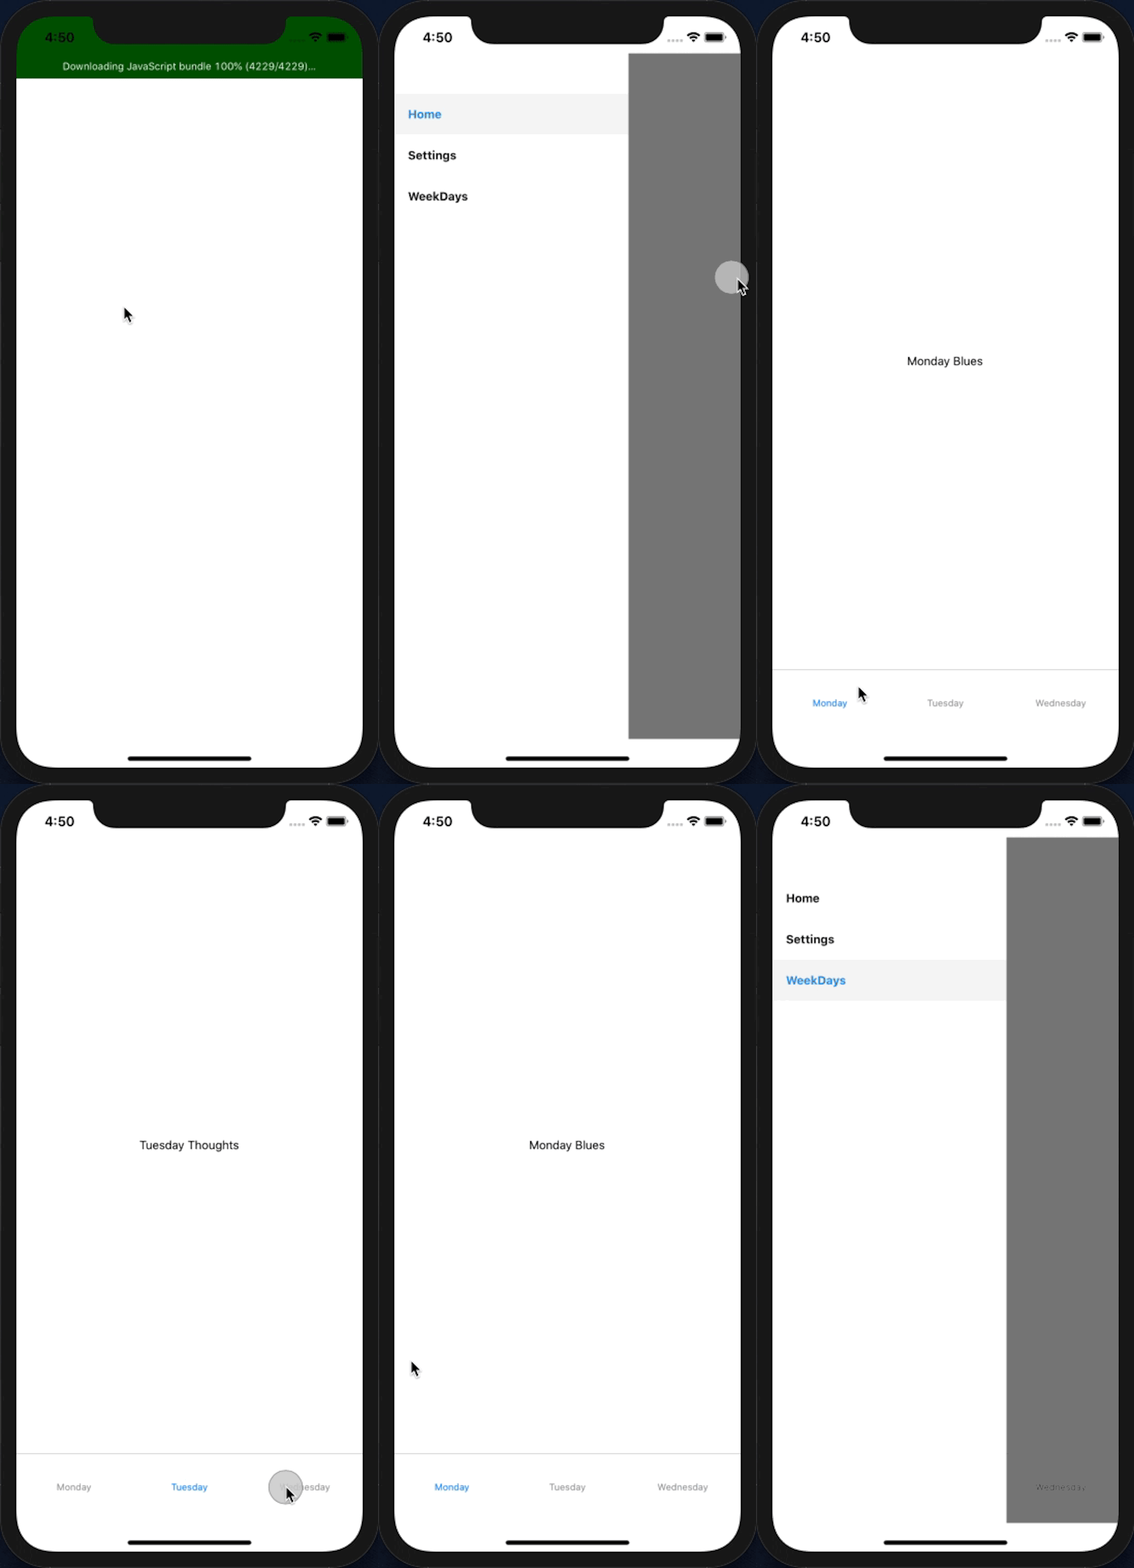
With this in place, we should have WeekDays option on the side menu, which will then display the different tab options as seen below:
Finally the last navigator we will talk about is the stack navigator. This navigator moves between different screens by placing the new screens on top of a stack. Stack navigator is pretty simple — a new screen is placed on top of the stack and to view previous screens you just navigate back.
yarn add react-navigation-stack @react-native-community/masked-view
For this, we are going to add profile settings to our app, which ideally should be on the same stack with settings. Let’s create ProfileSettings.js and then set up the settings stack navigation:
// ProfileSettings.js
import React from 'react'
import { StyleSheet, View, Text } from 'react-native'

class ProfileSettings extends React.Component {
  render() {
    return (
      <View style={styles.container}>
        <Text>Profile Settings Screen</Text>
      </View>
    )
  }
}
const styles = StyleSheet.create({
  container: {
    flex: 1,
    alignItems: 'center',
    justifyContent: 'center',
  },
})
export default ProfileSettings
With this ready now we can make final changes to our App.js to add our stack navigator. After necessary imports, we initialize the stack navigator and move settings screen into it as well as the new ProfileSettings. On the drawer navigator, we also update it to point to the AllSettings stack navigator that contains our settings screen:
// App.js

...
import { createStackNavigator } from 'react-navigation-stack'
import ProfileSettings from './components/ProfileSettings'

const AllSettings = createStackNavigator(
  {
    Settings,
    ProfileSettings,
  }
)
const DrawerNavigator = createDrawerNavigator(
  {
    Home,
    AllSettings, // update this
    WeekDays,
  },
  {
    initialRouteName: 'Home',
  },
)
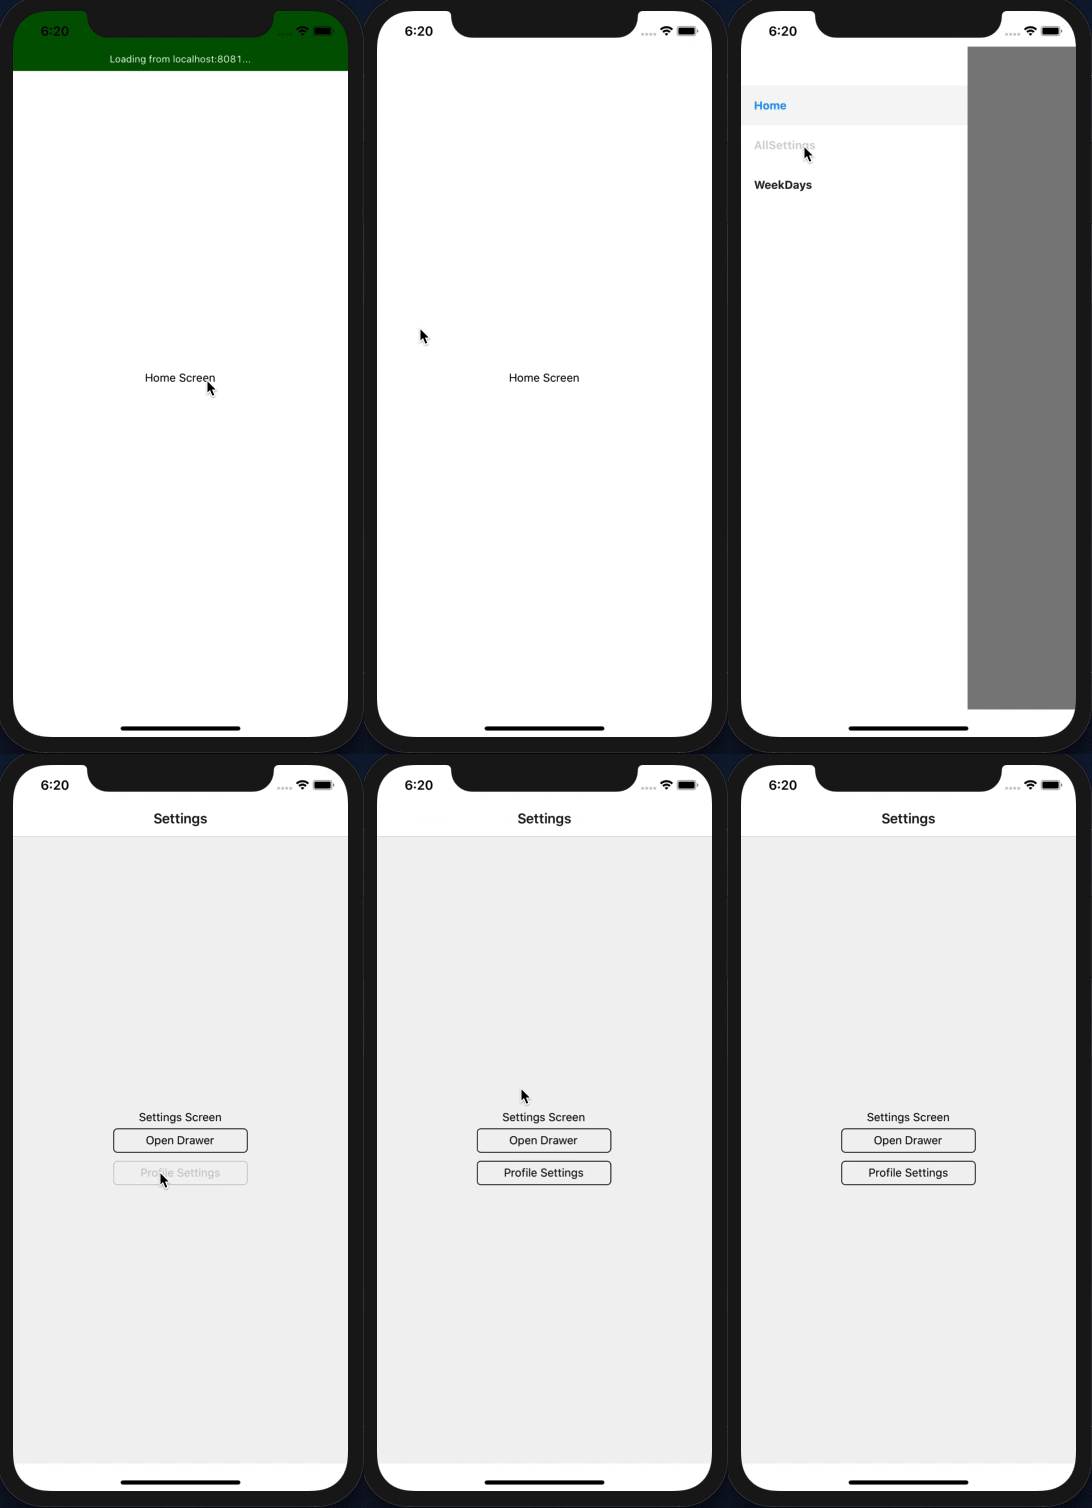
With this done, the app should run successfully, you should also be able to navigate to AllSettings from the drawer navigator which will display the settings screen. Also, notice there isn’t a way to navigate between the settings and profile settings screen. Let’s fix that from the settings screen by adding a button to navigate to profile settings from setting:
// Settings.js

...
        <TouchableOpacity
          style={styles.loginButton}
          onPress={() => this.props.navigation.openDrawer()}>
          <Text>Open Drawer</Text>
        </TouchableOpacity>

        <TouchableOpacity // add this
          style={styles.loginButton}
          onPress={() => this.props.navigation.navigate('ProfileSettings')}>
          <Text>Profile Settings</Text>
        </TouchableOpacity>

...
With this we should be able to navigate to profile settings using the button added above and navigate back using the native back button provided by the stack navigator, like this:
Voila, we are done with nested navigation!
We started out with a switch navigator to handle authentication states, then we created a drawer navigator which should be the base navigator when used and on top of that added the tab and stack navigators. The last two can be nested in whichever order you prefer.
The code for this can be found on Github.
nbsp;

LogRocket's Galileo AI watches sessions for you and and surfaces the technical and usability issues holding back your React Native apps.
LogRocket also helps you increase conversion rates and product usage by showing you exactly how users are interacting with your app. LogRocket's product analytics features surface the reasons why users don't complete a particular flow or don't adopt a new feature.
Start proactively monitoring your React Native apps — try LogRocket for free.

@container scroll-state: Replace JS scroll listeners nowCSS @container scroll-state lets you build sticky headers, snapping carousels, and scroll indicators without JavaScript. Here’s how to replace scroll listeners with clean, declarative state queries.

Russ Miles, a software development expert and educator, joins the show to unpack why “developer productivity” platforms so often disappoint.

Discover what’s new in The Replay, LogRocket’s newsletter for dev and engineering leaders, in the February 18th issue.

Learn how to recreate Claude Skills–style workflows in GitHub Copilot using custom instruction files and smarter context management.
Hey there, want to help make our blog better?
Join LogRocket’s Content Advisory Board. You’ll help inform the type of content we create and get access to exclusive meetups, social accreditation, and swag.
Sign up now