The Replay is a weekly newsletter for dev and engineering leaders.
Delivered once a week, it's your curated guide to the most important conversations around frontend dev, emerging AI tools, and the state of modern software.
SolidJS is a new addition to the ever-growing list of JavaScript frameworks. But it’s not just your regular, everyday framework. SolidJS has some pretty interesting features that bring intense heat to the competition.

The SolidJS framework was created by Ryan Carniato and open sourced in 2018, but recently garnered some popularity with its selling point of “fine-grained reactivity.”
SolidJS shares almost all the same philosophies with React, with a few exceptions. For example, the absence of a virtual DOM, and the rendering of components only once. These features contribute to the blazing fast speeds that apps built with SolidJS posses, and makes it one of the fastest JavaScript frameworks available today.
In this tutorial, we’ll explore how SolidJS works. To do this, we’ll build a sample “to do” app to showcase what this great framework has to offer.
There are two ways to get started with SolidJS. First is with their online REPL, which is useful for when you want to quickly prototype something. Second is by cloning preexisting templates made by the SolidJS team.
We’ll go with the latter method because it’s more convenient for the purpose of this guide.
There are two available templates, the vanilla JavaScript version or the TypeScript version. We’ll be using the vanilla JavaScript version for this introduction.
To get started with the template, run the following commands in your terminal:
# Create a solid app from the template
npx degit solidjs/templates/js solid-todo

# Change directory to project folder
cd solid-todo

# Install dependencies
npm i # or yarn install

# Start local server
npm run dev # or yarn dev
After the last command to run the local development server has been executed, go to http://localhost:3000/ on the browser to view the app running.

Solid componentsAll JavaScript frameworks are built on the concept of components. Components are little compartmentalized pieces of an application, like a form, an input field, or a footer.
Here’s a sample Solid component:
#App.jsx
import styles from "./App.module.css";
function App() {
  return (
    <div class={styles.App}>
      <header class={styles.header}>
        <img src={logo} class={styles.logo} alt="logo" />
        <p>
          Edit src/App.jsx and save to reload. </p> <a class={styles.link} href="https://github.com/solidjs/solid" target="_blank" rel="noopener noreferrer" > Learn Solid </a> </header> </div> ); } export default App;
Just like React, Solid components are written in JSX. As you can see in the code block above, SolidJS components are basically one huge JavaScript function that returns a mix of HTML and JavaScript code, known as JSX.
Signals are the foundation for reactivity in SolidJS. They contain values that automatically update at every instance they’re being used whenever a change occurs to that value.
To create a signal, first we need to import createSignal from solid-js and use it in our component as such:
import {createSignal} from "solid-js"

const [count, setCount] = createSignal(0);
createSignal accepts two values, a getter and a setter. The first value is a function returning the current value and not the value itself.
This means that whenever we need to access the current value, we do it like so:
return <div>Count: {count()}</div>;
Stores are SolidJS’s way of handling nested reactivity. A store’s return value is a proxy object whose properties can be tracked.
We can create and use a store like so:
# First import createStore at the top of your component
import { createStore } from "solid-js/store"

#
 const [todos, setTodos] = createStore({
        items: [
            { text: "Go skydiving", id: 3 },
            { text: "Go surfing", id: 2, },
            { text: "Climb Everest", id: 1 }
        ],
        counter: 4,
  })

const addTodoItem = (input) => {
        const title = input.value;
        if (!title.trim()) return;
        setTodos({
            items: [{ text: title, id: todos.counter }, ...todos.items],
            counter: todos.counter + 1
        });
        input.value = "";
    }

return (
      <div>
        <input type="text" ref={input}
          placeholder="What do you have to do today?" name="todo"
          onKeyDown={(e) => {
            if (e.key === "Enter") {
              addTodoItem(input);
                  }
            }}>
        </input>
        <ul>
          {todos.items.map(i => (
             <li>{i.text}</li>
           ))}
          </ul>
        </div>
);
The code above is a mini sample of the full demo. An input field would be rendered on screen, and when a user interacts by typing in a task and clicks on “enter,” the list of “to do” items gets updated and rendered in a list.
Accessing any value from the store can only be done through a property in the store and not by using the top level state, which is why we use todos.items and not todos to spread the items array on line 17.
Lifecycle methods are special methods built in to SolidJS used to operate on components throughout their duration in the DOM. SolidJS has a few lifecycles, such as onMount and onCleanup.
The onMount lifecyle is used when we need to run a piece of code when the component renders initially:
# First import onMount at the top of your component
import { onMount } from "solid-js"
import { createStore } from "solid-js/store"

  const [todos, setTodos] = createStore({
      items: [],
      counter: 3,
  })

  onMount(() => {
      setTodos("items", [
          { text: "Go swimming", id: 2 },
          { text: "Go scuba diving", id: 1 }
      ])
  })
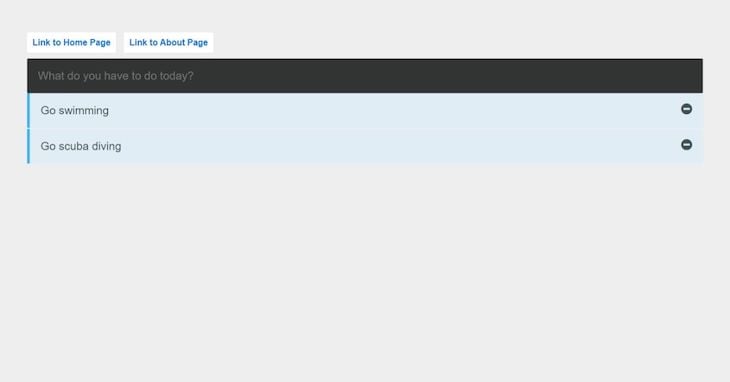
From the code block above, notice the store has been modified and its content moved to the onMount lifecycle hook. When the component is first rendered, the items array is filled up with our list of to dos.
The onCleanup lifecycle method is used to perform any necessary cleanup after functions with side effects:
import { createSignal, onCleanup } from "solid-js";

function Counter() {
  const [count, setCount] = createSignal(0);
  const timer = setInterval(() => setCount(count() + 1), 1000);
    onCleanup(() => clearInterval(timer));

  return <div>Count: {count()}</div>;
}
Solid JS has a bunch of built in helpers for when when need to carry out various actions such as
conditional rendering or looping through a list of arrays. These helpers avoid wastefully recreating all the DOM nodes on every update.
Here’s a code block demonstrating how they are used:
import { Show, Switch, Match, Portal, For } from "solid-js";

<Show
  when={loggedIn()}
  fallback={() => <button onClick={toggle}>Log in</button>}
>
  <button onClick={toggle}>Log out</button>
</Show>

<For each={todos.items}>{(todo) =>
  <li>
    <div class={styles.todoItem}>
        {todo.text}
      <i class="fa fa-minus-circle" onClick={() => {
        removeTodoItem(todo.id);
        }}>
      </i>
    </div>
  </li>
    }
</For>

<Portal>
  <div class="popup">
    <h1>Popup</h1>
    <p>Some text you might need for something or other.</p>
  </div>
</Portal>

<Switch fallback={<p>{x()} is between 5 and 10</p>}>
  <Match when={x() > 10}>
    <p>{x()} is greater than 10</p>
  </Match>
  <Match when={5 > x()}>
    <p>{x()} is less than 5</p>
  </Match>
</Switch>
Let’s take a look at what’s happening in the code block above.
Show conditionally shows or hides elements, For loops through a list of items, Portal inserts elements out of the normal flow of the app, and Switch renders elements based on certain conditions.
We’ll begin by creating the various views for our to do app. In total, we’ll create just two new components: a Todolist.jsx and About.jsx component, and a stylesheet for the Todolist.jsx component, Todolist.module.css.
To do this, first create a components folder in the root of the project’s src folder and create the components mentioned.
Run the commands below in sequence to achieve the instructions above:
# navigate to the src folder
cd src
#create the components folder
mkdir components
#navigate to the components folder
cd components
#create the Todolist and About component and stylesheet
touch Todolist.jsx Todolist.module.css About.jsx
The Todolist.jsx component will contain the input field and the list of all to dos recorded by the user.
Update the Todolist.jsx component with the following code:
//Todolist.jsx

import styles from "./Todolist.module.css"
import { For, onMount } from "solid-js"
import { createStore } from "solid-js/store"

function TodoList() {
    let input;
    const addTodoItem = (input) => {
        const title = input.value;
        if (!title.trim()) return;
        setTodos({
            items: [{ text: title, id: todos.counter }, ...todos.items],
            counter: todos.counter + 1
        });
        input.value = "";
    }

    const removeTodoItem = (index) => {
        setTodos('items', (t) => t.filter((item) => item.id !== index))
    }
    onMount(() => {
        setTodos("items", [
            { text: "Go swimming", id: 2 },
            { text: "Go scuba diving", id: 1 }
        ])
    })
    const [todos, setTodos] = createStore({
        items: [],
        counter: 3,
    })
    return (
        <>
            <div class={styles.container}>
                <input type="text" ref={input}
                    placeholder="What do you have to do today?" name="todo"
                    onKeyDown={(e) => {
                        if (e.key === "Enter") {
                            addTodoItem(input);
                        }
                    }}>
                </input>
                <ul class={styles.todoList}>
                    <For each={todos.items}>{(todo) =>
                        <li>
                            <div class={styles.todoItem}>
                                {todo.text}
                                <i class="fa fa-minus-circle" onClick={() => {
                                    removeTodoItem(todo.id);
                                }}></i>
                            </div>
                        </li>
                    }
                    </For>
                </ul>
            </div>
        </>
    );
}
export default TodoList
Below, let’s add the CSS styling for the Todolist.jsx component:
// Todolist.module.css
.container {
    background: #fff;
  }
  .todoList {
    margin: 0;
    padding: 0;
    list-style-type: none;
  }

  .todoList li {
    padding: 20px;
    font-size: 1.3em;
    background-color: #E0EDF4;
    border-left: 5px solid #3EB3F6;
    margin-bottom: 2px;
    color: #3E5252;
  }
  input {
    width: calc(100% - 40px);
    border: 0;
    padding: 20px;
    font-size: 1.3em;
    background-color: #323333;
    color: #687F7F;
  }
  li .todoItem{
    display:flex;
    justify-content: space-between;
  }
  .todoItem i{
    cursor: pointer;
  }
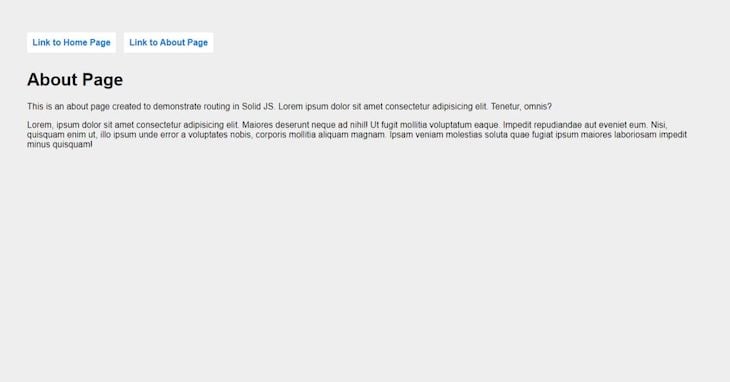
About componentTo create the about component, add the following code into About.jsx:
function About() {
  return (
    <div>
      <h1>About Page</h1>
        <div>
          <p>This is an about page created to demonstrate routing in Solid JS. Lorem ipsum dolor sit amet consecteturadipisicing elit. Tenetur, omnis?
          </p>
          <p>Lorem, ipsum dolor sit amet consectetur adipisicing elit. Maiores deserunt neque ad nihil! Ut fugit mollitia voluptatum eaque. Impedit repudiandae aut eveniet eum. Nisi, quisquam enim ut, illo ipsum unde error a voluptates nobis, corporis mollitia aliquam magnam. Ipsam veniam molestias soluta quae fugiat ipsum maiores laboriosam impedit minus quisquam!
          </p>
        </div>
    </div>
    );
}
export default About;
Just like every other framework, SolidJS has its own way of handling routing, that is enabling users move in between various pages on a website.
To implement routing in SolidJS, we start first by installing it:
yarn add solid-app-router
#OR
npm i solid-app-router
Next, we’ll configure the routes and create links that users can use to move between the pages.
To do this, let’s move to our App.jsx file, remove all the markup, and replace it with the code below:
//App.jsx
import styles from "./App.module.css";
import { Router, Routes, Route, Link } from "solid-app-router";
import { lazy } from "solid-js";

const Todolist = lazy(() => import("./components/Todolist"));
const About = lazy(() => import("./components/About"));

function App() {
  return (
    <>
      <Router>
        <div class={styles.app}>
          <Link href="/">Link to Home Page</Link>
          <Link href="/about">Link to About Page</Link>
          <Routes>
            <Route path="/" element={<Todolist />} />
            <Route path="/about" element={<About />} />
          </Routes>
        </div>
      </Router>
    </>
  );
}
export default App;
After importing our global stylesheet, we import Router, Routes, Route, and Link from solid-app-router to enable our router configuration work. Next, we import lazy from SolidJS to help us lazy load our routes.
The code to import a route while utilizing the lazy loading feature is as follows:
const Todolist = lazy(() => import("./components/Todolist"));
Next, we have to wrap our app between Router tags and define our routes as such:
<Routes>
  <Route path="/" element={<Todolist />} />
  <Route path="/about" element={<About />} />
</Routes>
Then, we need to add navigation links for users to be able to switch between routes:
<Link href="/">Link to Home Page</Link>
<Link href="/about">Link to About Page</Link>
Let’s update the styles on the global stylesheet, App.module.css:
body, html {
  margin: 0;
  height: 100%;
}
.app {
  width: 100%;
}
body {
  background-color: #EEEEEE;
  font-family: 'Montserrat', sans-serif;
  padding: 50px 50px 0 50px;
}
nav {
  padding: 20px 20px 20px 0;
}
nav a {
  padding: 10px;
  text-decoration: none;
  background: #fff;
  border-radius: 3px;
  color: rgb(0, 110, 255);
  font-weight: bold;
  margin-right: 15px;
}
Here’s what our application looks like now:


We’ve gone through some of the basic features of SolidJS and have successfully built a small to do list application demonstrating some of the features. There are many more interesting features that couldn’t be discussed in this introduction, so feel free to check out the Solid JS documentation site for more information.
There’s no doubt that frontends are getting more complex. As you add new JavaScript libraries and other dependencies to your app, you’ll need more visibility to ensure your users don’t run into unknown issues.
LogRocket is a frontend application monitoring solution that lets you replay JavaScript errors as if they happened in your own browser so you can react to bugs more effectively.

LogRocket works perfectly with any app, regardless of framework, and has plugins to log additional context from Redux, Vuex, and @ngrx/store. Instead of guessing why problems happen, you can aggregate and report on what state your application was in when an issue occurred. LogRocket also monitors your app’s performance, reporting metrics like client CPU load, client memory usage, and more.
Build confidently — start monitoring for free.
Install LogRocket via npm or script tag. LogRocket.init() must be called client-side, not
server-side
$ npm i --save logrocket

// Code:

import LogRocket from 'logrocket';
LogRocket.init('app/id');
// Add to your HTML:

<script src="https://cdn.lr-ingest.com/LogRocket.min.js"></script>
<script>window.LogRocket && window.LogRocket.init('app/id');</script>

@container scroll-state: Replace JS scroll listeners nowCSS @container scroll-state lets you build sticky headers, snapping carousels, and scroll indicators without JavaScript. Here’s how to replace scroll listeners with clean, declarative state queries.

Explore 10 Web APIs that replace common JavaScript libraries and reduce npm dependencies, bundle size, and performance overhead.

Russ Miles, a software development expert and educator, joins the show to unpack why “developer productivity” platforms so often disappoint.

Discover what’s new in The Replay, LogRocket’s newsletter for dev and engineering leaders, in the February 18th issue.
Would you be interested in joining LogRocket's developer community?
Join LogRocket’s Content Advisory Board. You’ll help inform the type of content we create and get access to exclusive meetups, social accreditation, and swag.
Sign up now