Apollo Server powers backend applications that handle large data queries, fulfills queries with existing data, and provides efficient API manipulation methods through GraphQL. With these capabilities, developers can build and ship more production-ready, self-documenting GraphQL APIs that can fetch data from any source.

We’ll explore some of the latest features in Apollo Server 3, learn how to implement a simple backend application using apollo-server, and test our application using the Apollo Sandbox.
The Replay is a weekly newsletter for dev and engineering leaders.
Delivered once a week, it's your curated guide to the most important conversations around frontend dev, emerging AI tools, and the state of modern software.
Apollo Server 3 focuses more on improvements rather than adding more new features to the library.
Some improvements done on the recent Apollo Server 2 versions, which focused on removing hardcoded dependencies, improved the server’s flexibility, meaning the features lost by removing these dependencies can be easily integrated back into it.
This approach enabled a faster process of adding and releasing new features. With Apollo Server 3, the release provided a lighter, nimbler codebase that serves as a foundation for backward scalability for future releases by reducing non-hardcoded dependencies and increasing the extensibility of the Apollo Server.
Codebase written with Apollo Server 2 doesn’t necessarily need to make any code updates when upgrading to Apollo Server 3, especially if it’s the “batteries-included” apollo-server library that provides the basic and necessary server library requirements.
Let’s proceed to look at some of the updates in Apollo Server 3.
With the release of Apollo Server 3, projects built with the latest versions of backend frameworks like Fastify (v3) and Hapi are now compatible.
Building with these nonserverless frameworks, including Express.js and others, requires that users call the server.start() asynchronously using the new await server.start() ES6 async/await syntax before integrating the server to a chosen framework.
Note, however, that this requirement doesn’t apply to the apollo-server library.
On the other hand, building a serverless application using apollo-server-lambda, updated as createHandler, is now called as an asynchronous function to return a Promise, removing the optional callback.
Handling CORS through customized headers now defaults to access-control-allow-origin: for all integrations that permit customization.
For errors in requests like invalid JSON data or a missing body, they are now consistent across the different integrations, consistently returning a 4xx status code instead of the fluctuating return of the 5xx status code.
And finally, the release of Apollo Server 3 requires the latest version of the graphql library, and it is important to note that both successful and erroneous GraphQL responses are affected by the requestContext.response.http.status settings.
Introduced in the Apollo Server 3 version is Apollo Sandbox, a new playground to quickly test-run applications by querying the server for a response.
Projects built with previous versions, like the Apollo Server 2, used the GraphQL Playground to query servers. But now the hands-on experience of Apollo Sandbox introduces features like the intelligent field and path search functionality to easily navigating the graph of a project.
Now, let’s quickly explore how to build a simple GraphQL project and use Apollo Sandbox to query a response on our server. For this tutorial, we’ll use the VIM text editor, Ubuntu OS, and the Nodemon package installed globally on a local machine.
Let’s create a project folder and change the directory into it using the following commands on the terminal. Then, initialize the project by generating the package.json file using npm:
mkdir simple-apollo-sandbox
cd simple-apollo-sandbox
npm init -y
Using the -y flag passes yes as the default answer to the questions asked while generating the package.json file and its content.
Next, let’s update the following fields within our package.json file:
...
  "description": "A quick intro to apollo-server and apollo sandbox",
  "main": "server.js",
  "keywords": ["graphql", "apollo-server", "apollo-sandbox"],
...
We can now create the server.js file to contain the code for this project inside our simple-apollo-sandbox directory:
touch server.js
After creating the server.js file, which will serve as the entry file for our project, proceed to install the dependencies needed for the project:
npm install apollo-server graphql
The above command installs the core library for Apollo Server 3 to define the exact shape of our data and how to communicate with it. The graphql library gives us the capacity to implement a GraphQL schema and execute queries against it.
We’ll proceed to define our GraphQL schema, the data structure of the response that returns on the frontend when queried. Add the following code to your server.js file:
const { ApolloServer, gql } = require('apollo-server');

const typeDefs = gql`
  type Footballer {
    name: String
    age: Int
    retired: Boolean
  }

  type Query {
    club: [Footballer]
  }
`;
The above code defines our GraphQL schema that returns an array of Footballers when a query of club executes on it through the client-side of this project.
For our server to understand and use the above schema, we must define a resolver. A resolver is an object that tells the Apollo Server how to interpret the data type that’s requested:
...
const resolvers = {
  Query: {
    club: () => club,
  },
};
To continue with our project, let’s hardcode the sample data within this project following the GraphQL schema we defined earlier. Note that we can get data from any source like an external API, another GraphQL server, or a database:
...
const club = [
  {
    name: 'Lionel Andrés Messi',
    age: 34,
    retired: false,
  },
  {
    name: 'Wayne Rooney',
    age: 35,
    retired: true,
  },
  {
    name: 'Cristiano Ronaldo dos Santos Aveiro GOIH ComM',
    age: 36,
    retired: false,
  },
];
...
The above object returns when we query the server with the valid GraphQL query, and the response structure mirrors our schema.
Now, let’s spin up our Apollo Server using the below code while passing the typeDefs and the resolvers into it:
...
const server = new ApolloServer({ typeDefs, resolvers});

server.listen().then(({ url }) => {
  console.log(`Our server is spinned and ready at this ${url} 🚀🚀`)
});
Now that we’ve created our server, let’s take it for a test run and make sure everything is functional. Start the server by running the below command on your terminal using the nodemon package or npm:
nodemon server.js
Now, let’s navigate to http://localhost:4000/ to view the landing page that provides a link to access Apollo Sandbox:
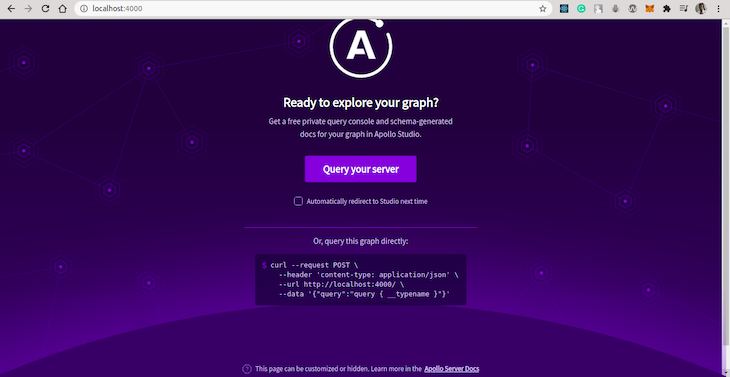
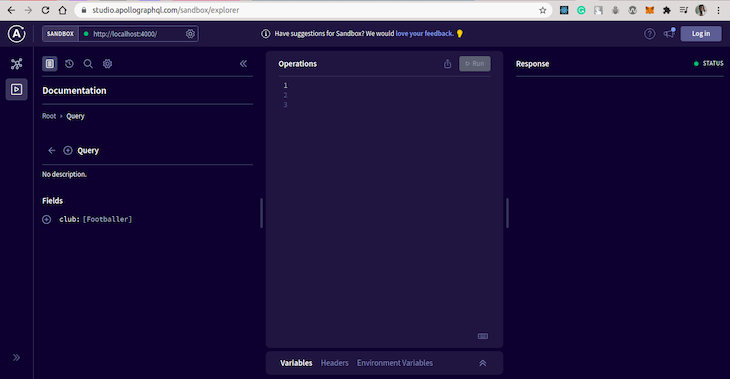
Let’s click the Query your server button to navigate to Apollo Sandbox. The Sandbox UI includes:
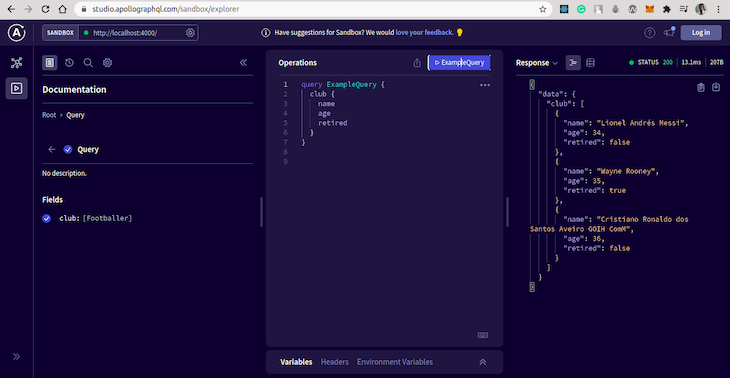
Let’s start querying our server using the below GraphQL query string for executing the club query on Apollo Sandbox:
query ExampleQuery {
  club {
    name
    age
    retired
  }
}
Paste the above query in the Operations panel and click the Run button to get a response on the Response panel shown below:
Now we have successfully implemented an Apollo Server project and used the new Apollo Sandbox to query our backend application for a response.
In the above screenshot, the Apollo Sandbox sends off a request to our server on the backend, requesting data stored in the name, age and retired variables. This request is a GET request that returns a JSON data consumable on any frontend application.
We can choose to fetch only one field, two fields, or all three fields at once, which we did in the above code.
In this tutorial we learned about the new Apollo Server 3, Apollo Sandbox, how to set up and install Apollo Server, implement a simple project, and use the Apollo Sandbox to send GraphQL queries to the server.
The new updates on Apollo Server 3 give the benefit of having a less dependent codebase while using the Apollo server. This makes it a good fit to build backend servers with Apollo Server to handle large data queries and define custom routes for external data with GraphQL.
Install LogRocket via npm or script tag. LogRocket.init() must be called client-side, not
server-side
$ npm i --save logrocket

// Code:

import LogRocket from 'logrocket';
LogRocket.init('app/id');
// Add to your HTML:

<script src="https://cdn.lr-ingest.com/LogRocket.min.js"></script>
<script>window.LogRocket && window.LogRocket.init('app/id');</script>

Write agent-friendly API documentation with OpenAPI, clear schemas, workflow guidance, and llms.txt for safer AI automation.

Local AI proxy tutorial for detecting, masking, and rehydrating PII before prompts reach cloud LLMs.

Learn how Graph RAG uses connected knowledge structures to improve retrieval beyond simple text similarity.

Learn how sibling-index() enables clean, JavaScript-free stagger animations using native CSS.
Would you be interested in joining LogRocket's developer community?
Join LogRocket’s Content Advisory Board. You’ll help inform the type of content we create and get access to exclusive meetups, social accreditation, and swag.
Sign up now

