Editor’s note: This article was last updated by Oyinkansola Awosan on 16 April 2024 to offer a comparison between WebSocket and Socket.io, cover how to set up a local WebSocket server and use it in Next.js, as well as test its connections locally.

Real-time communication on the web uses the WebSocket API, which is a full-duplex communication channel over a single TCP connection. This makes it possible to have multiple clients connected to a server and sharing real-time data, which enables experiences such as multiplayer games, interactive documents, chat rooms, and more.
The most famous WebSocket wrapper for Node.js is Socket.io, which is a package with a Node.js server and a client library that is used on the browser. In this article, I will use Socket.io to demonstrate a WebSocket connection between a server and a Next.js application.
It’s important to note that serverless functions on Vercel do not support WebSockets. Although Vercel is not the only option for deploying a Next.js application, this limitation might be a deal-breaker for some. Vercel recommends using third-party solutions for real-time communication on deployments to their platform. They also provide a guideline for integrating one of these third-party solutions, which is called Pusher.
The Replay is a weekly newsletter for dev and engineering leaders.
Delivered once a week, it's your curated guide to the most important conversations around frontend dev, emerging AI tools, and the state of modern software.
We’ll start by creating a Next.js application using the Create Next App package. Run npx create-next-app websocket-example, where websocket-example is the name of the project. This will generate a boilerplate app.
When you navigate into the project folder, you will see the pages/api folder. This is where we create the endpoints that the client will consume. Any file under pages/api is treated as an endpoint that is mapped to /api/*.
Create a socket.js file under pages/api. This file will handle the WebSocket connection by ensuring that there is only one instance of the WebSocket, which we will access by making a request to /api/socket on the client.
By default, Next.js has its own server and you don’t need any configuration unless a custom server is required. For this basic WebSocket example, we don’t need to configure a custom server. In the socket.js file, we need to check if there is already a socket connection opened in the HTTP server. If not, we plug in Socket.io.
As you might already know, for an API route to work, Next.js requires a function to be exported as the default, which has the req and res parameters corresponding to http.IncomingMessage and http.ServerResponse, respectively.
Here’s an example of an API route:
export default function handler(req, res) {}
Now we need to use this pattern and initialize a socket connection where none exists already. To plug the HTTP server into Socket.io, we use the Server class from the Socket.IO package.
Inside the default exported function, we do a check on res.socket.server.io, which does not exist by default and shows that the socket connection is not in place. If the io object on res.socket.server is non-existent, then we start a new socket connection by instantiating a Server, which takes the res.socket.server as the input.
Next, we set the returned object to res.socket.server.io so that when there is a new request after the instantiation, res.socket.server.io will not be undefined.
Outside the if statement, we simply end the request to prevent it from resulting in a stalled request:
import { Server } from 'Socket.IO'

const SocketHandler = (req, res) => {
  if (res.socket.server.io) {
    console.log('Socket is already running')
  } else {
    console.log('Socket is initializing')
    const io = new Server(res.socket.server)
    res.socket.server.io = io
  }
  res.end()
}

export default SocketHandler
So far, we have created an endpoint to initialize the WebSocket connection. Now we need to use this endpoint on the client side.
Under the /pages directory, you will find the index.js file, which is the route for the main directory. Inside this file, we will implement a component with an input field. We’ll then emit the changes in the input field to the server to be broadcast back to all other connected clients. This is a basic example to show real-time communication.
The first thing we need to do in the component is establish the socket connection. To do so, we will use the useEffect Hook with an empty array dependency, which is the equivalent of the componentDidMount lifecycle Hook.
SocketInitializer is an async function because we need to make a call to the /api/socket endpoint to open the socket connection. Once this call is resolved, we can initialize the io() object and set it to a variable outside the function scope so that it stays the same throughout the component’s lifecycle.
Then, we use socket.on() to listen for a connect emit and log a message to ensure the client is connected. This is a reserved event and should not be emitted manually. You can find the list of reserved events here.
Now, we need to call this function inside the useEffect Hook with a [] dependency. The reason we wrap the socketInitializer inside another function is that effect callbacks should be synchronous to prevent race conditions:
import { useEffect } from 'react'
import io from 'Socket.IO-client'
let socket

const Home = () => {
  useEffect(() => socketInitializer(), [])

  const socketInitializer = async () => {
    await fetch('/api/socket')
    socket = io()

    socket.on('connect', () => {
      console.log('connected')
    })
  }

  return null
}

export default Home;
Now, if you visit the port on your local host, which runs the development server, you will see the “Connected” message logged in the console. If you check the terminal screen from which you started the development server, you will also see “Socket is initializing” logged after the first client is connected. And if you connect another client by visiting the development server on another browser tab or screen, you will see a message that reads “Socket is already running.”
Now that we have the socket connection in place, we can emit messages between clients and the server.
First, we are going to create a controlled input field. All we need is a state and a handler function for the onChange event of the input field:
const [input, setInput] = useState('')

const onChangeHandler = (e) => {
  setInput(e.target.value)
  socket.emit('input-change', e.target.value)
}

return (
  <input
    placeholder="Type something"
    value={input}
    onChange={onChangeHandler}
  />
)
Inside onChangeHandler, we set the input state to a new value and then emit this change to the server as an event. The first parameter to socket.emit() is the unique event name, which is input-change, and the second parameter is the message. In our case, this is the value of the input field.
Next, we need to handle this event in the server by listening to the specific input-change event. By registering a connection listener, we make sure that the socket connection is made. Afterward, inside the callback function, we subscribe to the input-change event through the socket.on() function, which takes an event name and a callback function as parameters:
io.on('connection', socket => {
  socket.on('input-change', msg => {
    socket.broadcast.emit('update-input', msg)
  })
})
Then, inside the callback function, we use socket.broadcast.emit(), which emits a message to all clients except the one that emitted the input-change event. So, only other clients receive msg, which is the text input value sent by one of the clients.
The final version of the socket.js file is as follows:
>import { Server } from 'Socket.IO'

const SocketHandler = (req, res) => {
  if (res.socket.server.io) {
    console.log('Socket is already running')
  } else {
    console.log('Socket is initializing')
    const io = new Server(res.socket.server)
    res.socket.server.io = io

    io.on('connection', socket => {
      socket.on('input-change', msg => {
        socket.broadcast.emit('update-input', msg)
      })
    })
  }
  res.end()
}

export default SocketHandler
Now, back to the client. This time, we need to handle the broadcasted event, which was update-input. All we need to do is subscribe to this event with socket.on() and call the setInput function inside the callback to update the input value with the value sent from the server:
import { useEffect, useState } from 'react'
import io from 'Socket.IO-client'
let socket;

const Home = () => {
  const [input, setInput] = useState('')

  useEffect(() => socketInitializer(), [])

  const socketInitializer = async () => {
    await fetch('/api/socket');
    socket = io()

    socket.on('connect', () => {
      console.log('connected')
    })

    socket.on('update-input', msg => {
      setInput(msg)
    })
  }

  const onChangeHandler = (e) => {
    setInput(e.target.value)
    socket.emit('input-change', e.target.value)
  }

  return (
    <input
      placeholder="Type something"
      value={input}
      onChange={onChangeHandler}
    />
  )
}

export default Home;
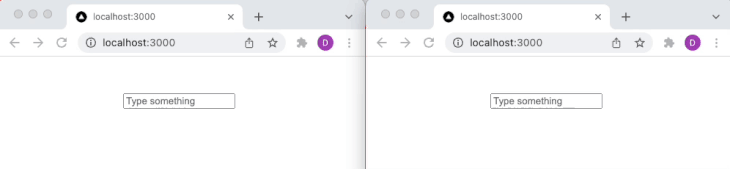
Below is a demonstration of two clients connecting to the socket and updating in real time following the data sent to the server:
To integrate real-time communication in a Next.js application, you can set up a local WebSocket server using Socket.io. This involves creating a custom server configuration that Next.js will run, enabling WebSocket connections alongside the typical HTTP requests.
First, install Socket.io and add it to your project if you haven’t already:
npm install socket.io
Next.js typically handles server tasks internally, but for WebSocket support, you’ll need to set up a custom server. Create a server.js file at the root of your project with the following contents:
const { createServer } = require('http');
const { parse } = require('url');
const next = require('next');
const { Server } = require("socket.io");

const app = next({ dev: process.env.NODE_ENV !== 'production' });
const handle = app.getRequestHandler();

app.prepare().then(() => {
  const server = createServer((req, res) => {
    const parsedUrl = parse(req.url, true);
    handle(req, res, parsedUrl);
  });

  const io = new Server(server);

  io.on('connection', socket => {
    console.log('Client connected');

    socket.on('disconnect', () => {
      console.log('Client disconnected');
    });
  });

  server.listen(3000, (err) => {
    if (err) throw err;
    console.log('> Ready on http://localhost:3000');
  });
});
This script sets up a Node.js server using HTTP and Socket.io and integrates it with the Next.js application.
Now that you have your WebSocket server running, you can modify your Next.js application to use this server:
pages/api directory that initializes the Socket.io connection if it doesn’t already exist. The file’s contents are similar to the socket.js file we discussed earlierpages/index.js:
import { useEffect } from 'react';
import io from 'socket.io-client';

export default function Home() {
  useEffect(() => {
    const socket = io();

    socket.on('connect', () => {
      console.log('Connected to WebSocket server');
    });

    return () => {
      socket.disconnect();
    };
  }, []);

  return <div>WebSocket Test Page</div>;
}
To test your WebSocket implementation, start your server by running node server.js. This will make your Next.js application available at http://localhost:3000 with WebSocket support.
Then, open multiple browser tabs/windows and navigate to http://localhost:3000. If your WebSocket connection is set up correctly, actions in one tab (like sending messages) should be reflected in real-time across other tabs. Use WebSocket testing tools like Postman or WebSocket King to verify the real-time capabilities of your server.
Though WebSocket and Socket.io have similarities, they differ in their functionalities and features, and they each have use cases they are best suited for.
| WebSocket | Socket.io |
|---|---|
| WebSocket is an actual protocol | Socket.io is a library designed to work with the WebSocket protocol |
| There is no fallback option provided if WebSocket is not available | Provides a built-in fallback option if WebSocket is not available |
| WebSocket is quite basic and does not have many features | Socket.IO provides additional features like automatic reconnection, message acknowledgment, multiplexing (using different channels), and broadcasting to multiple sockets |
Due to features like an automatic reconnection, fallback option, multiplexing, etc., Socket.io may be a better option for projects or developers optimizing for reliability.
Socket.io is built on WebSocket, which means there is an abstraction layer coupled with the other features Socket.io has. WebSocket has the upper hand in this case, as it is ideal for applications requiring raw, low-latency, full-duplex communication with minimal overhead while Socket.io introduces slightly higher latency.
Socket.io is designed for a faster development process and ease of development, hence the readily available features that make it a favorite for developers. However, scalability concerns come up occasionally, especially when dealing with applications with high user concurrency.
On the other hand, WebSocket offers direct connection, minimal overhead, and a lower resource footprint, which can make it a better option for developers who are optimizing for low latency.
In this article, we learned how to integrate Socket.io into Next.js to start a WebSocket connection to share information in real time between the client and server.
We also created an endpoint in the Next.js backend, which was then requested by the client to initialize the socket connection. After that, the remaining communication between the server and the client was handled through the socket connection.
Debugging Next applications can be difficult, especially when users experience issues that are difficult to reproduce. If you’re interested in monitoring and tracking state, automatically surfacing JavaScript errors, and tracking slow network requests and component load time, try LogRocket.
LogRocket captures console logs, errors, network requests, and pixel-perfect DOM recordings from user sessions and lets you replay them as users saw it, eliminating guesswork around why bugs happen — compatible with all frameworks.
LogRocket's Galileo AI watches sessions for you, instantly identifying and explaining user struggles with automated monitoring of your entire product experience.
The LogRocket Redux middleware package adds an extra layer of visibility into your user sessions. LogRocket logs all actions and state from your Redux stores.


Modernize how you debug your Next.js apps — start monitoring for free.

A real-world debugging session using Claude to solve a tricky Next.js UI bug, exploring how AI helps, where it struggles, and what actually fixed the issue.

CSS wasn’t built for dynamic UIs. Pretext flips the model by measuring text before rendering, enabling accurate layouts, faster performance, and better control in React apps.

Why do real-time frontends break at scale? Learn how event-driven patterns reduce drift, race conditions, and inconsistent UI state.

Test out Auth.js, Clerk, WorkOS, and Better Auth in Next.js 16 to see which auth library fits your app in 2026.
Would you be interested in joining LogRocket's developer community?
Join LogRocket’s Content Advisory Board. You’ll help inform the type of content we create and get access to exclusive meetups, social accreditation, and swag.
Sign up now

