
Signature pads are useful tools for capturing handwritten signatures in web applications. They enhance user interaction by allowing users to capture handwritten signatures or create drawings directly on the platform.
Below I’ll show you how to create a customizable, responsive signature pad using JavaScript with features like touch support, stroke styles, and export functionality, while incorporating advanced tools like the signature_pad library.
The Replay is a weekly newsletter for dev and engineering leaders.
Delivered once a week, it's your curated guide to the most important conversations around frontend dev, emerging AI tools, and the state of modern software.
Let’s create a simple signature pad using just HTML, CSS, and vanilla JavaScript.
First, the HTML file — create an index.html file in your working directory:
<!DOCTYPE html>
<html lang="en">
<head>
    <meta charset="UTF-8">
    <meta name="viewport" content="width=device-width, initial-scale=1.0">
    <title>Signature Pad</title>
    <link rel="stylesheet" href="styles.css">
</head>
<body>
    <div class="signature-container">
        <canvas id="signature-pad" width="400" height="200"></canvas>
        <button id="clear">Clear</button>
    </div>
    <script src="script.js"></script>
</body>
</html>
We are using the <canvas> element to implement our signature pad. Canvas is suitable for our purpose as it would allow us to do the following:
Now let’s add some styling to the page with styles.css:
body {
    display: flex;
    justify-content: center;
    align-items: center;
    height: 100vh;
    background-color: #f0f0f0;
    margin: 0;
}

.signature-container {
    display: flex;
    flex-direction: column;
    align-items: center;
}

canvas {
    border: 1px solid #000;
    background-color: #fff;
}

button {
    margin-top: 10px;
    padding: 5px 10px;
    cursor: pointer;
}
Now for the JavaScript, add a script.js file to the directory:
document.addEventListener('DOMContentLoaded', function () {
    var canvas = document.getElementById('signature-pad');
    var ctx = canvas.getContext('2d');
    var drawing = false;
    canvas.addEventListener('mousedown', function (e) {
        drawing = true;
        ctx.beginPath();
        ctx.moveTo(e.offsetX, e.offsetY);
    });
    canvas.addEventListener('mousemove', function (e) {
        if (drawing) {
            ctx.lineTo(e.offsetX, e.offsetY);
            ctx.stroke();
        }
    });
    canvas.addEventListener('mouseup', function () {
        drawing = false;
    });
    canvas.addEventListener('mouseout', function () {
        drawing = false;
    });
    document.getElementById('clear').addEventListener('click', function () {
        ctx.clearRect(0, 0, canvas.width, canvas.height);
    });
});
Let’s do a rundown of what’s going on here:
canvas variable references the <canvas> elementctx gets the 2D drawing context, which provides methods and properties for drawing on the canvasmousedown event listener which starts the drawing process when the mouse button is pressed. ctx.beginPath() starts a new path, and ctx.moveTo(e.offsetX, e.offsetY) moves the drawing cursor to the position where the mouse was clickedmousemove event listener draws a line to the current mouse position if the user is drawing. ctx.lineTo(e.offsetX, e.offsetY) adds a line to the current path, and ctx.stroke() actually draws the linemouseup and mouseout, which stop the drawing process when the mouse button is released or the cursor leaves the canvas area respectively. Similarly, ctx.clearRect(0, 0, canvas.width, canvas.height); clears the canvas on clicking the clear buttonThis example is primarily set up for mouse events, but it can be easily extended to support touch devices as well. Here’s how you can modify the JavaScript to handle touch events:
document.addEventListener('DOMContentLoaded', function () {
    var canvas = document.getElementById('signature-pad');
    var ctx = canvas.getContext('2d');
    var drawing = false;

    function startDrawing(e) {
        drawing = true;
        ctx.beginPath();
        ctx.moveTo(e.offsetX || e.touches[0].clientX - canvas.offsetLeft, e.offsetY || e.touches[0].clientY - canvas.offsetTop);
    }

    function draw(e) {
        if (drawing) {
            ctx.lineTo(e.offsetX || e.touches[0].clientX - canvas.offsetLeft, e.offsetY || e.touches[0].clientY - canvas.offsetTop);
            ctx.stroke();
        }
    }

    function stopDrawing() {
        drawing = false;
    }

    // Mouse events
    canvas.addEventListener('mousedown', startDrawing);
    canvas.addEventListener('mousemove', draw);
    canvas.addEventListener('mouseup', stopDrawing);
    canvas.addEventListener('mouseout', stopDrawing);

    // Touch events
    canvas.addEventListener('touchstart', startDrawing);
    canvas.addEventListener('touchmove', draw);
    canvas.addEventListener('touchend', stopDrawing);
    canvas.addEventListener('touchcancel', stopDrawing);

    document.getElementById('clear').addEventListener('click', function () {
        ctx.clearRect(0, 0, canvas.width, canvas.height);
    });
});
For touch events, e.touches[0].clientX and e.touches[0].clientY are used to get the touch coordinates. Adjustments are made to account for the canvas’s position using canvas.offsetLeft and canvas.offsetTop:
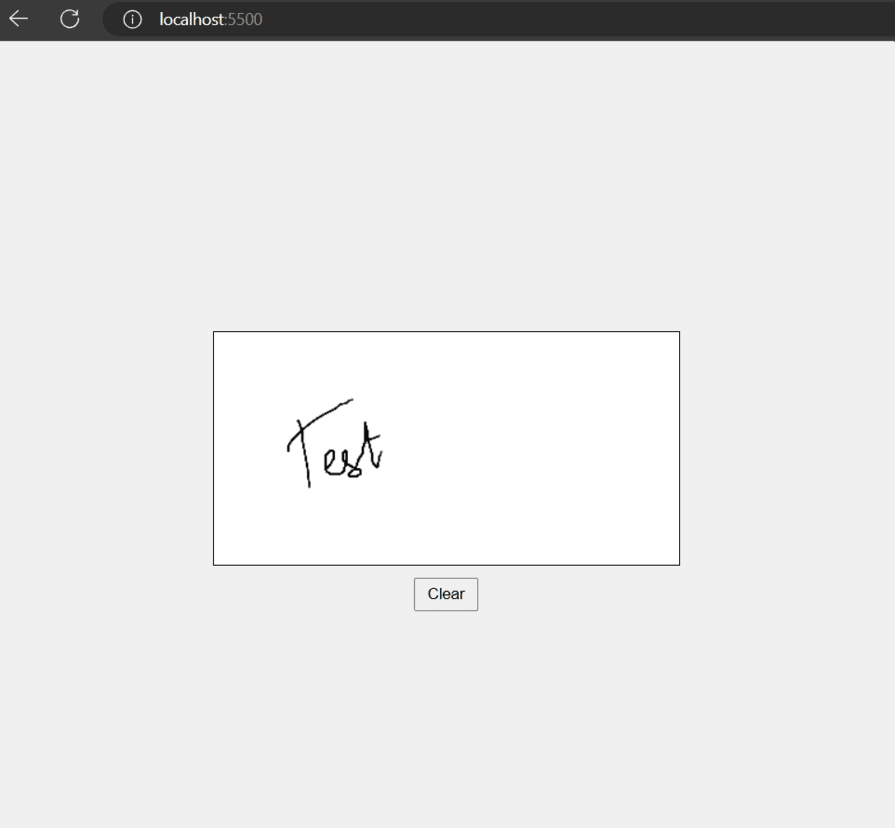
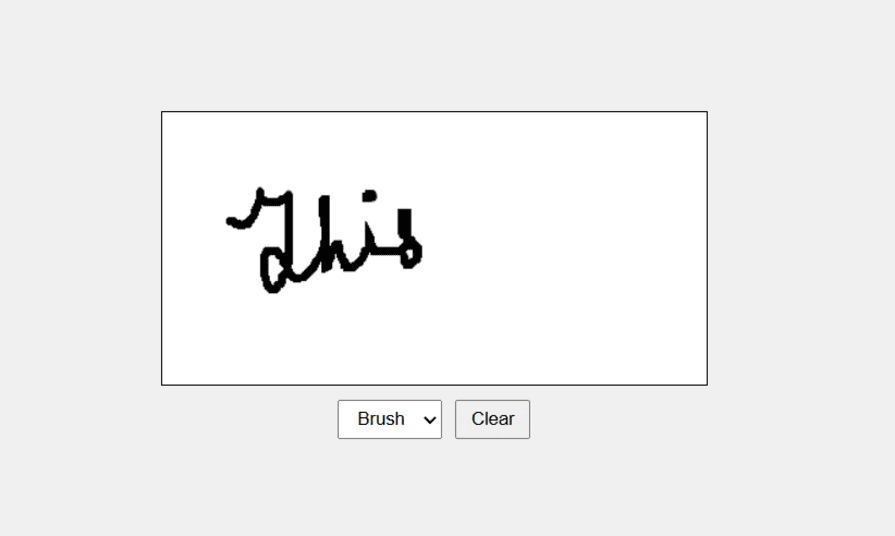
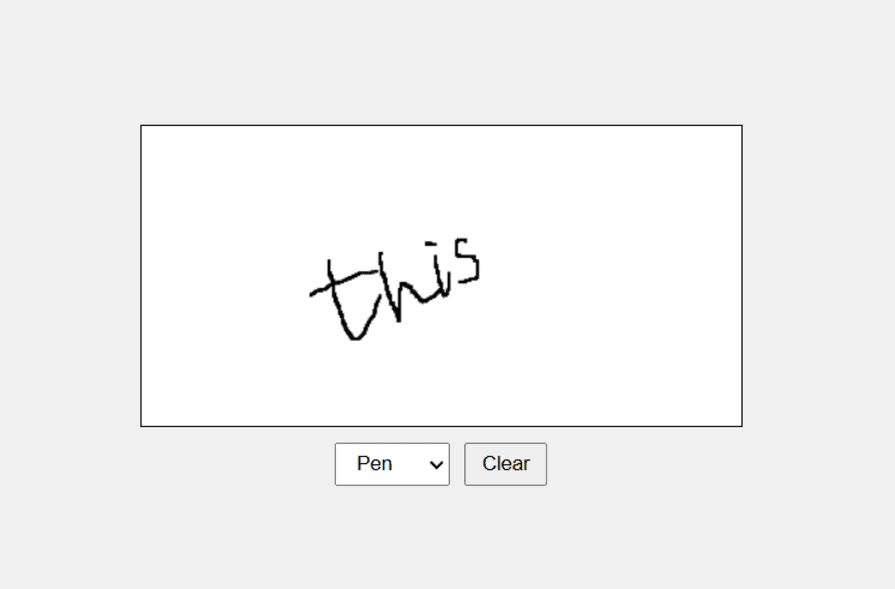
We can add some functionality to the signature pad, like providing the option to choose the strokes. We’ll see how we can offer either a pen or a brush stroke. The key changes that we’ll make are the following:
<select> element with options for Pen and Brush to allow users to choose the stroke stylectx.lineWidth and ctx.lineCap properties based on the selected stroke styleWe can add these lines to our HTML:
<div class="controls">
            <select id="stroke-style">
                <option value="pen">Pen</option>
                <option value="brush">Brush</option>
            </select>
            <button id="clear">Clear</button>
</div>
And then we update our CSS:
body {
    display: flex;
    justify-content: center;
    align-items: center;
    height: 100vh;
    background-color: #f0f0f0;
    margin: 0;
}

.signature-container {
    display: flex;
    flex-direction: column;
    align-items: center;
}

canvas {
    border: 1px solid #000;
    background-color: #fff;
}

.controls {
    margin-top: 10px;
    display: flex;
    gap: 10px;
}

button, select {
    padding: 5px 10px;
    cursor: pointer;
}
And finally, we’ll update the script.js:
document.addEventListener('DOMContentLoaded', function () {
    var canvas = document.getElementById('signature-pad');
    var ctx = canvas.getContext('2d');
    var drawing = false;
    var strokeStyle = 'pen';

    function startDrawing(e) {
        drawing = true;
        ctx.beginPath();
        ctx.moveTo(e.offsetX || e.touches[0].clientX - canvas.offsetLeft, e.offsetY || e.touches[0].clientY - canvas.offsetTop);
    }

    function draw(e) {
        if (drawing) {
            ctx.lineTo(e.offsetX || e.touches[0].clientX - canvas.offsetLeft, e.offsetY || e.touches[0].clientY - canvas.offsetTop);
            ctx.stroke();
        }
    }

    function stopDrawing() {
        drawing = false;
    }

    // Mouse events
    canvas.addEventListener('mousedown', startDrawing);
    canvas.addEventListener('mousemove', draw);
    canvas.addEventListener('mouseup', stopDrawing);
    canvas.addEventListener('mouseout', stopDrawing);

    // Touch events
    canvas.addEventListener('touchstart', startDrawing);
    canvas.addEventListener('touchmove', draw);
    canvas.addEventListener('touchend', stopDrawing);
    canvas.addEventListener('touchcancel', stopDrawing);

    document.getElementById('clear').addEventListener('click', function () {
        ctx.clearRect(0, 0, canvas.width, canvas.height);
    });

    document.getElementById('stroke-style').addEventListener('change', function (e) {
        strokeStyle = e.target.value;
        if (strokeStyle === 'pen') {
            ctx.lineWidth = 2;
            ctx.lineCap = 'round';
        } else if (strokeStyle === 'brush') {
            ctx.lineWidth = 5;
            ctx.lineCap = 'round';
        }
    });

    // Set initial stroke style
    ctx.lineWidth = 2;
    ctx.lineCap = 'round';
});
If you switch to a smaller screen, the signature pad breaks as the design is not responsive. We can add responsiveness to the application so that it’s easier for devices with smaller screens to draw the signatures.
We’ll need to make sure that the canvas and the containers are all flexible. To do that, we need to adjust the canvas size dynamically based on the viewport size.
Here are the key changes we would need to make:
.signature-container should have a flexible width (90%) and a maximum width (600px)width: 100% and height: auto to make it responsiveOn the JavaScript front, we would need to do the following:
resizeCanvas function to adjust the canvas size based on its container’s sizeresizeCanvas initially and add an event listener for window resize to ensure the canvas resizes dynamicallyWith all of that being said, update styles.css like this:
body {
    display: flex;
    justify-content: center;
    align-items: center;
    height: 100vh;
    background-color: #f0f0f0;
    margin: 0;
}

.signature-container {
    display: flex;
    flex-direction: column;
    align-items: center;
    width: 90%;
    max-width: 600px;
}

canvas {
    border: 1px solid #000;
    background-color: #fff;
    width: 100%;
    height: auto;
}

.controls {
    margin-top: 10px;
    display: flex;
    gap: 10px;
}

button, select {
    padding: 5px 10px;
    cursor: pointer;
}
This is how script.js looks like after the addition:
document.addEventListener('DOMContentLoaded', function () {
    var canvas = document.getElementById('signature-pad');
    var ctx = canvas.getContext('2d');
    var drawing = false;
    var strokeStyle = 'pen';

    function resizeCanvas() {
        canvas.width = canvas.offsetWidth;
        canvas.height = canvas.offsetHeight;
        ctx.lineWidth = strokeStyle === 'pen' ? 2 : 5;
        ctx.lineCap = 'round';
    }

    function startDrawing(e) {
        drawing = true;
        ctx.beginPath();
        ctx.moveTo(e.offsetX || e.touches[0].clientX - canvas.offsetLeft, e.offsetY || e.touches[0].clientY - canvas.offsetTop);
    }

    function draw(e) {
        if (drawing) {
            ctx.lineTo(e.offsetX || e.touches[0].clientX - canvas.offsetLeft, e.offsetY || e.touches[0].clientY - canvas.offsetTop);
            ctx.stroke();
        }
    }

    function stopDrawing() {
        drawing = false;
    }

    // Mouse events
    canvas.addEventListener('mousedown', startDrawing);
    canvas.addEventListener('mousemove', draw);
    canvas.addEventListener('mouseup', stopDrawing);
    canvas.addEventListener('mouseout', stopDrawing);

    // Touch events
    canvas.addEventListener('touchstart', startDrawing);
    canvas.addEventListener('touchmove', draw);
    canvas.addEventListener('touchend', stopDrawing);
    canvas.addEventListener('touchcancel', stopDrawing);

    document.getElementById('clear').addEventListener('click', function () {
        ctx.clearRect(0, 0, canvas.width, canvas.height);
    });

    document.getElementById('stroke-style').addEventListener('change', function (e) {
        strokeStyle = e.target.value;
        ctx.lineWidth = strokeStyle === 'pen' ? 2 : 5;
    });

    // Initial canvas setup
    resizeCanvas();
    window.addEventListener('resize', resizeCanvas);
});
You’ll notice that the signature disappears when you resize the viewport, and that’s because resizing the canvas element clears the canvas. This is the default behavior of the canvas element. We can create a workaround to resolve this, so let’s take a look how.
To keep the drawn signature and scale it accordingly when the canvas is resized, we need to save the current drawing, resize the canvas, and then redraw the saved drawing. We’ll use the toDataURL method for this.
The HTMLCanvasElement.toDataURL() method returns a data URL containing a representation of the image in the format specified by the type parameter.
Now let’s try to save our signature in state so that we can redraw the signature when the window is resized. Here are the key changes we would need to make in order to do this:
signatureData variable, used to store the current drawing as a data URLresizeCanvas function to save the current drawing, resize the canvas, and then redraw the saved drawingImage object to load the saved drawing and redraw it on the resized canvasstopDrawing function update signatureData with the current canvas content using canvas.toDataURL()signatureData to nullThis is what our JavaScript file looks like after making these changes:
document.addEventListener('DOMContentLoaded', function () {
    var canvas = document.getElementById('signature-pad');
    var ctx = canvas.getContext('2d');
    var drawing = false;
    var strokeStyle = 'pen';
    var signatureData = null;

    function resizeCanvas() {
        if (signatureData) {
            var img = new Image();
            img.src = signatureData;
            img.onload = function () {
                ctx.clearRect(0, 0, canvas.width, canvas.height);
                canvas.width = canvas.offsetWidth;
                canvas.height = canvas.offsetHeight;
                ctx.drawImage(img, 0, 0, canvas.width, canvas.height);
                setStrokeStyle();
            };
        } else {
            canvas.width = canvas.offsetWidth;
            canvas.height = canvas.offsetHeight;
            setStrokeStyle();
        }
    }

    function setStrokeStyle() {
        if (strokeStyle === 'pen') {
            ctx.lineWidth = 2;
            ctx.lineCap = 'round';
        } else if (strokeStyle === 'brush') {
            ctx.lineWidth = 5;
            ctx.lineCap = 'round';
        }
    }

    function startDrawing(e) {
        drawing = true;
        ctx.beginPath();
        ctx.moveTo(e.offsetX || e.touches[0].clientX - canvas.offsetLeft, e.offsetY || e.touches[0].clientY - canvas.offsetTop);
    }

    function draw(e) {
        if (drawing) {
            ctx.lineTo(e.offsetX || e.touches[0].clientX - canvas.offsetLeft, e.offsetY || e.touches[0].clientY - canvas.offsetTop);
            ctx.stroke();
        }
    }

    function stopDrawing() {
        drawing = false;
        signatureData = canvas.toDataURL();
    }

    // Mouse events
    canvas.addEventListener('mousedown', startDrawing);
    canvas.addEventListener('mousemove', draw);
    canvas.addEventListener('mouseup', stopDrawing);
    canvas.addEventListener('mouseout', stopDrawing);

    // Touch events
    canvas.addEventListener('touchstart', startDrawing);
    canvas.addEventListener('touchmove', draw);
    canvas.addEventListener('touchend', stopDrawing);
    canvas.addEventListener('touchcancel', stopDrawing);

    document.getElementById('clear').addEventListener('click', function () {
        ctx.clearRect(0, 0, canvas.width, canvas.height);
        signatureData = null;
    });

    document.getElementById('stroke-style').addEventListener('change', function (e) {
        strokeStyle = e.target.value;
        setStrokeStyle();
    });

    // Initial canvas setup
    resizeCanvas();
    window.addEventListener('resize', resizeCanvas);
});
Let’s take this a step further and add two buttons to export the drawn signature in PNG and JPEG formats with a white background. The changes we would need to make for this are the following:
exportCanvas function to handle exporting the canvas content with a white background; this will create a new canvas, fill it with a white background, draw the current signature, and then export it as either a PNG or JPEGHere’s the updated HTML:
<!DOCTYPE html>
<html lang="en">
<head>
    <meta charset="UTF-8">
    <meta name="viewport" content="width=device-width, initial-scale=1.0">
    <title>Signature Pad</title>
    <link rel="stylesheet" href="styles.css">
</head>
<body>
    <div class="signature-container">
        <canvas id="signature-pad" width="400" height="200"></canvas>
        <div class="controls">
            <select id="stroke-style">
                <option value="pen">Pen</option>
                <option value="brush">Brush</option>
            </select>
            <button id="clear">Clear</button>
            <button id="export-png">Export as PNG</button>
            <button id="export-jpeg">Export as JPEG</button>
        </div>
    </div>
    <script src="script.js"></script>
</body>
</html>
And this is the JavaScript file after making the additions:
document.addEventListener('DOMContentLoaded', function () {
    var canvas = document.getElementById('signature-pad');
    var ctx = canvas.getContext('2d');
    var drawing = false;
    var strokeStyle = 'pen';
    var signatureData = null;

    function resizeCanvas() {
        if (signatureData) {
            var img = new Image();
            img.src = signatureData;
            img.onload = function () {
                ctx.clearRect(0, 0, canvas.width, canvas.height);
                canvas.width = canvas.offsetWidth;
                canvas.height = canvas.offsetHeight;
                ctx.drawImage(img, 0, 0, canvas.width, canvas.height);
                setStrokeStyle();
            };
        } else {
            canvas.width = canvas.offsetWidth;
            canvas.height = canvas.offsetHeight;
            setStrokeStyle();
        }
    }

    function setStrokeStyle() {
        if (strokeStyle === 'pen') {
            ctx.lineWidth = 2;
            ctx.lineCap = 'round';
        } else if (strokeStyle === 'brush') {
            ctx.lineWidth = 5;
            ctx.lineCap = 'round';
        }
    }

    function startDrawing(e) {
        drawing = true;
        ctx.beginPath();
        ctx.moveTo(e.offsetX || e.touches[0].clientX - canvas.offsetLeft, e.offsetY || e.touches[0].clientY - canvas.offsetTop);
    }

    function draw(e) {
        if (drawing) {
            ctx.lineTo(e.offsetX || e.touches[0].clientX - canvas.offsetLeft, e.offsetY || e.touches[0].clientY - canvas.offsetTop);
            ctx.stroke();
        }
    }

    function stopDrawing() {
        drawing = false;
        signatureData = canvas.toDataURL();
    }

    function exportCanvas(format) {
        var exportCanvas = document.createElement('canvas');
        exportCanvas.width = canvas.width;
        exportCanvas.height = canvas.height;
        var exportCtx = exportCanvas.getContext('2d');

        // Fill the background with white
        exportCtx.fillStyle = '#fff';
        exportCtx.fillRect(0, 0, exportCanvas.width, exportCanvas.height);

        // Draw the signature
        exportCtx.drawImage(canvas, 0, 0);

        // Export the canvas
        var dataURL = exportCanvas.toDataURL(`image/${format}`);
        var link = document.createElement('a');
        link.href = dataURL;
        link.download = `signature.${format}`;
        link.click();
    }

    // Mouse events
    canvas.addEventListener('mousedown', startDrawing);
    canvas.addEventListener('mousemove', draw);
    canvas.addEventListener('mouseup', stopDrawing);
    canvas.addEventListener('mouseout', stopDrawing);

    // Touch events
    canvas.addEventListener('touchstart', startDrawing);
    canvas.addEventListener('touchmove', draw);
    canvas.addEventListener('touchend', stopDrawing);
    canvas.addEventListener('touchcancel', stopDrawing);

    document.getElementById('clear').addEventListener('click', function () {
        ctx.clearRect(0, 0, canvas.width, canvas.height);
        signatureData = null;
    });

    document.getElementById('stroke-style').addEventListener('change', function (e) {
        strokeStyle = e.target.value;
        setStrokeStyle();
    });

    document.getElementById('export-png').addEventListener('click', function () {
        exportCanvas('png');
    });

    document.getElementById('export-jpeg').addEventListener('click', function () {
        exportCanvas('jpeg');
    });

    // Initial canvas setup
    resizeCanvas();
    window.addEventListener('resize', resizeCanvas);
});
We can use a library to make it easier to do some complicated things without a signature pad. We’ll use signature_pad, which is a great library to easily do most of the features we implemented. Plus, it allows us to create smoother signatures.
Let’s add the functionality to undo, redo and then export in different formats using signature_pad.
We start by including the signature_pad library in our HTML:
<script src="https://cdn.jsdelivr.net/npm/[email protected]/dist/signature_pad.umd.min.js"></script>
Then add the necessary buttons. Here’s what the final HTML looks like:
<!DOCTYPE html>
<html lang="en">
<head>
    <meta charset="UTF-8">
    <meta name="viewport" content="width=device-width, initial-scale=1.0">
    <title>Advanced Signature Pad</title>
    <link rel="stylesheet" href="styles.css">
    <script src="https://cdn.jsdelivr.net/npm/[email protected]/dist/signature_pad.umd.min.js"></script>
</head>
<body>
    <div class="signature-container">
        <canvas id="signature-pad" width="400" height="200"></canvas>
        <div class="controls">
            <button id="undo">Undo</button>
            <button id="redo">Redo</button>
            <button id="clear">Clear</button>
            <button id="save-png">Save as PNG</button>
            <button id="save-jpeg">Save as JPEG</button>
        </div>
    </div>
    <script src="script.js"></script>
</body>
</html>
Update the styling:
body {
    display: flex;
    justify-content: center;
    align-items: center;
    height: 100vh;
    background-color: #f0f0f0;
    margin: 0;
}

.signature-container {
    display: flex;
    flex-direction: column;
    align-items: center;
    width: 90%;
    max-width: 600px;
}

canvas {
    border: 1px solid #000;
    background-color: #fff;
    width: 100%;
    height: auto;
}

.controls {
    margin-top: 10px;
    display: flex;
    gap: 10px;
    flex-wrap: wrap;
}

button {
    padding: 5px 10px;
    cursor: pointer;
}
And our script.js would need the following changes:
undoStack and redoStack to manage the states for undo and redo functionalitysaveState function to save the current state to the undo stackundo and redo functions to handle the undo and redo operationsThis is what the final script.js looks like:
document.addEventListener('DOMContentLoaded', function () {
    var canvas = document.getElementById('signature-pad');
    var signaturePad = new SignaturePad(canvas);
    var undoStack = [];
    var redoStack = [];
    function saveState() {
        undoStack.push(deepCopy(signaturePad.toData()));
        redoStack = [];
    }
    function undo() {
        if (undoStack.length > 0) {
            redoStack.push(deepCopy(signaturePad.toData()));
            undoStack.pop();
            signaturePad.clear();
            if (undoStack.length) {
                var lastStroke = undoStack[undoStack.length - 1];
                signaturePad.fromData(lastStroke, { clear: false });
            }
        }
    }
    function redo() {
        if (redoStack.length > 0) {
            undoStack.push(deepCopy(signaturePad.toData()));
            var nextState = redoStack.pop();
            signaturePad.clear();
            if (nextState.length) {
                signaturePad.fromData(nextState);
            }
        }
    }
    document.getElementById('undo').addEventListener('click', undo);
    document.getElementById('redo').addEventListener('click', redo);
    document.getElementById('clear').addEventListener('click', function () {
        signaturePad.clear();
        undoStack = [];
        redoStack = [];
    });
    document.getElementById('save-png').addEventListener('click', function () {
        if (!signaturePad.isEmpty()) {
            var dataURL = signaturePad.toDataURL('image/png');
            var link = document.createElement('a');
            link.href = dataURL;
            link.download = 'signature.png';
            link.click();
        }
    });
    document.getElementById('save-jpeg').addEventListener('click', function () {
        if (!signaturePad.isEmpty()) {
            var dataURL = signaturePad.toDataURL('image/jpeg');
            var link = document.createElement('a');
            link.href = dataURL;
            link.download = 'signature.jpeg';
            link.click();
        }
    });
    // Save state on drawing end
    signaturePad.addEventListener("endStroke", () => {
        console.log("Signature end");
        saveState();
      });
    // Initial canvas setup
    function resizeCanvas() {
        var ratio = Math.max(window.devicePixelRatio || 1, 1);
        canvas.width = canvas.offsetWidth * ratio;
        canvas.height = canvas.offsetHeight * ratio;
        canvas.getContext('2d').scale(ratio, ratio);
        signaturePad.clear(); // otherwise isEmpty() might return incorrect value
        if (undoStack.length > 0) {
            signaturePad.fromData(undoStack[undoStack.length - 1]);
        }
    }
    function deepCopy(data) {
        return JSON.parse(JSON.stringify(data));
    }
    window.addEventListener('resize', resizeCanvas);
    resizeCanvas();
});
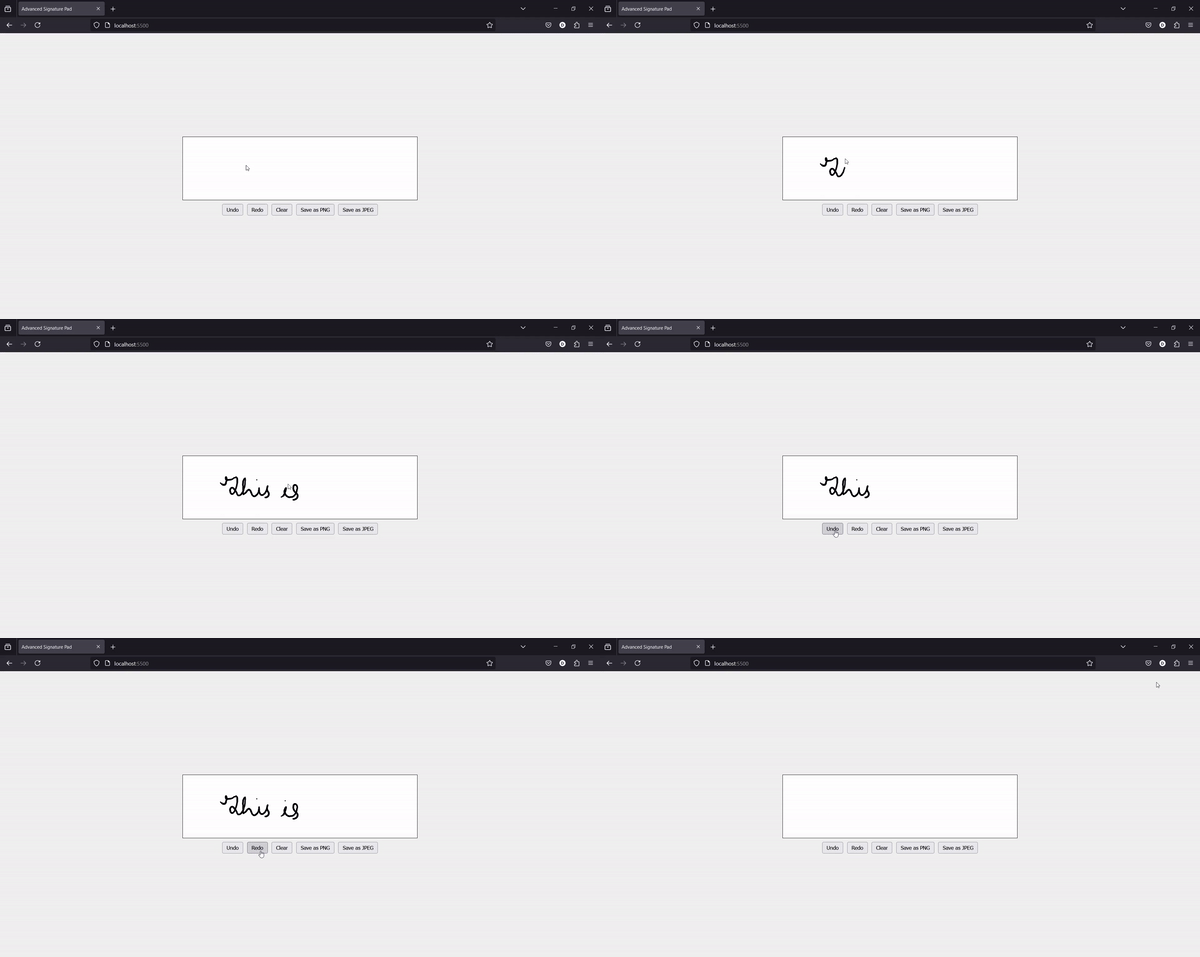
Learning the above code can help us with several situations.
E-signature collection in web forms
Signature pads allow users to sign documents electronically within web forms. This is especially valuable for contracts, agreements, and consent forms. In industries such as legal, real estate, healthcare, and finance, collecting signatures is a critical part of the workflow, eliminating the need for physical paperwork.
Drawing tool for online applications
Developers can integrate signature pads into applications where users need to draw or annotate. For example, collaborative whiteboards, design tools, or interactive feedback sections benefit from signature pads. Another example, in an online classroom platform, students can use a signature pad to draw diagrams or solve math problems during a live session. The instructor can provide immediate feedback on their work.
Annotation tool in web-based document or image editors
Signature pads can serve as annotation tools, enabling users to add handwritten notes, comments, or sketches directly onto documents or images.
Visitor management
Visitors can sign in and out digitally when entering or leaving premises. This is useful in corporate offices and events.
We saw how simple it is to create a signature pad using plain JavaScript. We also saw how data can be exported from our canvas. And when using libraries like signature_pad, adding advanced features also becomes easier. The exported data can also be sent to the backend and processed if you want to implement features like signature verification.
Debugging code is always a tedious task. But the more you understand your errors, the easier it is to fix them.
LogRocket allows you to understand these errors in new and unique ways. Our frontend monitoring solution tracks user engagement with your JavaScript frontends to give you the ability to see exactly what the user did that led to an error.

LogRocket records console logs, page load times, stack traces, slow network requests/responses with headers + bodies, browser metadata, and custom logs. Understanding the impact of your JavaScript code will never be easier!

@container scroll-state: Replace JS scroll listeners nowCSS @container scroll-state lets you build sticky headers, snapping carousels, and scroll indicators without JavaScript. Here’s how to replace scroll listeners with clean, declarative state queries.

Russ Miles, a software development expert and educator, joins the show to unpack why “developer productivity” platforms so often disappoint.

Discover what’s new in The Replay, LogRocket’s newsletter for dev and engineering leaders, in the February 18th issue.

Learn how to recreate Claude Skills–style workflows in GitHub Copilot using custom instruction files and smarter context management.
Hey there, want to help make our blog better?
Join LogRocket’s Content Advisory Board. You’ll help inform the type of content we create and get access to exclusive meetups, social accreditation, and swag.
Sign up now