Editor’s note: This article was last updated by Joseph Mawa on 1 March 2024 to include information about implementing React Native SVG animation using the react-native-animation package, rendering animated SVGs using React Native WebView, how to simplify importing SVG files in your RN project, and more.

When you’re developing a React Native application, you may need to implement icons. The easy way to do this is to simply extract the .png or .jpeg file of the icon and use it in the Image component of React Native. This would do the trick for you, but you wont get crisp quality and you’ll end up bloating your app with higher image file sizes, which will increase your app bundle size.
Instead of using .png or .jpeg files in your React Native app, you should be using the SVG format. SVG is a vector-based format that can scale infinitely without compromising quality.
In this guide, you’ll learn how to implement SVG icons in your React Native app using the react-native-svg library.
SVG is an XML-based format used to render vector images. A vector image can scale however much you want without pixelating because they use mathematical equations and do not have pixels like other image formats, such as .png and .jpeg.
Because of the vector nature of the SVG format, the image is independent of resolution. An SVG image looks sharp on any screen, from the gorgeous 285 DPI pixel density screens found on new smartphones to the 85 DPI screens of standard monitors. SVG files are also small in size compared to other image formats.
If you open an SVG file in a text editor, you’ll see a large XML code with numbers and various nodes. In this tutorial, we won’t focus on the SVG itself. Instead, we’ll demonstrate rendering SVGs on a mobile app screen.
Rendering SVGs in mobile apps is not as simple as on the web, where you can use SVG directly as an image source or paste the SVG code into your HTML file. This is because there isn’t a built-in React Native component that can render SVGs directly.
Because React Native doesn’t provide default support for SVGs, we’ll have to install a few libraries from the npm package registry. Luckily, there’s a popular npm package called react-native-svg that works well for most use cases.
Let’s start by setting up a React Native project. Run the following command:
npx react-native init SvgDemoApp
To install the react-native-svg and react-native-svg-transformer packages, navigate into the project directory and run the following commands:
cd SvgDemoApp
npm i react-native-svg
npm i --save-dev react-native-svg-transformer
react-native-svg provides SVG support to your React Native project on both Android and iOS platforms. react-native-svg-transformer enables you to import local SVG files in your React Native project, like how you would do in a Creact React App project on the web.
If you’re using the Expo CLI instead of React Native CLI, you can start by running the following commands:
expo init SvgDemoApp
expo install react-native-svg
Let’s look at how you can use the react-native-svg library to render SVGs in your app.
Open the project directory in your favorite text editor and start by importing the Svg and Circle components from react-native-svg, as shown below:
import Svg, { Circle } from 'react-native-svg';
The <Svg> component is a parent component needed to render any SVG shape. It’s like a container component for all your SVG shapes. If you’re rendering any SVG shape, such as a circle or a polygon, you must use this as a wrapper around your SVG component:
<Svg height="50%" width="50%" viewBox="0 0 100 100" >
       ...
</Svg>
The <Svg> component takes three props: height, width, and viewBox. The viewBox prop describes how to position your SVG in space. The height and width props are self-explanatory.
Inside the <Svg> component, render the <Circle> component as follows:
<Svg height="50%" width="50%" viewBox="0 0 100 100" >
    <Circle cx="50" cy="50" r="50" stroke="purple" strokeWidth=".5" fill="violet" />
</Svg>
The <Circle> component takes the x and y coordinates as cx and cy props, respectively. These coordinates define how and where your SVG component will be positioned inside the container. If you were to render a different SVG shape, such as a rectangle, the same would be represented by x and y props, respectively.
To describe the radius of the circle, you can pass an integer as a string to the r prop. You can set this value to increase or decrease the size of the rendered SVG circle.
The stroke prop can be used to denote the color of the border around the SVG element and the strokeWidth represents the thickness of that border. Finally, the fill prop indicates the color of the rendered SVG element. These props are similar to the attributes on the native HTML <svg> element and are common across most of the SVG components.
Have a look at the entire code that renders an SVG circle on the screen:
import React from 'react';
import { StyleSheet, View } from 'react-native';
import Svg, { Circle } from 'react-native-svg';

export default function App() {
  return (
    <View style={styles.container}>
      <Svg height="50%" width="50%" viewBox="0 0 100 100" >
        <Circle cx="50" cy="50" r="50" stroke="purple" strokeWidth=".5" fill="violet" />
      </Svg>
    </View>
  );
}
const styles = StyleSheet.create({
  container: {
    flex: 1,
    backgroundColor: '#fff',
    alignItems: 'center',
    justifyContent: 'center',
  },
});
You should see a violet SVG circle, as shown below:
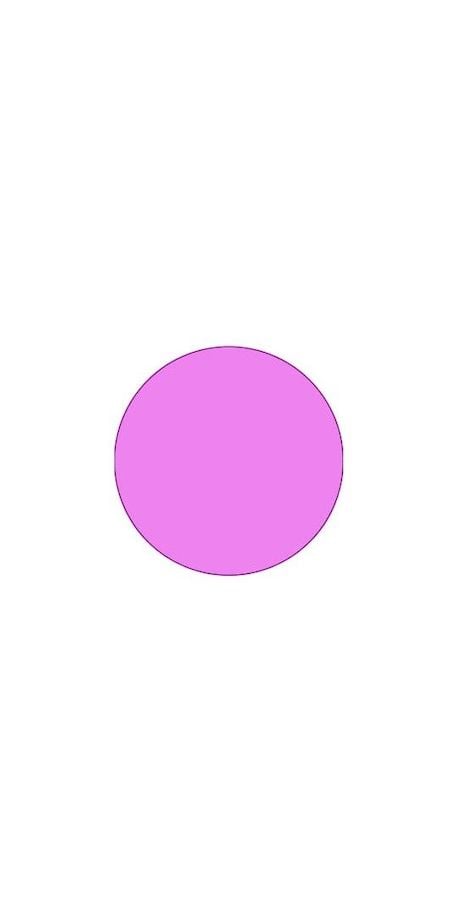
Notice that I’ve wrapped the <Svg> component inside a <View> component. You can wrap your SVG components inside any generic container component, such as <View> or any other custom wrapper component. This allows you to place and position your SVG components anywhere on the screen using flexbox layouts, as in the above example.
Similarly, you can render other SVG shapes, such as rectangles, polygons, lines, ellipses, etc. However, you need to be aware that react-native-svg doesn’t support all SVG elements yet.
You can compose the supported SVG elements, like in the above example, only when creating basic SVG shapes. In real-world applications, you can use online tools such as SVGR.
Copy and paste the SVG code into the online SVGR playground. It will transform the SVG into a React component that you can use with react-native-svg.
Now that you understand how to create and render SVGs using the react-native-svg library, let’s explore how you can render SVG icons and images loaded from a URI.
Here, you need to use a different component called SvgUri, so let’s import it from the library:
import { SvgUri } from 'react-native-svg';
The <SvgUri> component takes the width, height, and uri props. You can specify the uri prop pointing to the SVG’s URL. For instance, if you wish to render this SVG, you can assign that URL to the uri prop in your <SvgUri> component, as shown below:
<SvgUri
    width="100%"
    height="100%"
    uri="https://dev.w3.org/SVG/tools/svgweb/samples/svg-files/debian.svg"
/>
This is quite similar to rendering images in React, where you’d specify the src attribute of your <img> as the URL of the image.
The above code should render the SVG on the screen as shown below:
![]()
You can adjust the width and height of the SVG using the width and height props of the <SvgUri> component. Unlike when rendering SVG shapes, you don’t need a container component here.
In the previous sections, we explored using react-native-svg to create and render SVGs in a React Native application. However, in some cases, you may need to reference a local SVG icon or an image inside your project.
When setting up the example project, recall that you also installed react-native-svg-transformer as a development dependency. You can use it to render a local SVG icon or image inside your project.
With react-native-svg-transformer, you can import raw SVG assets as React components. It transforms the SVGs into a format that is compatible with react-native-svg out of the box.
Make configurational changes to your project before using react-native-svg-transformer. Head over to your project’s metro.config.js file. If this file doesn’t exist in your project, create it.
Then, add the following code inside it:
const { getDefaultConfig } = require('metro-config');

module.exports = (async () => {
  const {
    resolver: { sourceExts, assetExts },
  } = await getDefaultConfig();
  return {
    transformer: {
      babelTransformerPath: require.resolve('react-native-svg-transformer'),
    },
    resolver: {
      assetExts: assetExts.filter(ext => ext !== 'svg'),
      sourceExts: [...sourceExts, 'svg'],
    },
  };
})();
Next, download an SVG and save it inside your project, similar to how you’d download an image that you want to use in your project. Let’s say you named your SVG file image.svg. You can now import this SVG file like any other React component:
import SVGImg from './image.svg';
And render it inside any component:
<SVGImg width={200} height={200} />
The above code should render the same SVG on the screen. If your project requires you to render SVG icons locally, you can follow this approach to render different SVG icons in your app.
In rare cases, if you’re not able to reference local SVGs using react-native-svg-transformer, you can use XML strings to render SVGs in a React Native app.
Let’s say you’ve downloaded another example SVG to your project. If you view the SVG file in a text editor like VS Code, you’ll notice the XML code with an <svg> HTML element. You can directly render an SVG from its XML code using the <SvgXml /> component:
import { SvgXml } from 'react-native-svg';
Copy everything inside the <svg> element from the SVG file’s XML code and store it inside a string variable.
const xml = `
<svg version="1.1" id="Layer_1" xmlns="http://www.w3.org/2000/svg" xmlns:xlink="http://www.w3.org/1999/xlink" x="0px" y="0px"
width="500px" height="500px" viewBox="0 0 500 500" enable-background="new 0 0 500 500" xml:space="preserve">
...
</svg>
`;
Then, pass the above variable to the xml prop inside your <SvgXml> component, as shown below:
<SvgXml xml={xml} width="100%" height="100%" />
And voila! You should now see the following SVG on the screen:

One of the benefits of using SVG is that you can animate them using JavaScript and CSS. However, React Native doesn’t have built-in high-performance SVG animation capabilities. Therefore, implementing SVG animations may not be trivial.
In this section, we will explore some techniques you can use to add dynamic and interactive graphics in React Native using SVGs.
React Native’s built-in animation API is low-level. Therefore, using it for animating SVGs without third-party packages may be difficult.
In this section, we will use React Native Reanimated to animate the violet circle we created using react-native-svg in one of the sections above. We have already installed react-native-svg. You can install React Native Reanimated from the npm package registry using one of the commands below:
# npm
npm install react-native-reanimated

# yarn
yarn add react-native-reanimated

# expo
npx expo install react-native-reanimated
After successfully installing React Native Reanimated, add the react-native-reanimated/plugin plugin to your project’s babel.config.js like so:
module.exports = {
  presets: [
    ... // don't add it here
  ],
  plugins: [
    ...
    // it needs to be the last in the list
    'react-native-reanimated/plugin'
  ]
};
After adding the above babel plugin, it’s recommended that you reset the Metro bundler cache using one of the following commands:
# npm
npm start -- --reset-cache

# yarn
yarn start --reset-cache

# expo
npx expo start -c
If you’re developing for Android, that’s everything you need to start using React Native Reanimated. However, if you’re developing for iOS, also install pods:
cd ios && pod install
Let’s animate the violet circle we created above. We will create a pulse effect by animating its radius and opacity. Create a component file, and copy and paste the code below:
import React, {useEffect} from 'react';
import Svg, {Circle} from 'react-native-svg';
import Animated, {
  useSharedValue,
  useAnimatedProps,
  withRepeat,
  withTiming,
  Easing,
} from 'react-native-reanimated';

const AnimatedSVGCircle = Animated.createAnimatedComponent(Circle);

function AnimatedPulseCircle() {
  const pulse = useSharedValue(0);

  const style = useAnimatedProps(() => {
    return {
      r: 10 + pulse.value * 35,
      opacity: 1 - pulse.value,
    };
  });

  useEffect(() => {
    pulse.value = withRepeat(
      withTiming(1, {duration: 800, easing: Easing.linear}),
      -1,
      false,
    );
  }, [pulse]);

  return (
    <Svg width={100} height={100}>
      <AnimatedSVGCircle
        cx={50}
        cy={50}
        r={50}
        stroke="purple"
        strokeWidth=".5"
        fill="violet"
        animatedProps={style}
      />
    </Svg>
  );
}

export default AnimatedPulseCircle;
In the code above, we used createAnimatedComponent to wrap the Circle element from react-native-svg. To animate props or styles associated with a component, you wrap it in createAnimatedComponent as in the example above.
The useSharedValue Hook is one of the built-in hooks in React Native Reanimated. It’s for defining shared values in a component. It returns an object with a single value property. You can directly access and modify the value property. In the above example, we are setting its value to the animation object returned by the withRepeat animation modifier in the useEffect Hook.
In React Native Reanimated, an animation modifier is a higher-order function you can use to customize animations. React Native Reanimated has several built-in animation modifiers. One of them is withRepeat. As its name suggests, withRepeat is for repeating an animation many times. In the above example, we are repeating the animation indefinitely.
The useAnimatedProps Hook creates an animated props object. It’s for animating properties of third-party components. In the above example, we passed the returned object to the <AnimatedSVGCircle /> component as the value of animatedProps.
You will get the animation below if you render the component above:

Another way you can render animated SVGs in React Native is by using React Native WebView. You need to first install React Native WebView from the npm package registry like so:
npm install react-native-webview
You can use SVGator’s online tool to create an SVG animation and embed it in your React Native project using React Native WebView. The online tool has a feature for exporting your animated SVG for React Native out of the box.
After generating your SVG animation, copy and paste the code into your React Native project and render the generated component. Review the SVGator documentation to learn how to use it to create SVG animations.
I exported one of the example SVG animations in SVGator. The GIF below shows what it looks like after rendering the generated component:

SVGs are great for rendering images and icons you want to use in your React Native apps. You can even use them to create complex shapes and patterns to add more aesthetic appeal to your app’s design.
Remember that storing a large number of SVG files locally will still bloat your app. You should always avoid saving a large number of SVG files in your project and referencing them locally. If you absolutely need to, you can optimize your SVG files using this SVG Optimizer.
I hope this tutorial makes it easier to use SVGs in your React Native project. You can also explore and play around with examples illustrated in the react-native-svg official docs.

LogRocket's Galileo AI watches sessions for you and and surfaces the technical and usability issues holding back your React Native apps.
LogRocket also helps you increase conversion rates and product usage by showing you exactly how users are interacting with your app. LogRocket's product analytics features surface the reasons why users don't complete a particular flow or don't adopt a new feature.
Start proactively monitoring your React Native apps — try LogRocket for free.
Would you be interested in joining LogRocket's developer community?
Join LogRocket’s Content Advisory Board. You’ll help inform the type of content we create and get access to exclusive meetups, social accreditation, and swag.
Sign up now
A breakdown of the wrapper and container CSS classes, how they’re used in real-world code, and when it makes sense to use one over the other.

This guide walks you through creating a web UI for an AI agent that browses, clicks, and extracts info from websites powered by Stagehand and Gemini.

This guide explores how to use Anthropic’s Claude 4 models, including Opus 4 and Sonnet 4, to build AI-powered applications.

Which AI frontend dev tool reigns supreme in July 2025? Check out our power rankings and use our interactive comparison tool to find out.


One Reply to "How to import SVG files in React Native using react-native-svg"
How we can use svga animation files in react naive. i am using “react-native”: “0.70.1”.
thanks