Frontend development is not what it used to be eight years ago, and new trends in user interfaces make building with vanilla JavaScript tedious. Fortunately, the emergence of JavaScript frameworks like React and Ruby on Rails make building highly interactive applications pleasant.
In this article, we’ll be looking at the ways you can use React, the popular JavaScript library, with your Ruby on Rails app.
There are two ways to use React with Ruby on Rails. The first is to build two separate, standalone apps, with the React app on a different repository and communicating with the backend via an API. This can simply be achieved by creating both apps separately using Create React App and the Rails CLI.
The other way is by having both apps in one repository, running side by side.
Choosing any of the above options depend on your architectural preference, but we will be looking at the second because it is the most common and difficult approach.
Before getting started, there are some tools you need to have on your
machine in order to follow along with this tutorial:
sqlite3 --version to confirmgem install railsYou should also have a working knowledge of React and Javascript.
If you’re just starting your app development, you can set up React and Rails at the same time using the following command:
rails new react-app --webpack=react
This tells the Rails CLI to install React as well.
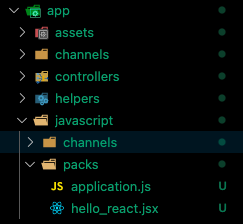
After a successful installation, open the new project in your editor. The packs folder should look like this:
We need to create a controller that will be responsible for serving the index page with React. To do this, run the command below:
rails g controller pages index
This creates a pages_controller.rb file in app/controllers with an index action.
Next, we need to set the root in /config/routes.rb to the newly generated index page:
Rails.application.routes.draw do
  root 'pages#index'
end
Start the server with the command below and navigate to http://localhost:3000. You should see the content of the index page:
rails s #start the development server
At this point, React is still not being used in our application. What we need to do now is link to the entry React file (hello_react) using a JavaScript pack tag.
Clear the content of app/views/pages/index.html.erb then add the snippet below just before the closing head tag in app/views/layouts/applcation.html.erb:
<%= javascript_pack_tag 'hello_react' %>
This way, we can start development with React on the front end.
Create a file with components/Counter.jsx inside /app/javascript, then paste the snippet below into the component:
import React, { useState} from 'react'
const Counter = () => {
  const [count, setCount] = useState(0);
  const increase = () => setCount(count+1);
  const decrease = () => setCount(count-1);
  return (
    <div>
      <button onClick={decrease}>-</button>
      <span>{count}</span>
      <button onClick={increase}>+</button>
    </div>
  )
}
export default Counter;
As you can see, this app will be a simple counter app.
The final step to see it in action is to replace the content of hello_react.jsx with this:
import React from 'react'
import ReactDOM from 'react-dom'

import Counter from '../components/Counter';

document.addEventListener('DOMContentLoaded', () => {
  ReactDOM.render(
    <Counter/>,
    document.body.appendChild(document.createElement('div')),
  )
})
Voila! you’re now ready to create stunning applications with React.
In a situation in which you already have an existing Rails app, installing React is also easy.
To do so, run the command below to set up React using webpacker:
rails webpacker:install:react
Now React has been set up in the application and is ready for development. If you check app/javascript/packs you’ll see a hello_react.jsx file just like in the previous example above.
Because you’re adding React to an existing app, you should determine if you want to completely migrate the existing Rails frontend to React, or if you just want to add React to specific pages alone. We’ll go over what to do in each scenario next.
With this approach, you want to create a new controller and layout for easier migration.
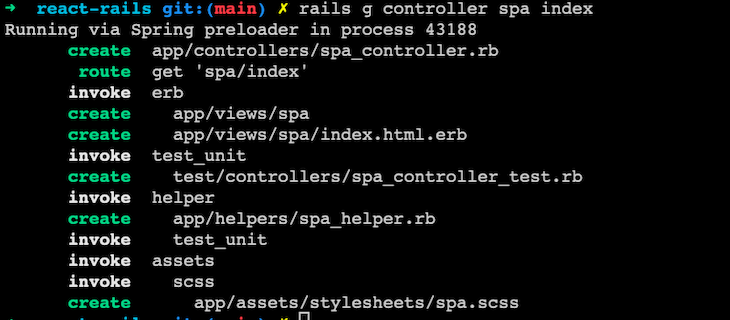
Run the command below to create a new controller and an index page:
rails g controller spa index
This creates a spa_controller.rb file and a view file in views/spa/index.html.erb as shown in the screenshot below:
Next, create a spa.html.erb file in app/views/layouts and paste in the code below:
<!DOCTYPE html>
<html>
  <head>
    <title>ReactRails</title>
    <%= csrf_meta_tags %>
    <%= csp_meta_tag %>
    <%= stylesheet_link_tag 'application', media: 'all', 'data-turbolinks-track': 'reload' %>
    <%= javascript_pack_tag 'application', 'data-turbolinks-track': 'reload' %>
    <%= javascript_pack_tag 'hello_react' %>
  </head>
  <body>
    <%= yield %>
  </body>
</html>
This file will be the base layout for the new React front end.
Next, update the newly created spa_controller.rb file with the code below:
class SpaController < ApplicationController
  layout 'spa'

  def index
  end
end
After setting up the layout, we need to set a new route matcher in config/routes.rb to use the spa layout to render the React front end.
Replace the following line:
get 'spa/index'
With the following code:
get 'app', to: 'spa#index'
get 'app/*path', to: 'spa#index'
The new lines above serve all requests to the React frontend on /app using the spa controller. This technique also catches all registered React routes on the front end and redirects them back for React to handle.
With everything set up now, spin up your development server using rails s and try to open any URL with /app/* in the browser.
You can resume development with React by creating your components just like the example where we created a new Rails app.
Assuming you already have a full-blown app and only want to use React on specific pages, you can use the following instructions to do so.
Create a new jsx file in app/javascript/packs/; I’m using main_list.jsx for this example.
The content of the file should look like the following:
import React, { useState} from 'react'
import ReactDOM from 'react-dom'

const App = props => {
  const [tasks] = useState(['laundry', 'shopping']);
  return (
    <div>
      <h1>Tasks</h1>
      <ul>{tasks.map((task, index) => <li key={index}>{task}</li>)}</ul>
    </div>
  )
}


document.addEventListener('DOMContentLoaded', () => {
  ReactDOM.render(
    <App />,
    document.body.appendChild(document.createElement('div')),
  )
})
You can also work with existing components or create new ones to add.
The next step is to add the pack tag in the Rails view file in which you want React. For example, I am using a list.html.erb file:
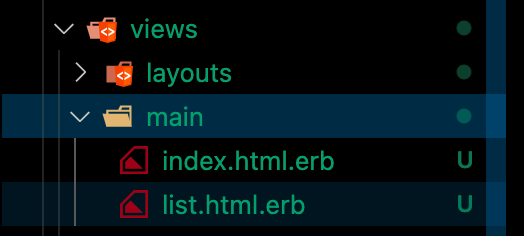
I can simply add the pack tag and continue development in the jsx file:
# views/main/list.html.erb
<%= javascript_pack_tag 'main_list' %>
One final thing to note is that when you’re using a JavaScript framework for the front end of your Rails app, you can no longer handle data the traditional way where you’d make queries in the .erb files. In this case, the React frontend will have to communicate with the backend via a JSON API.
In this article, we covered the best ways to use React with Ruby on Rails.
As I mentioned at the beginning of this article, taking advantage of the benefits of JavaScript frameworks like React, you can build powerful, modern front end applications faster.
By using React in your Ruby on Rails apps, you can do more than just build complex UIs; for example, combining the two allows you to write unit tests for your React components.
Install LogRocket via npm or script tag. LogRocket.init() must be called client-side, not
server-side
$ npm i --save logrocket

// Code:

import LogRocket from 'logrocket';
LogRocket.init('app/id');
// Add to your HTML:

<script src="https://cdn.lr-ingest.com/LogRocket.min.js"></script>
<script>window.LogRocket && window.LogRocket.init('app/id');</script>

Explore 15 essential MCP servers for web developers to enhance AI workflows with tools, data, and automation.

Learn how contrast-color() automatically picks accessible text colors using native CSS, without JavaScript.

Learn how to build a harness-style AI workflow using Claude Code with specialized Dev, QE, and Ops subagents, gated handoffs, MCP telemetry, and LEARNING.md.

Learn how to build smooth staggered animations in CSS using modern features like sibling-index(), complete with practical examples, fallbacks, and accessibility tips.
Hey there, want to help make our blog better?
Join LogRocket’s Content Advisory Board. You’ll help inform the type of content we create and get access to exclusive meetups, social accreditation, and swag.
Sign up now

