Gone are the days when a company would need to hire multiple engineers to launch an app on mobile platforms and the web. This approach invariably leads to subtle inconsistencies between versions and other challenges associated with managing multiple codebases.

With Flutter 2.0, you can ship your existing mobile app as a web app with little or no change to the existing code. At the time of writing, the stable build for the web is suitable for developing:
In this tutorial, we’ll show you how to convert your Flutter mobile app to a web app and deploy it on Firebase Hosting. We’ll cover the following:
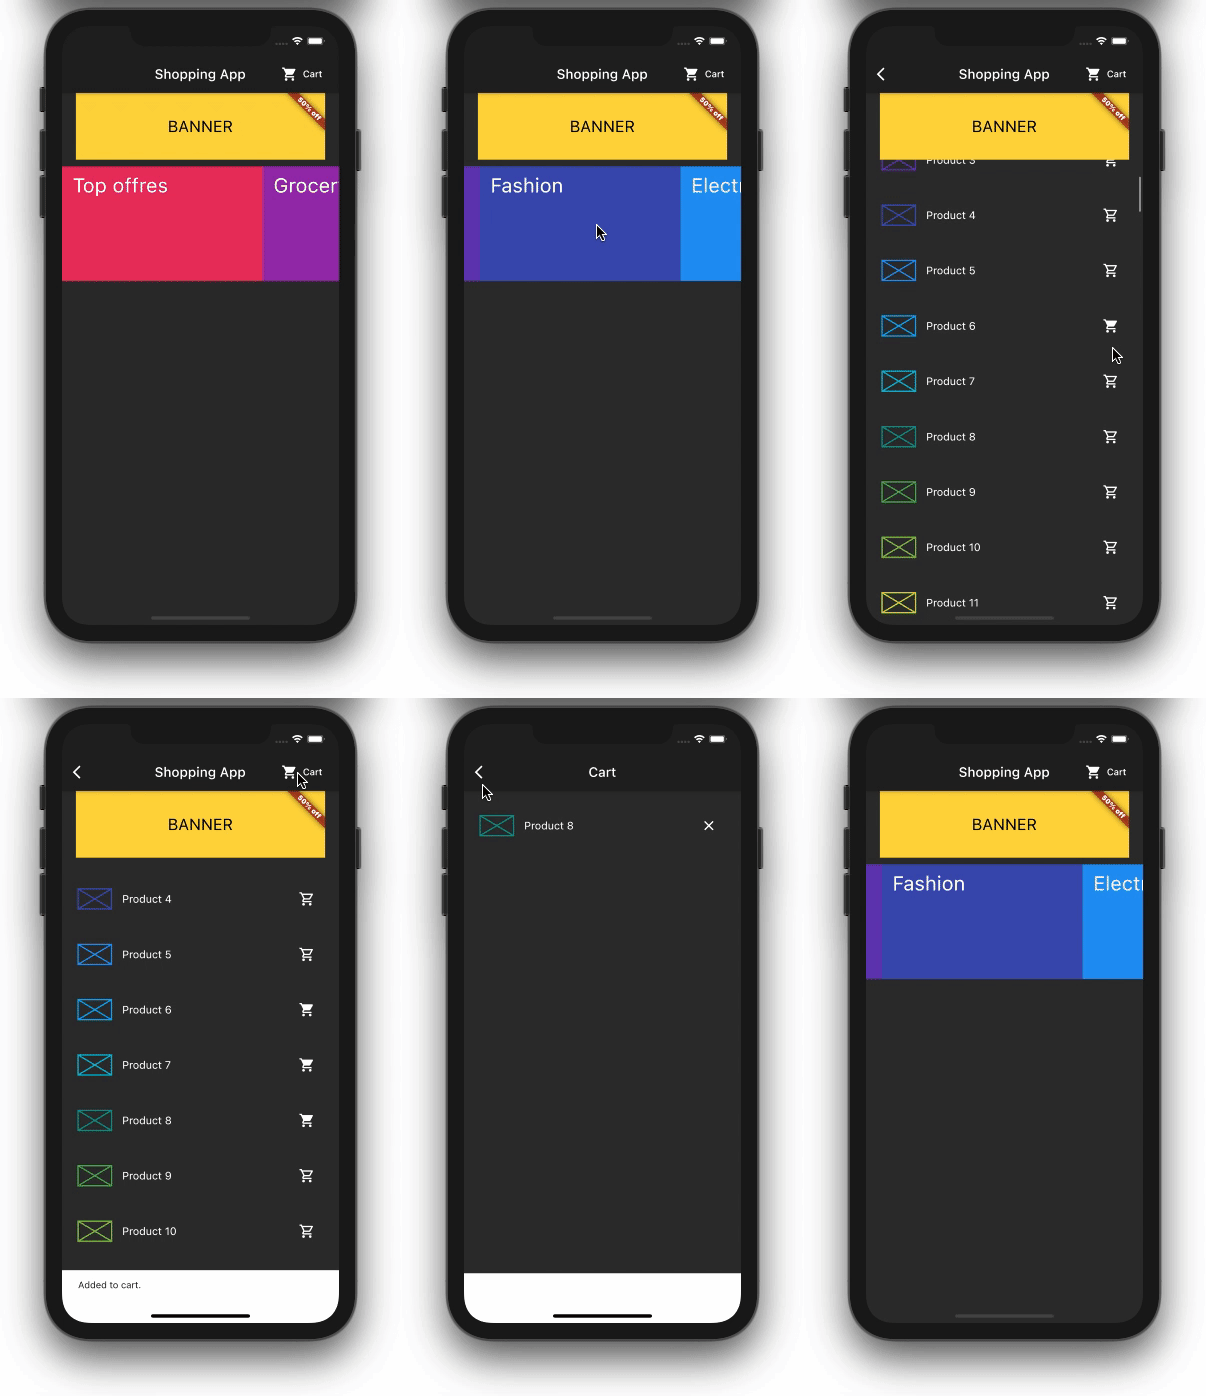
We’ll build an example Flutter app that shows the list of shopping categories. Clicking a category opens a list of available products. Users can add and remove products from the cart. We’ll target this simple app to ship to the web with the same code.
The finished product will look like this:
If you want to convert a Flutter mobile app to a web app, the first step is to create a web directory:
flutter create .
The above command should create the web directory at the root of the project beside the Android and iOS folders.
Now it’s time to run the same app on the web:
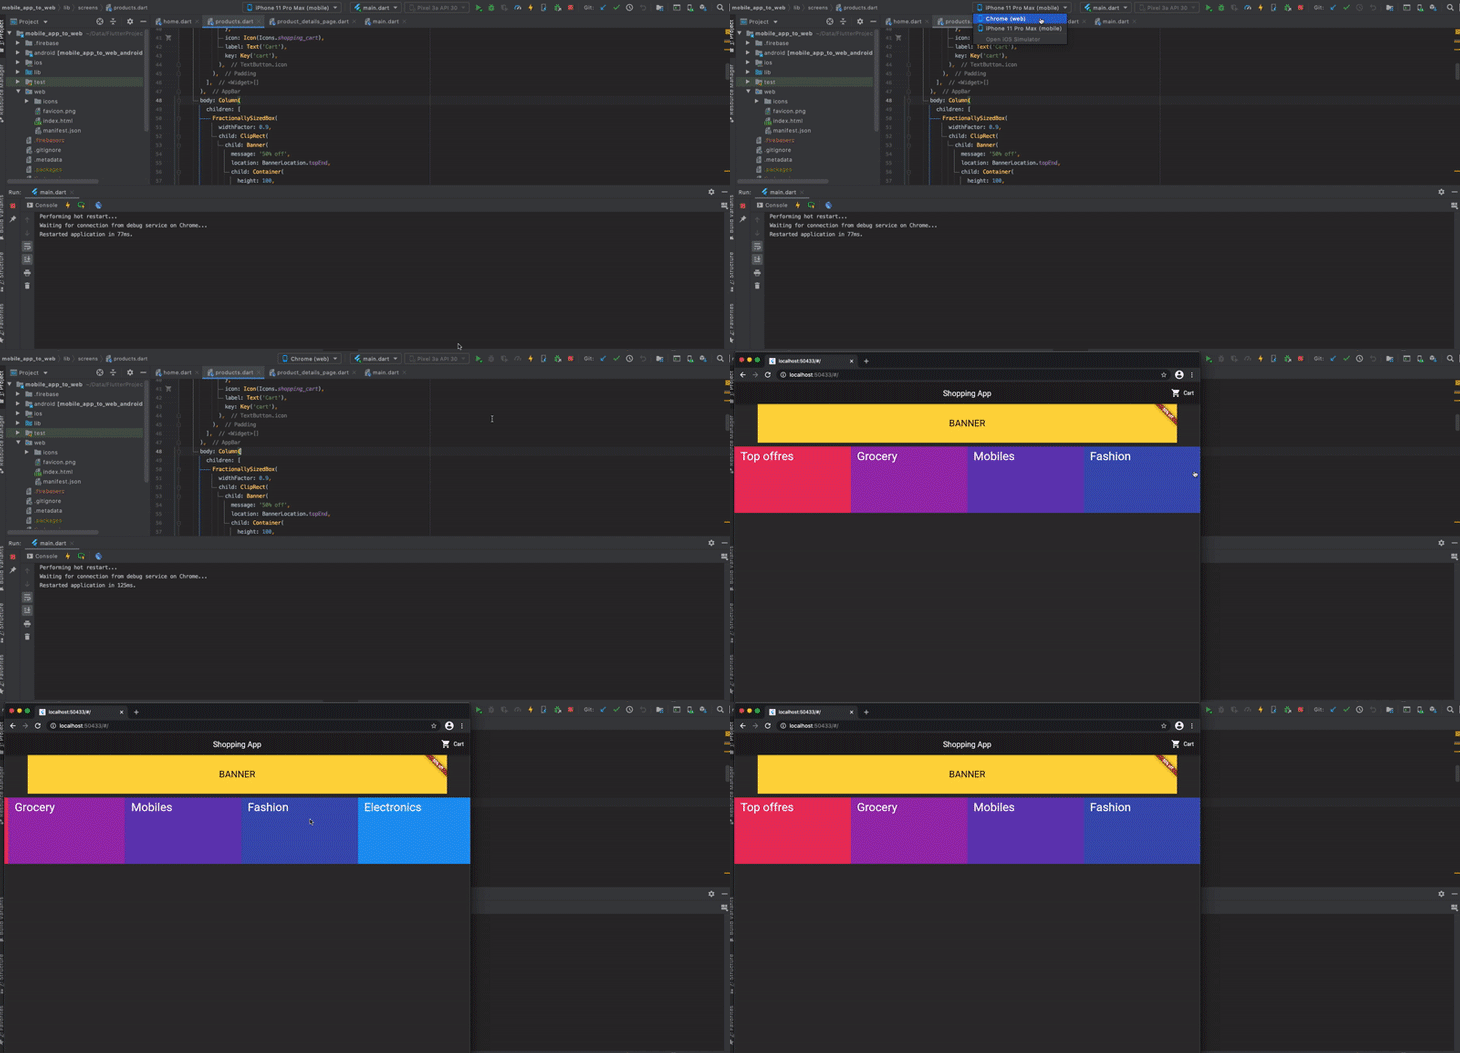
To run an app in the browser, select Chrome if you’re using a Mac or Linux system or Edge if you’re on Windows. Then, hit the Run button.
Amazing! Now our Flutter app, which was used to target mobile, is running on the web. But just because it’s running, that doesn’t mean it’ll work perfectly as it does on mobile. Let’s see what other steps we need to take to make the web version of the app function seamlessly.
This is a very important step. Before we go any further, we need to make sure there is a web version available for all the packages and plugins powering the mobile app.
To check whether a web version of a given package is available, head to pub.dev, paste the package name in the search bar and check whether it has a web label in the search result.
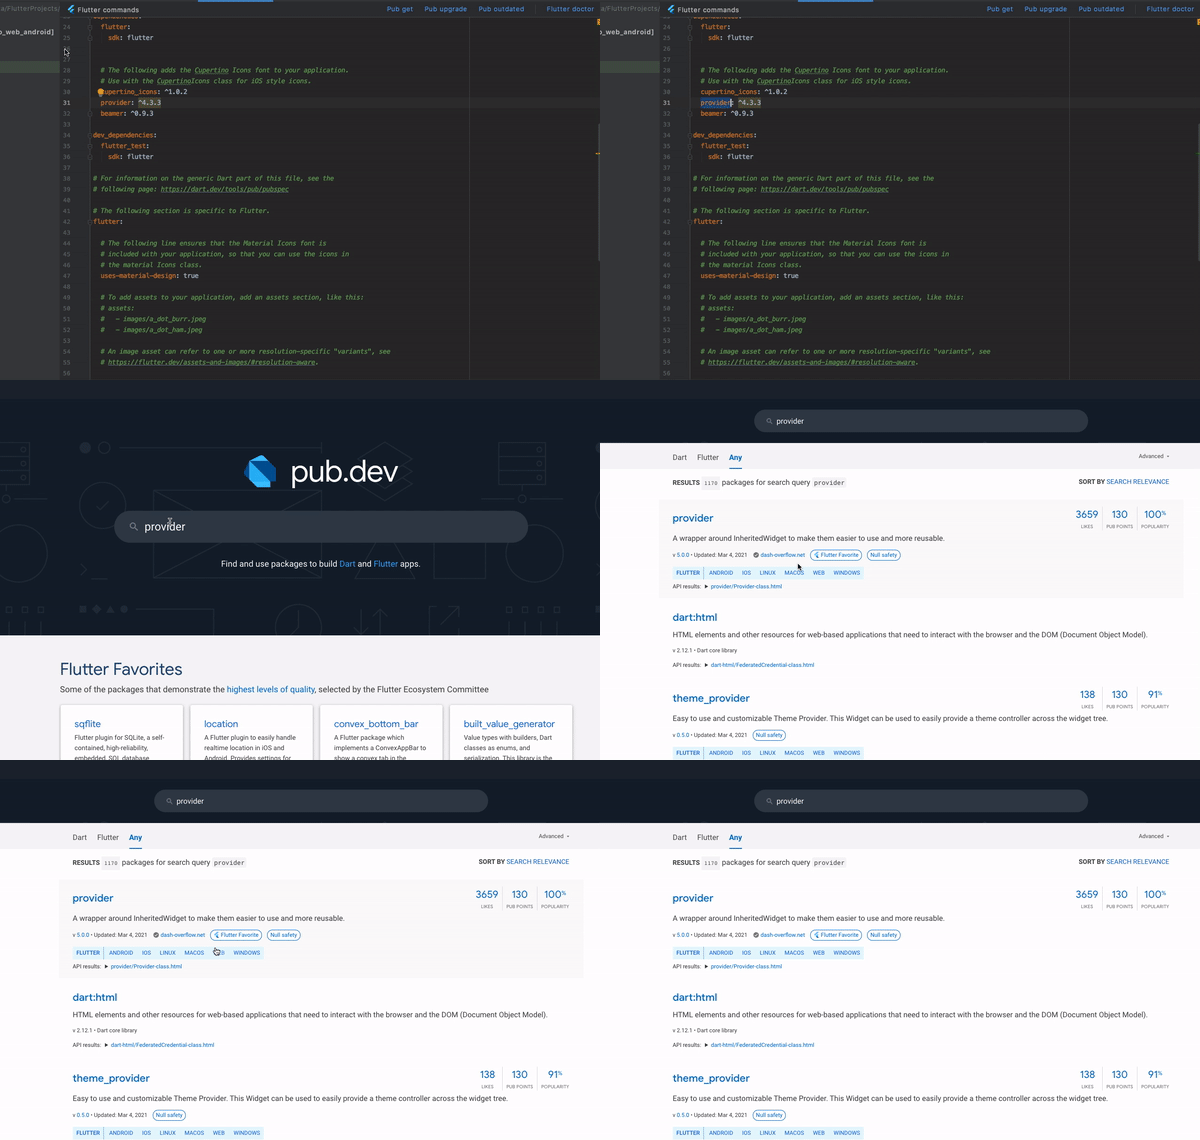
In our example Flutter app, we’re using provider for state management, which is available for the web. If any library is not available for the web, you can try to find an alternative to that library and refactor the code. If you’re inclined to take matters into your own hands, you can also contribute to the library and introduce support for the web yourself.
Web browsers have a lot of space. Now that our shopping app is going to run on web browsers as well, we need to rethink how it will look when the UI is rendered in browsers. The app should be able to respect varying screen sizes and provide different UI/UX for a rich experience.
Let’s see what the shopping app looks like without any responsive UI:
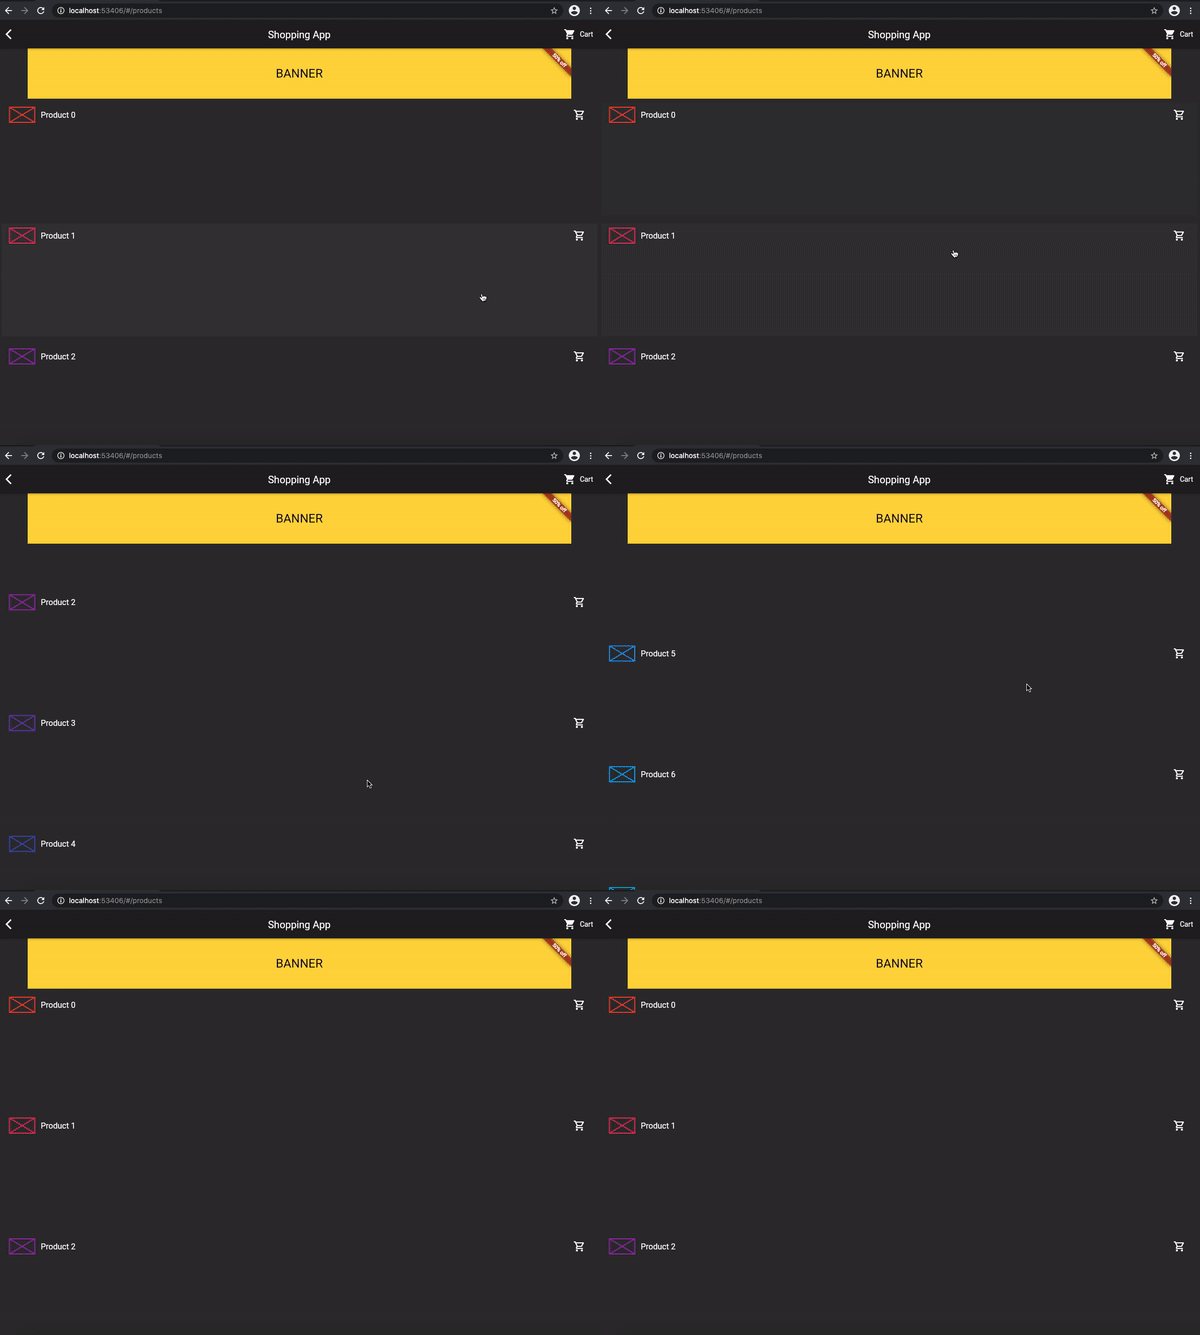
It just looks like the mobile UI on a larger screen. There is an unsightly gap between product name and cart icon, which makes for a poor user experience. Let’s see how we can accommodate this large gap and develop a responsive UI:
//Before
GridView.builder(
  itemCount: 100,
  itemBuilder: (context, index) => ItemTile(index),
  gridDelegate: SliverGridDelegateWithFixedCrossAxisCount(
    crossAxisCount: 1,
    childAspectRatio: 5,
  ),
)
//After
LayoutBuilder(builder: (context, constraints) {
  return GridView.builder(
    itemCount: 100,
    itemBuilder: (context, index) => ItemTile(index),
    gridDelegate: SliverGridDelegateWithFixedCrossAxisCount(
      crossAxisCount: constraints.maxWidth > 700 ? 4 : 1,
      childAspectRatio: 5,
    ),
  );
})
The LayoutBuilder widget’x builder function is called whenever the parent widget passes different layout constraints. That means whenever the screen resolution changes, it provides the constraints, which determine the width and provide various UI accordingly.
For our shopping app, if the current width is greater than 700, we’ll render 4 columns in GridView.builder. The result will look like this:
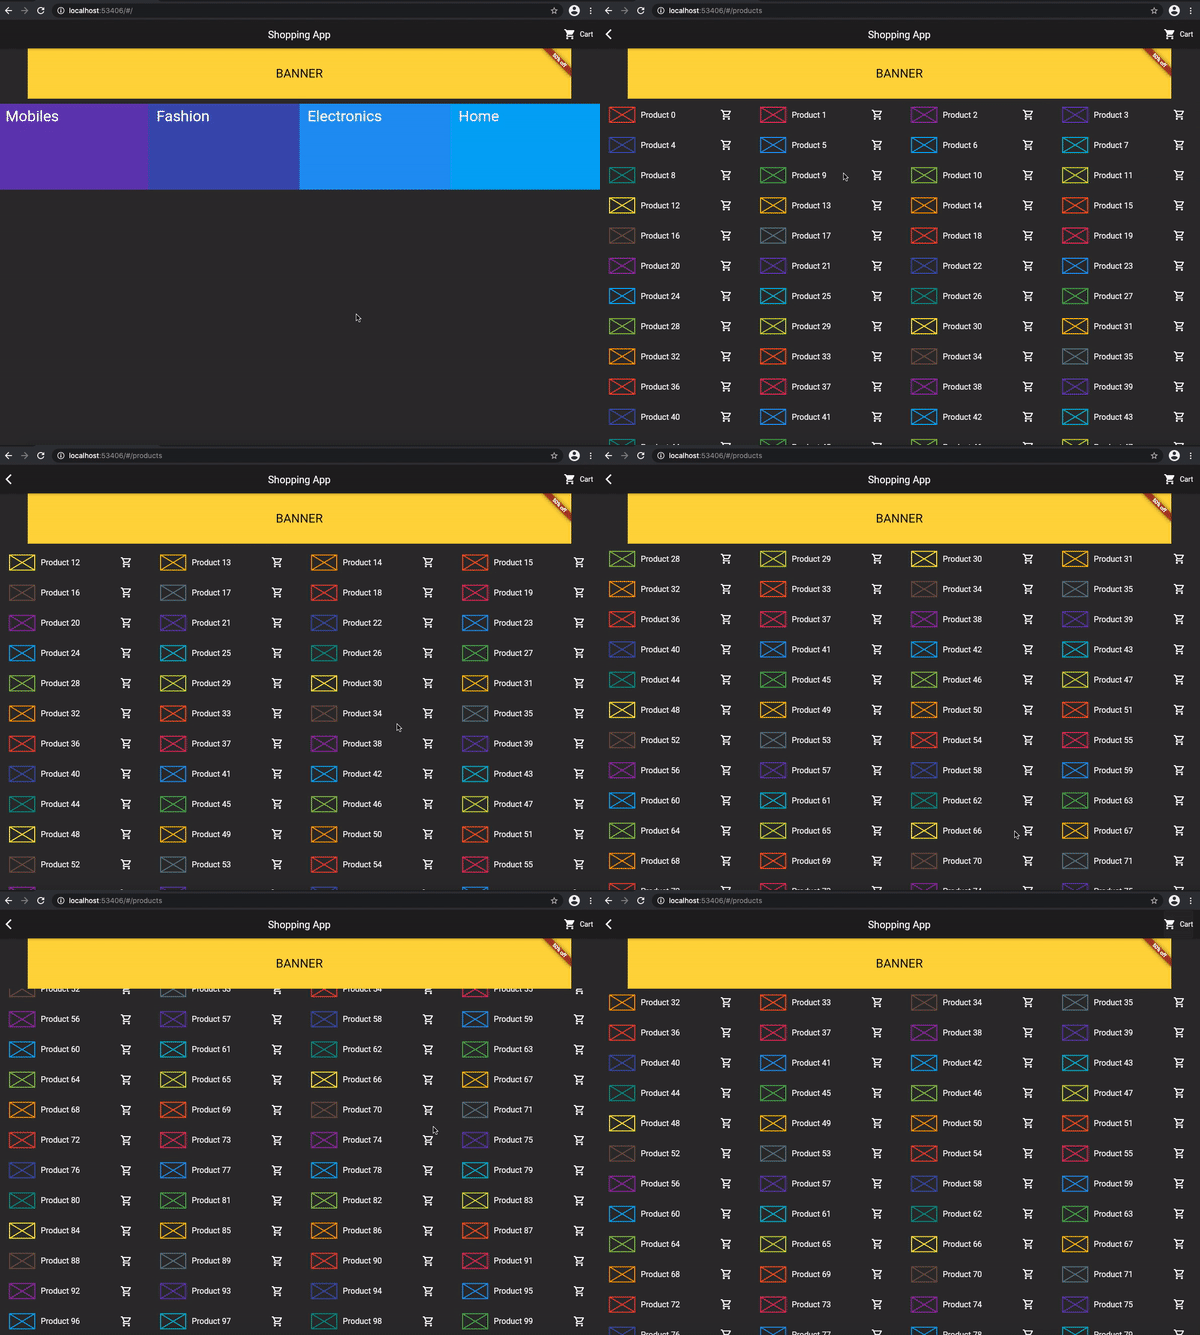
The main difference between the mobile and web versions of our app is the way users navigate inside the app.
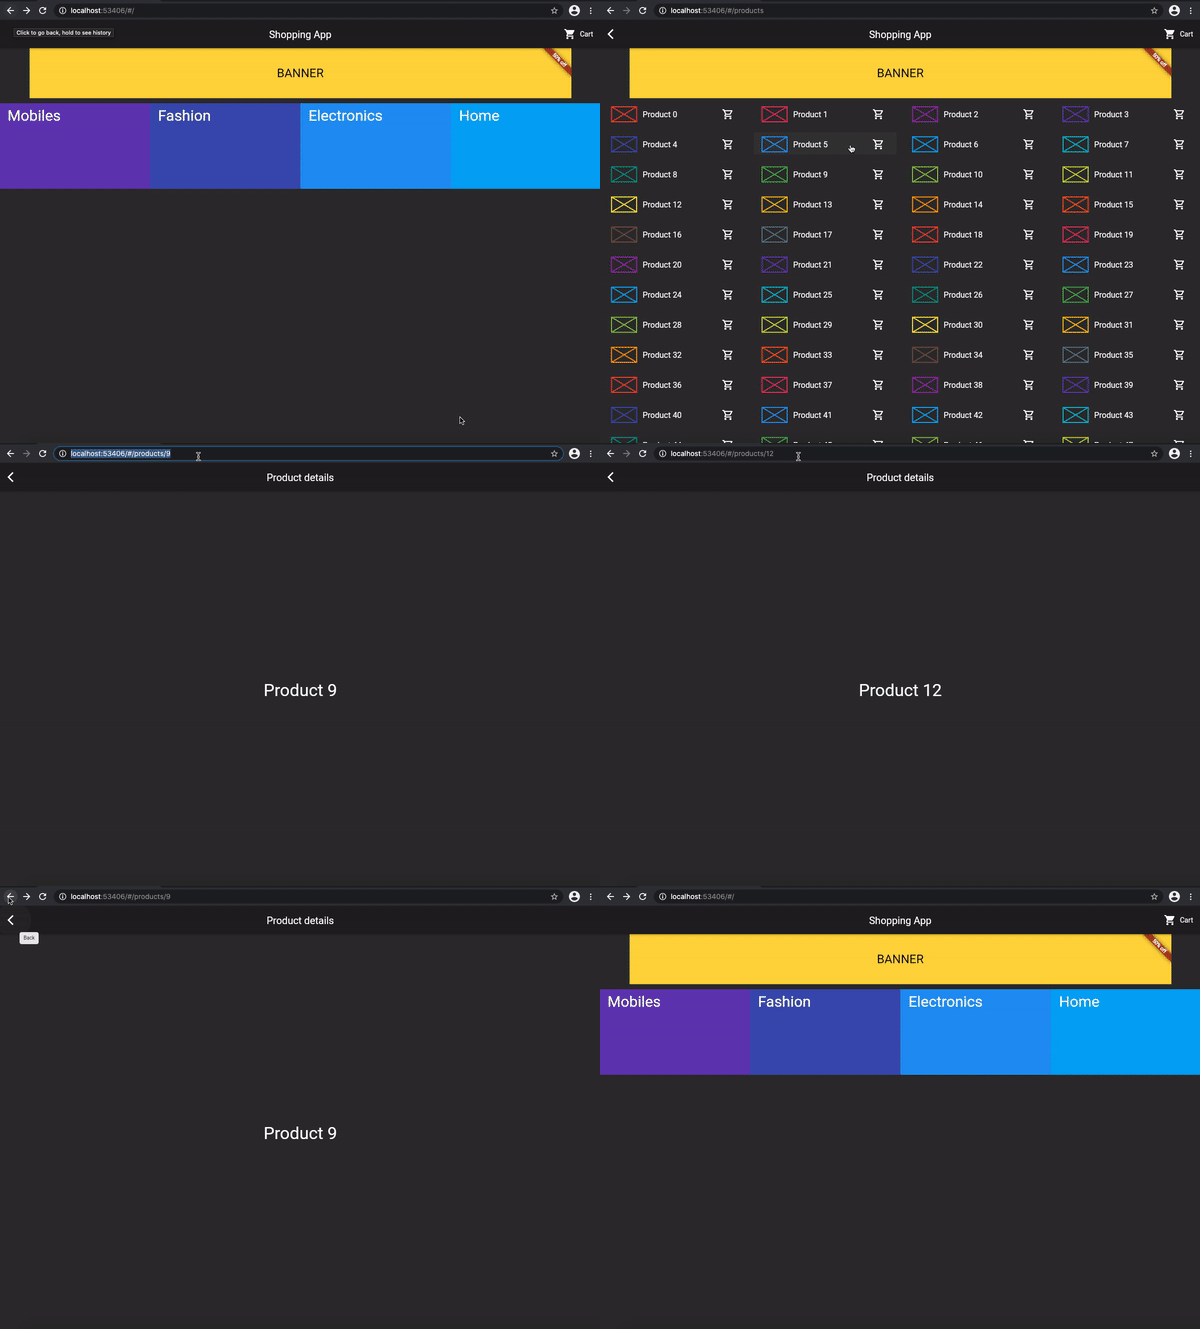
The mobile app has some fixed flow, which means that to open any screen, the user has to follow a predefined path. For example, to open the product details page, the user has to first open the list of products. But when it runs on the web, the user can directly jump to the product details page by modifying the URL. Apart from navigating inside the app, the user has the ability to navigate through the address bar in the browser.
So how do we handle this for our shopping app? We can use the beamer package for this purpose. beamer uses the power of the Navigator 2.0 API and implements all the underlying logic for you.
class HomeLocation extends BeamLocation {
  @override
  List<String> get pathBlueprints => ['/'];

  @override
  List<BeamPage> pagesBuilder(BuildContext context) => [
        BeamPage(
          key: ValueKey('home'),
          child: HomePage(),
        ),
      ];
}
The above code simply opens the HomePage() whenever the app starts.
class ProductsLocation extends BeamLocation {
  @override
  List<String> get pathBlueprints => ['/products/:productId'];

  @override
  List<BeamPage> pagesBuilder(BuildContext context) => [
        ...HomeLocation().pagesBuilder(context),
        if (pathSegments.contains('products'))
          BeamPage(
            key: ValueKey('products-${queryParameters['title'] ?? ''}'),
            child: ProductsPage(),
          ),
        if (pathParameters.containsKey('productId'))
          BeamPage(
            key: ValueKey('product-${pathParameters['productId']}'),
            child: ProductDetailsPage(
              productId: pathParameters['productId'],
            ),
          ),
      ];
}
If the user tries /products, the listing of all products will open. And if the link has a product ID —something like /products/2 — it will open the product details page for the given product ID:
Now that the app is running perfectly fine in the web browser, we should enable some browser- or desktop-specific interactions to provide a much better experience.
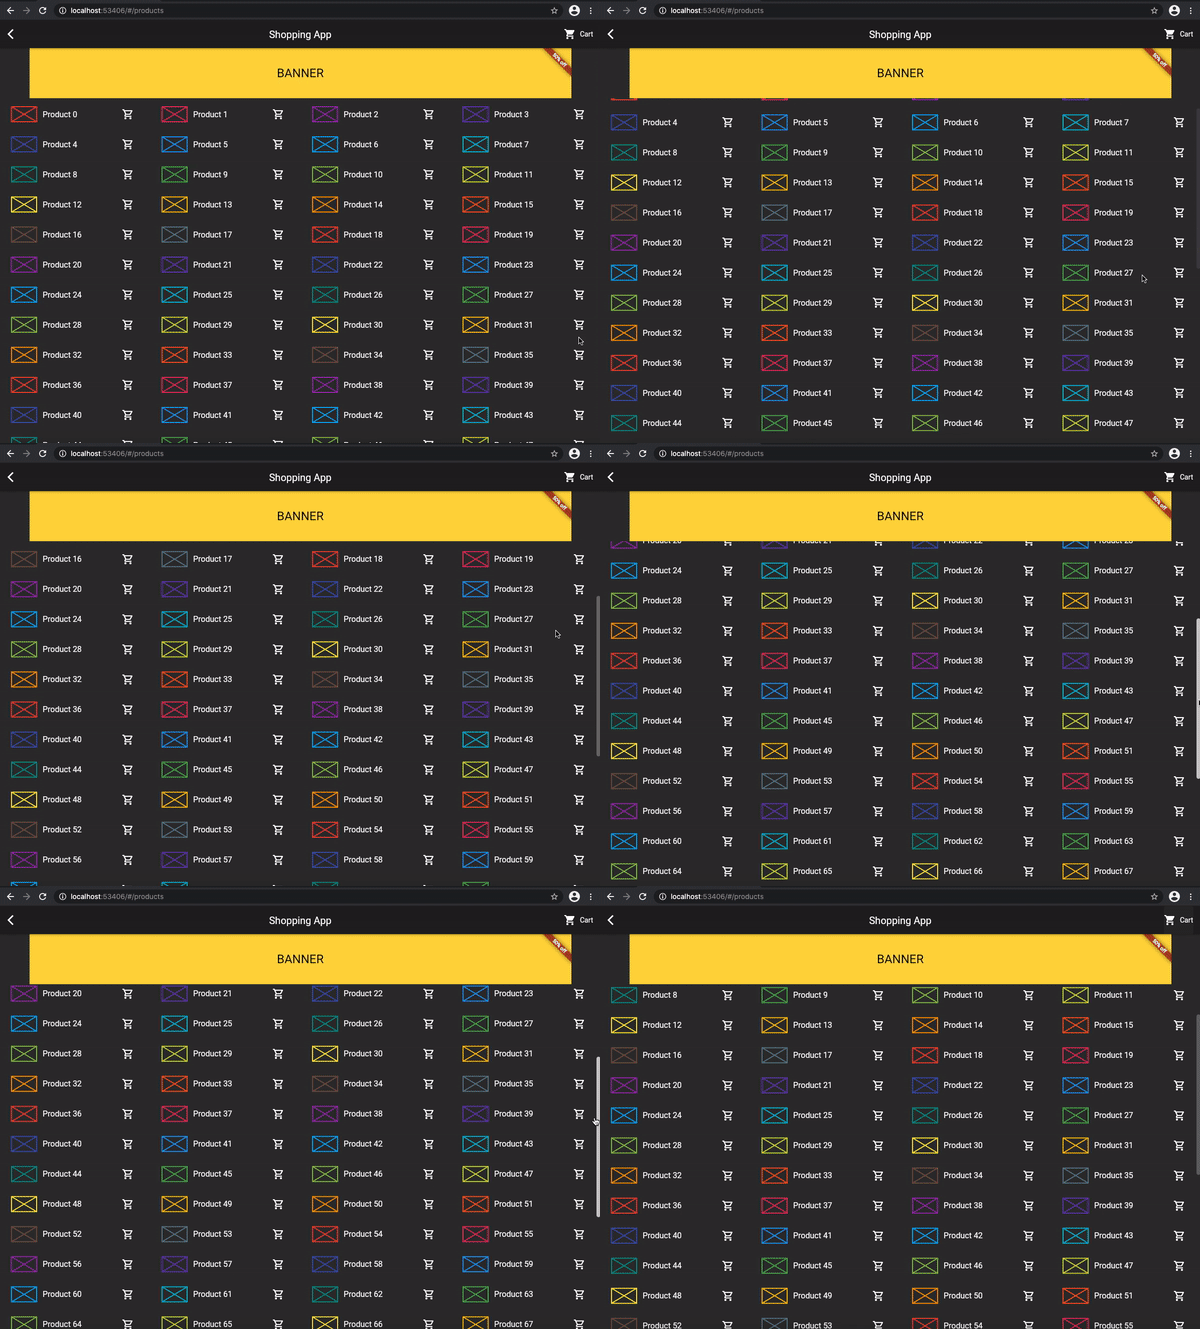
ScrollBar
Wrapping the entire product listing inside Scrollbar will show the scrollbar beside the product list so users can get an idea of the scroll position.
LayoutBuilder(builder: (context, constraints) {
  return Scrollbar(
    child: GridView.builder(
      itemCount: 100,
      itemBuilder: (context, index) => ItemTile(index),
      gridDelegate: SliverGridDelegateWithFixedCrossAxisCount(
        crossAxisCount: constraints.maxWidth > 700 ? 4 : 1,
        childAspectRatio: 5,
      ),
    ),
  );
})
Mouse
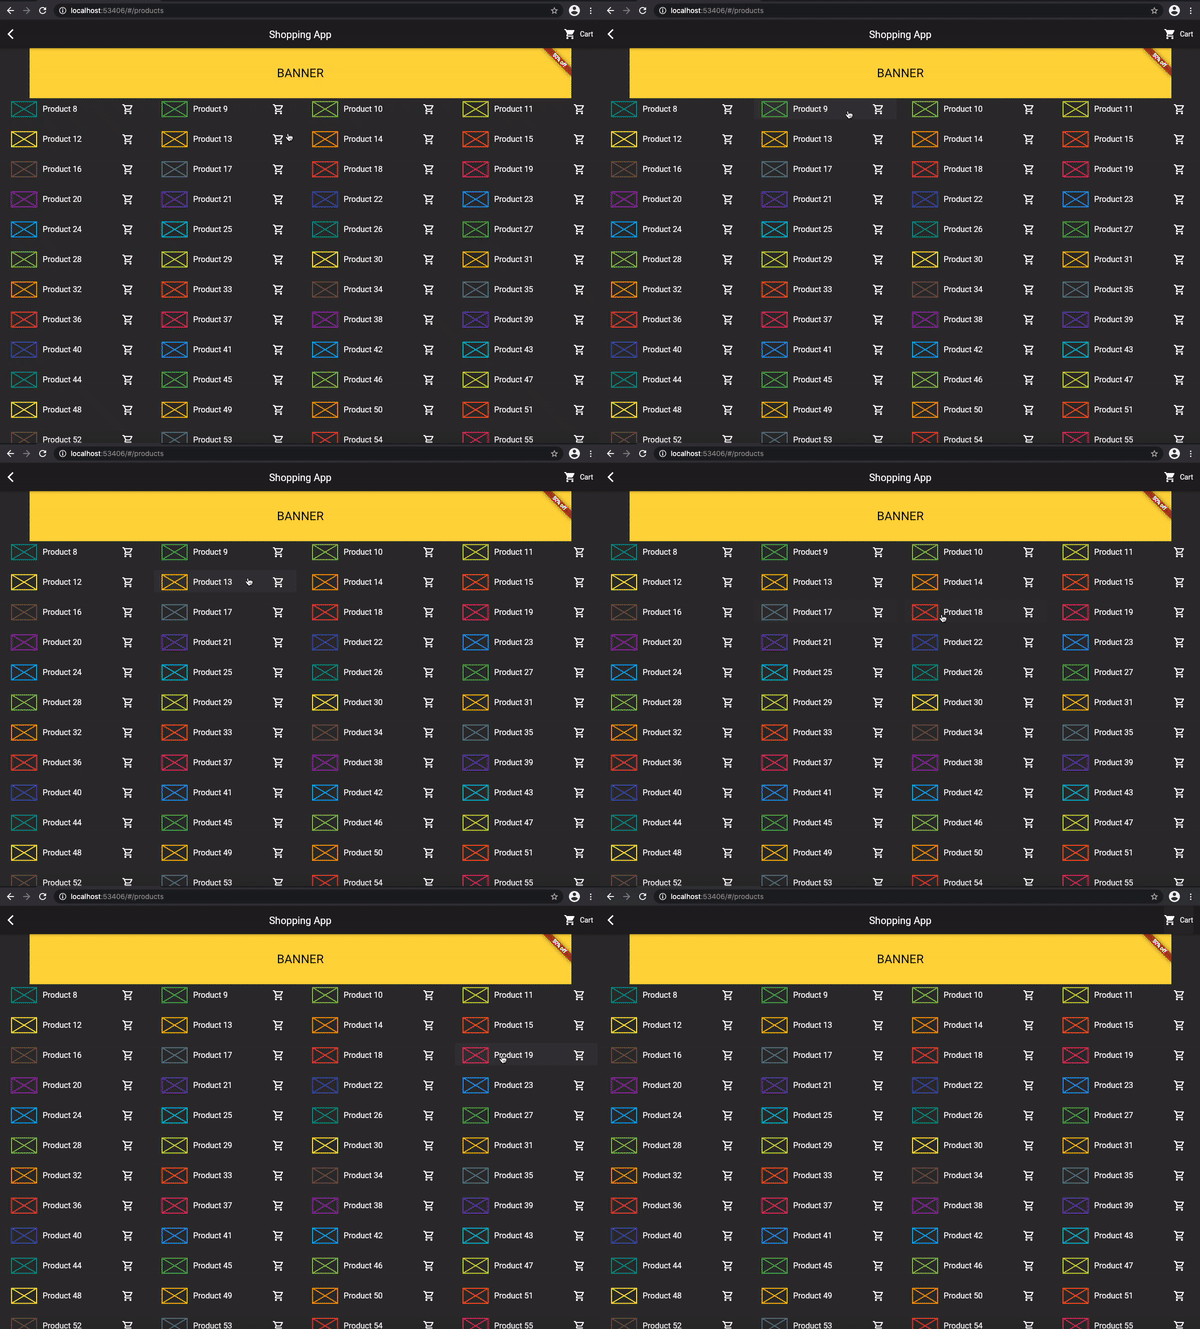
Wrapping the product list tile inside MouseRegion changes the cursor when you hover over the product.
MouseRegion(
  cursor: SystemMouseCursors.text,
  child: ListTile(
    ...
  ),
)
Keyboard shortcut
Keyboard shortcuts aren’t very useful in a shopping app. But for the sake of demonstrating how they work, let’s make it so that pressing the ALT key places a product in the user’s cart.
Shortcuts(
  shortcuts: <LogicalKeySet, Intent>{
    LogicalKeySet(LogicalKeyboardKey.alt): const AddProduct(),
  },
  child: Actions(
    actions: <Type, Action<Intent>>{
      AddProduct: CallbackAction<AddProduct>(
          onInvoke: (AddProduct intent) => setState(() {
                addRemoveProduct(cartList, context);
              })),
    },
    child: Focus(
      autofocus: true,
      child: MouseRegion(
        cursor: SystemMouseCursors.text,
        child: ListTile(
          ...
        ),
      ),
    ),
  ),
)
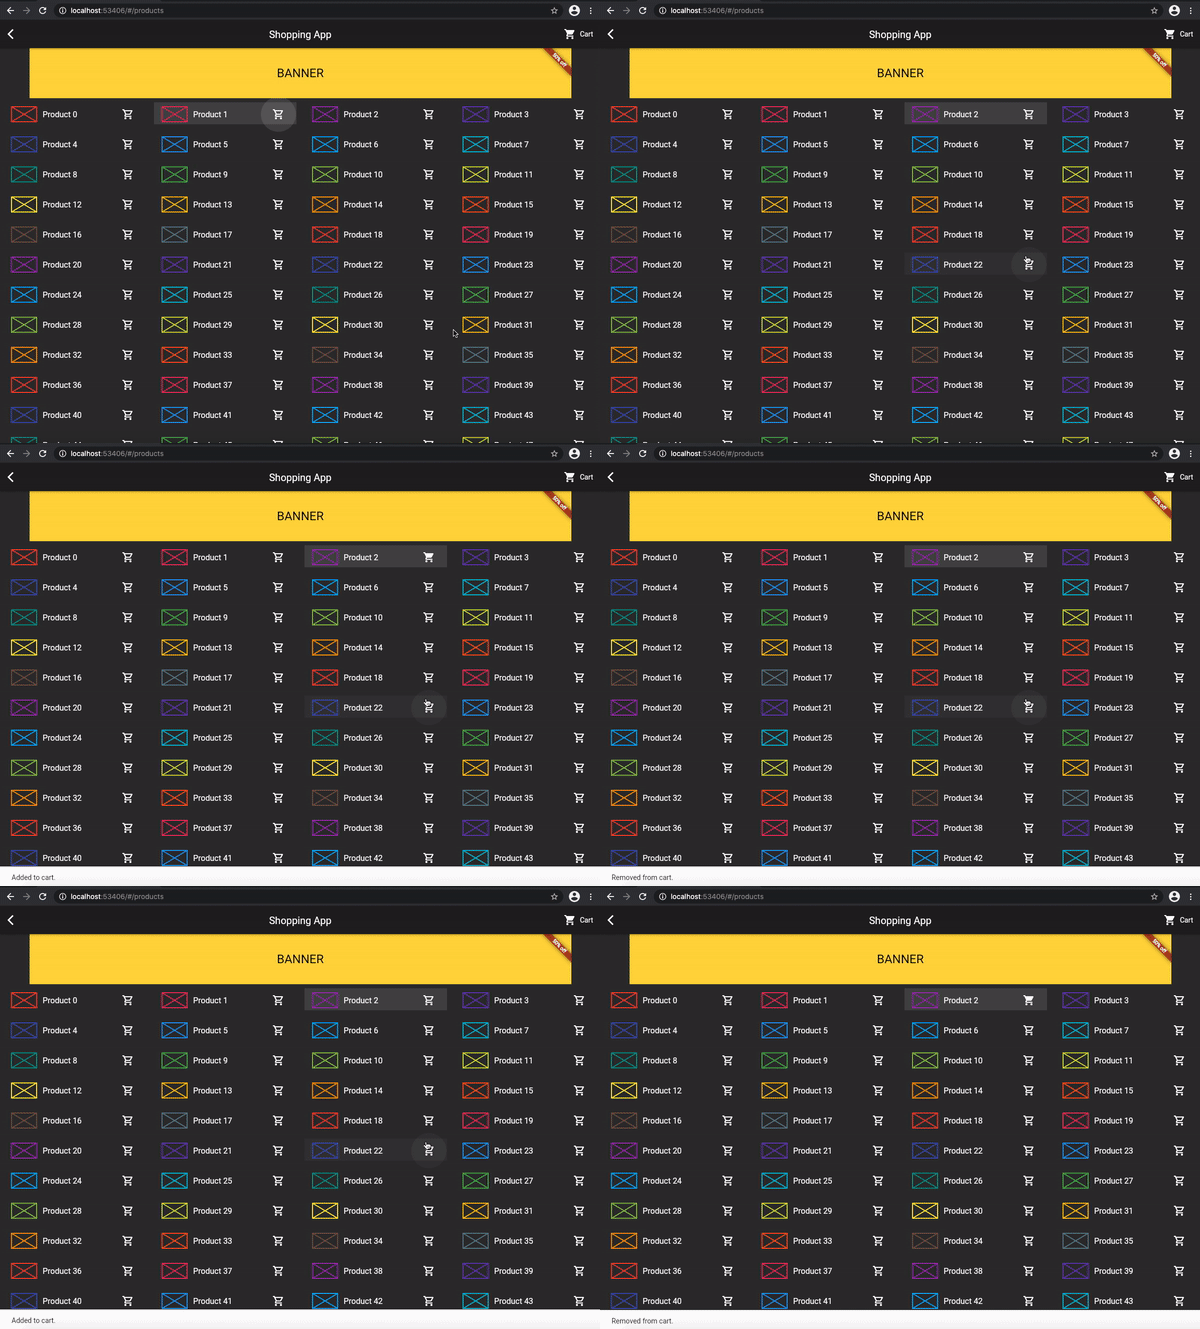
Now we’re ready to ship our newly converted shopping app using the Firebase Hosting service.
Check the official Firebase Hosting docs for detailed hosting instructions. Below is a quick overview of how to deploy your Flutter app with Firebase Hosting.
First, initialize Firebase Hosting for the project:
firebase init hosting
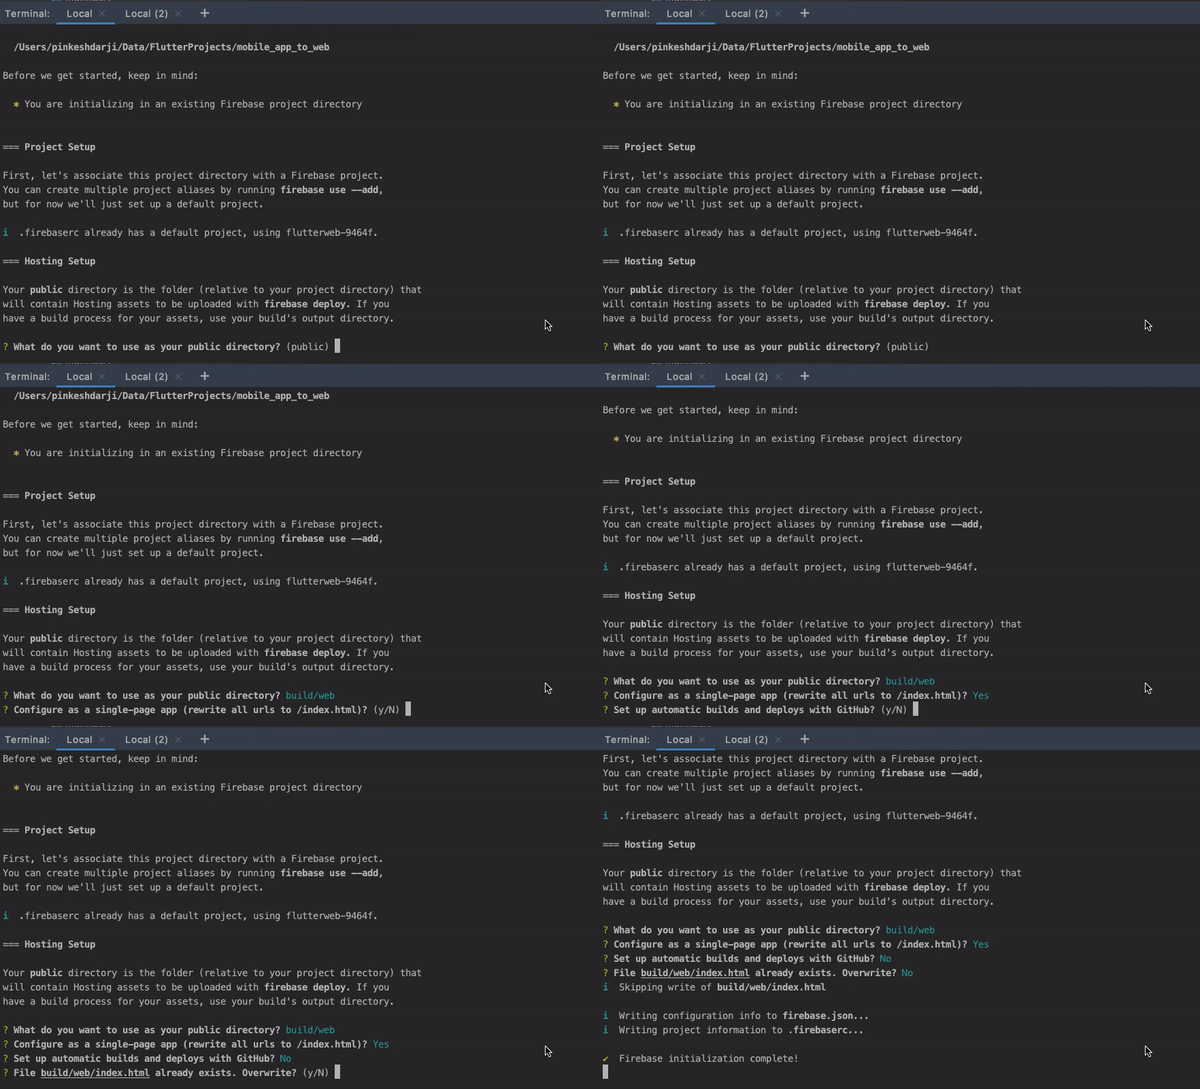
Next, deploy your app using the following command:
firebase deploy --only hosting
You can check out the web version of our Flutter mobile app here. The full code used for this example is available on GitHub.
LogRocket is a frontend application monitoring solution that lets you replay problems as if they happened in your own browser. Instead of guessing why errors happen, or asking users for screenshots and log dumps, LogRocket lets you replay the session to quickly understand what went wrong. It works perfectly with any app, regardless of framework, and has plugins to log additional context from Redux, Vuex, and @ngrx/store.
In addition to logging Redux actions and state, LogRocket records console logs, JavaScript errors, stacktraces, network requests/responses with headers + bodies, browser metadata, and custom logs. It also instruments the DOM to record the HTML and CSS on the page, recreating pixel-perfect videos of even the most complex single-page apps.
Would you be interested in joining LogRocket's developer community?
Join LogRocket’s Content Advisory Board. You’ll help inform the type of content we create and get access to exclusive meetups, social accreditation, and swag.
Sign up now
This guide explores how to use Anthropic’s Claude 4 models, including Opus 4 and Sonnet 4, to build AI-powered applications.

Which AI frontend dev tool reigns supreme in July 2025? Check out our power rankings and use our interactive comparison tool to find out.

Learn how OpenAPI can automate API client generation to save time, reduce bugs, and streamline how your frontend app talks to backend APIs.

Discover how the Interface Segregation Principle (ISP) keeps your code lean, modular, and maintainable using real-world analogies and practical examples.