Next.js is a popular React framework that fills in the missing pieces of a typical React library to make it a proficient full-stack framework. In this post, we will use a server-side rendered (SSR) Next.js example and deploy it on Google Cloud Run at the click of a button.
Next.js is a framework built on top of the ultra-popular React library that allows developers to easily create websites with a full-stack framework. It is dubbed “the React framework for production” and has a great developer experience.
Next.js provides Typescript support, the option to choose between Static Site Generation (SSG) or Server Side Rendering (SSR), is SEO-friendly, and provides great image optimization out of the box. These features make it stand out as one of the most beloved React frameworks in the frontend development community.
The main obvious benefit of Server Side Rendering (SSR) is that each page has a static URL and, because the content is pre-generated on the server, it is SEO friendly. Server-side rendering is very useful if the data in your applications changes frequently or is generated dynamically, depending on permissions or which user is logged in.
Another important benefit of Server Side Rendering is that the content is always dynamic, because the HTML is rendered on each request. For this tutorial, it is important to keep this in mind, because we will be hosting a fullstack example of Next.js (which has a mock API) and the response of the API is rendered on the frontend.
This takes us to one of the best options to host your APIs or any other web applications: Google Cloud Run.
Google Cloud Run is arguably the best fully-managed service to run containers in a true serverless fashion. We can deploy and scale to hundreds of containers without needing to write a single line of YAML or understand Kubernetes and Knative.
We can go from nothing to a working URL with serverless containers using Google Cloud Run, and best of all, it’s free.
Next up we will run the API example of Next.js, and Dockerize it.
Before we begin diving into the code, make sure you have these prerequisites:
Now let’s look at some code samples.
Next.js has 270+ examples in its examples folder in the Github repository. We are going to use this API-routes example that has APIs to list Star Wars characters and their various features. Then we will Dockerize so that it will be easier to deploy to Google Cloud Run. Let’s get started!
To get the Next.js API routes example, we will run the following:
npx create-next-app --example api-routes api-routes-app
It will take a couple of minutes to download and set up the API routes example in the api-routes-app folder.
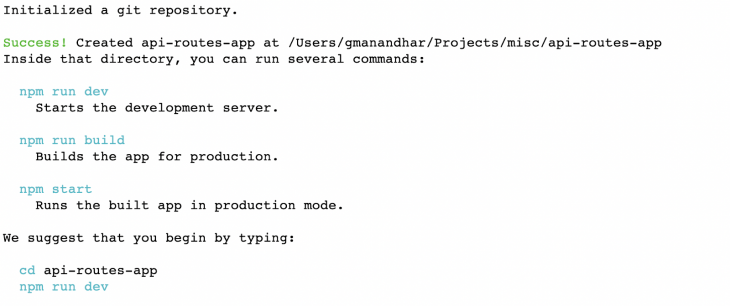
When it finished we should see something like the screenshot below:
After that we can check how it runs locally with the following:
cd api-routes-app
npm run dev
Then we can check the output on our favorite browser at http://localhost:3000, which will look something like this:
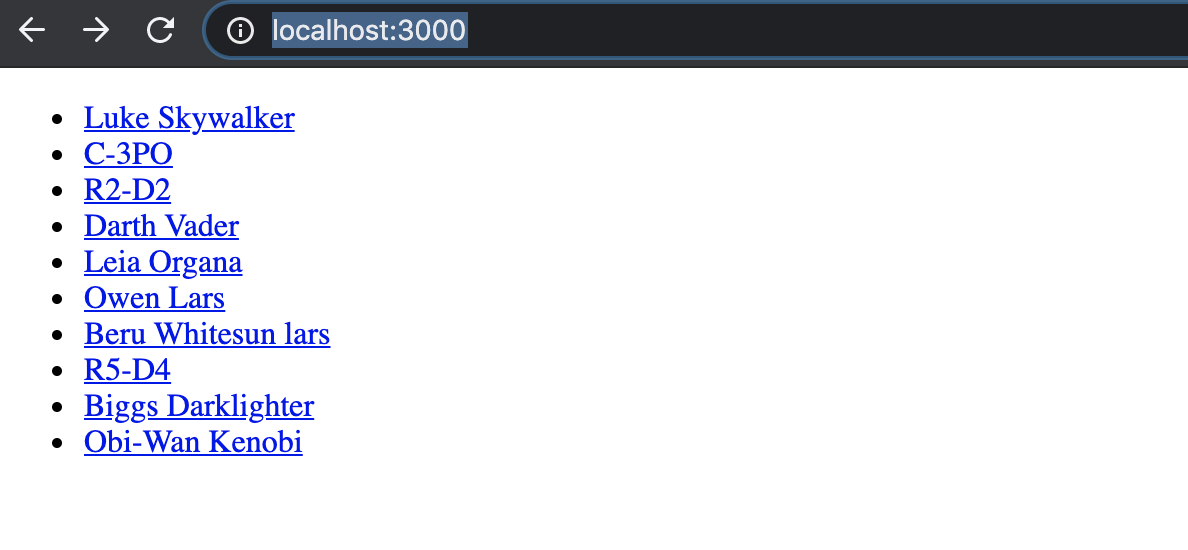
If we click one of the names, it will give certain details about that character. It runs with a simple API that can be accessed at http://localhost:3000/api/people which yields a JSON like below:

You can go ahead and read the code in the example to understand how it works.
To Dockerize this Next.js API example app we will add a new Docker file with the following content:
# Get NPM packages
FROM node:14-alpine AS dependencies
RUN apk add --no-cache libc6-compat
WORKDIR /app
COPY package.json package-lock.json ./
RUN npm ci --only=production

# Rebuild the source code only when needed
FROM node:14-alpine AS builder
WORKDIR /app
COPY . .
COPY --from=dependencies /app/node_modules ./node_modules
RUN npm run build

# Production image, copy all the files and run next
FROM node:14-alpine AS runner
WORKDIR /app

ENV NODE_ENV production

RUN addgroup -g 1001 -S nodejs
RUN adduser -S nextjs -u 1001

COPY --from=builder --chown=nextjs:nodejs /app/.next ./.next
COPY --from=builder /app/node_modules ./node_modules
COPY --from=builder /app/package.json ./package.json

USER nextjs
EXPOSE 3000

CMD ["npm", "start"]
This is a multi-stage Docker file. The first stage is a dependency that runs npm ci to get all the npm packages.
The second stage is a builder that runs npm run build to build the Next.js application.
The final stage is the runner stage where we copy the application and its dependencies from the previous builder stage and run it with NODE_ENV as production.
Consequently, we will add a Docker-compose.yml file to make it easier to build our Docker container. It will look like the code below:
version: '3'
services:
  app:
    build:
      context: ./
    volumes:
      - .:/app
    ports:
      - "3000:3000"
In this Docker-compose file we are building the application and mapping the local root of the project to /app inside the container. Then we are exposing the container’s port 3000 to local port 3000.
For a faster Docker build, we will use Docker’s BuildKit feature. To build the container with the BuildKit feature turned on we will run the following command:
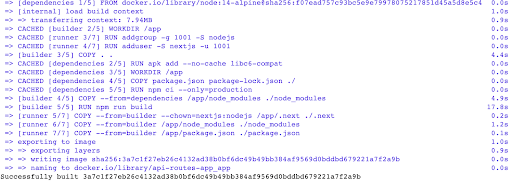
COMPOSE_DOCKER_CLI_BUILD=1 DOCKER_BUILDKIT=1 docker-compose build
It will give us an output seen in the screenshot below:
To run the app locally to test it we can run:
docker-compose up
It will show us something like the below:

Now if we go to http://localhost:3000 it will show us the same output of the list of people as we saw in the previous step.
At this point, I recommend reading more about Node.js and Docker if you are interested.
Congrats! You have successfully Dockerized a Next.js application.
To deploy the code to Google Cloud Run we will use the handy Cloud Run Button. To use this magic button we will paste the following two lines into readme.md:
## Deploy to Google Cloud Run [](https://deploy.cloud.run)
Then we will create a new app.json file on the root like below:
{
  "name": "nextjs",
  "options": {
    "allow-unauthenticated": true,
    "memory": "256Mi",
    "cpu": "1",
    "port": 3000,
    "http2": false
  }
}
By default, Cloud Run expects apps to run on port 8080, so this app.json file tells Cloud Run to listen at port 3000 in place of the default one.
In addition, it also instructs Cloud Run to open the application for public access with allow-unauthenticated set to true. Then it is directed to use 1 CPU and 256MB of memory for each container.
Finally, it tells Cloud Run to not use HTTP2 for this service.
We will need to push the code to GitHub to make it easier to deploy the application. To do that, we will create a new repository like the one seen in the screenshot below:
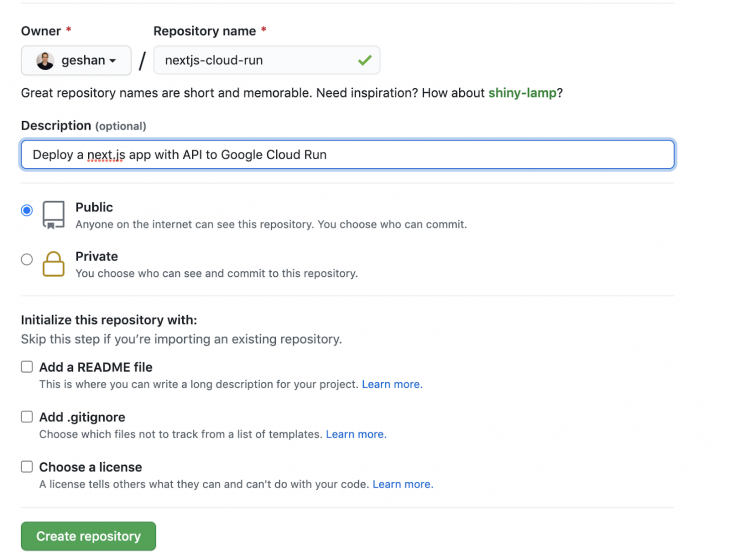
Then we will run the following commands in the root of our project:
git remote add origin [email protected]:geshan/nextjs-cloud-run.git #replace with your repo URL
git add .
git commit -m "next.js full application with cloud run config"
git push -u origin main
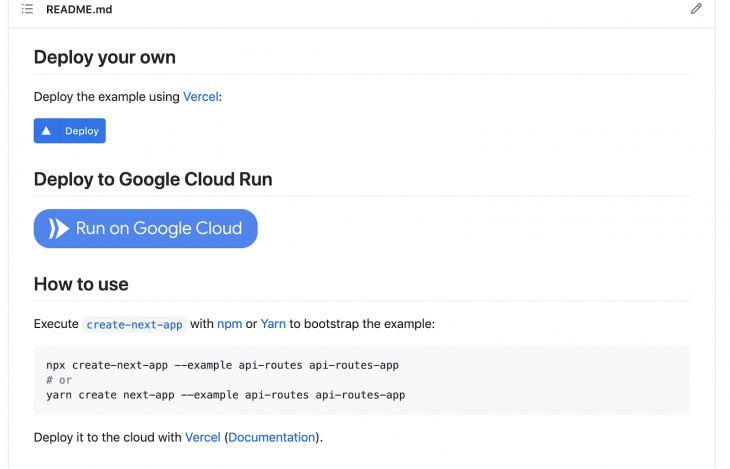
Subsequently, we will go to the repo’s root and click the big blue button that says Run on Google Cloud as seen below:
It will take us to the Google Cloud console where we will need to authorize the script to deploy our app which looks like the gif below:
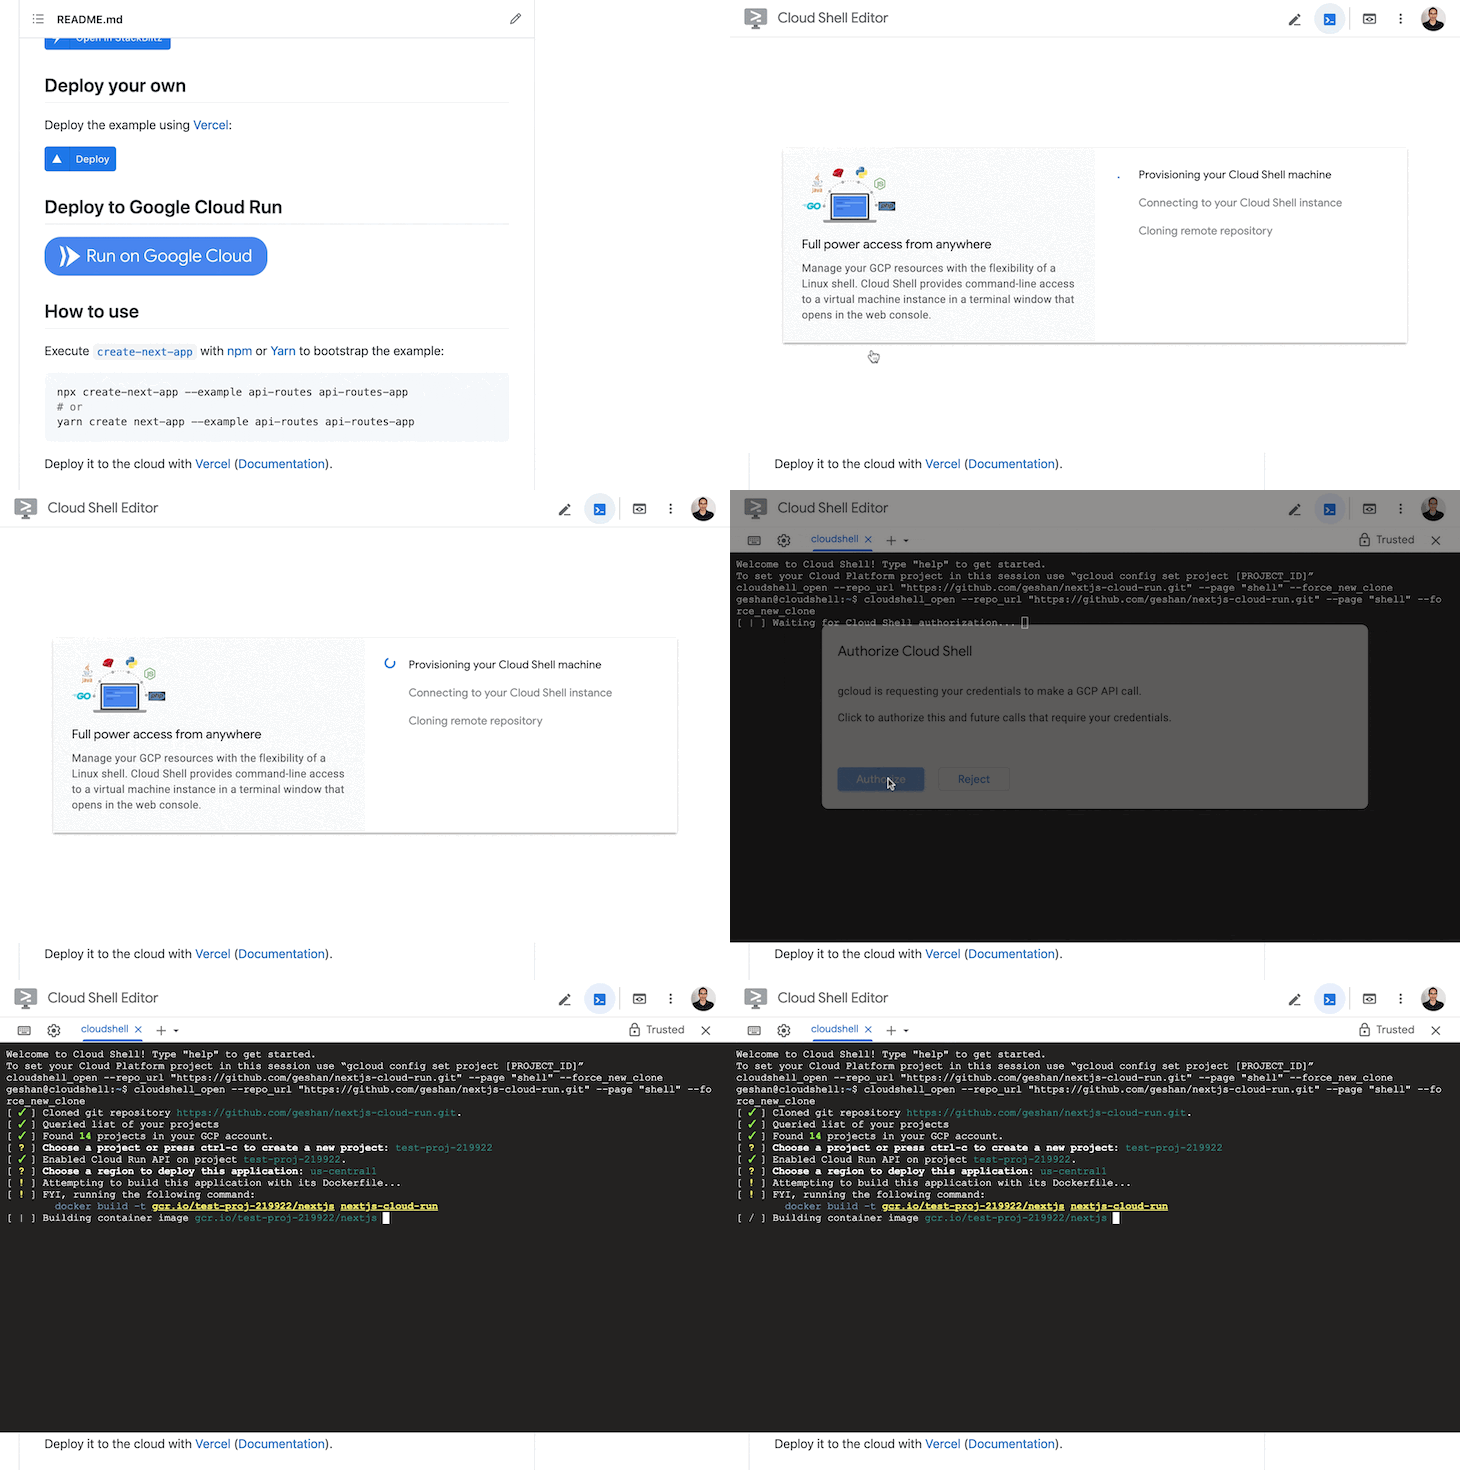
We will also need to select the project and region in the above process.
The Docker build takes a couple of minutes, but our Next.js application is deployed to Google cloud run with the click of a button.
It should look as follows when the deployment is done and we get a URL ending in run.app to our service:
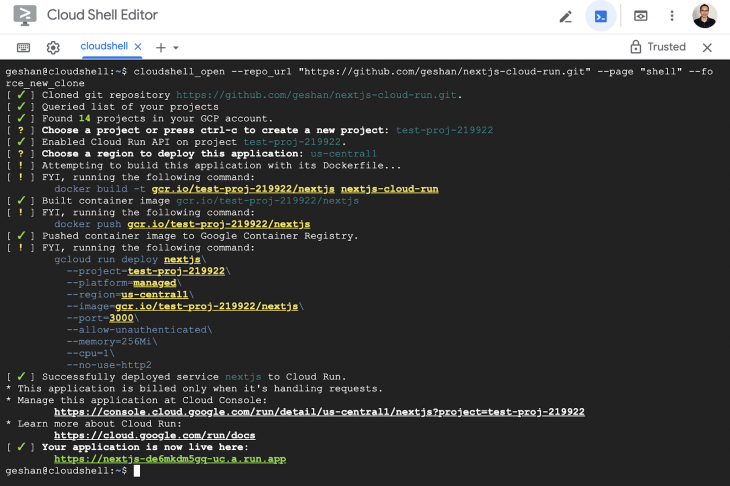
After that, if we click on the URL in green in the above image, we will see our demo Next.js app working on Google Cloud Run as seen below:
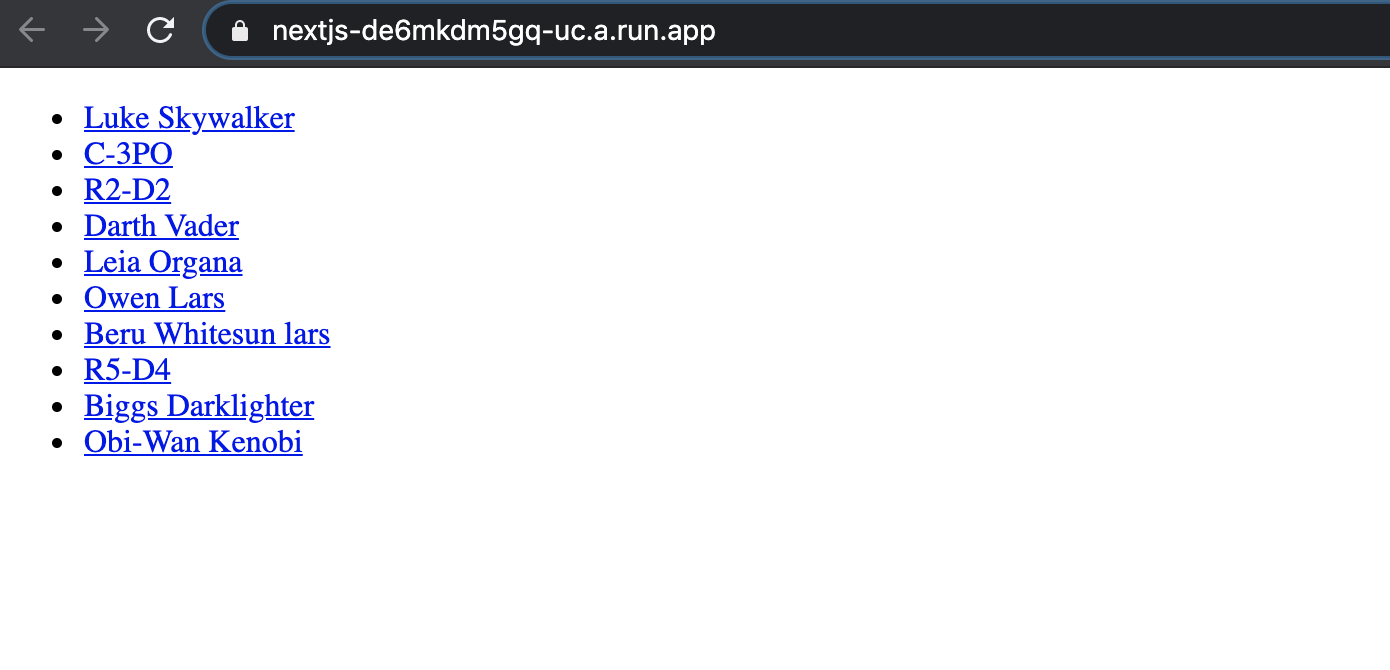
If you just want to deploy from my Github repository, you can do it as well.
Hurray! We have our Next.js example app working well on Google Cloud Run.
This is a quick and easy way to get started with Next.js on Google Cloud Run for a side project.
In the case of a team project, I recommend exploring Google Cloud Build, Google Container Registry, and how these services can be used together to create a robust CI/CD pipeline for Google Cloud Run.
You can also have a look at this cloud build YAML instruction file that has only three steps to deploy a built container to Google Cloud Run. Something similar can also be achieved from the UI if that is your preference for continuous deployment.
We have seen how to deploy a Next.js application that has a server-side rendering component on a highly scalable and optimally cost-efficient service: Google Cloud Run. Not only is Cloud Run super developer-friendly, but it is also modern and serverless. Enjoy running Next.js on serverless containers!
Debugging Next applications can be difficult, especially when users experience issues that are difficult to reproduce. If you’re interested in monitoring and tracking state, automatically surfacing JavaScript errors, and tracking slow network requests and component load time, try LogRocket.
LogRocket captures console logs, errors, network requests, and pixel-perfect DOM recordings from user sessions and lets you replay them as users saw it, eliminating guesswork around why bugs happen — compatible with all frameworks.
LogRocket's Galileo AI watches sessions for you, instantly identifying and explaining user struggles with automated monitoring of your entire product experience.
The LogRocket Redux middleware package adds an extra layer of visibility into your user sessions. LogRocket logs all actions and state from your Redux stores.


Modernize how you debug your Next.js apps — start monitoring for free.
Hey there, want to help make our blog better?
Join LogRocket’s Content Advisory Board. You’ll help inform the type of content we create and get access to exclusive meetups, social accreditation, and swag.
Sign up now
Learn how to integrate MediaPipe’s Tasks API into a React app for fast, in-browser object detection using your webcam.

Integrating AI into modern frontend apps can be messy. This tutorial shows how the Vercel AI SDK simplifies it all, with streaming, multimodal input, and generative UI.

Interviewing for a software engineering role? Hear from a senior dev leader on what he looks for in candidates, and how to prepare yourself.

Set up real-time video streaming in Next.js using HLS.js and alternatives, exploring integration, adaptive streaming, and token-based authentication.
One Reply to "How to deploy Next.js on Google Cloud Run"
thanks for this. I’m curious why you don’t have to deploy 2 containers; 1 for the client and 1 for the server?