One of the most important features of React Native is that it can generate apps for both Android and iOS. In this tutorial, we’ll focus on Android and demonstrate how to generate .apk files to successfully deploy on Google Play Store.

Here’s what we’ll cover:
Google Play Store is the official search engine and digital distribution platform for Android apps. For security and encryption, it is mandatory to digitally sign the apps before publishing.
To sign an app, you need a hash key, which is called release key. This key is used to sign all the future updates, so it’s important to keep it safe; otherwise, you may lose access to your app.
Google provides an option to let it manage your signing keys with a feature called Play App Signing, which enables you to
Google Play Store also requires another key to upload an Android app known as an upload key.
While the release key can be generated and managed by Google, the upload key is generated by you and used to sign all the updates. If you don’t want Google to generate a release key for you, then you may use upload key as release key. This is not recommended because it’s more secure to have different keys.
If you happen to lose the upload key, you can generate a new one and contact Google support to reset the key.
You can generate an upload key using Java keytool.
The keytool utility is provided with Java SDK, so we need to run it from there. Check where your Java SDK is installed. By default its location is as follows:
C:\Program Files\Java\jdkx.x.x_x\
x.x.x_x represents the version number (on my PC, it is 1.8.0_152). The keytool is inside the bin folder. The first step is to migrate to this location in terminal:
cd "c:\Program Files\Java\jdk1.8.0_152\bin"
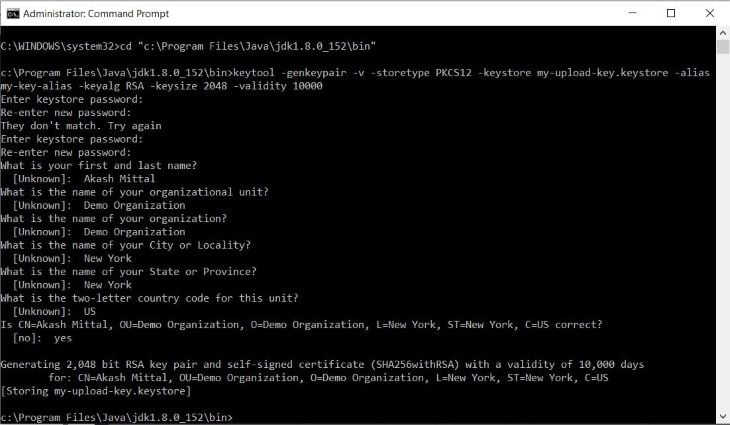
Next, run the keytool with some defined options:
keytool -genkeypair -v -storetype PKCS12 -keystore my-upload-key.keystore -alias my-key-alias -keyalg RSA -keysize 2048 -validity 10000
Let’s break down what’s going on here:
PKCS12 is an archive file format that is used to store cryptographic keys. It stands for public key cryptography standardsmy-upload-key.keystore is the name and extension of the generated file. You can put any valid name heremy-key-alias is an identity name for the key. Again, you can put any valid name here. Remember this alias because you’ll need it to sign the appRSA is a widely used cryptographic system based on private-public keys2048 is the size of the key that is to be generatedvalidity signifies the validity of a key in the number of days. In our command, we kept it at 10000When you run this keytool, it will ask you to enter a password. Remember this password because you’ll need to use it for app signing.
Apart from that, it will ask few more questions, such as your name, location, organization, etc. After answering all the questions, it will generate the keystore:
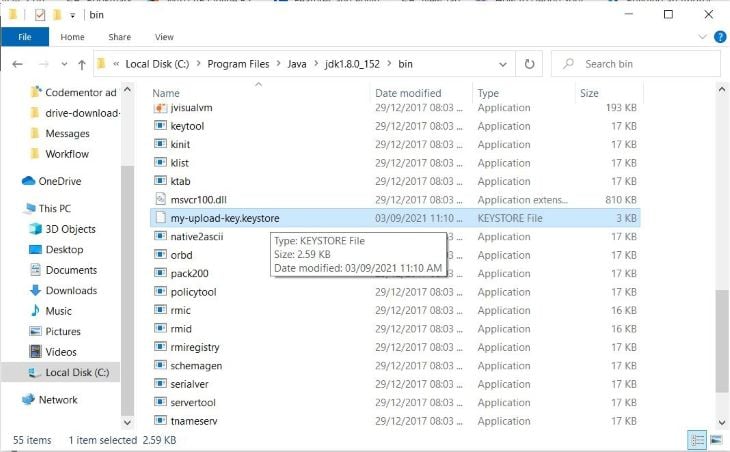
You can find the generated keystore in current terminal location. Here we are in the bin folder:
The process for generating an upload key on Mac is quite similar to that of Windows. If you don’t know the location of the Java SDK, use this command:
/usr/libexec/java_home
This will print the location, like so:
/Library/Java/JavaVirtualMachines/jdkX.X.X_XXX.jdk/Contents/Home
Move to this location using cd and run the keytool:
sudo keytool -genkey -v -keystore my-upload-key.keystore -alias my-key-alias -keyalg RSA -keysize 2048 -validity 10000
After successfully generating the keystore, it’s time to update the gradle files with the keystore information so that our app will get signed with it.
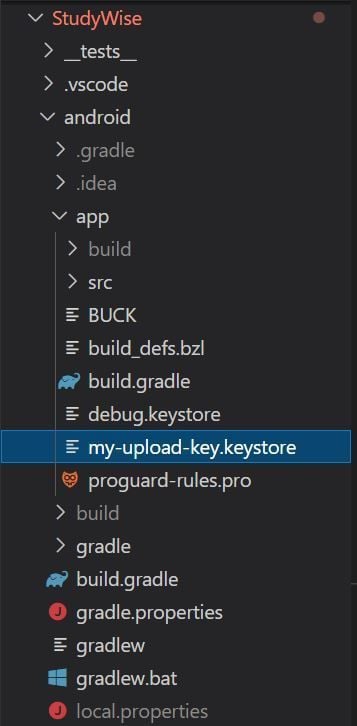
First, copy the keystore file from the bin folder to the React Native app’s android/app folder:
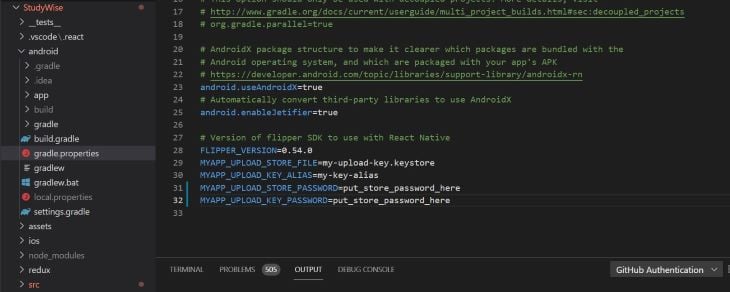
Next, open ~/.gradle/gradle.properties or android/gradle.properties and add the following references:
MYAPP_UPLOAD_STORE_FILE=my-upload-key.keystore
MYAPP_UPLOAD_KEY_ALIAS=my-key-alias
MYAPP_UPLOAD_STORE_PASSWORD=*****
MYAPP_UPLOAD_KEY_PASSWORD=*****
Change the store password and key password to the one you have entered while creating the keystore:
If you’re running MacOS and do not want to store the passwords in plain text, you can use Keychain Access and skip the password fields in Gradle.
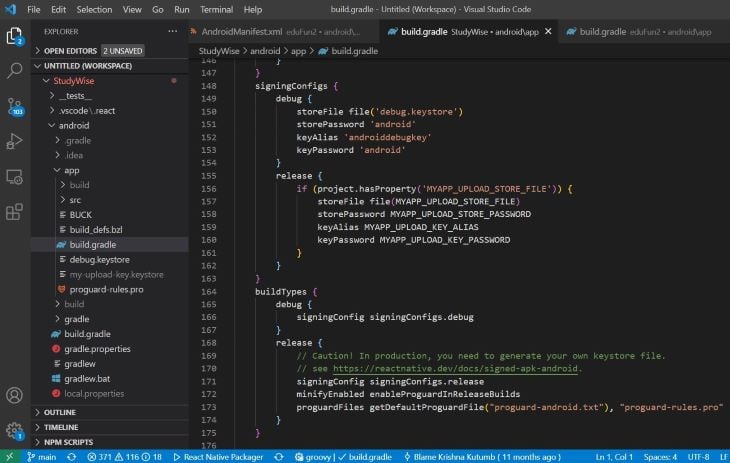
In the above step, we set up the variables. Now we need to instruct the Gradle to use these values.
Open android/app/build.gradle and edit it with the following information:
...
android {
    ...
    defaultConfig { ... }
    signingConfigs {
        release {
            if (project.hasProperty('MYAPP_UPLOAD_STORE_FILE')) {
                storeFile file(MYAPP_UPLOAD_STORE_FILE)
                storePassword MYAPP_UPLOAD_STORE_PASSWORD
                keyAlias MYAPP_UPLOAD_KEY_ALIAS
                keyPassword MYAPP_UPLOAD_KEY_PASSWORD
            }
        }
    }
    buildTypes {
        release {
            ...
            signingConfig signingConfigs.release
        }
    }
}
...
After completing all the above steps, you’re ready to generate the release build. Enter into the Android directory and run the release build:
cd android
./gradlew bundleRelease
This command will create an optimized bundle in AAB format. Since August 2021, it is required for new apps to be published in AAB.
With the help of this format, Google Play generates optimized APKs for various device configurations. This leads to the smaller app size because the resources are selectively used according to device requirements.
If you want to test your release build without manually installing it on your phone, you can run it with the following command:
npx react-native run-android --variant=release
Make sure you’ve uninstalled any previous build from your phone; the debug build is signed with a debug key and there will be a mismatch with the release variant. React Native will throw an error if you try to install both.
You can easily publish your build from your Google Play account. For a fresh app (not an update to an existing app), you need to fill in some required information, including app name, description, category, language, etc. It also asks for screenshots and videos.
You need to complete a rating survey to let Google know whether your app is suitable for a given range of ages. While uploading the AAB, Google will ask you to create a release key and to allow it to manage the key. This is your best bet because you won’t need to worry about it in the future.
In this tutorial, we learned about how to create a signing key and generate AAB for Android. As you can see, it’s possible to build a deployment-ready Android package with very little configuration.

LogRocket's Galileo AI watches sessions for you and and surfaces the technical and usability issues holding back your React Native apps.
LogRocket also helps you increase conversion rates and product usage by showing you exactly how users are interacting with your app. LogRocket's product analytics features surface the reasons why users don't complete a particular flow or don't adopt a new feature.
Start proactively monitoring your React Native apps — try LogRocket for free.

A guide for using JWT authentication to prevent basic security issues while understanding the shortcomings of JWTs.

Discover how to build, render, and automate product demo videos with Remotion, replacing traditional screen recordings with reusable React code.

Chrome’s Modern Web Guidance embeds modern web platform skills into AI coding agents, helping them choose native HTML, CSS, and browser APIs over legacy patterns.

Learn how to use Fallow to analyze AI-generated code, detect dead code, duplicate logic, and complexity issues, and integrate automated code quality checks into your AI-assisted development workflow.
Hey there, want to help make our blog better?
Join LogRocket’s Content Advisory Board. You’ll help inform the type of content we create and get access to exclusive meetups, social accreditation, and swag.
Sign up now

