A Graphical User Interface, better known as GUI, is a characteristic feature of most personal computers today. It provides an intuitive experience to users of varying levels of computing skills. Though they may use more resources, GUI applications are generally user-friendly due to their point-and-click nature.
PyQt is one of the toolkits you can use to develop cross-platform GUI applications in Python. It is powerful and easy to learn if you already have a firm grasp of this language.
This article will introduce you to the basics of building a GUI with PyQt. It requires you to have a working knowledge of the fundamentals of Python and object-oriented programming. Instead of explaining Python concepts, our focus will mainly be on PyQt.
PyQt is Python binding for the cross-platform application development framework, Qt. Using PyQt gives you the benefit of developing GUI applications using a simple but powerful language like Python. It exposes all the functionalities of the Qt API.
Riverbank Computing is the company behind the development and maintenance of PyQt. Its latest stable release is PyQt6. The release cycle of the PyQt major version appears to be in sync with that of Qt, judging from the release history.
In this article, we shall use PyQt5. It requires Python v3.5 or later, though you can also build with earlier versions of Python. Note, however, that PyQt6 requires Python v3.6.1 or later.
Before diving headfirst into building GUI apps, you should be aware that PyQt is dual-licensed. These licenses are GPL v3 and the Riverbank commercial license.
It is a requirement for you to distribute your code under a compatible license if you obtain PyQt under the GPL v3 license. Similarly, your PyQt license should be in harmony with your Qt license.
What I have provided here is a high-level overview of the PyQt licensing requirements. I recommend you acquaint yourself with the licensing requirement of the specific version of PyQt you want to use.
For the commercially licensed version of PyQt, you must first acquire the license before installation. To install the GPL licensed version, run the commands below to create a virtual environment and install PyQt5. Though you can install PyQt globally, it is recommended you use a virtual environment.
# Create virtual environment
python3 -m venv env

# Activate virtual environment
source env/bin/activate

# Install PyQt5
pip install PyQt5
For detailed installation instructions, you should check the documentation for the specific version of PyQt you want to use. It has instructions for installing both the GPL and commercial versions. The documentation also has troubleshooting tips in case you run into some errors.
Let us get a taste of PyQt by building a simple “hello world” GUI. Building this simple app will make things a lot easier in the subsequent sections.
Before we get started, it is worth mentioning here that PyQt uses camelCase for method and property names. Throughout this article, we shall use camelCase when naming variables and functions for consistency instead of the recommended naming convention in Python.
We shall intentionally keep things simple and minimal at the moment. I am assuming you have an app.py file created in your project directory; you can add the lines of code in each step to your app.py file as you follow the steps below.
PyQt comes with several built-in modules. However, the module you will interact with most regularly when building a GUI is the QtWidgets module. It has classes you will use for creating your GUI.
Because our goal is to create the most basic “hello world” GUI, we shall use the QApplication and QWidgets classes only. Start by importing them like so:
from PyQt.QtWidgets import QApplication, QWidgets
You can import the other classes you want to use in your application the same way.
We need to initialize the application by creating an instance of QApplication. It is responsible for managing the application’s main settings and control flow. Therefore, you should instantiate this class before creating any other object related to the user interface.
application = QApplication([])
For more insights about the responsibilities of the QApplication class, check the Qt documentation.
In the code above, we passed an empty array to QApplication, but you can also pass sys.argv instead if you want the app to receive arguments from the command line. Be sure to import sys if you are passing sys.argv as an argument.
The main window, also referred to as a top-level window, is a widget that doesn’t have a parent. Every GUI must have a main window.
At the moment, we shall create an instance of QWidget and make it our main window like so:
mainWindow = QWidget()
mainWindow.setGeometry(0, 0, 350, 400)
mainWindow.setWindowTitle('Hello World')
After creating an instance of Qwidget, there are several other methods you can invoke. For our simple GUI, we have invoked the setGeometry method and the setWindowTitle methods.
The setGeometry method is for positioning the GUI on the screen and setting its dimensions. Its function signature is setGeometry(x, y, width, height). The first two arguments specify the x and y coordinates of the window on the screen, and the width and height are for setting the width and height of the window, respectively.
The setWindowTitle method, like its name suggests, is for setting the title of the application. You can pass the title as a string argument. The window won’t have a title if you don’t set it yourself.
The window we have created in the previous step is not visible by default. We need to show it by invoking the show method:
mainWindow.show()
Finally, you need to fire up the event loop by invoking the application.exec method:
application.exec()
You can also use application.exec_() instead to start the event loop.
After following all five steps outlined above, your app.py file should have the following code:
from PyQt5.QtWidgets import QWidget, QApplication

application = QApplication([])

mainWindow = QWidget()

mainWindow.setGeometry(0, 0, 350, 400)
mainWindow.setWindowTitle('Hello World')

mainWindow.show()

application.exec()
Like any other Python script, you need to run app.py by using the command python3 app.py. You should be able to see the window displayed. The appearance of the window largely depends on your system. On Linux, it should look similar to the image below.

We have just created our very first “hello world” GUI. Let us now look at some of the main concepts that will broaden our knowledge of PyQt. Some level of familiarity with these concepts is necessary for building production-level GUIs.
Like most GUI toolkits out there, widgets are the building blocks of PyQt GUIs. You can use a widget to display data, receive user input, or use it as a container for grouping other related widgets.
Most widgets are nested within other widgets, however, there is always a widget that does not have a parent. As already mentioned, a widget that does not have a parent is referred to as a window.
The main class for creating widgets in PyQt is the QWidgets class. All the elements for creating UIs in PyQt are either sub-classes of the QWidgets class or are used in connection with the QWidgets class.
There are several widget classes that you can read about in the PyQt or Qt documentation. We cannot mention all of them here. Some of the basic widget classes include:
QLabel for displaying text and imagesQPushButton for creating command buttonsQLineEdit for creating a one-line text editorQRadioButton for creating a radio button with a text labelLet us add a simple pushButton widget to our “hello world” GUI:
from PyQt5.QtWidgets import QWidget, QApplication, QPushButton
application = QApplication([])
mainWindow = QWidget()
mainWindow.setGeometry(0, 0, 350, 400)
mainWindow.setWindowTitle('Button Widget')
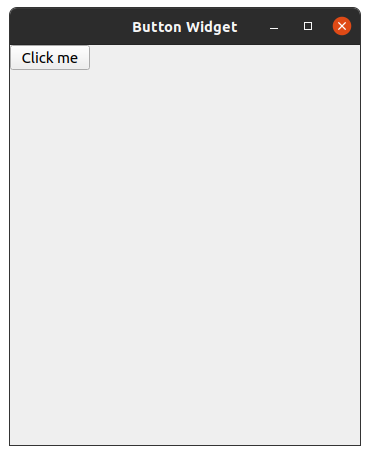
pushButton = QPushButton(parent=mainWindow, text='Click me')
mainWindow.show()
application.exec()
Running the code above will create a window similar to the image below.
Most GUI toolkits are event-driven. PyQt is no exception. An event can originate from user interaction with the app like a button click, filling an input text, clicking a link, or closing the window. An event can also be from the window system or other sources. It is the responsibility of the event loop to manage these events.
Invoking the .exec method will fire off the event loop, as we highlighted while building the “hello world” GUI. The loop waits for events to occur and responds when they do. It terminates and exits the application if it receives the Terminate event.
It is through this event-response functionality that you can add interactivity to the GUI using signals and slots. We shall learn about signals and slots in the section below.
We looked at how to use widgets to create the visible components of the GUI in one of the previous sections. It is through signals and slots that you can add interactivity to your GUI. We added a push-button widget to our “hello world” GUI, but clicking the button doesn’t do anything at the moment.
Ordinarily, a button click should trigger an action such as opening another widget, closing a widget, or logging in. You need signals and slots to respond to such user actions or changes in the state of a widget.
A signal is a notification the widget emits whenever something happens. It can be a button click, mouse move, or a change in a text input field. Different widgets emit different signals. For example, a push-button widget emits the clicked signal when clicked. The push-button widget also emits other lesser-known signals such as the pressed, released, and toggled signals. To know what signal a specific widget emits, you need to read the documentation for the widget’s corresponding class.
A slot is a function or method that is invoked after a widget emits a specific signal. Several widgets come with predefined slots. However, you can also define slots to handle signals of interest.
To illustrate what we have just learned, let us add a slot to our push-button widget so that it runs in response to a clicked signal:
from PyQt5.QtWidgets import QWidget, QApplication, QPushButton

application = QApplication([])

mainWindow = QWidget()
mainWindow.setGeometry(0, 0, 350, 400)
mainWindow.setWindowTitle('Slot and Signal')

def clickedSlot():
    print('The button has been clicked')

pushButton = QPushButton(parent=mainWindow, text='Click me')
pushButton.clicked.connect(clickedSlot)

mainWindow.show()
application.exec()
After running the code above and clicking the button, you should see the text The button has been clicked on the terminal.
Up to this moment, we have looked at only the most basic components of PyQt. In a real-world app, you will be dealing with multiple widgets within the same window. Fortunately, Qt has several functionalities for managing widget layout in your application’s UI. You can use these functionalities to describe how to arrange widgets. The layouts automatically resize and position widgets whenever the space changes. As a result, the UI remains usable.
Though PyQt has several forms of layouts, we shall look at the horizontal, vertical, grid, and form layouts in this article. You can read about the others in the PyQt or Qt documentation. Each of the mentioned layouts has a corresponding built-in layout class. These classes are:
QHBoxLayoutQVBoxLayoutQGridLayoutQFormLayoutYou can use the built-in QHBoxLayout class to lay out widgets horizontally, usually from left to right. It can also arrange widgets from right to left for right-to-left languages.
In the code below, I have modified the “hello world” GUI to display five images in a horizontal layout. To avoid repetition, I have used a for loop to add the images to the layout. Make sure you have an image in the cat.jpg file before running this code:
from PyQt5.QtGui import QPixmap
from PyQt5.QtWidgets import (
    QLabel,
    QWidget,
    QApplication,
    QHBoxLayout,
)

application = QApplication([])

mainWindow = QWidget()

mainWindow.setGeometry(0, 0, 350, 400)
mainWindow.setWindowTitle('Horizontal Layout')

horizontalLayout = QHBoxLayout()

for num in range(6):
    label = QLabel()
    pixmap = QPixmap('cat.jpg')
    label.setPixmap(pixmap)
    horizontalLayout.addWidget(label)

mainWindow.setLayout(horizontalLayout)
mainWindow.show()

application.exec()
In PyQt, you can render images using the QLabel widget. You start by creating an instance of QPixmap class after importing it from the QtGui module. Use the setPixmap method of the QLabel class to set it on the label widget as shown in the for loop above.
You can play with the code before moving to the next section. Instead of laying out images, you can lay out other widgets like push buttons.
The code above should create a GUI similar to the image below.

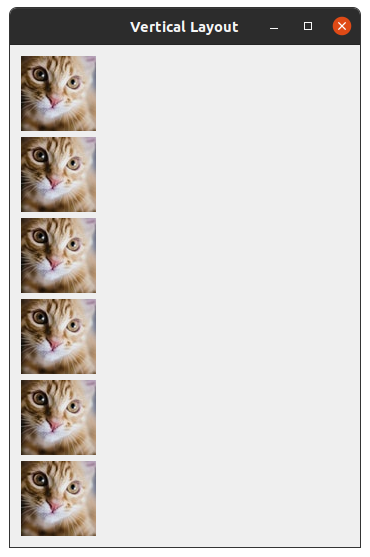
Unlike the QHBoxLayout class, which lays out widgets horizontally from left to right or from right to left, the QVBoxLayout class lays widgets vertically from top to bottom.
The code below shows how you use the QVBoxLayout class for vertical layout management. It is very similar to the horizontal layout:
from PyQt5.QtGui import QPixmap
from PyQt5.QtWidgets import (
    QLabel,
    QWidget,
    QApplication,
    QVBoxLayout,
)

application = QApplication([])

mainWindow = QWidget()

mainWindow.setGeometry(0, 0, 350, 400)
mainWindow.setWindowTitle('Vertical Layout')

verticalLayout = QVBoxLayout()

for num in range(6):
    label = QLabel()
    pixmap = QPixmap('cat.jpg')
    label.setPixmap(pixmap)
    verticalLayout.addWidget(label)

mainWindow.setLayout(verticalLayout)
mainWindow.show()

application.exec()
Running the code above should create a GUI with images arranged from top to bottom similar to the image below.
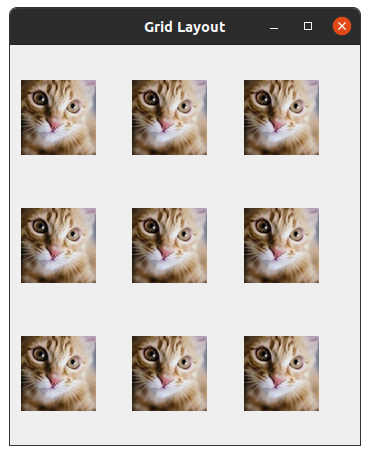
Grid layout management involves laying out widgets in a two dimensional grid. The QGridLayout is a handy built-in class for doing just that. In a grid layout, an item can occupy two grids. You can also nest another layout within a grid item. It makes building more complex GUIs a lot easier.
You can create an instance of QGridLayout class and add widgets to it using the addWidget method. Like in the previous sections, I am adding images to the grid in a loop to avoid repetition in the code below. It is also possible to skip a grid while populating the grid with widgets:
from PyQt5.QtGui import QPixmap
from PyQt5.QtWidgets import (
    QLabel,
    QWidget,
    QApplication,
    QGridLayout,
)

application = QApplication([])

mainWindow = QWidget()

mainWindow.setGeometry(0, 0, 350, 400)
mainWindow.setWindowTitle('Grid Layout')

gridLayout = QGridLayout()

for row in range(3):
    for col in range(3):
        label = QLabel()
        pixmap = QPixmap('cat.jpg')
        label.setPixmap(pixmap)
        gridLayout.addWidget(label, row, col)

mainWindow.setLayout(gridLayout)
mainWindow.show()

application.exec()
Because you are placing the widgets in a two dimensional grid, you need to specify the location of each widget when adding it to the layout.
Your “hello world” GUI should look like the image below after running the code above.
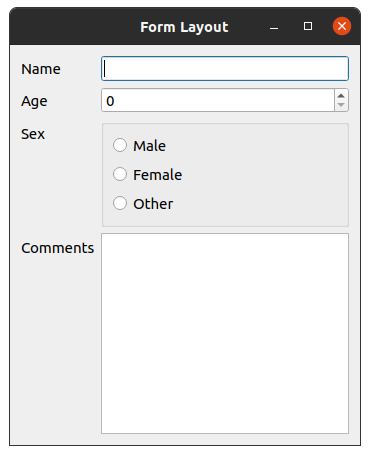
The form layout is primarily for managing input widgets and their associated labels. It comprises rows of widgets laid out as label-field pairs. You need to use the QFormLayout class to arrange widgets in a form layout as illustrated in the code below:
from PyQt5.QtWidgets import (
    QGroupBox,
    QLabel,
    QLineEdit,
    QPlainTextEdit,
    QRadioButton,
    QSpinBox,
    QVBoxLayout,
    QWidget,
    QApplication,
    QFormLayout,
)

application = QApplication([])

mainWindow = QWidget()

mainWindow.setGeometry(0, 0, 350, 400)
mainWindow.setWindowTitle('Form Layout')

formLayout = QFormLayout()

nameLabel = QLabel('Name')
nameField = QLineEdit()

ageLabel = QLabel('Age')
ageField = QSpinBox()
ageField.setMinimum(0)
ageField.setMaximum(130)


sexLabel = QLabel('Sex')
sexGroup = QGroupBox()
verticalLayout = QVBoxLayout()

for sex in ['Male', 'Female', 'Other']:
    radioButton = QRadioButton(sex)
    verticalLayout.addWidget(radioButton)

sexGroup.setLayout(verticalLayout)

commentLabel = QLabel('Comments')
commentField = QPlainTextEdit()


formLayout.addRow(nameLabel, nameField)
formLayout.addRow(ageLabel, ageField)
formLayout.addRow(sexLabel, sexGroup)
formLayout.addRow(commentLabel, commentField)

mainWindow.setLayout(formLayout)
mainWindow.show()

application.exec()
Run the code above to see a GUI similar to the image below. You can see label-field pairs of widgets. Each row has a label widget and the corresponding field widget to the right.
The layouts mentioned above are by no means exhaustive. You can read about other forms of layout in the PyQt or Qt documentation.
With PyQt, you can use an arbitrary widget to create the main window; that is what we did for the illustrations in the previous sections in order to keep things simple and understandable. However, that is not what you do in a real-world application. PyQt comes with the QMainWindow class for managing an application’s main window.
The QMainWindow class provides layouts for adding widgets such as menu bars, toolboxes, and status bars out of the box. It is common practice to create a subclass of QMainWindow class and use it as the main window. And that is what we shall do.
Below is the refactored code for the “hello world” GUI:
from PyQt5.QtWidgets import QMainWindow, QApplication

class MainWindow(QMainWindow):
    def __init__(self, parent=None):
        super().__init__(parent)

        self.setWindowTitle('Hello Wordl')
        self.setGeometry(0, 0, 350, 400)

if (__name__ == '__main__'):
    application = QApplication([])
    mainWindow = MainWindow()
    mainWindow.show()
    application.exec()
You will notice how our MainWindow class inherits from the QMainWindow class. When you run the code above, the window it creates will be the same as our first “hello world” GUI. From now on, we shall always create a subclass of the QMainWindow class.
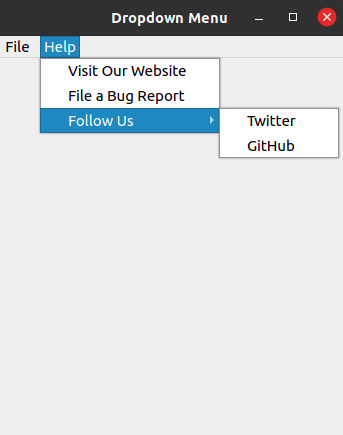
Menus are characteristic features of most GUI applications. Desktop GUIs usually have menus at the top of the main window. Some dropdown menus have sub-menus that open on hover. The image below shows what a typical menu looks like on a desktop GUI.
As noted in the previous section, the QMainWindow class provides a layout for adding a menu bar to your GUI out of the box. To create a menu bar, you need to use the menuBar method.
Below is the code for creating the dropdown menu in the image above. I have used the QAction class to create actions and added them to the corresponding menu to create a dropdown menu:
from PyQt5.QtWidgets import QMainWindow, QApplication, QAction

class MainWindow(QMainWindow):
    def __init__(self, parent=None):
        super().__init__(parent)

        self.setWindowTitle('Dropdown Menu')
        self.setGeometry(0, 0, 350, 400)
        self.addMenu()

    def addMenu(self):

        # Create menu bar
        menuBar = self.menuBar()

        # Add menu items
        fileMenu = menuBar.addMenu('File')
        helpMenu = menuBar.addMenu('Help')

        # Create actions

        visitWebsiteAction = QAction('Visit Our Website', self)
        fileBugReportAction = QAction('File a Bug Report', self)

        # Add dropdown menu items on the Help menu

        helpMenu.addAction(visitWebsiteAction)
        helpMenu.addAction(fileBugReportAction)

        # Add 'Follow Us' dropdown menu item on the Help menu

        followUs = helpMenu.addMenu('Follow Us')

        # Social media actions

        twitterAction = QAction('Twitter', self)
        githubAction = QAction('GitHub', self)

        # Add actions

        followUs.addAction(twitterAction)
        followUs.addAction(githubAction)


if (__name__ == '__main__'):
    application = QApplication([])
    mainWindow = MainWindow()
    mainWindow.show()
    application.exec()
Hopefully, the above sections have introduced you to the basics of PyQt. Let us now put the knowledge we have just acquired to use by building a standard GUI.
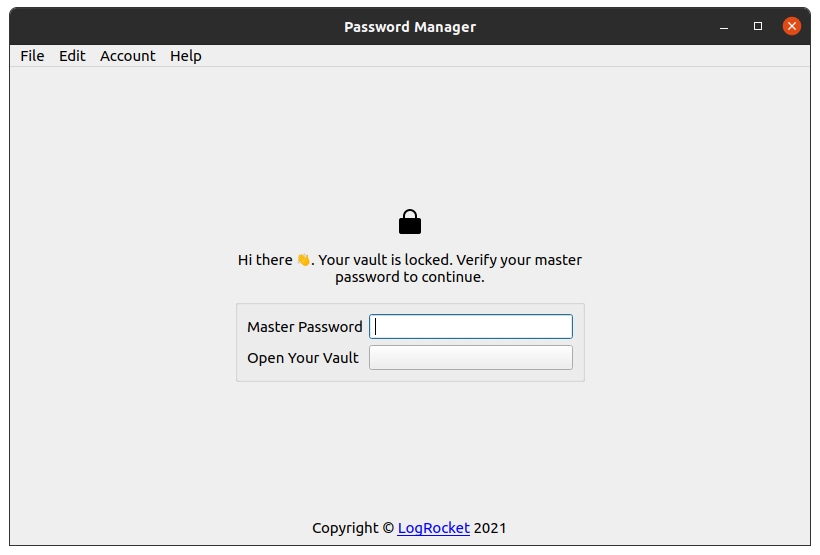
The image below shows the login screen for the desktop version of a password management app. It has a menu bar and a password field. We have looked at most of the widgets in the GUI in the previous sections. However, I will briefly explain some of the methods shortly.
I have kept it simple by just focusing on the basics. If you are interested, you can push yourself further by adding more features and interactivity to it.
Below is the corresponding code for the above GUI. I have left comments on most sections to explain what is happening. I urge you to read through the code before reading my explanation:
from PyQt5.QtWidgets import (QAction, QApplication, QFormLayout, QGroupBox,
                             QLabel, QPushButton, QVBoxLayout, QWidget,
                             QMainWindow, QLineEdit)
from PyQt5.QtCore import Qt
from PyQt5.QtGui import QPixmap

class MainWindow(QMainWindow):
    def __init__(self, parent=None):
        super().__init__(parent)
        self.createUI()
        self.createActions()
        self.creatMenu()
    def createUI(self):
        # Create window
        self.setWindowTitle('Password Manager')
        self.resize(800, 500)
        self.setMinimumSize(500, 450)
        # Create central widget and layout
        self._centralWidget = QWidget()
        self._verticalLayout = QVBoxLayout()
        self._centralWidget.setLayout(self._verticalLayout)
        # Set central widget
        self.setCentralWidget(self._centralWidget)
        # Vertically center widgets
        self._verticalLayout.addStretch(1)
        # Add lock image
        self.addLockImage()
        self.addText()
        self.addInputText()
        # Vertically center widgets
        self._verticalLayout.addStretch(1)
        # Add Copyright
        self.addCopyRight()
    def addLockImage(self):
        imageLabel = QLabel()
        pixmap = QPixmap('lock.png')
        imageLabel.setPixmap(pixmap)
        self._verticalLayout.addWidget(imageLabel, alignment=Qt.AlignCenter)
    def addText(self):
        messageLabel = QLabel(
            'Hi there 👋. Your vault is locked. Verify your master password to continue.'
        )
        messageLabel.setAlignment(Qt.AlignCenter)
        messageLabel.setFixedWidth(350)
        messageLabel.setMinimumHeight(50)
        messageLabel.setWordWrap(True)
        self._verticalLayout.addWidget(messageLabel, alignment=Qt.AlignCenter)

    def addCopyRight(self):
        copyRight = QLabel(
            'Copyright © <a href="https://logrocket.com/">LogRocket</a> 2021')
        copyRight.setOpenExternalLinks(True)
        self._verticalLayout.addWidget(copyRight, alignment=Qt.AlignCenter)

    def addInputText(self):
        groupBox = QGroupBox()
        groupBox.setFixedWidth(350)

        formLayout = QFormLayout()

        passwordLabel = QLabel('Master Password')
        passwordField = QLineEdit()
        passwordField.setTextMargins(3, 0, 3, 0)
        passwordField.setMinimumWidth(200)
        passwordField.setMaximumWidth(300)
        passwordField.setEchoMode(QLineEdit.Password)
        passwordField.setClearButtonEnabled(True)

        submitLabel = QLabel('Open Your Vault')
        submitField = QPushButton()

        formLayout.addRow(passwordLabel, passwordField)
        formLayout.addRow(submitLabel, submitField)

        groupBox.setLayout(formLayout)
        self._verticalLayout.addWidget(groupBox, alignment=Qt.AlignCenter)

    def creatMenu(self):
        # Create menu bar
        menuBar = self.menuBar()
        # Add menu items
        fileMenu = menuBar.addMenu('File')
        editMenu = menuBar.addMenu('Edit')
        accountMenu = menuBar.addMenu('Account')
        helpMenu = menuBar.addMenu('Help')
        # Add sub-items under Help menu item
        helpMenu.addAction(self.sendEmailAction)
        helpMenu.addAction(self.visitWebsiteAction)
        helpMenu.addAction(self.fileBugReportAction)
        # Add horizontal line
        helpMenu.addSeparator()
        # Add 'Follow Us' sub-item under Help menu item
        # Use addMenu method because it contains sub-items
        followUs = helpMenu.addMenu('Follow Us')
        followUs.addAction(self.twitterAction)
        followUs.addAction(self.facebookAction)
        followUs.addAction(self.githubAction)

    def createActions(self):
        # Help menu actions
        self.sendEmailAction = QAction('Email Us', self)
        self.visitWebsiteAction = QAction('Visit Our Website', self)
        self.fileBugReportAction = QAction('File a Bug Report', self)
        # Social media actions
        self.twitterAction = QAction('Twitter', self)
        self.facebookAction = QAction('Facebook', self)
        self.githubAction = QAction('GitHub', self)

if (__name__ == '__main__'):
    application = QApplication([])
    mainWindow = MainWindow()
    mainWindow.show()
    application.exec()
In the code above, I have declared the createUI method for creating the GUI. I have extracted the functionalities for creating the other widgets to separate methods. We have encountered most of the widgets that make up the UI in the previous sections, and I have added comments in the code to explain what is happening. Therefore, I will not explain all of them here. However, I will talk about how the UI is organized.
The GUI comprises four widgets in a vertical layout. I have added a stretchable space at the start of the vertical layout using the addStretch method. Similarly, there is another stretchable space after the group box. The stretchable spaces help displace the copyright text to the bottom of the GUI and vertically center the rest of the widgets.
The previous sections introduced you to the basics of building a GUI app programmatically. There is an alternative drag-and-drop interface for building GUIs referred to as Qt Designer. It will significantly increase your productivity. For more, you can read the Qt designer manual.
If you are looking to develop cross-platform GUI applications using Python, PyQt is a handy toolkit. You can use the various built-in classes to create widgets and then add interactivity using signals and slots. Using it with Qt Designer can significantly reduce development time and increase productivity.
Hopefully, you found this article helpful. What we have covered here are just the basics, and PyQt has tons of classes and methods. Nonetheless, I hope it has given you enough background knowledge to read the documentation and start using PyQt.
Unfortunately, there are lots of missing sections in the PyQt5 and PyQt6 documentation at the time of writing this article. Therefore, using the PyQt documentation without other resources might not be very helpful. You need to use the PyQt and the Qt documentation concurrently.
However, be aware that the Qt documentation is C++-oriented. You can also use the documentation for earlier versions of PyQt like PyQt4 instead of the most recent versions like PyQt5 or PyQt6. Some sections of the API haven’t changed much.
Install LogRocket via npm or script tag. LogRocket.init() must be called client-side, not
server-side
$ npm i --save logrocket

// Code:

import LogRocket from 'logrocket';
LogRocket.init('app/id');
// Add to your HTML:

<script src="https://cdn.lr-ingest.com/LogRocket.min.js"></script>
<script>window.LogRocket && window.LogRocket.init('app/id');</script>

Debug RSC hydration mismatches in production with Next.js instrumentation, Suspense isolation, HTML diffing, and CI smoke tests.

Explore why npm dependencies are a major supply chain security risk and how to protect JavaScript apps from compromised packages and transitive threats.

Enabled React Compiler v1.0 on a production Next.js app. Here’s every warning, breakage, and silent opt-out I documented — and what actually worked.

We built the same app in TanStack Start RSC and Next.js RSC. TanStack shipped 40% less JS and built 4x faster — but Next.js is still the safer production bet.
Would you be interested in joining LogRocket's developer community?
Join LogRocket’s Content Advisory Board. You’ll help inform the type of content we create and get access to exclusive meetups, social accreditation, and swag.
Sign up now

