Editor’s Note: This article was updated 4 October 2022 to include sections on why to use Express with Next, whether Express is better than a custom server for Next.js, advantages of using Express and Next, examples of server-side rendering, and other general updates to the text.

It goes without saying that React is an excellent choice for building high-quality web applications. However, as your projects become more complex, you’ll need to learn about client-side routing, page layout, and so on to scale your applications. At some point, you’ll want your pages to load faster, for example. Oftentimes, this is where things can become difficult.
Next.js is a universal JavaScript framework that runs in both the browser and the server. It offers developers an easy way to get started, and, because it uses React for templating, it is also a straightforward way for developers with React experience to get productive fast.
One of its strong points is that it handles server-side rendering excellently, and it integrates with Express just as well. Oh, how I love Express.
But we’re getting ahead of ourselves. Let’s talk about why you need server-side rendering in the first place. Then we’ll start building things.
The Replay is a weekly newsletter for dev and engineering leaders.
Delivered once a week, it's your curated guide to the most important conversations around frontend dev, emerging AI tools, and the state of modern software.
Next.js is an open source development framework built on top of Node.js, enabling React-based web application functionalities, such as server-side rendering, and allowing the ability to generate static websites. It was initially released on October 25, 2016, but has quickly become one of the go-to JavaScript frameworks when developers are looking to build high-quality web applications.
Next.js gives you the best developer experience with all the features you need for production, such as hybrid static and server rendering, TypeScript support, smart bundling, route prefetching, fast refresh, and inbuilt CSS support with absolutely no special configuration needed.
One of its strengths is that it handles server-side rendering excellently, and it integrates with Express just as well. For us to fully take advantage of Next, we need to understand what server-side rendering is, how it works, and then get started building our example server-side rendered React and Express web application.
Server-side rendering was the conventional method for getting your HTML up onto a screen. This refers to using a server environment to get your HTML up to the browser. So why the fuss if it’s a conventional method that’s been around forever?
Remember the introduction of MVC (model, view, controller) concept that caused some concern? Basically, there was some disagreement that eventually brought about the rise of JavaScript frameworks for rendering views.
So what has this got to do with anything? Soon enough, a problem emerged: modern JavaScript frameworks only displayed a bunch of divs in the browser, using DOM manipulation to do its work around the browser. This meant that the user had to wait longer to see anything. It can also impact SEO if crawlers can’t see the content of the page quickly.
One solution was to render the JavaScript files from the server before returning its output to the server.
When using server-side rendering, the HTML of the page is rendered directly from the server. On the client-side, the HTML is used to show a fast, non-interactive page, while JavaScript is used to make the page interactive. To take advantage of server-side rending, we will use getServerSideProps.
getServerSideProps only runs server side and will not run in the browser. It should be used if you need to render a page and also need the data fetched at the request time.
export async function getServerSideProps(context) {
  return {
    props: {}, // will be passed to the page component as props
  }
}
When you export a function called getServerSideProps from a page, Next.js will prerender this page on each request using the data returned by getServerSideProps.
Getting started with Next is simple. Because it’s built on top of Node, go ahead and install Node v10.13 or later. You’ll also be using your text editor and terminal app for this tutorial.
There are two ways we can create our application.
The first method is what I recommend for this tutorial, as it’s ready to go out of the box.
npx create-next-app logrocket-nextjs --use-npm --example
# https://github.com/vercel/next-learn/tree/master/basics/learn-starter
The command above uses the tool called create-next-app, which bootstraps a Next.js app for you. It uses a default learning template specified through the --example flag. Once this is done, run the development server:
# change to the project directory
cd logrocket-nextjs
# start the development server
npm run dev
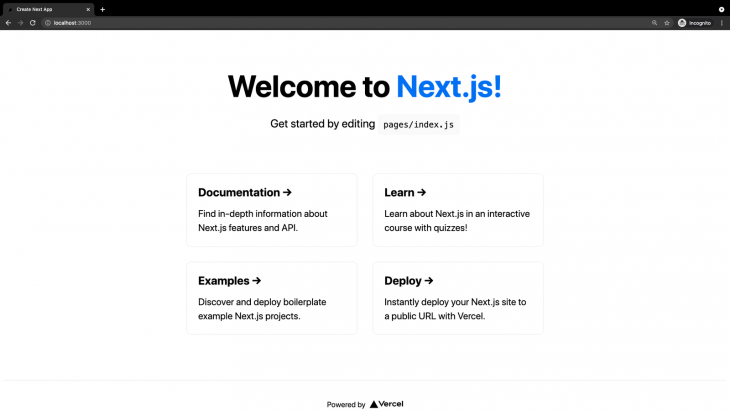
Once this is done, navigate to http://localhost:3000, where you should see the example web application running:
First, start by using the following code:
# make a directory
mkdir logrocket-nextjs
# change to the new directory
cd logrocket-nextjs
# init a new node project
npm init -y
# install react, react-dom and next
npm install --save react react-dom next
Next, open up your package.json and replace your script section with this:
"scripts": {
        "dev": "next",
        "build": "next build",
        "start": "next start"
    }
Run the npm run dev command, you should get an error like this:
next > Couldn't find a `pages` directory. Please create one under the project root
This is because Next uses the pages directory and the files in them to map its routes. This means if we have a file called index.js in our pages folder, Next would try to use the component in it as our entry point. Let’s create the pages folder and the index.js file:
#create pages directory
mkdir pages
#create file for base route
touch pages/index.js
Next, let’s add some code to the pages/index.js file:
const Index = () => (


Hello Next.js, this is your friend Brian from logrocket


)
export default Index
Save the file above and run the command npm run dev in your terminal. If you visit your browser, see the text “Hello Next.js, this is your friend Samuel from LogRocket” printed out on your browser.

Notice how easy this is? No need to mount React to a div, no need to import React, and no need to set up routes. In our usual React app, we would need to do other configs to allow for code-splitting and server-side rendering. But hey, view your page source. You’ll be amazed. It’s all done out of the box.
Next.js on its own is a powerful tool. When combined with Express, it makes a sacred combination. Using Express with Next.js, you can:
According to the official documentation of Next.js, a custom Next.js server allows you to start a server 100 percent programmatically in order to use custom server patterns.
Using custom servers will take away certain features such as performance optimizations, automatic static optimization, serverless functions, and others, but if you have custom needs and custom infrastructure, then having your own custom server for Next.js would be a good fit.
Using Express as your server only allows you to do more backend tasks.
The great thing about Next.js is that there are a lot of advantages, not only for the developers, but also for the users and business owners using Next.js in the technology stack.
For developers, Next.js has:
Some other advantages of using Express with Next.js also include:
I bet you thought that was all the magic Next.js had in store. But Next went a step further by allowing better server-side rendering using Express for the tougher cases.
First, add Express into your app:
npm install --save express
Then create a file called ssr-server.js in your app and add the following content:
const express = require('express')
const next = require('next')

const dev = process.env.NODE_ENV !== 'production'
const app = next({ dev })
const handle = app.getRequestHandler()

app.prepare()
.then(() => {
  const server = express()

  server.get('*', (req, res) => {
    return handle(req, res)
  })

  server.listen(3000, (err) => {
    if (err) throw err
    console.log('> Ready on http://localhost:3000')
  })
})
.catch((ex) => {
  console.error(ex.stack)
  process.exit(1)
})
In the code block above, we imported the Express and Next libraries and created an instance passing in a boolean based on the environment which detects whether to launch Next.js in dev or production mode.
The app.getRequestHandler returns a request handler that we can use to parse all HTTP requests. The prepare function returns a promise, so we can add a .then pipe to it. In the .then call, we initiate Express, and we use a wild card route to catch all routes and return them to the handler function.
Now update your npm dev script to run the server-side rendering application entry point:
{ "scripts": { "dev": "node ssr-server.js" } }
If you run npm run dev, your page would spin up looking the same as it was, but we can now easily achieve clean application routing, as seen below:
server.get('/p/:id', (req, res) => {
    const actualPage = '/post'
    const queryParams = { id: req.params.id }
    app.render(req, res, actualPage, queryParams)
})
In the code above, we use the popular express routing to define such routes, then we pass the page that should be loaded and the id as a query param to the main Next app. Here, the call /p?id=2 happens under the hood where no one can see what is going on.
The regular user sees the URL as /p/2/.
Now that we’ve developed our application, we’ll need to deploy it into a production environment. First, we have to build the app. Then we can serve it using the command below:
#build the app
npm run build
#serve the application in a production environment
npm run serve
Wow, that’s cool. What if you want to export the app as a static HTML file? Great question.
First, create a file called next.config.js in the root of your app and add the following content:
module.exports = {
  exportPathMap: function () {
    return {
      '/': { page: '/' }
    }
  }
}
Note: In the setup above, only the index page would be exported as it is the only route we have specified in the
PathMap.
It’s also easy to add more pages if you need to. You can add a new key and value in the return object of the PathMap like '/about': { page: '/about' }.
Next, add the following to the scripts section of your package.json:
"export": "next export"
Finally, build and export your app.
#build app
npm run build
#export app
npm run export
Next.js provides us with an extensive list of features that are easy to use and configure, such as clean routing, faster load time, improved SEO, and so much more. You can learn more about Next.js from the official documentation.

Learn about TypeScript v6’s breaking changes, new ES2025 features, and deprecated options. A complete migration guide from v5 to prepare for v7.

Learn how Vite+ unifies Vite, Vitest, Oxlint, Oxfmt, Rolldown, and Node.js management in one CLI.

AI companies are buying developer tools as coding agents turn runtimes, package managers, and linters into strategic infrastructure.

Learn how AI-assisted development governance uses rules, agents, hooks, and protocols to help AI coding tools produce safer, more consistent code.
Hey there, want to help make our blog better?
Join LogRocket’s Content Advisory Board. You’ll help inform the type of content we create and get access to exclusive meetups, social accreditation, and swag.
Sign up now

