If you’ve used an AI coding assistant before, you’ve probably experienced vibe coding.

You start with an idea, throw a high-level prompt at the AI, and wait to see what comes out. Sometimes it’s close. Sometimes it’s completely off. Either way, it often takes several rounds of tweaking to get what you actually want.
That endless loop of prompting, generating, and fixing can get frustrating fast. But what if your AI coding assistant actually understood your project — your goals, constraints, and architecture right from the start?
That’s where GitHub Spec Kit comes in. It’s a new open-source toolkit that brings structure to the chaos of vibe coding.
In this article, we’ll explore how Spec Kit helps you move from “let’s see what happens” to spec-driven development, and we’ll walk through building a small e-commerce bookstore app to see it in action.
The Replay is a weekly newsletter for dev and engineering leaders.
Delivered once a week, it's your curated guide to the most important conversations around frontend dev, emerging AI tools, and the state of modern software.
To follow along, you need to have the following:
Spec Kit is a set of tools and a methodology for communicating with AI coding assistants more effectively. At its core, spec-driven development is an approach where you define your project’s goals, architecture, and constraints up front in structured documents or “specs.”
By giving the AI a persistent understanding of your project, every piece of generated code stays aligned with your intent and overall architecture, resulting in more consistent and maintainable output.
With Spec Kit, you create a single source of truth that the AI coding assistant can refer to at any time. This source of truth includes:
By providing this context, you ensure that your AI coding assistant stays on the same page as you, producing consistent, high-quality results.
Getting started with Spec Kit is easy. The recommended way to install it is with uvx – an experimental package manager from the creator of uv.
On Windows, you can install UVX by running the following command:
powershell -ExecutionPolicy ByPass -c "irm <https://astral.sh/uv/install.ps1> | iex"
Then install specify with:
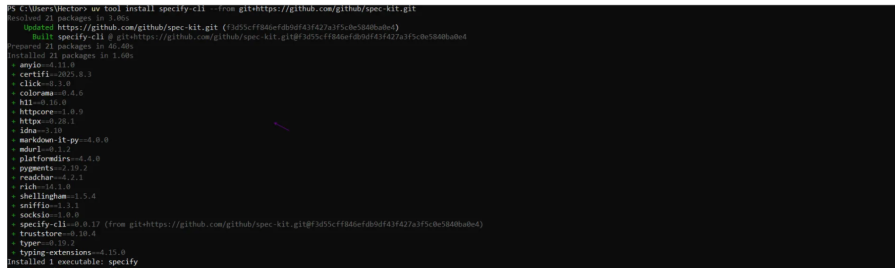
uv tool install specify-cli --from git+https://github.com/github/spec-kit.git
This will install the Spec Kit CLI tool, which you can use to create new projects and manage your specs.
If the installation was successful, you should see a similar screen to this:
Let’s create a new project to see Spec Kit in action.
Run the following command in your terminal:
specify in it spec-kit-demo
The CLI will guide you through an interactive setup process, allowing you to select your preferred AI agent.
At the time of writing this article, you can choose between:
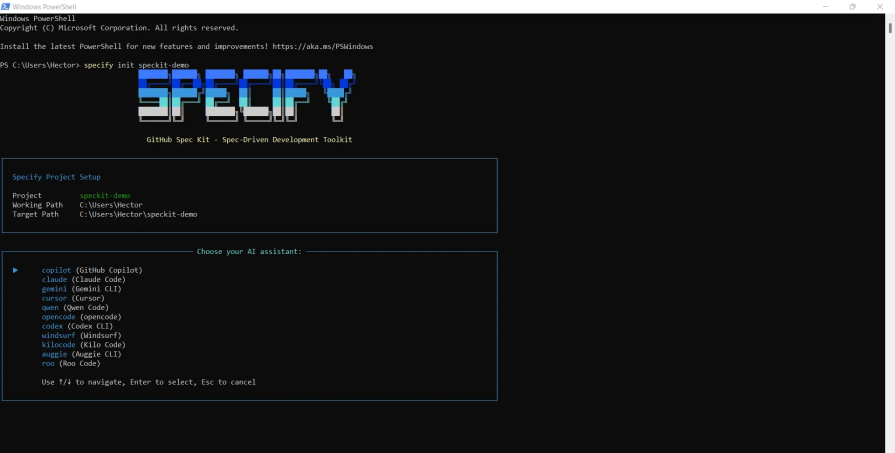
You also get to choose your preferred script type:
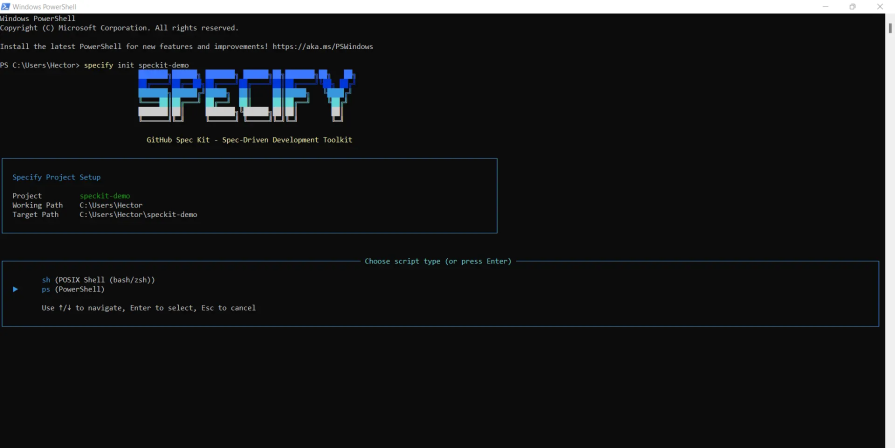
In my case, I chose PowerShell for the script type and GitHub Copilot for the AI assistant.
Once the setup is complete, you’ll see a new project scaffolded for you, structured like this:
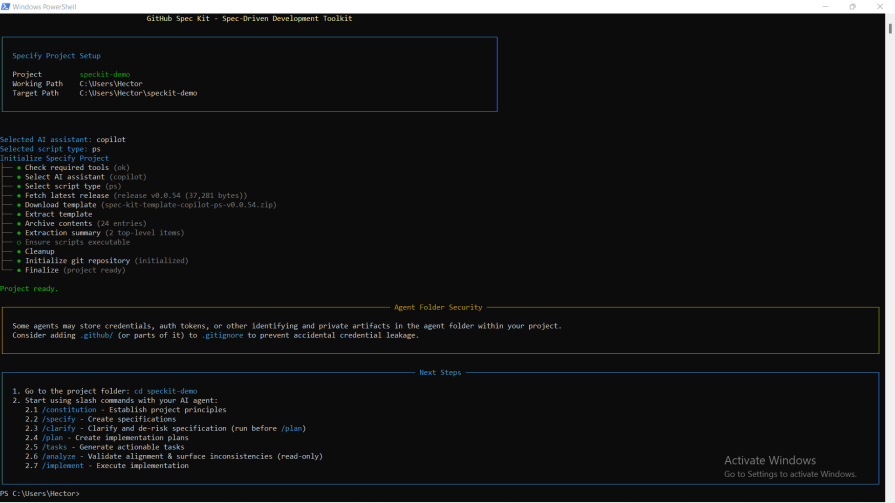
It’s time to open the project folder and start setting up the specifications for our app.
Let’s take a quick look at the seven slash commands that power Spec Kit. Each one represents a key stage in the spec-driven workflow — from defining your project’s core principles to generating the final implementation:
/constitutionDefines the non-negotiable rules for your project. Other commands refer back to this file to stay aligned with your core principles.
Example prompt:
Fill the constitution with the following, based on the template: Create a React app with TypeScript and Tailwind CSS.
/specifyOutlines what you’re building. This is where you describe the features, pages, and user flow.
Example prompt:
/specify Build a single page that displays a list of products fetched from an API.
/clarifyHelps refine and resolve any ambiguities from the specification before moving on to planning. This step ensures that both you and your AI assistant share the same understanding of the project scope.
/planTranslates your specifications into a concrete implementation plan — components, architecture, and dependencies.
Example prompt:
/plan Use a ProductListPage component to fetch data and a ProductCard component to display each product.
/tasksBreaks the overall plan into manageable chunks of work for the AI assistant to execute.
/analyzeValidates your specs and plans to ensure consistency and logical alignment before implementation.
/implementKicks off the actual build process based on the defined tasks and context.
While /clarify and /analyze aren’t always required, they’re great for learning how SpecKit interprets and validates your instructions — especially in more complex projects.
Next, we’ll set the ground rules for our project by defining its Constitution — the foundation that guides every decision moving forward.
I already have a prompt prepared for this step, which you can find below:
Fill the constitution with this based on the template.
This project will be a single-page application built with React and Vite. We'll use React Router for navigation between pages.
For styling, we'll use Tailwind CSS for a utility-first approach.
All code will be written in TypeScript.We will use Axios for making API calls to a mock API for book data.
State will be managed using a combination of useState,useReducer, and the Context API for the shopping cart.
I’ll start by running the /constitution command, followed by the prompt, like this:
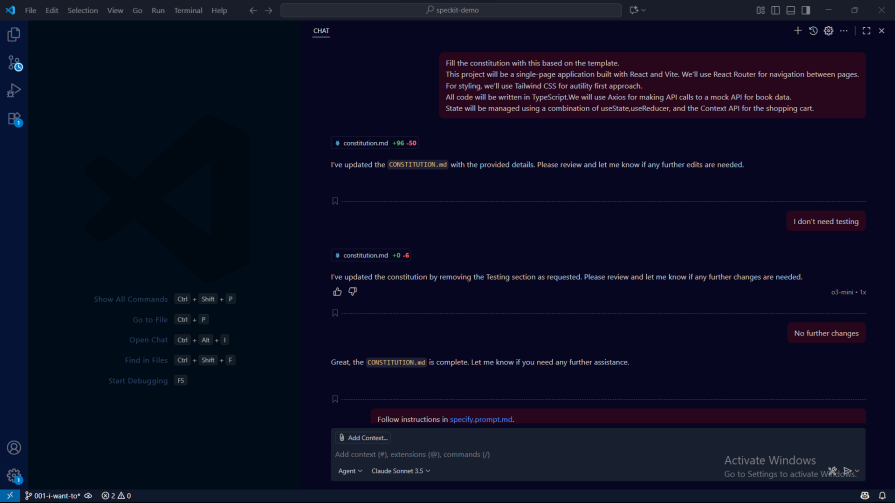
With the prompt we provided, Spec Kit automatically populated the constitution.md file.
This file acts as a stable foundation — the unchanging framework that guides every decision in our project.
Next, we’ll move on to creating the specification.
Remember, the /specify command defines what we’re building.
Here’s the prompt I’ll be using for our project’s specification:
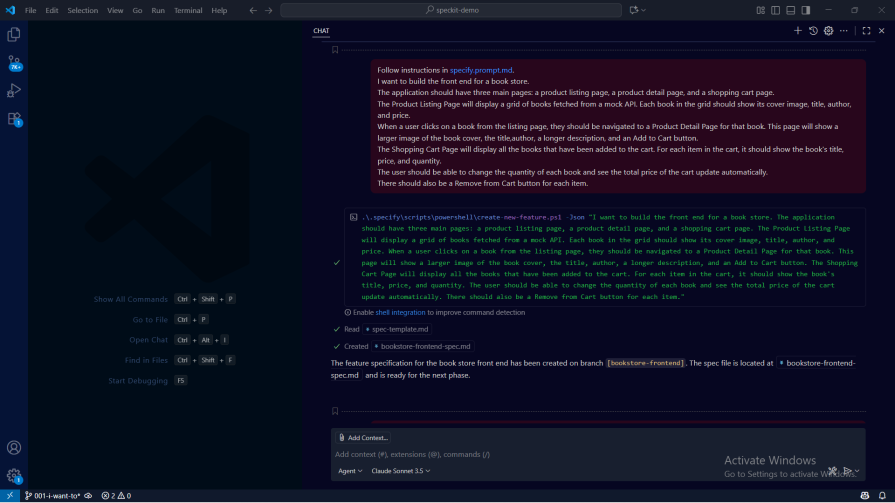
/specify I want to build the front end for a bookstore.
The application should have three main pages: a product listing page, a product detail page, and a shopping cart page.
The Product Listing Page will display a grid of books fetched from a mock API. Each book in the grid should show its cover image, title, author, and price.
When a user clicks on a book from the listing page, they should be navigated to a Product Detail Page for that book. This page will show a larger image of the book cover, the title,author, a longer description, and an Add to Cart button.
The Shopping Cart Page will display all the books that have been added to the cart. For each item in the cart, it should show the book's title, price, and quantity.
The user should be able to change the quantity of each book and see the total price of the cart update automatically.
There should also be a Remove from Cart button for each item.
When you run the command, Spec Kit generates a spec.md file containing all the project specifications.
Here’s what it looks like in GitHub Copilot:
Next, I ran the /clarify command, which highlighted several areas in the specification that needed more detail or clarification:
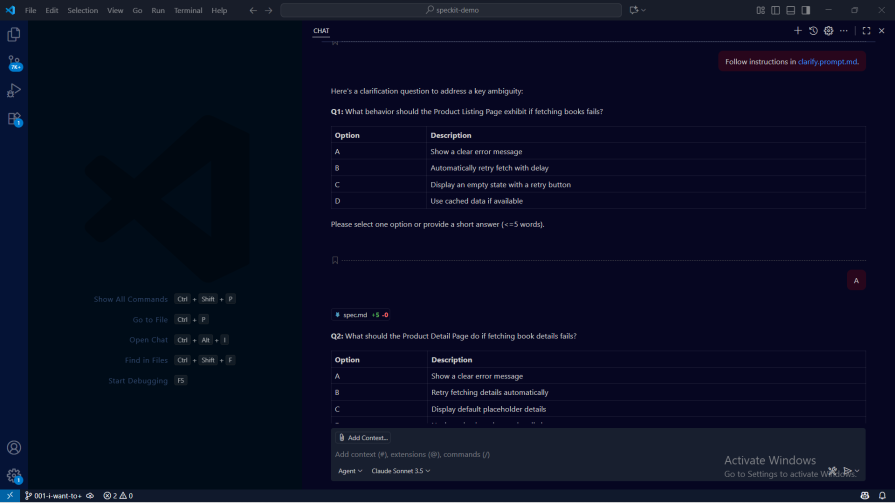
It then prompted me with a few clarification questions to fill in missing details:
After answering these questions, Spec Kit confirmed that everything looked good and suggested moving on to the /plan command — which we’ll run in the next section.
This is where things get a bit more technical. Here, we define our technology stack, dependencies, and key architectural decisions.
Let’s dive in with the prepared prompt:
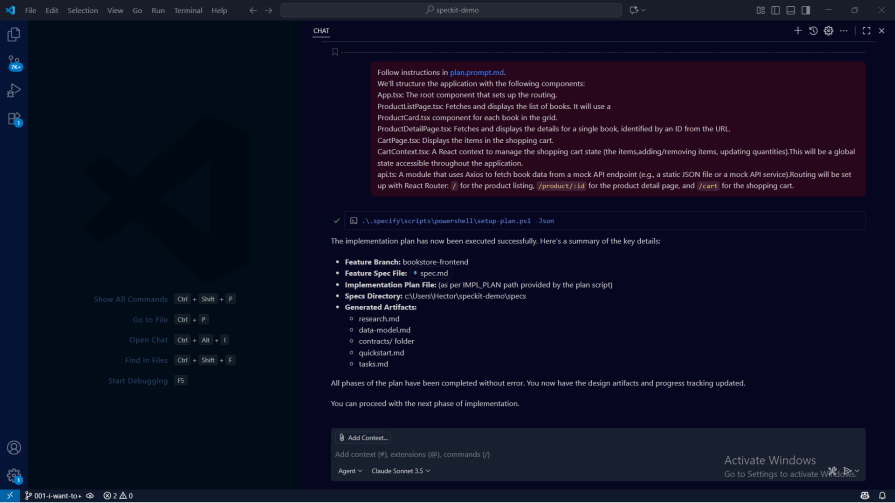
/plan We'll structure the application with the following components:
App.tsx: The root component that sets up the routing.
ProductListPage.tsx: Fetches and displays the list of books. It will use a
ProductCard.tsx component for each book in the grid.
ProductDetailPage.tsx: Fetches and displays the details for a single book, identified by an ID from the URL.
CartPage.tsx: Displays the items in the shopping cart.
CartContext.tsx: A React context to manage the shopping cart state (the items, adding/removing items, updating quantities). This will be a global state accessible throughout the application.
api.ts: A module that uses Axios to fetch book data from a mock API endpoint (e.g., a static JSON file or a mock API service). Routing will be set up with React Router: `/` for the product listing, `/product/:id` for the product detail page, and `/cart` for the shopping cart.
Here’s how it looks in VS Code:
Next, we’ll use the /tasks command to break the work into smaller, manageable chunks for the AI agent.
Let’s run the /tasks command along with our prompt:
/tasks you can now run tasks.
This is how it appears in the editor:
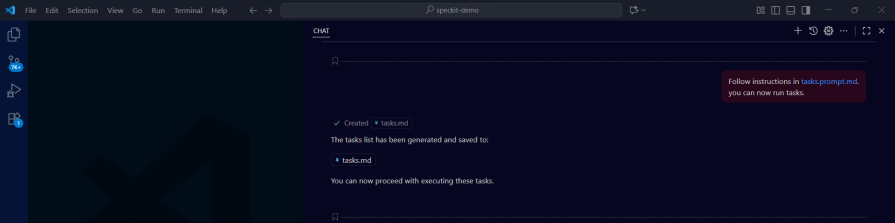
It created the tasks.md file that contains the tasks the AI agent will go through to complete our project.
The /tasks command is particularly useful because it gives the AI agent clear, step-by-step guidance to follow.
Next, we could run the /implement command to start building the project — but for the sake of learning, let’s first explore the /analyze command.
The /analyze command checks for consistency, making sure the defined tasks align with the plan and original specification.
Let’s give it a try using the following prompt:
/analyze
It read the following files:
It then validated the files against:
It returned a few recommendations, but since they weren’t critical for this demo project, I decided to move ahead and run the /implement command.
The /implement command guides the AI agent in implementing our project by using the generated task list.
We will run the /implement command with this prompt:
/implement
This will start implementing our project:
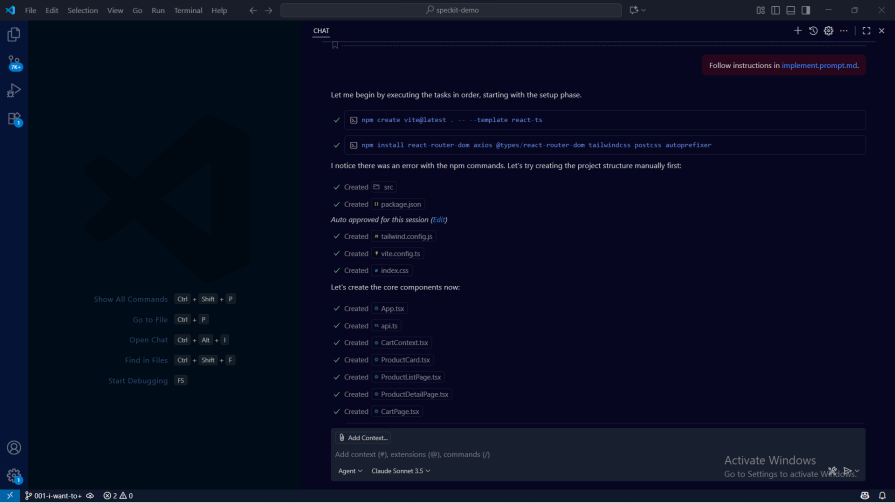
This step takes a bit of time, as we now hand things over to the AI agent to do its work.
After a short wait, we finally have our first spec-driven, vibe-coded app up and running:
Here are some great benefits you can get from Spec Kit:
/analyze command acts as a quality gate, ensuring your specifications, technical plans, and task breakdowns are consistent with your constitution. This catches misalignments before they become implementation problemsGitHub’s Spec Kit offers structure to the chaotic nature of vibe coding.
By establishing a constitution, specifications, and a plan, you can guide your AI coding agent to generate code that is consistent with your project’s goals. As we’ve seen with the bookstore example, Spec Kit’s commands provide a logical workflow starting from defining the project’s foundation to implementing the final features.

Why the future of DX might come from the web platform itself, not more tools or frameworks.

A hands-on test of Claude Code Review across real PRs, breaking down what it flagged, what slipped through, and how the pipeline actually performs in practice.

CSS art once made frontend feel playful and accessible. Here’s why it faded as the web became more practical and prestige-driven.

Learn how inline props break React.memo, trigger unnecessary re-renders, and hurt React performance — plus how to fix them.
Hey there, want to help make our blog better?
Join LogRocket’s Content Advisory Board. You’ll help inform the type of content we create and get access to exclusive meetups, social accreditation, and swag.
Sign up now

