Editor’s note: This article was last reviewed and updated by Joseph Mawa in January 2025 to offer updated information since the release of React 19, including removing the previous implementation of React’s Concurrent Mode, which is natively enabled if you use createRoot, the default rendering method in React 18 and above, as well as to offer more information about the useTransition Hook.

React’s Transitions API was released as part of React 18’s Concurrent Mode. It prevents an expensive UI render from being executed immediately.
To understand why we need this feature, remember that forcing expensive UI renders to run immediately can block lighter, more urgent UI renders from rendering in time. This can frustrate users who need an immediate response from the urgent UI renders.
An example of an urgent UI render would be typing in a search bar. When you type, you want to see your typing manifested and begin searching immediately. If the app freezes and the searching stops, you risk frustrating your user. Other expensive UI renders can bog down the whole app, including the light UI renders that are supposed to be fast (like seeing search results as you type).
Before the introduction of the Transitions API in React, you could solve this problem by debouncing or throttling. Unfortunately, using debouncing or throttling can still cause an app to become unresponsive.
React’s startTransition function allows you to mark certain updates in your app as non-urgent, so they are paused while more urgent updates are prioritized. This makes your app feel faster and can reduce the burden of rendering items in your app that are not strictly necessary. Therefore, no matter what you are rendering, your app is still responding to your user’s input.
In this article, we’ll learn how to use startTransition in your React app to delay non-urgent UI updates and avoid blocking urgent UI updates. With this feature, you can convert your slow React app into a fast, responsive one in no time. You can find the source code for our project in this GitHub repository.
The Replay is a weekly newsletter for dev and engineering leaders.
Delivered once a week, it's your curated guide to the most important conversations around frontend dev, emerging AI tools, and the state of modern software.
Before beginning the tutorial, you should have:
Let’s begin by creating a React project using Create React App (CRA):
npx create-react-app starttransition_demo
The command above creates a React project using the latest stable version of React, which is version 19. You can also use Vite instead of CRA.
After successfully creating the demo project, use the command below to start the development server:
npm run start
You can open the project in the browser on localhost on port 3000. You should see the familiar default page of a React project with a rotating React logo.
Next, let’s create a React app with a light UI render and an expensive UI render. Open the src/App.js file in the project we created above. If you created the project using CRA, you should see the App functional component displaying a React logo, a p tag, and a link.
Replace the App functional component with the code below:
function App() {
  const [search_text, setSearchText] = useState("");
  const [search_result, setSearchResult] = useState();

  const handleChange = (e) => {
    setSearchText(e.target.value);
  };

  useEffect(() => {
    if (search_text === "") {
      setSearchResult(null);
    } else {
      const rows = Array.from(Array(5000), (_, index) => {
        return (
          <div key={index}>
            <img src={logo} className="App-logo" alt="logo" />
            <div>
              {index + 1}. {search_text}
            </div>
          </div>
        );
      });

      const list = <div>{rows}</div>;
      setSearchResult(list);
    }
  }, [search_text]);

  return (
    <div className="App">
      <header className="App-header">
        <div className="SearchEngine">
          <div className="SearchInput">
            <input type="text" value={search_text} onChange={handleChange} />
          </div>
          <div className="SearchResult">{search_result}</div>
        </div>
      </header>
    </div>
  );
}
Now, you need to import the useEffect and useState hooks. Add the import statement below at the top of the App.js file:
import {useState, useEffect } from 'react';
Here, we are creating the app’s UI, which consists of two parts: the search input and the search result.
Because the input has a callback, when you type the text in the input field, the text is passed as an argument to setSearchText to update the value of search_text using the useState Hook. Then, the search result shows up. For this demo, the result is 5,000 rows where each row consists of a rotating React logo and the same search query text.
Our light and immediate UI render is the search input with its text. When you type some text in the search input field, the text should appear immediately. However, displaying 5,000 React logos and the search text is an expensive UI render.
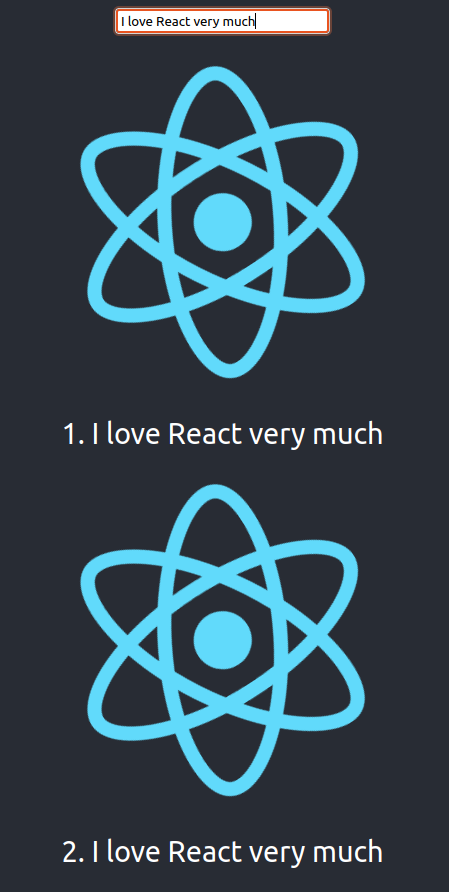
Let’s look at an example. Try typing “I love React very much” quickly in the app’s text input field. When you type “I,” the app renders the “I” text immediately in the search input. Then it renders the 5,000 rows. This takes a noticeably long time, which reveals our rendering problem.
The React app can’t render the full text immediately. The expensive UI render makes the light UI render slow as well. The overall UI becomes unresponsive.
You can try it yourself on the app at localhost on port 3000. You’ll be presented with a search input field. I have set up a demo app for this. Here’s a quick visual of the sample React app with a search bar that reads “I love React very much”:

What we want is for the expensive UI render not to drag the light UI render into the mud while it loads. They should be separated, which is where startTransition and the Transitions API come in.
startTransition functionLet’s see what happens when we turn the expensive state update into a non-blocking transition using the startTransition function. We’ll start by importing it as seen in the code below:
import { useState, useEffect, startTransition } from 'react';
Then, wrap the state updates for the expensive UI in the startTransition function we imported. Change the setSearchResult(null) and setSearchResult(list) state updates in the useEffect Hook to look like these:
useEffect(() => {
  if (search_text === "") {
    startTransition(() => {
      setSearchResult(null);
    });
  } else {
    ...
    startTransition(() => {
      setSearchResult(list);
    });
  }
}, [search_text]);
Now, you can test the app again. When you type something in the search field, the text is rendered immediately. After you stop (or a few seconds pass), the React app renders the search result.
The app remains responsive during the expensive UI update because we marked the setSearchResult state update as non-blocking using the startTransition function. Other urgent state updates can interrupt a non-blocking update. Therefore, rendering the expensive UI doesn’t block any interactions with the application.
You will notice that we used the startTransition function in the useEffect Hook but we never passed it as a dependency. This is because the startTransition function has a stable identity. You can omit it from the list of dependencies as we did above. Adding it to the list of dependencies won’t trigger the effect either.
What if you want to display something on the search results while waiting for the expensive UI render to finish? You may want to display a progress bar to give immediate feedback to users so they know the app is working on their request. For this, we can use the isPending variable that comes with the useTransition Hook.
useTransition HookBoth the useTransition Hook and the startTransition function are part of React’s Transitions API. Because useTransition is a hook, you must follow the rules of hooks when using it. You can only use it at the top level of a functional component or custom hook. On the other hand, you can use the startTransition function anywhere, including outside a React component.
The useTransition Hook doesn’t take any argument and returns an array of two elements. The first element is the variable that tracks the transition states. Its value is true if there is a pending transition; otherwise, it’s false. You can use it to display a loading indicator when there is a pending transition. The second element is the startTransition function you can use to mark non-blocking state updates:
const [isPending, startTransition] = useTransition();
Another difference between React’s useTransition Hook and the startTransition function we explored above is that useTransition is capable of tracking the transition states while startTransition cannot.
Now that we know what the useTransition Hook is, let’s implement it in our project. First, change the import line at the top of the App.js file into the code below:
import { useState, useEffect, useTransition } from 'react';
Extract isPending and startTransition from the useTransition Hook. Add the code below on the first line within the App functional component:
const [isPending, startTransition] = useTransition();
Next, change the contents of <div className="SearchResult"> to the code below:
{isPending && <div><br /><span>Loading...</span></div>}
{!isPending && search_result}
Now when you type the text in the search input very quickly, the loading indicator is displayed first:

The stable version of React 19 was released for production use in December 2024 and it included new features to the Transitions API.
In React 18, the actions callback function you passed to the startTransition function had to be synchronous, like so:
startTransition(() => {
  setState(newState);
});
However, in React 19, the startTransition function callback can be asynchronous. This improvement to the React Transitions API makes it easier to handle the different app states while performing asynchronous operations such as form submission in a transition callback.
Before the introduction of the async actions callback, you needed to manage loading and error states yourself and update the UI accordingly. However, with the async actions callback, you can now easily track loading and error states as in the example below:
const [error, setError] = useState(null);
const [isPending, startTransition] = useTransition();

const submitForm = () => {
  startTransition(async () => {
    const error = await updateUserDetails(details);
    if (error) {
      setError(error);
      return;
    }

    redirect("/new-path");
  });
};
In the code above, React will set isPending to true, then it will perform an async operation, and switch isPending back to false. Your UI will remain responsive throughout because these are non-blocking transitions.
React’s startTransition function and the useTransition Hook allow you to create smoother and more responsive React apps by separating immediate UI renders from non-urgent updates.
To get hands-on experience, check out the startTransition demo app and experiment with its features. With these tools and insights, you’re well-equipped to build React apps that are not only functional but also smooth.
Happy coding!
Install LogRocket via npm or script tag. LogRocket.init() must be called client-side, not
server-side
$ npm i --save logrocket

// Code:

import LogRocket from 'logrocket';
LogRocket.init('app/id');
// Add to your HTML:

<script src="https://cdn.lr-ingest.com/LogRocket.min.js"></script>
<script>window.LogRocket && window.LogRocket.init('app/id');</script>

@container scroll-state: Replace JS scroll listeners nowCSS @container scroll-state lets you build sticky headers, snapping carousels, and scroll indicators without JavaScript. Here’s how to replace scroll listeners with clean, declarative state queries.

Explore 10 Web APIs that replace common JavaScript libraries and reduce npm dependencies, bundle size, and performance overhead.

Russ Miles, a software development expert and educator, joins the show to unpack why “developer productivity” platforms so often disappoint.

Discover what’s new in The Replay, LogRocket’s newsletter for dev and engineering leaders, in the February 18th issue.
Would you be interested in joining LogRocket's developer community?
Join LogRocket’s Content Advisory Board. You’ll help inform the type of content we create and get access to exclusive meetups, social accreditation, and swag.
Sign up now
One Reply to "Getting started with startTransition in React 19"
Awesome explanation! I appreciate this