Editor’s note: This article was last updated on 10 October 2023 to enhance clarity and improve the comprehensibility of the code.

Frontend developers traditionally focus on user interfaces and don’t usually need to understand the process of receiving, recording, and removing information. But gaining an understanding of backend and database interactions comes with many advantages:
In this tutorial, we’ll demonstrate how to create a small application using Express and Node.js that can record and remove information from a PostgreSQL database according to the HTTP requests it receives. We’ll then create a simple React app to test how the entire application flows from front to back.
Jump ahead:
I published a GitHub repo for this tutorial so you can compare your code if you get stuck. Now let’s get our database running.
The Replay is a weekly newsletter for dev and engineering leaders.
Delivered once a week, it's your curated guide to the most important conversations around frontend dev, emerging AI tools, and the state of modern software.
PostgreSQL, or Postgres, is a relational database management system that claims to be the world’s most advanced open source relational database. It has been maintained since 1996 and has a reputation for being reliable and robust.
Start by downloading and installing PostgreSQL. It supports all major operating systems, so choose the right one for your computer and follow the instructions to set up the database. The setup wizard will prompt you to enter a superuser password. Make sure you remember this password; you’ll need it to log in later.
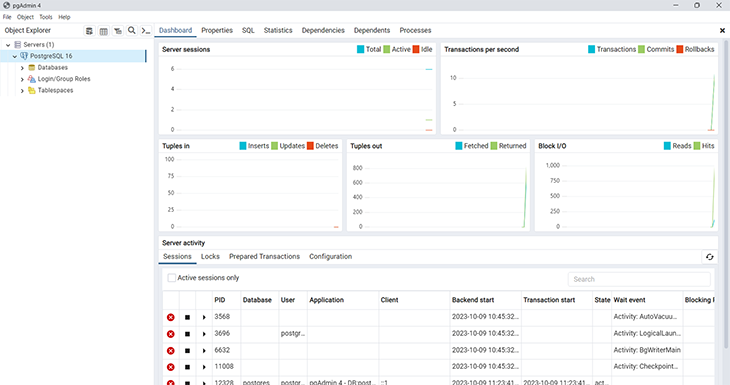
Once the installation is complete, you can access your database by using pgAdmin, a graphical interface tool that is installed automatically with PostgreSQL.
Once opened, pgAdmin will ask for your password to log in. Below is the overview of a newly installed PostgreSQL database:
To better understand the SQL language, we need to create a database and table from the terminal.
To access PostgreSQL from the terminal, use the command psql with the option -d to select the database you want to access and -U to select the user. If the terminal replies that the psql command is not found, you’ll most likely need to add the Postgres bin/ and lib/ directories into your system path:
psql -d postgres -U postgres
You will also be asked to input the password you created earlier. Once you’re logged in, create a new user by adding a login permission with the password “root“:
CREATE ROLE my_user WITH LOGIN PASSWORD 'root';
A user is simply a role that has login permission. Now that you have one, give it permission to create databases by issuing the ALTER ROLE [role name] CREATEDB syntax:
ALTER ROLE my_user CREATEDB;
In order to see what permissions you’ve granted to different users, you should run \du. This lists all users (roles) and what actions you’ve granted permissions for.
Log out from your postgres superuser and log in as my_user using the \q command. The password that you input here is the one you created for the my_user role:
\q
psql -d postgres -U my_user;
Now that you’re back inside, create a new database named my_database:
CREATE DATABASE my_database;
After creating your database, you will have to navigate into it before you start creating any tables. To do that, you can run \c my_database.
You might be wondering why we can’t just use the default postgres user to create the database. That’s because the default user is a superuser, which means it has access to everything within the database. According to the Postgres documentation, superuser status is dangerous and should be used only when needed.
An SQL-based database stores data inside a table. Now that you have a database, let’s create a simple table where you can record your data:
CREATE TABLE merchants( id SERIAL PRIMARY KEY, name VARCHAR(30), email VARCHAR(30) );
One database can have multiple tables, but we’ll be fine with one table for this tutorial.
If you’d like to check the created database and table, you can use the commands \list and \dt, respectively. You might see more rows or less, but as long as you have the database and the table you created previously, your table should look like this:
my_database=> \list
          List of databases
 Name        |  Owner   | Encoding
 my_database | my_user  | UTF8
 postgres    | postgres | UTF8
 template0   | postgres | UTF8
 template1   | postgres | UTF8


my_database=> \dt
          List of relations
 Schema |   Name    | Type  |  Owner
--------+-----------+-------+---------
 public | merchants | table | my_user
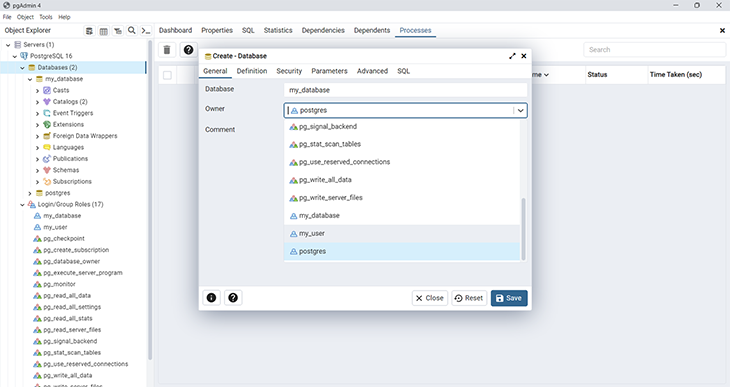
You can also create a database using pgAdmin 4 in only a few steps:
Now that we can create databases and consequently tables, we can start inserting data.
Postgres is an SQL-based system, which means you need to use SQL language to store and manipulate its data. Let’s explore four basic examples of SQL queries you can use.
To retrieve data from a table, use the SELECT key, followed by the name of the columns you want to retrieve and the name of the table:
SELECT id, name, email from merchants;
To retrieve all columns in the table, you can simply use SELECT *:
SELECT * from merchants;
To insert new data into a table, use the INSERT keyword followed by the table name, column name(s), and values:
INSERT INTO merchants (name, email) VALUES ('john', '[email protected]');
You can delete a row from a table by using the DELETE keyword:
DELETE from merchants WHERE id = 1;
When you use the delete query, don’t forget to specify which row you want to delete with the WHERE keyword. Otherwise, you’ll delete all the rows in that table.
Here’s how to delete multiple rows at the same time:
DELETE FROM merchants WHERE id IN(1,2)
We are using the above query with the assumption that we have more than one row in our database with IDs of 1 and 2. These two rows will be deleted.
To update a certain row, you can use the UPDATE keyword:
UPDATE merchants SET name = 'jake', email = '[email protected]' WHERE id = 1;
Now that you know how to manipulate data inside your table, let’s examine how to connect your database to React.
For this next section, we’re going to create a simple server with Node.js and Express and connect it to the PostgreSQL database we created. To imitate the behavior of a typical full-stack application, we’ll build a React frontend and communicate with the CRUD API we build on the server.
To connect your React app with a PostgreSQL database, you must first create an API server that can process HTTP requests.
Create a new directory and set a new npm package from your terminal with the following commands. I’ll create a backend folder just so I can split my work for better understanding. We’ll build our entire server inside this backend folder:
mkdir node-postgres && cd node-postgres
mkdir backend && cd backend
npm init
I like to run npm init -y so that it creates the package.json file without me having to fill in anything.
You can fill in your package information as you prefer, but here is an example of my package.json:
{
  "name": "node-postgres",
  "version": "1.0.0",
  "description": "Learn how NodeJS and Express can interact with PostgreSQL",
  "main": "index.js",
  "license": "ISC"
}
Next, install the required packages:
npm i express pg
Express is a minimalist web framework you can use to write web applications on top of Node.js technology, while node-postgres(pg) is a client library that enables Node.js apps to communicate with PostgreSQL.
After this step, feel free to open the directory (node-postgres) in an editor of your choice.
Create an index.js file in the root directory with the following contents:
const express = require('express')
const app = express()
const port = 3001

app.get('/', (req, res) => {
  res.status(200).send('Hello World!');
})

app.listen(port, () => {
  console.log(`App running on port ${port}.`)
})
Open your terminal in the same directory and run node index.js. Your Node application will run on port 3001, so open your browser and navigate to http://localhost:3001. You’ll see “Hello World!” text displayed in your browser.
You now have everything you need to write your API.
The pg library allows your Node application to talk with Postgres, so you’ll want to import it first. Create a new file named merchantModel.js and input the following code:
const Pool = require('pg').Pool
const pool = new Pool({
  user: 'my_user',
  host: 'localhost',
  database: 'my_database',
  password: 'root',
  port: 5432,
});
Please note that putting credentials such as user, host, database, password, and port like in the example above is not recommended in a production environment. We’ll keep it in this file to simplify the tutorial.
The right way to do this, however, would be to install a package called dotenv (remember to do this in your backend folder still) and use environment variables to reference these values from a .env file. Before pushing your project to a public platform such as GitHub, be sure to include the .env file in your .gitignore.
Back in our merchantModel.js code, the pool object you created above will allow you to query the database that it’s connected to. Let’s create three queries to make use of this pool. These queries will be placed inside a function, which you can call from your index.js:
const Pool = require("pg").Pool;
const pool = new Pool({
  user: "my_user",
  host: "localhost",
  database: "my_database",
  password: "root",
  port: 5432,
});
//get all merchants our database
const getMerchants = async () => {
  try {
    return await new Promise(function (resolve, reject) {
      pool.query("SELECT * FROM merchants", (error, results) => {
        if (error) {
          reject(error);
        }
        if (results && results.rows) {
          resolve(results.rows);
        } else {
          reject(new Error("No results found"));
        }
      });
    });
  } catch (error_1) {
    console.error(error_1);
    throw new Error("Internal server error");
  }
};
//create a new merchant record in the databsse
const createMerchant = (body) => {
  return new Promise(function (resolve, reject) {
    const { name, email } = body;
    pool.query(
      "INSERT INTO merchants (name, email) VALUES ($1, $2) RETURNING *",
      [name, email],
      (error, results) => {
        if (error) {
          reject(error);
        }
        if (results && results.rows) {
          resolve(
            `A new merchant has been added: ${JSON.stringify(results.rows[0])}`
          );
        } else {
          reject(new Error("No results found"));
        }
      }
    );
  });
};
//delete a merchant
const deleteMerchant = (id) => {
  return new Promise(function (resolve, reject) {
    pool.query(
      "DELETE FROM merchants WHERE id = $1",
      [id],
      (error, results) => {
        if (error) {
          reject(error);
        }
        resolve(`Merchant deleted with ID: ${id}`);
      }
    );
  });
};
//update a merchant record
const updateMerchant = (id, body) => {
  return new Promise(function (resolve, reject) {
    const { name, email } = body;
    pool.query(
      "UPDATE merchants SET name = $1, email = $2 WHERE id = $3 RETURNING *",
      [name, email, id],
      (error, results) => {
        if (error) {
          reject(error);
        }
        if (results && results.rows) {
          resolve(`Merchant updated: ${JSON.stringify(results.rows[0])}`);
        } else {
          reject(new Error("No results found"));
        }
      }
    );
  });
};
module.exports = {
  getMerchants,
  createMerchant,
  deleteMerchant,
  updateMerchant
};
The three functions above don’t do anything extraordinary:
getMerchants function gets all the merchants from our databasecreateMerchant creates a new merchant, with the name and email received from the body. These values will be passed by our frontend — we’ll see how this happens as we codedeleteMerchant function deletes a particular merchant from the database. This merchant is specified by id, which is passed in as a parameter. On the frontend, id is a promptupdateMerchant updates a specific merchant, determined by that merchant’s idThe code above will process and export the getMerchants, createMerchant, updateMerchants, and deleteMerchant functions. Now it’s time to update your index.js file and use these functions:
const express = require('express')
const app = express()
const port = 3001

const merchant_model = require('./merchantModel')

app.use(express.json())
app.use(function (req, res, next) {
  res.setHeader('Access-Control-Allow-Origin', 'http://localhost:5173');
  res.setHeader('Access-Control-Allow-Methods', 'GET,POST,PUT,DELETE,OPTIONS');
  res.setHeader('Access-Control-Allow-Headers', 'Content-Type, Access-Control-Allow-Headers');
  next();
});

app.get('/', (req, res) => {
  merchant_model.getMerchants()
  .then(response => {
    res.status(200).send(response);
  })
  .catch(error => {
    res.status(500).send(error);
  })
})

app.post('/merchants', (req, res) => {
  merchant_model.createMerchant(req.body)
  .then(response => {
    res.status(200).send(response);
  })
  .catch(error => {
    res.status(500).send(error);
  })
})

app.delete('/merchants/:id', (req, res) => {
  merchant_model.deleteMerchant(req.params.id)
  .then(response => {
    res.status(200).send(response);
  })
  .catch(error => {
    res.status(500).send(error);
  })
})
app.put("/merchants/:id", (req, res) => {
  const id = req.params.id;
  const body = req.body;
  merchant_model
    .updateMerchant(id, body)
    .then((response) => {
      res.status(200).send(response);
    })
    .catch((error) => {
      res.status(500).send(error);
    });
});

app.listen(port, () => {
  console.log(`App running on port ${port}.`)
})
Now the app has three HTTP routes that can accept requests. The app uses middleware to ensure that requests are being processed properly and that certain requests are valid. For example, app.use(express.json()) is written so that Express can accept incoming requests with JSON payloads.
We also have this:
app.use(function (req, res, next) {
  res.setHeader("Access-Control-Allow-Origin", "http://localhost:3000");
  res.setHeader("Access-Control-Allow-Methods", "GET,POST,PUT,DELETE,OPTIONS");
  res.setHeader(
    "Access-Control-Allow-Headers",
    "Content-Type, Access-Control-Allow-Headers"
  );
  next();
});
The above middleware lets our Express app allow requests to this app from React.
Note: because we are using plain Node to start our server, whenever you make changes to the backend, you need to run node index to make sure that your new changes are reflected. To get past this, you can install nodemon, which monitors the server for changes and restarts the server automatically.
Your API is ready to serve and process requests, so now it’s time to create a React application to send requests into it. Before moving on, navigate out of the backend folder and back into the root node-postgres folder.
Let’s bootstrap your React app with Vite. To do this, run npm create vite@latest in the terminal, and give the name frontend when prompted to give the project name.
Choose React as the framework you want to work with, and simultaneously run the next three commands you are prompted to run to finish setting up your app: cd <project name>, npm install, npm run dev.
You can freely delete files and folders that are not needed, as they’ll only clutter up your directory.
Now let’s write a simple React app from scratch. You can replace the contents of the App.js file with the following contents:
import {useState, useEffect} from 'react';

function App() {
  const [merchants, setMerchants] = useState(false);

  function getMerchant() {
    fetch('http://localhost:3001')
      .then(response => {
        return response.text();
      })
      .then(data => {
        setMerchants(data);
      });
  }

  function createMerchant() {
    let name = prompt('Enter merchant name');
    let email = prompt('Enter merchant email');
    fetch('http://localhost:3001/merchants', {
      method: 'POST',
      headers: {
        'Content-Type': 'application/json',
      },
      body: JSON.stringify({name, email}),
    })
      .then(response => {
        return response.text();
      })
      .then(data => {
        alert(data);
        getMerchant();
      });
  }

  function deleteMerchant() {
    let id = prompt('Enter merchant id');
    fetch(`http://localhost:3001/merchants/${id}`, {
      method: 'DELETE',
    })
      .then(response => {
        return response.text();
      })
      .then(data => {
        alert(data);
        getMerchant();
      });
  }

  function updateMerchant() {
    let id = prompt('Enter merchant id');
    let name = prompt('Enter new merchant name');
    let email = prompt('Enter new merchant email');
    fetch(`http://localhost:3001/merchants/${id}`, {
      method: 'PUT',
      headers: {
        'Content-Type': 'application/json',
      },
      body: JSON.stringify({name, email}),
    })
      .then(response => {
        return response.text();
      })
      .then(data => {
        alert(data);
        getMerchant();
      });
  }

  useEffect(() => {
    getMerchant();
  }, []);
  return (
    <div>
      {merchants ? merchants : 'There is no merchant data available'}
      <br />
      <button onClick={createMerchant}>Add merchant</button>
      <br />
      <button onClick={deleteMerchant}>Delete merchant</button>
      <br />
      <button onClick={updateMerchant}>Update merchant</button>
    </div>
  );
}
export default App;
This React app will send requests to the Express server you created. It has two buttons to add and delete a merchant. The getMerchant function will fetch merchant data from the server and set the result to the merchant state.
createMerchant, deleteMerchant, and updateMerchnat will start the process to add, remove, and update merchants, respectively, when you click on the buttons.
Now run your React app with npm run dev. You can test and see how the data collected from your React application is recorded in PostgreSQL:
Now you know how to install the PostgreSQL database, create a database and table, and build a minimal CRUD API to function as a bridge between your React app and your database.
We created an end-to-end example of how to use Postgres with React and demonstrated exactly what happens when you send those HTTP requests from your React app. This small application can be improved upon to handle different errors and edge cases, but you see the general idea of how to manipulate data in PostgreSQL.
This tutorial is far from a complete guide to backend programming, but it’s enough to help you get started in understanding how the backend works.
If you find any error or can’t insert data from the application, you can clone the complete source code from this repo and compare the code with your example.
Install LogRocket via npm or script tag. LogRocket.init() must be called client-side, not
server-side
$ npm i --save logrocket

// Code:

import LogRocket from 'logrocket';
LogRocket.init('app/id');
// Add to your HTML:

<script src="https://cdn.lr-ingest.com/LogRocket.min.js"></script>
<script>window.LogRocket && window.LogRocket.init('app/id');</script>

I had four weeks to build a complete app from scratch using AI tools like OpenCode and Claude Opus: here’s how it went.

Learn how to build a reusable Vue 3 table engine that powers tables, cards, and lists with shared sorting and pagination logic.

Compare the best React chart libraries for 2026, including Recharts, Nivo, visx, Apache ECharts, MUI X Charts, and more.

Claude Code vs. OpenCode in a real Next.js refactor: benchmark results, mistakes, prompts, and when to use each CLI agent.
Hey there, want to help make our blog better?
Join LogRocket’s Content Advisory Board. You’ll help inform the type of content we create and get access to exclusive meetups, social accreditation, and swag.
Sign up now

