
The OpenAPI specification simplifies the RESTful API development process by offering a standard document that developers can use to auto-generate API documentation, validators, and client SDKs. Angular developers can speed up the initial frontend development tasks by generating API client modules using OpenAPI specifications without spending time writing API clients from scratch.
In this tutorial, we’ll learn how to generate OpenAPI API clients for Angular web projects.
The Replay is a weekly newsletter for dev and engineering leaders.
Delivered once a week, it's your curated guide to the most important conversations around frontend dev, emerging AI tools, and the state of modern software.
Using auto-generated API clients brings the following benefits to your Angular projects.
OpenAPI code generation tools let developers build RESTful API clients by importing the YAML/JSON OpenAPI specification file without writing any HTTP client implementation sources. For example, you can easily call the getProducts() method of the generated client without implementing it with HttpClient, Axios, or Fetch to make an HTTP request to GET /products.
Automated code generation eliminates common developer errors, such as method naming issues, missing fields in responses, and HTTP client implementation issues in manually written API clients.
OpenAPI client generators rely on API specification files and basic code generation options (e.g., letter case styles), so they will always generate consistent method implementations that app developers can use without confusion.
Like Angular TypeScript code, developers can generate API clients for multiple language targets by maintaining the same API interface. Suppose you need to port your Angular app into another language and platform. In that case, you don’t need to worry about an auto-generated Angular API client source since OpenAPI code generators support multiple target languages/platforms, i.e., Java, Rust, Android, etc..
Let’s learn how to generate an API client for an Angular project using the open-source OpenAPI Generator program. The OpenAPI Generator project offers a CLI for generating API client modules for multiple language targets by importing a YAML/JSON API specification file.
We’ll generate an API client for a sample Angular project and use it to connect with a simple backend RESTful server through the Angular app interface.
Create a new Angular project to continue with this tutorial:
ng new openapi-demo
cd openapi-demo
First, you should find your RESTful API server’s OpenAPI specification file to generate an API client for your Angular frontend. In this tutorial, we’ll use a simple, pre-developed RESTful API server and its OpenAPI specification file to generate a new API client. We’ll test the generated client using a sample Angular app frontend implementation.
Get the sample RESTful API server source which implements a few endpoints to add, retrieve, and remove simple product objects by cloning this GitHub repository. Create a new directory named server within the Angular project and clone the GitHub repository inside it as follows:
mkdir server
cd server
git clone https://github.com/codezri/openapi-generator-node.git .
Install dependencies and start the RESTful server:
npm install
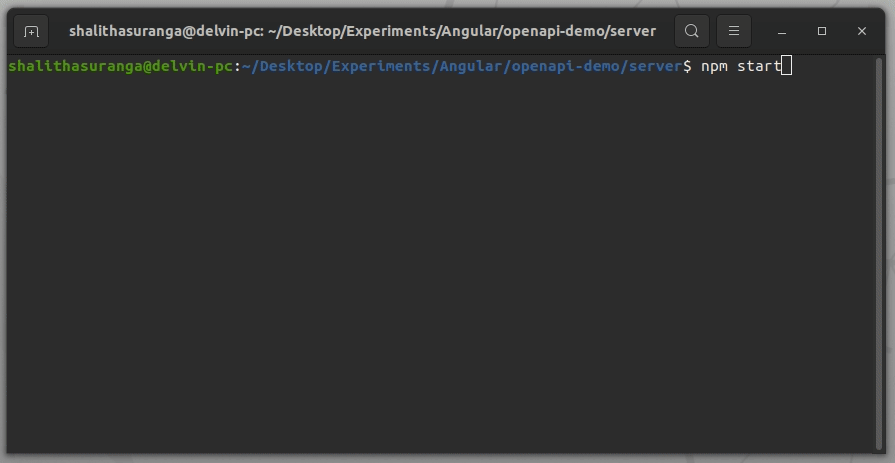
npm start
# --- or --- #
yarn
yarn start
The start script generates the openapi.yaml API specification file based on JSDoc annotations using the [swagger-jsdoc](https://github.com/Surnet/swagger-jsdoc) library and starts the RESTful server on the port 8080. Now, we can use the generated OpenAPI specification file to generate an API client for Angular:
In production systems, you may have to request API specifications from the backend development team if you are a front-end developer — or export it yourself (i.e., from an API designer console like AWS API Gateway) if you are a full-stack developer.
Before installing code generation dependency packages, make sure that your computer has a working Java Runtime Environment (JRE) version 11 or greater since the OpenAPI Generator CLI uses .jar artifacts for code generation. You can verify your JRE installation by entering the java command on the terminal.
Install OpenAPI Generator CLI as a developer dependency into your Angular project:
npm install @openapitools/openapi-generator-cli -D
# --- or --- #
yarn add @openapitools/openapi-generator-cli -D
After the installation, we can use the openapi-generator-cli command within package.json scripts to generate API client sources for the Angular app at a specified output directory.
Update the NPM scripts section to auto-generate the client before running and building the app:
...
"scripts": {
  "ng": "ng",
  "generate": "openapi-generator-cli generate -i server/openapi.yaml -g typescript-angular -o src/app/modules/openapi --additional-properties fileNaming=kebab-case,withInterfaces=true --generate-alias-as-model",
  "start": "npm run generate && ng serve",
  "build": "npm run generate && ng build",
...
The above generate NPM script generates the API client source using the openapi-generator-cli command using the typescript-angular code generator module. The generate script executes the openapi-generator-cli command with several CLI options like --additonal-properties to generate client code matching Angular coding style and recommended file naming conventions. We’ll discuss configuring the code generator in an upcoming section of this tutorial.
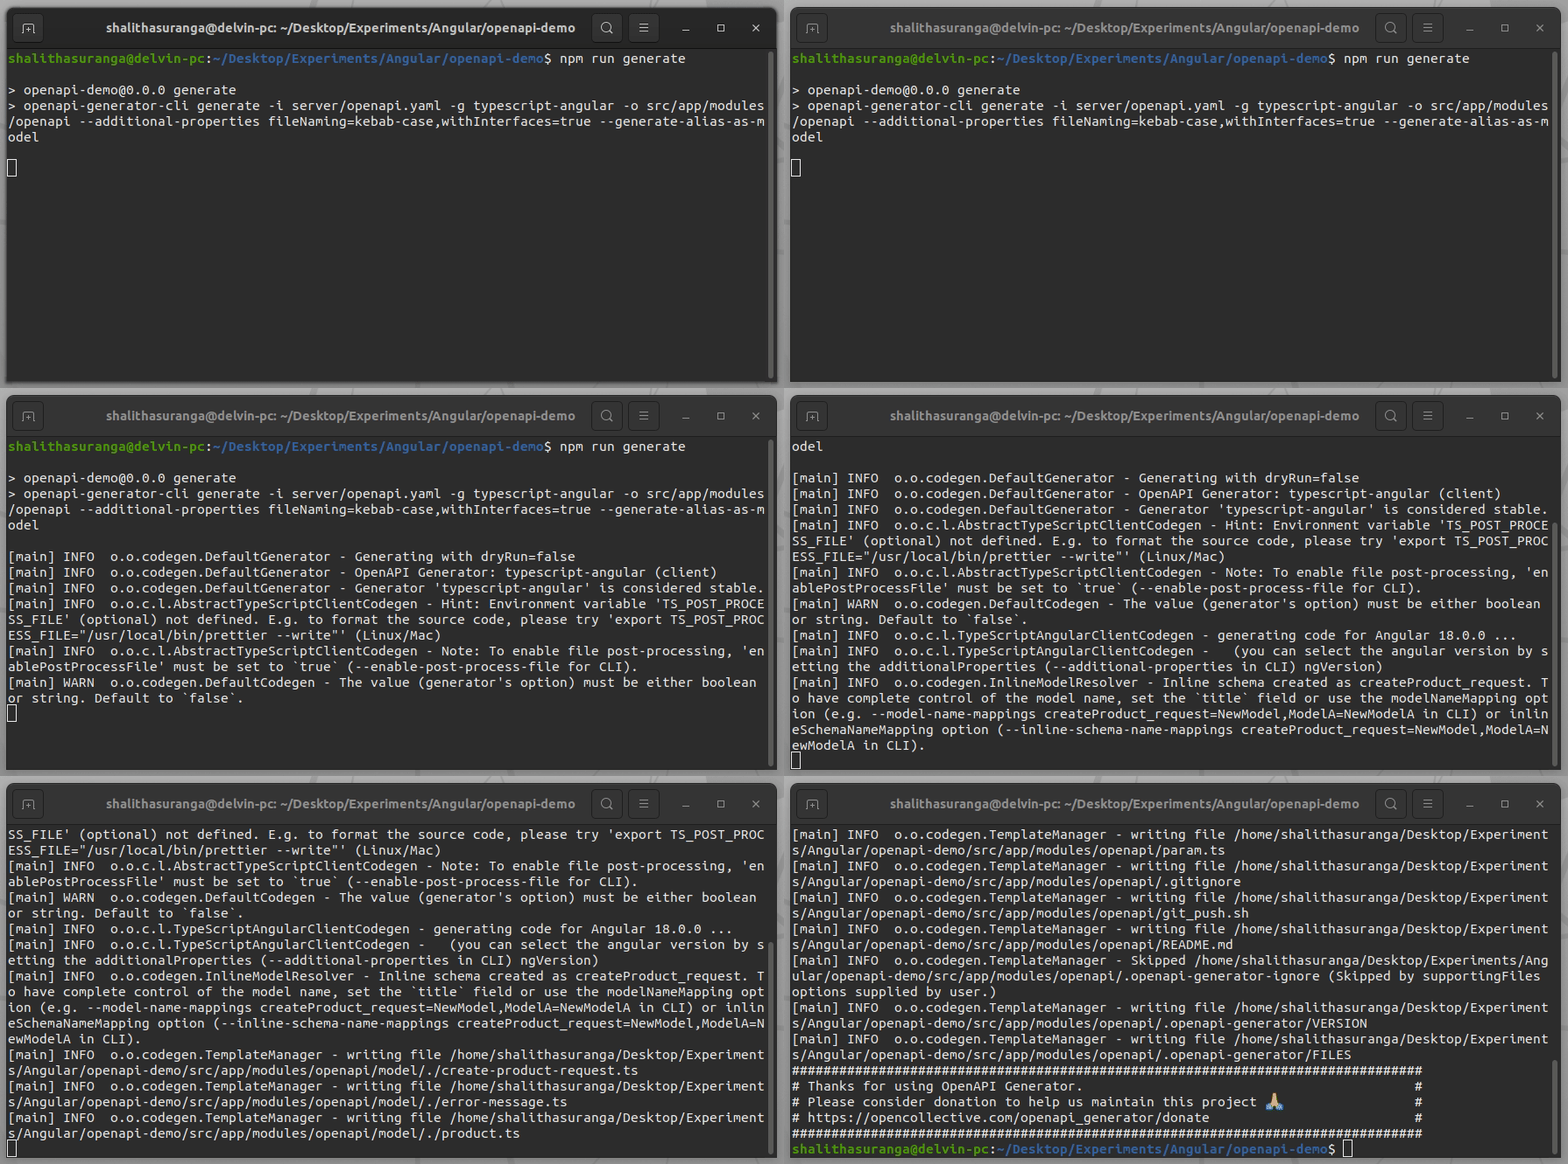
Run the generate script to auto-generate the client source at src/app/modules/openapi, as demonstrated below:
Browse the auto-generated client implementation and see how it creates a new service, defines models, and exports necessary elements:
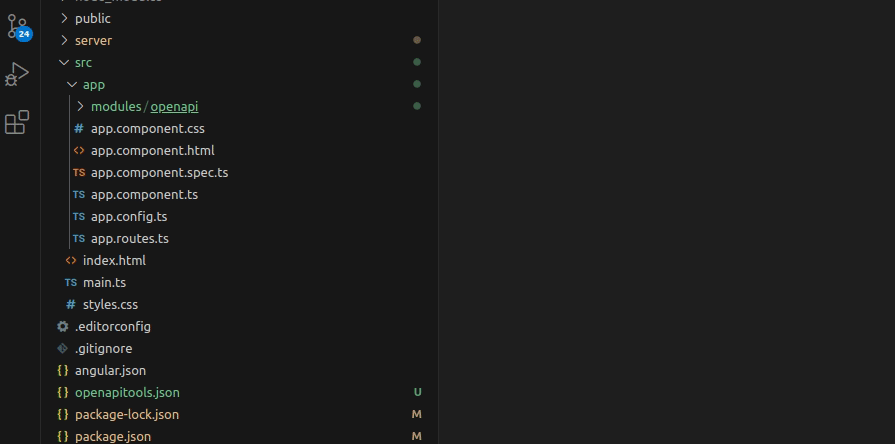
Here are some important facts to notice in this code-generation process:
servers section in the API specificationoperationId field, i.e., getProducts operation identifier helps the code generator define the getProducts() method that invokes the GET /products endpointproduct tag, so the generated client only contains the product.service.ts service fileThe auto-generated Angular service is ready for use with our sample Angular app.
The auto-generated client source uses the Angular HttpClient class to make HTTP requests, so enable it in the app by updating app.config.ts file as follows:
// ...
import { provideHttpClient } from '@angular/common/http';

export const appConfig: ApplicationConfig = {
  providers: [provideZoneChangeDetection({ eventCoalescing: true }), provideRouter(routes), provideHttpClient()]
};
Next, import the auto-generated ProductService and Product elements to the app.component.ts file:
import { ProductService, Product } from './modules/openapi';
Inject an instance of the ProductService class by updating the component constructor:
constructor(private productService: ProductService) {}
See available methods of the injected service using your code editor’s auto-completion feature. You’ll see all the operations you’ve defined in the API specification file, as shown in the following preview:

Using this approach, you can use any auto-generated client service in any Angular component.
To make this tutorial more practical and interactive, we’ll create a simple UI for adding, listing, and removing product elements through the generated OpenAPI client.
First, update the app.component.ts file with the following required imports to start developing the app:
// ...
import { Observable } from 'rxjs';
import { AsyncPipe } from '@angular/common';
import { FormsModule } from '@angular/forms';
// ...
Update the component decorator’s imports section with AsyncPipe and FormsModule as follows:
@Component({
  // ...
  imports: [RouterOutlet, AsyncPipe, FormsModule],
})
Update the app component class by implementing methods to add, list, and delete products:
export class AppComponent {
  products$!: Observable<Product[]>;
  productName!: string;

  constructor(private productService: ProductService) {}

  ngOnInit() {
    this.loadProducts();
  }

  loadProducts() {
    this.products$ = this.productService.getProducts();
  }

  deleteProduct(productId: number) {
    this.productService.deleteProduct(productId)
      .subscribe(() => this.loadProducts());
  }

  createProduct() {
    this.productService.createProduct({name: this.productName})
      .subscribe(() =>  {
        this.productName = '';
        this.loadProducts();
      })
  }
}
The above component implementation uses createProduct(), getProducts(), and deleteProduct() methods from the auto-generated API client service to call RESTful API endpoints.
Update the app.component.html file as follows to create a simple UI to invoke the above component methods and render products:
<h1>Products</h1>

<div>
  <input type="text" [(ngModel)]="productName" placeholder="Product name">
  <button (click)="createProduct()">Create</button>
</div>

<div>
  <ul>
    @for (product of (products$ | async); track product.id) {
    <li>{{ product.name }} <span (click)="deleteProduct(product.id!)">✖️</span></li>
    }
  </ul>
</div>

<router-outlet />
Finally, style the above HTML structure using the following styles in the app.component.css file:
ul {
    margin: 1em 0 0 0;
    padding: 0;
}

li {
    list-style: none;
    background-color: #eee;
    padding: 0.5em;
    margin-bottom: 0.2em;
}

li span {
    cursor: pointer;
    font-size: 0.75em;
    padding-left: 0.5em;
}

button,
input {
    font-size: 0.8em;
    padding: 0.3em 1em 0.3em 1em;
    margin-right: 0.8em;
}
Start the sample RESTful server on the port 8080 and start your Angular app. Now your Angular app communicates with the server via the auto-generated OpenAPI client and lets you list, add, and remove product entities demonstrated as follows:
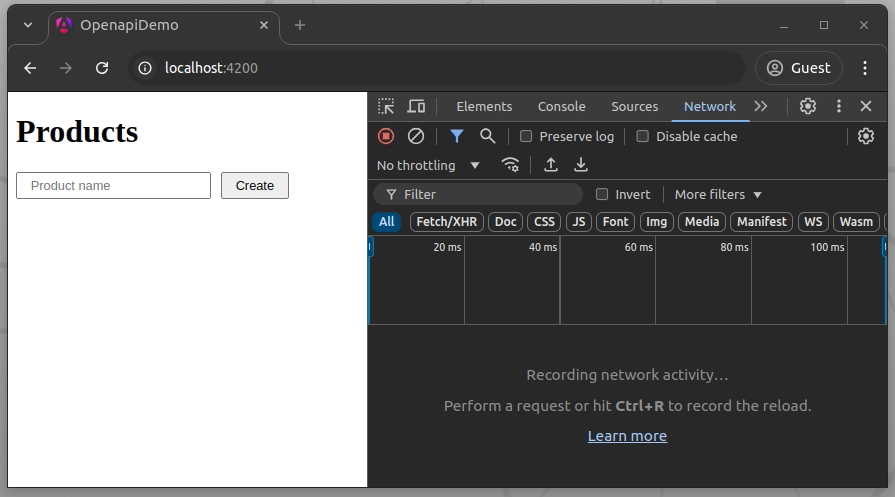
As shown in the above demonstration, the auto-generated OpenAPI client makes HTTP requests to the server when its methods are invoked.
In this tutorial, we let the code generator define the API server URL using the OpenAPI servers section, but you can set it from app.config.ts without using the servers the section in API specification:
import { BASE_PATH } from './modules/openapi';

export const appConfig: ApplicationConfig = {
  providers: [..., { provide: BASE_PATH, useValue: 'http://localhost:8080' }]
};
The above code snippet uses the BASE_VALUE injected token to set the API server URL via a custom provider object.
Alternatively, you can directly change the basePath property of the service configuration as well:
this.productService.configuration.basePath = "http://localhost:8080";
The above sample RESTful server implementation used a public API without protected endpoints to simplify the OpenAPI client code generation demonstration. However, most modern RESTful servers implement protected endpoints using the bearer token authentication strategy. OpenAPI Generator supports the bearer authentication strategy and generates code to include Authorization HTTP header for calling protected endpoints.
Let’s check how to generate code for protected endpoints that use bearer authentication. Assume that the sample RESTful server treats the /products endpoint as a protected endpoint by validating the JWT bearer token.
Define the JWT security strategy in the OpenAPI components section by updating the server/openapi.yaml file:
...
components:
  securitySchemes:
    JWT:
      type: http
      scheme: bearer
      bearerFormat: JWT
...
Now, use the JWT security strategy for the GET /products endpoint as follows:
...
paths:
  /products:
    get:
      security:
        - JWT: []
      operationId: getProducts
...
Now, the generated client will include the bearer token authentication code that will set the Authorization header for the GET /products endpoint call. The JWT token is usually obtained after a successful user login flow, but we can use a random token to test the bearer authentication implementation of the auto-generated API client. Set a test JWT token from the ngInit() method as follows:
ngOnInit() {
  this.productService.configuration.credentials = { JWT: 'access_token' };
  this.loadProducts();
}
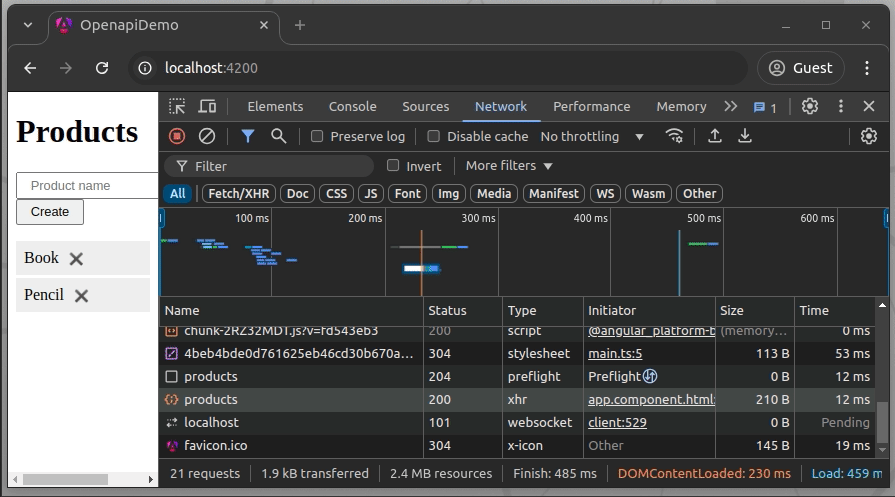
Re-run the Angular project to generate the client and start the sample app. You’ll notice the test JWT token value only in the headers of the protected GET /products endpoint call, as shown in the following screen recording:
The refresh token request flow is not yet implemented in the Angular code generator of the OpenAPI Generator project, but you can implement refresh token flow with HTTP interceptors as shown in the following sample code snippet:
export const appConfig: ApplicationConfig = {
  providers: [..., provideHttpClient(withInterceptors([refreshTokenInterceptor]))]
};
In the above code snippet, the refreshTokenInterceptor is an Angular HTTP interceptor that calls your RESTful server to request a new token using the stored refresh token if the current JWT bearer token has expired.
Learn more about REST API authentication flows from this article.
The OpenAPI Generator CLI program accepts several global and target-language-specific code generation configuration properties via CLI options. For example, earlier we used the fileNaming=kebab-case configuration property after the--additional-properties CLI option to use the kebab case for Angular source file naming.
Here are some general configuration properties that you may need to use with your OpenAPI client project:
Configuration property (sent using --additional-properties) |
Description | Default value |
|---|---|---|
ngVersion |
Angular version (use at least 9.0.0) | 18.0.0 |
npmName |
NPM package identifier. Use this if you want to publish the generated client as a separate NPM module | null |
npmVersion |
NPM package version | OpenAPI specification version or 1.0.0 |
npmRepository |
NPM package registry URL | null |
supportsES6 |
Generates ES6 code | false |
See all supported Angular-specific configuration properties by entering the following command on your terminal:
npx @openapitools/openapi-generator-cli config-help -g typescript-angular
The generate sub-command of the code generator CLI also supports various CLI options for configuring the generic code generation process. You can see all supported options of the generate sub-command parameters by entering the following command on your terminal:
npx @openapitools/openapi-generator-cli help generate
Auto-generated codes are not solely written by humans focusing on code readability and maintainability — code generators typically construct functionality-focused code using templates based on input parameters. So, auto-generated code should be kept away from the Angular app codebase you’ve written manually. Adhere to the following best practices while using auto-generated OpenAPI clients to improve the quality of the overall codebase:
src/api/modules/apiclientIn this tutorial, we explored the benefits of using OpenAPI client generators and generated a sample client for an Angular app by importing a YAML API specification file. We also discussed best practices that we should follow when we use auto-generated OpenAPI clients in Angular projects.
The OpenAPI Generator CLI lets you generate API client sources for numerous target languages and frameworks including the Angular framework. The code generator program automatically creates models and services that we can directly use within Angular projects without writing a single code line for manual API client implementations including bearer authentication.
Auto-generated code isn’t solely human-written, so we’ll have to follow the above-mentioned best practices to safeguard the quality and maintainability of the original Angular app codebase.
Debugging Angular applications can be difficult, especially when users experience issues that are difficult to reproduce. If you’re interested in monitoring and tracking Angular state and actions for all of your users in production, try LogRocket.
LogRocket lets you replay user sessions, eliminating guesswork by showing exactly what users experienced. It captures console logs, errors, network requests, and pixel-perfect DOM recordings—compatible with all frameworks.
With Galileo AI, you can instantly identify and explain user struggles with automated monitoring of your entire product experience.
The LogRocket NgRx plugin logs Angular state and actions to the LogRocket console, giving you context around what led to an error, and what state the application was in when an issue occurred.
Modernize how you debug your Angular apps — start monitoring for free.

React Server Components and the Next.js App Router enable streaming and smaller client bundles, but only when used correctly. This article explores six common mistakes that block streaming, bloat hydration, and create stale UI in production.

Gil Fink (SparXis CEO) joins PodRocket to break down today’s most common web rendering patterns: SSR, CSR, static rednering, and islands/resumability.

@container scroll-state: Replace JS scroll listeners nowCSS @container scroll-state lets you build sticky headers, snapping carousels, and scroll indicators without JavaScript. Here’s how to replace scroll listeners with clean, declarative state queries.

Explore 10 Web APIs that replace common JavaScript libraries and reduce npm dependencies, bundle size, and performance overhead.
Hey there, want to help make our blog better?
Join LogRocket’s Content Advisory Board. You’ll help inform the type of content we create and get access to exclusive meetups, social accreditation, and swag.
Sign up now