Imagine this: A customer is interested in building an app for their product or service. They’re mostly sold on the idea but haven’t yet committed to signing off on development. Maybe they’re unsure, or they’re struggling to convince stakeholders who control the budget.

That recently happened to me. And the reality is, you can describe your app in vivid detail — how it will work, how it all fits together — but while you can visualize the experience clearly, your customer may not. Worse, they might not visualize anything at all.
Giving customers something they can see and interact with goes a long way toward earning their buy-in.
When building Flutter apps, I know I can target iOS and Android. But Flutter also supports web apps. So I thought, “Can I create a compelling web experience that sells someone on building a mobile app?”
Turns out, yes — and the result is pretty impressive.
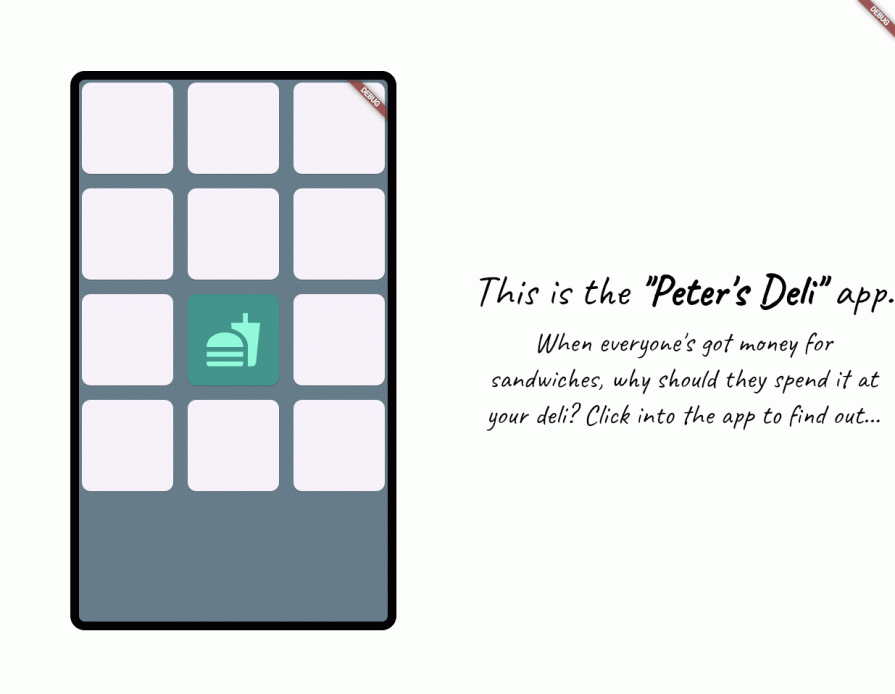
Here’s what the demo app looks like:
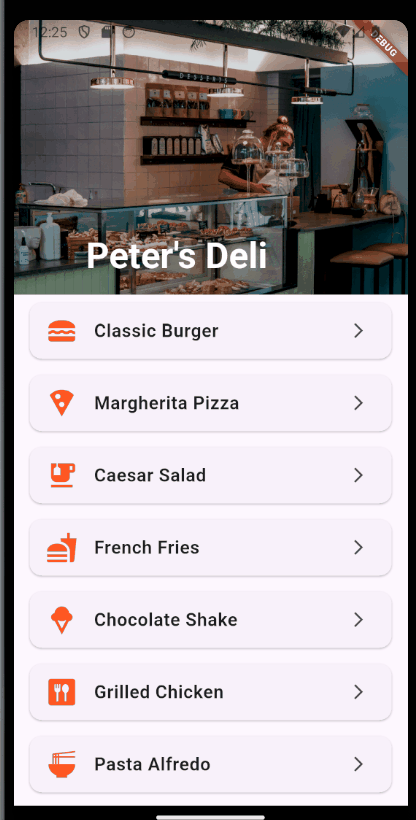
We have a functional app — so let’s walk through building out the demo website.
main.dart to support a showcase layoutTypically, your main.dart might look like this:
class MyApp extends StatelessWidget {
  const MyApp({super.key});

  @override
  Widget build(BuildContext context) {
    return MaterialApp(
      title: 'Flutter Demo',
      theme: ThemeData(
        colorScheme: ColorScheme.fromSeed(seedColor: Colors.deepPurple),
      ),
      home: PetersDeliHomePage(),
    );
  }
}
Here, the PetersDeliHomePage widget is the main entry point. But we can wrap the entire app in a custom widget to showcase it side-by-side with some descriptive text, without affecting its functionality.
Let’s create a ShowcaseWidget that displays the app on the left and some marketing copy on the right:
import 'package:appdemo/home/home.dart';
import 'package:flutter/material.dart';

class ShowcaseWidget extends StatelessWidget {
  const ShowcaseWidget({super.key});

  @override
  Widget build(BuildContext context) {
    return Row(
      children: [
        Expanded(child: PetersDeliHomePage()),
        Expanded(child: Text("We'll put some words over here")),
      ],
    );
  }
}
Here’s how that looks:
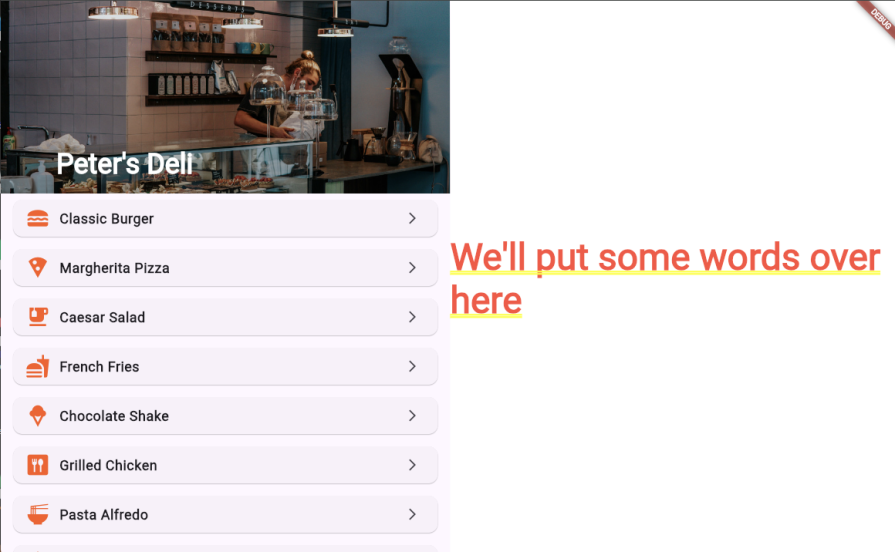
Now the user can interact with the app while reading key feature highlights on the side. Neat, right?
Most Flutter apps use MaterialApp as the root widget to provide styling and navigation. Because MaterialApp is just a widget, we can nest it. That’s the trick to making our demo feel like a real app inside a browser.
We’ll create a shell with a border that wraps the inner MaterialApp:
class DemoAppShell extends StatelessWidget {
  const DemoAppShell({super.key});

  @override
  Widget build(BuildContext context) {
    return Padding(
      padding: const EdgeInsets.all(100.0),
      child: Container(
        height: 800,
        width: 450,
        decoration: BoxDecoration(
          borderRadius: BorderRadius.circular(20),
          border: Border.all(color: Colors.black, width: 12),
          color: Colors.blueGrey,
        ),
        child: MaterialApp(
          home: PetersDeliApp(),
        ),
      ),
    );
  }
}
We’ll also add a splash screen with a loading animation that transitions into the app:
class Splashscreen extends StatefulWidget {
  const Splashscreen({super.key});

  @override
  State<Splashscreen> createState() => _SplashscreenState();
}

class _SplashscreenState extends State<Splashscreen> {
  var showLoader = false;

  @override
  void initState() {
    super.initState();
    Future.delayed(Duration(seconds: 3)).then((_) {
      setState(() => showLoader = true);

      Future.delayed(Duration(seconds: 5)).then((_) {
        Navigator.of(context).push(
          MaterialPageRoute(builder: (_) => PetersDeliHomePage()),
        );
      });
    });
  }

  @override
  Widget build(BuildContext context) {
    return Material(
      color: Colors.teal,
      child: Column(
        mainAxisAlignment: MainAxisAlignment.spaceEvenly,
        children: [
          appIcon(),
          Column(
            mainAxisSize: MainAxisSize.min,
            children: [
              Text(
                "P E T E R ' S    D E L I",
                style: Theme.of(context).textTheme.headlineLarge,
              ),
              AnimatedOpacity(
                duration: Duration(seconds: 1),
                opacity: showLoader ? 1 : 0,
                child: CircularProgressIndicator(color: Colors.tealAccent),
              ),
            ],
          ),
        ],
      ),
    );
  }
}
To ensure the demo works with a mouse as well as touch, update the scroll behavior to support all pointer devices:
child: MaterialApp(
  scrollBehavior: MaterialScrollBehavior().copyWith(
    dragDevices: {
      PointerDeviceKind.mouse,
      PointerDeviceKind.touch,
      PointerDeviceKind.stylus,
      PointerDeviceKind.unknown
    },
  ),
  navigatorKey: appNavigatorKey,
  home: PetersDeliApp(),
),
This lets users interact with the app using any input method:
It’s a simple technique, but the illusion of launching an app within the browser is effective.
Because this is an app showcase, we want two things:
For the text on the right, this should be where we describe our app and what is currently happening. Fortunately, Google has a huge fonts repository that we can use:
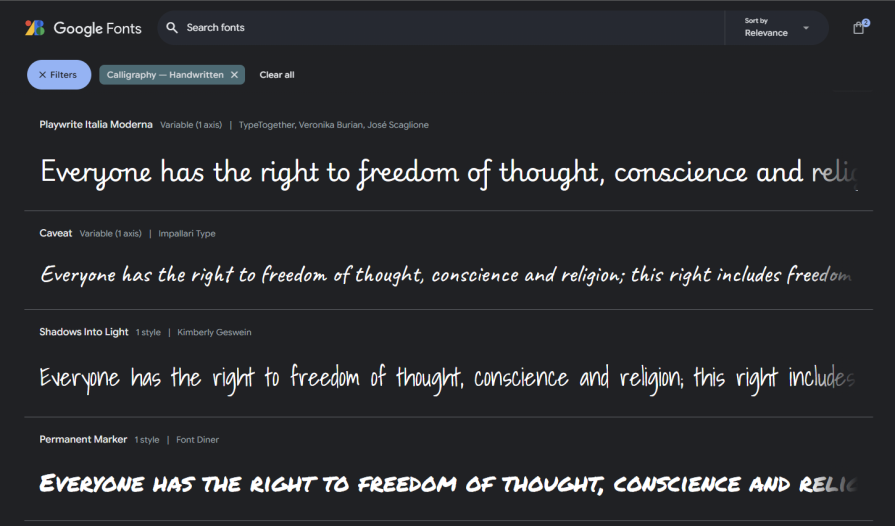
And there’s the google_fonts package, which lets us use these fonts. We can add it to our pubspec.yaml as a dependency.
For me, I’ll choose Caveat, because I think it strikes the right balance between being casual yet professional.
Because our widgets are nested under each other in the tree, when the user clicks an option in the simulator, we’d like to have that event bubble up to the outer shell. This way, we can communicate what the user is doing, or draw their attention to a specific aspect.
The various states (or pages) within our app will be the following:
enum CurrentAppState {
  Launcher,
  Loading,
  MainMenu,
  Ordering,
  Ordered,
}
We’ll also set up a Map describing what each step does:
const showcaseWidgets = {
  CurrentAppState.Launcher: [
    Text(
        "When everyone's got money for sandwiches, why should they spend it at your deli? Click into the app to find out...")
  ],
  CurrentAppState.Loading: [
    Text("Users' session and favourites are remembered on application load.")
  ],
  CurrentAppState.MainMenu: [
    Text("The main menu, so many tasty things!"),
    ListTile(
      title: Text(
        "Favorites",
      ),
      subtitle: Text(
          "Frequent orders are remembered and presented to the orderer again on subsequent orders."),
      tileColor: Colors.white,
    ),
    ListTile(
      title: Text("Specials"),
      subtitle:
          Text("Peter's weekend special is displayed at the bottom of the app"),
      tileColor: Colors.white,
    ),
    ListTile(
      title: Text("Looks good"),
      subtitle: Text("The picture of Peter fades out as the user scrolls up"),
      tileColor: Colors.white,
    )
  ],
  CurrentAppState.Ordering: [
    Text("A lot of options for people who know how they want their food"),
    ListTile(
      title: Text("Ordering time shown"),
      subtitle: Text("People can choose when they want their food"),
      tileColor: Colors.white,
    ),
    ListTile(
      title: Text("Some sauce, or no?"),
      subtitle: Text("Menu items are customisable"),
      tileColor: Colors.white,
    )
  ],
  CurrentAppState.Ordered: [
    Text("Straight from the kitchen out to you!"),
  ]
};
Then, within our topmost widget, we need to respond to these events appropriately:
class _ShowcaseTextState extends State<ShowcaseText> {
  var step = showcaseWidgets.entries.first;

  @override
  Widget build(BuildContext context) {
    return BlocListener<ShowcaseBloc, ShowcaseState>(
      listener: (context, state) {
        if (state is ShowcaseStep) {
          setState(() {
            step = showcaseWidgets.entries
                .firstWhere((x) => x.key == state.currentStep);
          });
        }
      },
This code is quite trivial: just set the active step based on what was set in the event.
Finally, we’d like to set up one more BlocListener for when the user places an order. This is to animate the background to give the user a good microinteraction when they click Order. Because the animation begins as white, we want to animate it forward, and then back when it finishes.
@override
Widget build(BuildContext context) {
  return BlocProvider(
    create: (context) => ShowcaseBloc(),
    child: BlocListener<ShowcaseBloc, ShowcaseState>(
      listener: (context, state) {
        if (state is ShowcaseStep) {
          if (state.currentStep == CurrentAppState.Ordered) {
            _animationController.forward().then((x) {
              _animationController.reverse();
            });
          }
        }
      },
So how does this look when it’s all put together?
It looks pretty good — and it might help sell customers who were previously undecided.
Building apps is expensive, and customers often hesitate. But if you can show them — right in the browser — what their app might look like, you’ve got a powerful tool.
Don’t get me wrong — I wouldn’t roll around pumping out apps in this showcase format for just anyone. But if a customer needs a little nudge, it might be enough to win them over.
Plus, the sheer portability of it is great. They can send the link to coworkers to get their input. That leads to feedback, and before you know it, people are talking about what they want added or changed in the app.
Building a showcase like this can be a powerful tool to close a customer. And afterwards, what you ship will look and feel quite similar to what they saw in the showcase — since they’re all built using the same tool.
To give it a go on your end, check out the repository below, or use the online demo:
👉 GitHub: azimuthdeveloper/fancy-flutter-showcase
Hopefully this has inspired you to produce a showcase for your next customer who needs a little help making a decision. Hopefully you’ll close them — and then it’s time to develop the actual app!

Learn how to protect full-stack projects from NPM supply chain attacks with a practical security checklist.

Explore 15 essential MCP servers for web developers to enhance AI workflows with tools, data, and automation.

Learn how contrast-color() automatically picks accessible text colors using native CSS, without JavaScript.

Learn how to build a harness-style AI workflow using Claude Code with specialized Dev, QE, and Ops subagents, gated handoffs, MCP telemetry, and LEARNING.md.
Hey there, want to help make our blog better?
Join LogRocket’s Content Advisory Board. You’ll help inform the type of content we create and get access to exclusive meetups, social accreditation, and swag.
Sign up now

