Editor’s note: This post was updated on 7 June 2023 to include information on how to create a blob and instructions for using the react-native-blob-util package to download PDFs from the cloud. See this resource for more information about blobs and how to read blob content.

Occasionally, when working with React Native, we might need to access our device’s file system to perform certain operations. These operations could include creating, saving, and editing a file, or uploading or downloading files from the cloud.
This is where the react-native-fs and react-native-blob-util packages come into play. These packages provide native file system access for React Native. In other words, they make file access and data transfer more accessible and efficient for React Native developers, especially for large files like blobs.
This article will explore how to manage cloud data in React Native by using these two packages to fetch and handle blobs, as well as to create, save, and read files. We will cover:
react-native-fs
react-native-blob-util
Blob is short for “Binary Large Object.” This data type holds multimedia objects like images and videos, GIFs, and audio. It stores binary data as a single entity.
To download, upload, and read blobs in React Native, we can use either the react-native-fs or react-native-blob-util package. These packages give developers access to upload and download data directly to and from cloud storage, which — especially for large files like blobs — is more efficient.
To create a blob, we use the blob() constructor. The blob() constructor returns a new blob object. Here’s the syntax:
new Blob(array, options);
In the above code, the array is the blob string value, object values, or a mix of the values we want to convert to a blob. The options include the blob types (mime-type) which can be application/json, text/plain, image/png, and so on.
Here’s an example:
// Example 1
const obj = 'How to create a Blob tutorial';
const blob = new Blob([obj], {
  type: 'text/plain',
});

// Example 2
const obj = {name: 'Chimezie Innocent'};
const blob = new Blob([JSON.stringify(obj, null, 2)], {
  type: 'application/json',
});
In the above code, we have an object we want to convert to a blob. Using the Blob() constructor, we pass our object as an array after stringifying it (if it is not a string). Next, we specify the blob mime-type options — in this case, application/json and text/plain.
To read our blob, we can use the FileReader() web API, like so:
const reader = new FileReader();
reader.onload = function (event) {
  const result = event.target.result;
    console.log(result); // { name: "Chimezie Innocent" }
  };
reader.readAsText(blob);
react-native-fsBefore we begin looking at how to manage our cloud data with the react-native-fs package, let’s first see how it works locally — i.e., how we can create, read, and save files on our devices.
To install the package, run either of the two commands below in the terminal:
/* npm */
npm install react-native-fs

/* yarn */
yarn add react-native-fs
After installation, we’ll link the package to our project by running the following command:
react-native link react-native-fs
This will automatically add the react-native-fs package to our project. In a scenario where the automatic linking does not work for some reason, check the official docs to see how to manually link the package to your project.
react-native-fsTo create a file, react-native-fs offers a method called writeFile. It allows us to write our files to a file path. The syntax is as follows:
writeFile(filepath, contents, encoding)
Let’s take a look at each component of this method:
filepath: the directory or absolute path in which you want to save your file
contents: the file content, or what you want to save
encoding: can be UTF-8, ASCII values, or the property you want to save your file as
See the code below for an example of creating and saving files with react-native-fs:
/* App.js */

import React, {useState} from 'react';
import {
  SafeAreaView,
  StyleSheet,
  Text,
  TextInput,
  View,
  TouchableOpacity,
  Alert,
} from 'react-native';
import {DocumentDirectoryPath, writeFile} from 'react-native-fs';

const App = () => {
  const [text, setText] = useState('');
  const filePath = `${DocumentDirectoryPath}/testing.txt`;

  const createFile = async () => {
    try {
      await writeFile(filePath, text, 'utf8');
      Alert.alert('File created successfully');
    } catch (e) {
      console.log('error', e);
    }
  };
  return (
    <SafeAreaView style={styles.parent}>
      <View style={styles.container}>
        <View style={styles.textInput}>
          <Text style={styles.title}>Enter text:</Text>
          <TextInput
            value={text}
            onChangeText={setText}
            style={styles.textArea}
            multiline
            textAlignVertical="top"
          />
        </View>
        <TouchableOpacity onPress={createFile} style={styles.button}>
          <Text style={styles.buttonText}>Create new file</Text>
        </TouchableOpacity>
      </View>
    </SafeAreaView>
  );
};
const styles = StyleSheet.create({
  parent: {
    flex: 1,
  },
  container: {
    padding: 16,
    flex: 1,
  },
  textInput: {
    flex: 1,
    paddingVertical: 16,
  },
  textArea: {
    height: 200,
    borderWidth: 1,
    borderColor: '#ccc',
    borderRadius: 5,
    padding: 16,
    fontSize: 18,
  },
  title: {
    color: '#fff',
    fontSize: 24,
    fontWeight: 'bold',
    marginBottom: 16,
  },
  button: {
    borderRadius: 5,
    marginBottom: 20,
    backgroundColor: 'green',
  },
  buttonText: {
    color: '#fff',
    fontSize: 16,
    textAlign: 'center',
    paddingVertical: 10,
  },
});
export default App;
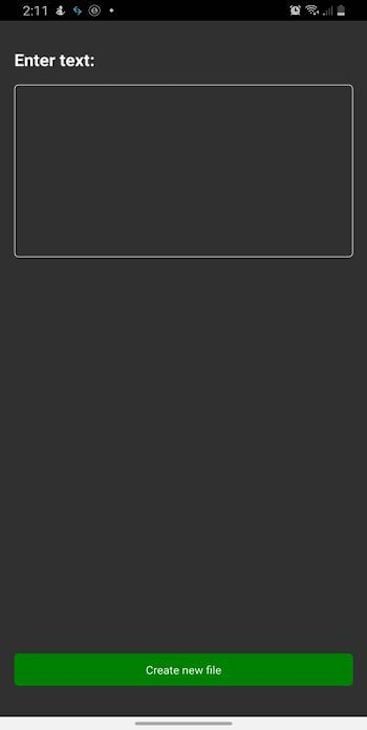
In the code above, we import DocumentDirectoryPath and writeFile from our react-native-fs package. We use the DocumentDirectoryPath constant to get the directory file path of the location where we want to save our file. Then, we use the writeFile method to save our file with the content of our input.
Here’s what we should see before creating a file:
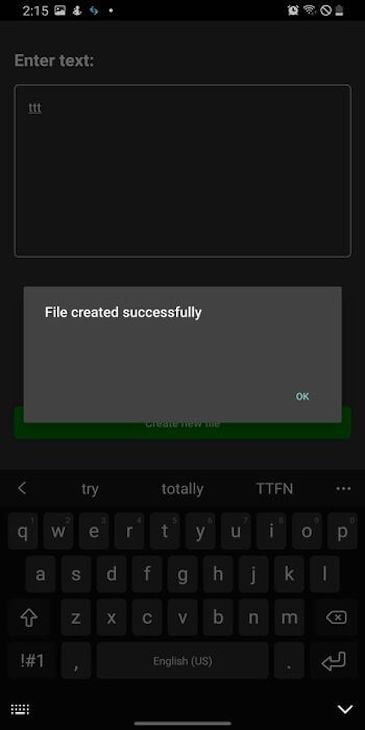
After saving the file, we should see the following:
readDir and readFilesIn the previous section, we successfully created a new file called testing.txt. Now, we’ll read the file. This means that we will be able to see a list of all the files created in our directory and view their contents as we select each one.
The react-native-fs package provides us with two methods: readDir and readFiles. Let’s see how to use each method to read our files.
readDir methodThe readDir method lets us read the contents of a path or absolute path. The syntax is as follows:
readDir(directorypath)
This method returns a promise that contains an array of objects with properties. These properties include:
ctime: the date that the file was created; this property is only available for iOS
mtime: the date that the file was last modified or changed
name: the name of the file or item
path: contains the absolute path of the file or item
size: shows the size of the file
isFile: a function that returns a boolean that shows if the item is a file or not
isDirectory: a function that returns a boolean that shows if a file is a directory or not
Consider the following:
/* App.js */

import React, {useState, useEffect} from 'react';
import {
SafeAreaView,
StyleSheet,
Text,
FlatList,
View,
TouchableOpacity,
} from 'react-native';
import {DocumentDirectoryPath, readDir} from 'react-native-fs';

const App = () => {
const [directory, setDirectory] = useState([]);

useEffect(() => {
const getDirectoryList = async () => {
try {
const pathList = await readDir(DocumentDirectoryPath);
setDirectory(pathList);
} catch (error) {
console(error);
}
};
getDirectoryList();
}, []);

const renderItem = ({item}) => (
{item.name}
);

return (
Files
{directory.length > 0 ? (
item.name}
/>
) : (
No files
)}
);
};

const styles = StyleSheet.create({
parent: {
flex: 1,
},
container: {
padding: 16,
flex: 1,
},
fileHeader: {
color: '#fff',
fontSize: 30,
marginBottom: 10,
borderColor: '#ccc',
paddingBottom: 10,
borderBottomWidth: 1,
},
list: {
marginVertical: 5,
paddingBottom: 12,
borderBottomWidth: 1,
borderColor: '#ccc',
},
listName: {
fontSize: 16,
},
});
export default App;
After running this code, here’s what we should see:
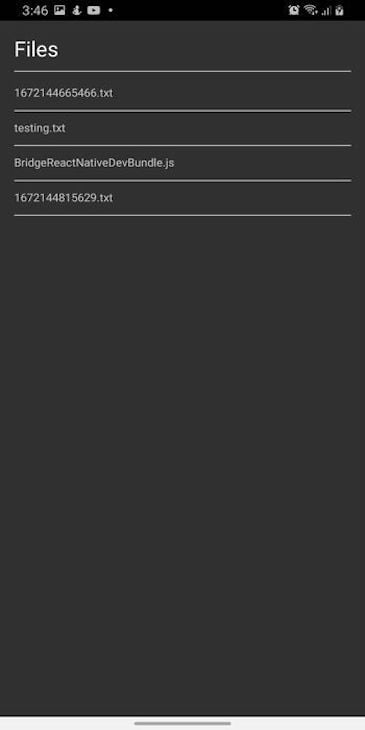
In the code above, we use the try...catch method to read our directory path using the readDir method. Then, we set the response to the directory array in our state. Next, we map through the array using FlatList and render the list of files as shown in the image above.
readFile methodThe readFile method lets us read the contents of a file that we have saved. It also returns a promise containing an array of objects with properties, just like the readDir method. The syntax is as follows:
readFile(filename, encoding)
Here’s an example of using the readFile method:
/* App.js */

import React, {useState, useEffect} from 'react';
import {
  SafeAreaView,
  StyleSheet,
  Text,
  FlatList,
  View,
  TouchableOpacity,
} from 'react-native';
import {DocumentDirectoryPath, readDir, readFile} from 'react-native-fs';

// component of the file we want to view
const ViewFile = ({content, onclose}) => {
  const [fileContent, setFileContent] = useState(null);
  useEffect(() => {
    const getContent = async () => {
      try {
          if (content.isFile()) {
          const response = await readFile(content.path, 'utf8');
          setFileContent(response);
        }
      } catch (error) {
        console.log(error);
      }
    };
    getContent();
    return () => getContent();
  }, []);

  return (
    <View style={styles.parent}>
      <View style={styles.container}>
        <View>
          <Text style={[styles.fileHeader, {textTransform: 'capitalize'}]}>
            {content.name.replace('.txt', '')}
          </Text>
        </View>
        <Text style={styles.content}>{fileContent}</Text>
      </View>
      <TouchableOpacity style={styles.button} onPress={onclose}>
        <Text style={styles.buttonText}>Go Back</Text>
      </TouchableOpacity>
    </View>
  );
};

// main component
const App = () => {
  const [directory, setDirectory] = useState([]);
  const [readFIle, setReadFile] = useState(null);
  const [checkContent, setCheckContent] = useState(false);

  useEffect(() => {
    const getDirectoryList = async () => {
      try {
        const pathList = await readDir(DocumentDirectoryPath);
        setDirectory(pathList);
      } catch (error) {
        console(error);
      }
    };
    getDirectoryList();
  }, []);

  // function to handle our read file
  const handleReadFile = item => {
    setCheckContent(true);
    setReadFile(item);
  };

  // render list of files in our directory
  const renderItem = ({item}) => (
    <View>
      <TouchableOpacity
        style={styles.list}
        onPress={() => handleReadFile(item)}>
        <Text style={styles.listName}>{item.name}</Text>
      </TouchableOpacity>
    </View>
  );

  // if checkContent is true, show the ViewFile component
  if (checkContent) {
    return (
      <ViewFile content={readFIle} onclose={() => setCheckContent(false)} />
    );
  }

  return (
    <SafeAreaView style={styles.parent}>
      <View style={styles.container}>
        <Text style={styles.fileHeader}>Files</Text>
        {/* if directory length is more than 0, then map through the directory array, else show no files text */}
        {directory.length > 0 ? (
          <FlatList
            data={directory}
            renderItem={renderItem}
            keyExtractor={item => item.name}
          />
        ) : (
          <Text>No files</Text>
        )}
      </View>
    </SafeAreaView>
  );
};

const styles = StyleSheet.create({
  parent: {
    flex: 1,
  },
  container: {
    padding: 16,
    flex: 1,
  },
  fileHeader: {
    color: '#fff',
    fontSize: 30,
    marginBottom: 10,
    borderColor: '#ccc',
    paddingBottom: 10,
    borderBottomWidth: 1,
  },
  list: {
    marginVertical: 5,
    paddingBottom: 12,
    borderBottomWidth: 1,
    borderColor: '#ccc',
  },
  listName: {
    fontSize: 16,
  },
  button: {
    borderRadius: 5,
    marginBottom: 20,
    backgroundColor: 'green',
  },
  buttonText: {
    color: '#fff',
    fontSize: 16,
    textAlign: 'center',
    paddingVertical: 10,
  },
});
export default App;
In the code above, we get the list of files in our directory and map through it using our FlatList method and our renderItem function.
Next, we click on the file or item that we want to read and set our checkContent state to true. Then, using conditional rendering, we return the ViewFile component only if the checkContent state returns true.
Moving forward, we make use of our readFilemethod to read the contents of our file. First, we check if our item is a file or not using the isFile() function property that we looked at earlier. If it is a file, then we can use readFile to read and display its contents.
Finally, we added a button that takes us back to our list page.
Now that we have seen how the react-native-fs package works and how we can use it to create and read files in our device, let’s take it a step further. In this section, we’ll see how to download blobs, such as images, from the cloud while checking if there is available space on our local device.
To check if there’s space in our device, react-native-fs provides us with a method called getFSInfo. The getFSInfo method allows us to see the device storage and the available or unused storage:
  getFSInfo().then(res => {
     console.log(res);
  });
With the above code, we‘ll see the total free space on our device:

Using this information about available or unused storage, we can check if the available storage is smaller or bigger than what we want to download. If it is smaller, the download will be allowed. Otherwise, it will be canceled and an error message will be shown to the user.
Let’s put together what we have learned so far and build a simple app.
In the App.js file, copy the code below:
/* App.js */

import React, {useState, useEffect} from 'react';
import {
  SafeAreaView,
  StyleSheet,
  Text,
  FlatList,
  View,
  TouchableOpacity,
} from 'react-native';
import {
  DocumentDirectoryPath,
  readDir,
  downloadFile,
  getFSInfo,
} from 'react-native-fs';
import ViewFile from './ViewFile';
const App = () => {
  const [directory, setDirectory] = useState([]);
  const [readFIle, setReadFile] = useState(null);
  const [checkContent, setCheckContent] = useState(false);
  const [isDownloadReady, setIsDownloadReady] = useState(false);
  useEffect(() => {
    const getDirectoryList = async () => {
      try {
        const pathList = await readDir(DocumentDirectoryPath);
        setDirectory(pathList);
      } catch (error) {
        console(error);
      }
    };
    getDirectoryList();
  }, []);
  const handleReadFile = item => {
    setCheckContent(true);
    setReadFile(item);
  };
  // handle download pdf function
  const handleDownload = () => {
    const url =
      'https://upload.wikimedia.org/wikipedia/commons/a/ae/Olympic_flag.jpg';
    const path = `${DocumentDirectoryPath}/testImage.png`;
    const response = downloadFile({
      fromUrl: url,
      toFile: path,
    });
    response.promise
      .then(async res => {
        if (res && res.statusCode === 200 && res.bytesWritten > 0) {
          console.log('size:', res.bytesWritten);
          await getFSInfo().then(response => {
            const deviceSpace = response.freeSpace * 0.001;
            if (deviceSpace > res.bytesWritten) {
              console.log('there is enough space');
              setIsDownloadReady(true);
            } else {
              alert('Not enough space');
            }
          });
        } else {
          console.log(res);
        }
      })
      .catch(error => console.log(error));
  };
  // render list of files in our directory
  const renderItem = ({item}) => (
    <View>
      <TouchableOpacity
        style={styles.list}
        onPress={() => handleReadFile(item)}>
        <Text style={styles.listName}>{item.name}</Text>
      </TouchableOpacity>
    </View>
  );
  if (checkContent) {
    return (
      <ViewFile content={readFIle} onclose={() => setCheckContent(false)} />
    );
  }
  return (
    <>
      {isDownloadReady ? (
        <SafeAreaView style={styles.parent}>
          <View style={styles.container}>
            <Text style={styles.fileHeader}>Files</Text>
            {/* if directory length is more than 0, then map through the directory array, else show no files text */}
            {directory.length > 0 ? (
              <FlatList
                data={directory}
                renderItem={renderItem}
                keyExtractor={item => item.name}
              />
            ) : null}
          </View>
        </SafeAreaView>
      ) : (
        <SafeAreaView style={styles.mainBody}>
          <View style={{alignItems: 'center'}}>
            <Text style={{fontSize: 30, textAlign: 'center'}}>
              React Native File Blob Tutorial
            </Text>
          </View>
          <TouchableOpacity
            style={styles.buttonStyle}
            activeOpacity={0.5}
            onPress={handleDownload}>
            <Text style={styles.buttonTextStyle}>Download Image</Text>
          </TouchableOpacity>
          <TouchableOpacity style={styles.buttonStyle} activeOpacity={0.5}>
            <Text style={styles.buttonTextStyle}>Upload Image</Text>
          </TouchableOpacity>
        </SafeAreaView>
      )}
    </>
  );
};
const styles = StyleSheet.create({
  // same style as above
});
export default App;
After that, create a new file called ViewFile.js and copy the code below:
/* ViewFile.js */

import React from 'react';
import {
  Text,
  View,
  Image,
  StyleSheet,
  Dimensions,
  PixelRatio,
  TouchableOpacity,
} from 'react-native';
import {DocumentDirectoryPath} from 'react-native-fs';
const ViewFile = ({content, onclose}) => {
  return (
    <View style={styles.parent}>
      <View style={styles.container}>
        <View>
          <Text style={[styles.fileHeader, {textTransform: 'capitalize'}]}>
            View Image
          </Text>
        </View>
        <Image
          style={[styles.ImageContainer, {width: Dimensions.width}]}
          source={{
            uri: `file://${DocumentDirectoryPath}/${content.name}`,
          }}
        />
        <Text style={styles.content}>Name: {content?.name}</Text>
      </View>
      <TouchableOpacity style={styles.button} onPress={onclose}>
        <Text style={styles.buttonText}>Go Back</Text>
      </TouchableOpacity>
    </View>
  );
};
export default ViewFile;
const styles = StyleSheet.create({
  parent: {
    flex: 1,
  },
  container: {
    padding: 16,
    flex: 1,
  },
  fileHeader: {
    color: '#fff',
    fontSize: 30,
    marginBottom: 10,
    borderColor: '#ccc',
    paddingBottom: 10,
    borderBottomWidth: 1,
  },
  content: {
    fontSize: 18,
  },
  button: {
    backgroundColor: 'green',
    marginBottom: 20,
    marginHorizontal: 20,
    padding: 7,
    borderRadius: 5,
  },
  buttonText: {
    textAlign: 'center',
    color: '#fff',
    fontSize: 20,
  },
  ImageContainer: {
    borderRadius: 8,
    width: 250,
    height: 250,
    borderColor: 'black',
    backgroundColor: 'green',
    borderWidth: 1 / PixelRatio.get(),
    justifyContent: 'center',
    alignItems: 'center',
  },
});
In the above code, we download a random image into our device’s directory. Then we check if there’s enough storage space on our device — i.e., if free space is greater than the image size.
If the check returns true, we download the image to our directory. If it returns false, then we will display an error message telling the user that there’s inadequate space on our device for the download.
After the download is complete, the file system directory displays the list of files we downloaded, including our image blob.
Here’s the final result:
Next, let’s look at how to upload blob images to the cloud with react-native-fs. The react-native-fs package does not provide us with an API to upload blob files (images, pdfs, etc.) to the cloud. Instead, it focuses on file system operations like reading, creating, and deleting files.
Therefore, to upload blobs to the cloud, we’ll need to use the readFile method to read the contents of the image before using fetch or Axios to upload the image.
For this example, I created a Cloudinary account from which I will upload the image. I’m also using the react-native-image-picker package to read and select images from my device:
/* App.js */

 // select image
  const handleSelectImage = async () => {
    const options = {
      title: 'Select Image',
      maxWidth: 2000,
      maxHeight: 2000,
      storageOptions: {
        skipBackup: true,
        path: 'images',
      },
    };
    await launchImageLibrary(options, res => {
      if (res.didCancel) {
        console.log('User cancelled image picker');
      } else if (res.error) {
        console.log('ImagePicker Error:', res.error);
      } else {
        const path = res.assets[0].uri;
        setImgUrl(path);
      }
    });
  };
In the code above, we use the react-native-image-picker package to open our device’s gallery so we can select an image. No additional permissions or configurations are needed to use the package.
After selecting the image, we will read the image data using readFile and then, append it to our form data. See the code below;
/* App/js */

  // handle download image function
  const handleUploadImage = async () => {
    try {
      const fileData = await readFile(imgUrl, 'base64');
      // Cloudinary API keys
      const cloudinaryURL =
        'https://api.cloudinary.com/v1_1/********/image/upload';
      const apiKey = '0_0tX5v05VWXlMGl********';
      const uploadPreset = 'irgy****';
      // Create the form data with the file data and upload parameters
      const formData = new FormData();
      formData.append('file', `data:image/jpeg;base64,${fileData}`);
      formData.append('upload_preset', uploadPreset);
      formData.append('api_key', apiKey);
      const response = await fetch(cloudinaryURL, {
        method: 'POST',
        body: formData,
      });

      const result = await response.json();
      const {secure_url: imageUrl, public_id: imageId} = result;
      console.group({image: imageId}, {path: imageUrl});
      Alert.alert('Image uploaded successfully!!!');
    } catch (error) {
      console.error('Error:', error);
    }
  };
In the above code, notice the prefix data:image/jpeg;base64 that we added to our image data. This is because we encoded the image to a base64 jpeg format and the server (Cloudinary) will throw an error if we don’t add the prefix.
Here’s the full code for this example:
/* App.js */

import React, {useState} from 'react';
import {
  Text,
  View,
  Alert,
  Image,
  Pressable,
  StyleSheet,
  SafeAreaView,
  TouchableOpacity,
} from 'react-native';
import {readFile} from 'react-native-fs';
import {launchImageLibrary} from 'react-native-image-picker';
const App = () => {
  const [imgUrl, setImgUrl] = useState('');
  const disableBtn = !imgUrl;
  // select image
  const handleSelectImage = async () => {
    const options = {
      title: 'Select Image',
      maxWidth: 2000,
      maxHeight: 2000,
      storageOptions: {
        skipBackup: true,
        path: 'images',
      },
    };
    await launchImageLibrary(options, res => {
      if (res.didCancel) {
        console.log('User cancelled image picker');
      } else if (res.error) {
        console.log('ImagePicker Error:', res.error);
      } else {
        const path = res.assets[0].uri;
        setImgUrl(path);
      }
    });
  };
  // handle download image function
  const handleUploadImage = async () => {
    try {
      const fileData = await readFile(imgUrl, 'base64');
      // Cloudinary API keys
      const cloudinaryURL =
        'https://api.cloudinary.com/v1_1/vicorlands/image/upload';
      const apiKey = '0_0tX5v05VWXlMGlEf0yTH41wr8';
      const uploadPreset = 'irgydprw';
      // Create the form data
      const formData = new FormData();
      formData.append('file', `data:image/jpeg;base64,${fileData}`);
      formData.append('upload_preset', uploadPreset);
      formData.append('api_key', apiKey);
      const response = await fetch(cloudinaryURL, {
        method: 'POST',
        body: formData,
      });
      const result = await response.json();
      const {secure_url: imageUrl, public_id: imageId} = result;
      console.group({image: imageId}, {path: imageUrl});
      Alert.alert('Image uploaded successfully!!!');
    } catch (error) {
      console.error('Error:', error);
    }
  };
  return (
    <SafeAreaView style={styles.container}>
      <View style={{alignItems: 'center'}}>
        <Text style={{fontSize: 30, textAlign: 'center', marginBottom: 20}}>
          React Native File Blob Tutorial
        </Text>
      </View>
      <View style={{alignItems: 'center', marginBottom: 10}}>
        {imgUrl && (
          <Image source={{uri: imgUrl}} style={{width: 200, height: 200}} />
        )}
      </View>
      <Pressable style={styles.selectFile} onPress={handleSelectImage}>
        <Text style={styles.buttonText}>Select Image</Text>
      </Pressable>
      <TouchableOpacity
        style={disableBtn ? styles.buttonDisable : styles.button}
        activeOpacity={0.5}
        disabled={disableBtn}
        onPress={handleUploadImage}>
        <Text style={styles.buttonText}>Upload Image</Text>
      </TouchableOpacity>
    </SafeAreaView>
  );
};
const styles = StyleSheet.create({
  container: {
    flex: 1,
    paddingHorizontal: 16,
    justifyContent: 'center',
  },
  selectFile: {
    borderRadius: 5,
    marginBottom: 20,
    backgroundColor: 'darkgrey',
  },
  buttonDisable: {
    borderRadius: 5,
    marginBottom: 20,
    backgroundColor: 'green',
    opacity: 0.6,
  },
  button: {
    borderRadius: 5,
    marginBottom: 20,
    backgroundColor: 'green',
  },
  buttonText: {
    color: '#fff',
    fontSize: 18,
    textAlign: 'center',
    fontWeight: 'bold',
    paddingVertical: 10,
  },
});
export default App;
The full app will look like this:
react-native-blob-utilNow that we have seen how to create, save, read, and download blobs with react-native-fs, let’s take a look at how to perform the same operations with the react-native-blob-util package.
This package is a fork of the now-deprecated react-native-fetch-blob package and its first fork, rn-fetch-blob. Since those packages are no longer maintained, the creator continued the project in this fork to go on supporting React Native developers in accessing and transferring data and files easily and efficiently.
react-native-blob-utilTo create a file with react-native-blob-util, copy the code below into the App.js file:
/* App.js */

import React, {useState} from 'react';
import {
  SafeAreaView,
  StyleSheet,
  Text,
  TextInput,
  View,
  TouchableOpacity,
  Alert,
} from 'react-native';
import RNFetchBlob from 'react-native-blob-util';
const App = () => {
  const [text, setText] = useState('');
  const docPath = RNFetchBlob.fs.dirs.DocumentDir;
  const filePath = `${docPath}/ReactNativeTutorial.txt`;

  const createFile = async () => {
    await RNFetchBlob.fs
      .writeFile(filePath, text, 'utf8')
      .then(res => Alert.alert('File created successfully'))
      .catch(error => console.log('error', e));
  };

  return (
    <SafeAreaView style={styles.parent}>
      <View style={styles.container}>
        <View style={styles.textInput}>
          <Text style={styles.title}>Enter text:</Text>
          <TextInput
            value={text}
            onChangeText={setText}
            style={styles.textArea}
            multiline
            textAlignVertical="top"
          />
        </View>
        <TouchableOpacity onPress={createFile} style={styles.button}>
          <Text style={styles.buttonText}>Create new file</Text>
        </TouchableOpacity>
      </View>
    </SafeAreaView>
  );
};
const styles = StyleSheet.create({
   // same style as above
});
export default App;
In the code above, we first import the react-native-blob-util module. Next, we get the path or file directory — i.e., where we want to store our text file.
The react-native-blob-util package has an API, called fs, that allows us to access dirs — the directory constant. With the directory constant, we can access different folders in our phone device, such as DocumentDir, CachedDir, DownloadDir, MusicDir, PicturesDir, RingtoneDir, and so on, depending on what we are saving or reading.
In our case, we want to save a text file, so we use the DocumentDir folder.
Next, we create a function that will handle saving the file when we click the Create new file button. Just like react-native-fs, react-native-blob-util has a writeFile method that allows us to write and save a file to the path we specified.
Assuming all our work saves correctly, we want to display a modal to the user that tells them that the operation was successful. However, if there’s an error, we want to log it in our console.
readFile methodreact-native-blob-util provides a method called readFile that allows us to read the content of any file in our specified directory. The syntax is as follows:
readFile(path, encoding)
Before we read the content of one of our files, let’s first get the list of files in our directory. This way, we’ll get to see all the files we have created, all displayed in one place. Then, we can read each file’s content when we click on it.
To get the list of files in a directory, react-native-blob-util has a method called lstat that allows us to get the statistical data of files in a directory. The result data will be an array of objects; it also returns a promise.
With the returned objects, we can map through and display the file names. We can also accomplish other tasks, like checking the last modified date and time as well as the size of the files. See the code below to understand how this works in action:
{
    filename : 'test.pdf', // file name
    path : '/path/to/the/file/without/file/name/', // folder path
    size : 4378133, // size, in bytes
    type : 'file', // `file` or `directory`
    lastModified : 141323298 // last modified timestamp
}
With lstat and readFile methods, we can create a list of files as well as a view screen to display the content of our files. The code below demonstrates how to achieve this functionality:
/* App.js */

import React, {useState, useEffect} from 'react';
import {
  SafeAreaView,
  StyleSheet,
  Text,
  FlatList,
  View,
  TouchableOpacity,
} from 'react-native';
import RNFetchBlob from 'react-native-blob-util';

// component of the file we want to view
const ViewFile = ({content, onclose}) => {
  const [fileContent, setFileContent] = useState(null);
  useEffect(() => {
    const getContent = async () => {
      try {
        if (content.type === 'file') {
          const response = await RNFetchBlob.fs.readFile(content.path, 'utf8');
          setFileContent(response);
        }
      } catch (error) {
        console.log(error);
      }
    };
    getContent();
    return () => getContent();
  }, []);
  return (
    <View style={styles.parent}>
      <View style={styles.container}>
        <View>
          <Text style={[styles.fileHeader, {textTransform: 'capitalize'}]}>
            {content.filename.replace('.txt', '')}
          </Text>
        </View>
        <Text style={styles.content}>{fileContent}</Text>
      </View>
      <TouchableOpacity style={styles.button} onPress={onclose}>
        <Text style={styles.buttonText}>Go Back</Text>
      </TouchableOpacity>
    </View>
  );
};

// main component
const App = () => {
  const [directory, setDirectory] = useState([]);
  const [readFIle, setReadFile] = useState(null);
  const [checkContent, setCheckContent] = useState(false);
  useEffect(() => {
    const docPath = RNFetchBlob.fs.dirs.DocumentDir;
    const getDirectoryList = async () => {
      await RNFetchBlob.fs
        .lstat(docPath)
        .then(response => {
          console.log(response);
          setDirectory(response);
        })
        .catch(error => console.error(error));
    };
    getDirectoryList();
  }, []);
  // function to handle our read file
  const handleReadFile = item => {
    setCheckContent(true);
    setReadFile(item);
  };

  // render list of files in our directory
  const renderItem = ({item}) => (
    <View>
      <TouchableOpacity
        style={styles.list}
        onPress={() => handleReadFile(item)}>
        <Text style={styles.listName}>{item.filename}</Text>
      </TouchableOpacity>
    </View>
  );
  // if checkContent is true, show the ViewFile component
  if (checkContent) {
    return (
      <ViewFile content={readFIle} onclose={() => setCheckContent(false)} />
    );
  }
  return (
    <SafeAreaView style={styles.parent}>
      <View style={styles.container}>
        <Text style={styles.fileHeader}>Files</Text>
        {/* if directory length is more than 0, then map through the directory array, else show no files text */}
        {directory.length > 0 ? (
          <FlatList
            data={directory}
            renderItem={renderItem}
            keyExtractor={item => item.name}
          />
        ) : (
          <Text>No files</Text>
        )}
      </View>
    </SafeAreaView>
  );
};
const styles = StyleSheet.create({
   // same style as above
});
export default App;
react-native-blob-utilJust as we have seen with react-native-fs, react-native-blob-util focuses on file system operations and therefore does not have an API for uploading blobs.
We can only read the blob’s content (in this case, images) using our readFile method and then use either fetch or Axios to make our upload request.
See the code below:
/* App.js */

import React, {useState} from 'react';
import {
  Text,
  View,
  Alert,
  Image,
  Pressable,
  StyleSheet,
  SafeAreaView,
  TouchableOpacity,
} from 'react-native';
import RNFetchBlob from 'react-native-blob-util';
import {launchImageLibrary} from 'react-native-image-picker';
const App = () => {
  const [imgUrl, setImgUrl] = useState('');
  const disableBtn = !imgUrl;
  // select image
  const handleSelectImage = async () => {
    const options = {
      title: 'Select Image',
      maxWidth: 2000,
      maxHeight: 2000,
      storageOptions: {
        skipBackup: true,
        path: 'images',
      },
    };
    await launchImageLibrary(options, res => {
      if (res.didCancel) {
        console.log('User cancelled image picker');
      } else if (res.error) {
        console.log('ImagePicker Error:', res.error);
      } else {
        const path = res.assets[0].uri;
        setImgUrl(path);
      }
    });
  };
  // handle download image function
  const handleUploadImage = async () => {
    try {
      const fileData = await RNFetchBlob.fs.readFile(imgUrl, 'base64');
      // Cloudinary API keys
      const cloudinaryURL =
        'https://api.cloudinary.com/v1_1/vicorlands/image/upload';
      const apiKey = '0_0tX5v05VWXlMGlEf0yTH41wr8';
      const uploadPreset = 'irgydprw';
      const formData = new FormData();
      formData.append('file', `data:image/jpeg;base64,${fileData}`);
      formData.append('upload_preset', uploadPreset);
      formData.append('api_key', apiKey);
      const response = await fetch(cloudinaryURL, {
        method: 'POST',
        body: formData,
        headers: {
          'Content-Type': 'multipart/form-data',
        },
      });
      const result = await response.json();
      console.log('res:', result);
      Alert.alert('Image uploaded successfully!!!');
      return result;
    } catch (error) {
      console.error('Error:', error);
    }
  };
  return (
    <SafeAreaView style={styles.container}>
      <View style={{alignItems: 'center'}}>
        <Text style={{fontSize: 30, textAlign: 'center', marginBottom: 20}}>
          React Native File Blob Tutorial
        </Text>
      </View>
      <View style={{alignItems: 'center', marginBottom: 10}}>
        {imgUrl && (
          <Image source={{uri: imgUrl}} style={{width: 200, height: 200}} />
        )}
      </View>
      <Pressable style={styles.selectFile} onPress={handleSelectImage}>
        <Text style={styles.buttonText}>Select Image</Text>
      </Pressable>
      <TouchableOpacity
        style={disableBtn ? styles.buttonDisable : styles.button}
        activeOpacity={0.5}
        disabled={disableBtn}
        onPress={handleUploadImage}>
        <Text style={styles.buttonText}>Upload Image</Text>
      </TouchableOpacity>
    </SafeAreaView>
  );
};
const styles = StyleSheet.create({
  container: {
    flex: 1,
    paddingHorizontal: 16,
    justifyContent: 'center',
  },
  selectFile: {
    borderRadius: 5,
    marginBottom: 20,
    backgroundColor: 'darkgrey',
  },
  buttonDisable: {
    borderRadius: 5,
    marginBottom: 20,
    backgroundColor: 'green',
    opacity: 0.6,
  },
  button: {
    borderRadius: 5,
    marginBottom: 20,
    backgroundColor: 'green',
  },
  buttonText: {
    color: '#fff',
    fontSize: 18,
    textAlign: 'center',
    fontWeight: 'bold',
    paddingVertical: 10,
  },
});
export default App;
In the above code, we access our gallery using react-native-image-picker and then make our POST request using the fetch API.
react-native-blob-utilTo complete this section and conclude the article, let’s see how to download blobs like images from the cloud using the react-native-blob-util package.
Note that we are using the react-native-blob-util Download Manager to download blobs. This allows us to provide a better user experience by showing the user the blob’s download progress and letting them know when the blob is successfully downloaded.
To do this, we set useDownloadManager and notifications to true in our config object:
RNFetchBlob.config({
      path: path,
      fileCache: true,
      addAndroidDownloads: {
        useDownloadManager: true,
        notification: true,
        title: 'Download Successful! Click to view',
        description: 'An image file.',
        mime: 'image/png',
      },
    })
We can set the title of the success notification to display whatever we want to the user, as well as set a blob description — i.e., whether it is an image, music, or movie file. The path is the file directory where we want to save the downloaded file.
Let’s look at the complete code example below, which is still using the fetch API:
/* App.js */

import React from 'react';
import {
  TouchableOpacity,
  SafeAreaView,
  StyleSheet,
  Text,
  View,
} from 'react-native';
import RNFetchBlob from 'react-native-blob-util';

const App = () => {
  const docPath = RNFetchBlob.fs.dirs.DocumentDir;

  // handle download image function
  const handleDownload = async () => {
    const url =
      'https://upload.wikimedia.org/wikipedia/commons/a/ae/Olympic_flag.jpg';
    const path = `${docPath}/DownloadImage.png`;
    await RNFetchBlob.config({
      path: path,
      fileCache: true,
      addAndroidDownloads: {
        useDownloadManager: true,
        notification: true,
        title: 'Download Successful! Click to view',
        description: 'An image file.',
        mime: 'image/png',
      },
    })
      .fetch('GET', url)
      .then(async res => {
        if (res && res.info().status === 200) {
          console.log(res);
        } else {
          console.log(res);
        }
      })
      .catch(error => console.log(error));
  };
  return (
    <SafeAreaView style={styles.mainBody}>
      <View style={{alignItems: 'center'}}>
        <Text style={{fontSize: 30, textAlign: 'center'}}>
          React Native Blob Util Tutorial
        </Text>
      </View>
      <TouchableOpacity
        style={styles.buttonStyle}
        activeOpacity={0.5}
        onPress={handleDownload}>
        <Text style={styles.buttonTextStyle}>Download Image</Text>
      </TouchableOpacity>
      <TouchableOpacity style={styles.buttonStyle} activeOpacity={0.5}>
        <Text style={styles.buttonTextStyle}>Upload Image</Text>
      </TouchableOpacity>
    </SafeAreaView>
  );
};
const styles = StyleSheet.create({
  mainBody: {
    flex: 1,
    justifyContent: 'center',
    padding: 20,
  },
  buttonStyle: {
    backgroundColor: '#307ecc',
    borderWidth: 0,
    color: '#FFFFFF',
    borderColor: '#307ecc',
    height: 40,
    alignItems: 'center',
    borderRadius: 30,
    marginLeft: 35,
    marginRight: 35,
    marginTop: 15,
  },
  buttonTextStyle: {
    color: '#FFFFFF',
    paddingVertical: 10,
    fontSize: 16,
  },
});
export default App;
Finally, here’s what our app looks like when downloading a sample image from the cloud using react-native-blob-util:
react-native-blob-utilSo far, we have seen how to create, read, upload, and even download blob files. Before we round up our learning, let’s look at how to download PDFs.
Downloading a PDF blob is similar to downloading an image blob. We only make a tweak of the mime config and change the file name with a .pdf extension to indicate that we are downloading a PDF. See the code below;
/* App.js */

/* eslint-disable react-native/no-inline-styles */
import React from 'react';
import {
  TouchableOpacity,
  SafeAreaView,
  StyleSheet,
  Text,
  View,
} from 'react-native';
import RNFetchBlob from 'react-native-blob-util';

const App = () => {
  const docPath = RNFetchBlob.fs.dirs.DocumentDir;
  // handle download PDF function
  const handleDownload = async () => {
    const url =
      'https://www.forteachersforstudents.com.au/site/wp-content/uploads/KidsMedia/RemembranceDay/pdfs/remembrance-day-facts.pdf';
    const path = `${docPath}/Warren.pdf`;
    await RNFetchBlob.config({
      path: path,
      fileCache: true,
      addAndroidDownloads: {
        useDownloadManager: true,
        notification: true,
        title: 'Pds downloaded successfully! Click to view',
        description: 'A PDF file.',
        mime: 'application/pdf',
      },
    })
      .fetch('GET', url)
      .then(async res => {
        if (res && res.info().status === 200) {
          console.log(res);
        }
      })
      .catch(error => console.log(error));
  };

  return (
    <SafeAreaView style={styles.mainBody}>
      <View style={{alignItems: 'center'}}>
        <Text style={{fontSize: 30, textAlign: 'center'}}>
          React Native Blob Util Tutorial
        </Text>
      </View>
      <TouchableOpacity
        style={styles.buttonStyle}
        activeOpacity={0.5}
        onPress={handleDownload}>
        <Text style={styles.buttonTextStyle}>Download PDF</Text>
      </TouchableOpacity>
    </SafeAreaView>
  );
};
const styles = StyleSheet.create({
  mainBody: {
    flex: 1,
    justifyContent: 'center',
    paddingHorizontal: 16,
  },
  buttonStyle: {
    borderRadius: 5,
    marginBottom: 20,
    backgroundColor: 'green',
  },
  buttonTextStyle: {
    color: '#fff',
    fontSize: 18,
    textAlign: 'center',
    fontWeight: 'bold',
    paddingVertical: 10,
  },
});
export default App;
The application looks like this:
The react-native-fs and react-native-blob-util packages allow us to access the file systems of our devices and perform certain operations, such as those demonstrated in this article.
We explored using these packages to create, save, and read files. We also saw how we can fetch and manage blobs in React Native, including uploading and downloading blobs from the cloud. During this process, we can perform a device storage check to provide better user experiences.
If you followed along with this tutorial and practiced the demonstrated examples, you should find it easy to fetch and handle blob data in React Native on your own using react-native-fs and react-native-blob-util. Be sure to comment with any questions you have while applying this knowledge to your projects.

LogRocket's Galileo AI watches sessions for you and and surfaces the technical and usability issues holding back your React Native apps.
LogRocket also helps you increase conversion rates and product usage by showing you exactly how users are interacting with your app. LogRocket's product analytics features surface the reasons why users don't complete a particular flow or don't adopt a new feature.
Start proactively monitoring your React Native apps — try LogRocket for free.

Learn how to set up Meilisearch, index documents, and build keyword, semantic, and hybrid search with AI-powered retrieval.

Compare pnpm and npm across security defaults, disk usage, dependency strictness, and workspace policy to decide which package manager fits your project.

I migrated 20 production-style components from Tailwind to StyleX. Here’s what the data showed about LOC, CSS bundle size, build time, and type safety.

A guide for using JWT authentication to prevent basic security issues while understanding the shortcomings of JWTs.
Would you be interested in joining LogRocket's developer community?
Join LogRocket’s Content Advisory Board. You’ll help inform the type of content we create and get access to exclusive meetups, social accreditation, and swag.
Sign up now

