Google’s Go programming language has made significant progress across various software development spectrums. With language efficiencies like memory safety, garbage collection, static typing, and concurrency, Go has earned a space in the topmost preferred programming languages for building scalable software.

Despite Go’s tremendous growth and success stories, most developers still find it difficult to scaffold a production-ready Go application from scratch. However, Create Go App, a CLI similar to the popular Create React App, has made it easier for developers to scaffold production-ready Go applications, providing the option of selecting a frontend library, like React, Svelte, Preact, Vue, etc. from the array of choices shipped with the package.
In this tutorial, we’ll learn how to scaffold a PWA using Go for the backend and React for the frontend. You’ll become familiar with the Create Go App project structure, gain an in-depth understanding of the package, and learn how to build a scalable Go PWA.
To follow along with this tutorial, you’ll need:
Let’s get started!
The Replay is a weekly newsletter for dev and engineering leaders.
Delivered once a week, it's your curated guide to the most important conversations around frontend dev, emerging AI tools, and the state of modern software.
Before we begin, check that you have Go ≥v.16 installed in your machine, as it is required by the Create Go App package.
Once installation is complete, open the terminal and run the following command to download and install the Create Go App package:
go install github.com/create-go-app/cli/v3/cmd/cgapp@latest
If you are on macOS, you can also install via the options below:
# Tap a new formula:
brew tap create-go-app/cli
//
# Installation:
brew install create-go-app/cli/cgapp
In the next section, we’ll initialize a new project with the Create Go App package and begin building our PWA.
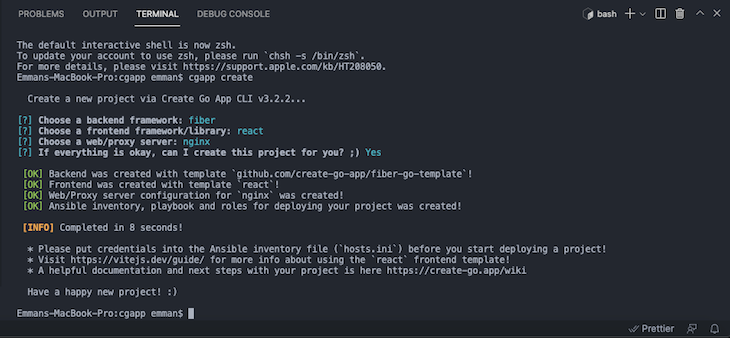
To initialize a new Create Go App project, navigate to your Go workspace, create a new folder named cgapp, and run the command below:
cgapp create
Select React as your frontend in the CLI’s interactive UI. Once initialization is complete, you should have an output similar to the screenshot below:
Next, open the newly generated folder in your code editor. Let’s discuss the folder structure.
If you selected net/http as the backend framework, your backend Go app will be generated with a net/http template developed by the creators of Create Go App. Similarly, by choosing the fiber option, you’ll have an automated template.
Create Go App uses a makefile to scaffold, run, and build the backend and frontend using a set of pre-defined shell commands that look like a typical npm command. The default makefile that exists in the root directory of Create Go App looks similar to the one below:
.PHONY: test run build
FRONTEND_PATH = $(PWD)/frontend
BACKEND_PATH = $(PWD)/backend
test:
    @if [ -d "$(FRONTEND_PATH)" ]; then cd $(FRONTEND_PATH) && npm run test; fi
    @if [ -d "$(BACKEND_PATH)" ]; then cd $(BACKEND_PATH) && go test ./...; fi
run: test
    @if [ -d "$(FRONTEND_PATH)" ]; then cd $(FRONTEND_PATH) && npm run dev; fi
    @if [ -d "$(BACKEND_PATH)" ]; then cd $(BACKEND_PATH) && $(MAKE) run; fi
build: test
    @if [ -d "$(FRONTEND_PATH)" ]; then cd $(FRONTEND_PATH) && npm run build; fi
    @if [ -d "$(BACKEND_PATH)" ]; then cd $(BACKEND_PATH) && $(MAKE) build; fi
From the shell script above, the paths to the frontend and the backend are accessed using PWD, then stored on FRONTEND_PATH and BACKEND_PATH, respectively.
The test command runs a test on the frontend and backend by navigating to each folder with a combination of Bash and npm commands. The same approach applies to the run and build commands.
Now that you have an idea of what our Create Go App project structure will look like, let’s discuss the two fundamental directories needed in building a PWA. Then, we’ll review its configuration and setup in Create Go App.
As you already know, every PWA should have the frontend and backend technologies logically separated from each other, favoring the clean architecture pattern of software development.
The folder structure for the backend looks like the screenshot below:
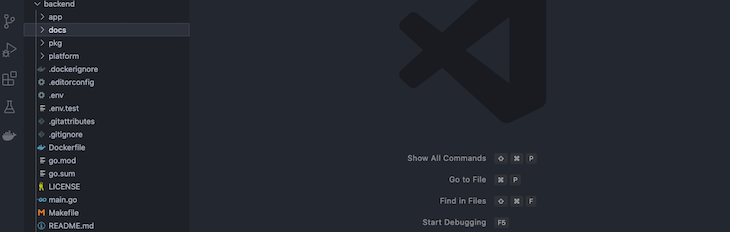
The app folder holds the folders and files that constitute the application logic, including controllers, models, and queries. This method provides a unique way to structure scalable applications from the very start without having to worry about future folder structures.
Considering the role of documentation in building RESTful APIs or services, the docs folder is one of the uniques features of Create Go App, containing configuration files to automatically generate API documentation using Swagger.
The pkg folder holds the configuration, middlewares, repositories, routes, and utils files, which are tailored specifically to the project’s business logic.
The platform folder holds the external logic that constitutes the project’s business logic, including the cache, database, and migrations. You can consider the platform folder as your services folder, which holds all of your external services.
.env holds all the application’s credentials, like the app name, database credentials, JWT credentials, host, port, and more. Finally, .Dockerfile creates a Docker image of the project for deployment.
To start the backend server, update the .env file with your server configuration and run the command below:
go run main.go
You should have the backend server running with details shown on your terminal. The output should look similar to the screenshot below:

You can access your server via http://127.0.0.1:5000, however, the actual URL for your endpoint should be http://127.0.0.1:5000/api/v1/{query}. Open up pkg/routes to view available routes.
In this tutorial, we generated the PWA scaffold using React for the frontend, however, you can use a different framework or library. If you’re already familiar with React, you should have a clear understanding of the frontend folder structure, which looks like the screenshot below:

Notice the vite.config.js file. The React template that is shipped with the Create Go App isn’t generated with the regular Create React App, but was bundled with the Vite npm module. Vite is a frontend tooling npm package that substitutes Babel and webpack. Vite includes features like an instant server, module replacement, asset optimization, and more.
A typical Vite configuration looks like the code snippet below:
import { defineConfig } from 'vite'
import react from '@vitejs/plugin-react'
// https://vitejs.dev/config/
export default defineConfig({
  plugins: [react()]
})
The configuration above sets the plugins to [react()], telling Vite that it should build the project for React. To start the development server, navigate to the frontend folder, then run the command below to install the required dependencies:
npm i
You should get an output similar to the screenshot below:

Press CMD + click to open the link in your web browser:
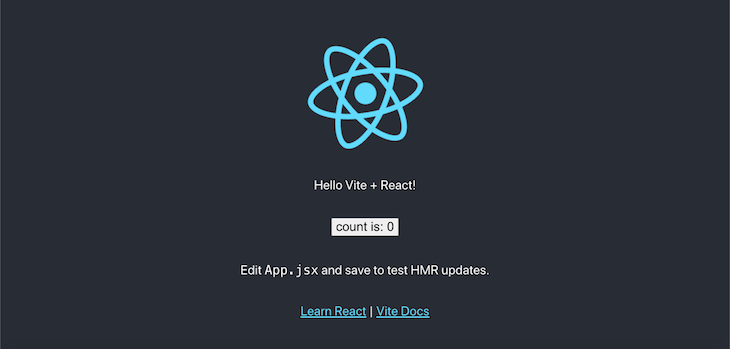
Now, you can begin building your PWA or even deploy your project to a production server.
To deploy the project, we’ll install Docker, Python v3.8+, and Ansible v2.5 in our system. Then, we’ll update the hosts.ini files with our server configuration.
Create Go App uses the Ansible Python library behind the scenes for automatic deployment, making our system act as a server for your remote project. To deploy the project, run the Create Go App command below via your terminal:
cgapp deploy
That’s all your need to deploy your project to a live server!
Create Go App is shipped with the technologies required to make building and deploying a production-ready, scalable Go application seamless, while still maintaining best practices. In this article, we explored Create Go App by building a PWA from scratch, starting with our scaffold, then finally, the backend and frontend of our application. I hope you enjoyed this article.
Install LogRocket via npm or script tag. LogRocket.init() must be called client-side, not
server-side
$ npm i --save logrocket

// Code:

import LogRocket from 'logrocket';
LogRocket.init('app/id');
// Add to your HTML:

<script src="https://cdn.lr-ingest.com/LogRocket.min.js"></script>
<script>window.LogRocket && window.LogRocket.init('app/id');</script>

When should you move API logic out of Next.js? Learn when Route Handlers stop scaling and how ElysiaJS helps.

Explore how Dokploy streamlines app deployment with Docker, automated builds, and simpler infrastructure compared to traditional CI/CD workflows.

A side-by-side look at Astro and Next.js for content-heavy sites, breaking down performance, JavaScript payload, and when each framework actually makes sense.

AI-generated tests can speed up React testing, but they also create hidden risks. Here’s what broke in a real app.re
Hey there, want to help make our blog better?
Join LogRocket’s Content Advisory Board. You’ll help inform the type of content we create and get access to exclusive meetups, social accreditation, and swag.
Sign up now

