A table of contents provides site viewers with a summary of the page’s content, allowing them to quickly navigate to sections of the page by clicking on the desired heading. Typically, tables of contents are implemented in documentation and blogs.

In this tutorial, we’ll learn how to create a sticky table of contents that will dynamically list the available headings on a page, highlighting the active headings. As we scroll through our article, when a heading becomes visible on the screen, it will be highlighted in the TOC, as seen in the gif below:

To follow along with this tutorial, you should be familiar with React and React Hooks. You should also have Node.js installed on your system. The full code for this tutorial is available on GitHub. Let’s get started!
For this tutorial, I’ve created a starter repo in which I’ve included the code we’ll use to create our table of contents. First, we’ll need to clone the repo. To do so, run the following command in the terminal:
$ git clone -b starter https://github.com/Tammibriggs/table-of-content.git

$ cd table-of-content

$ npm install
When we start the app with the $ npm start command, we should see the following page:
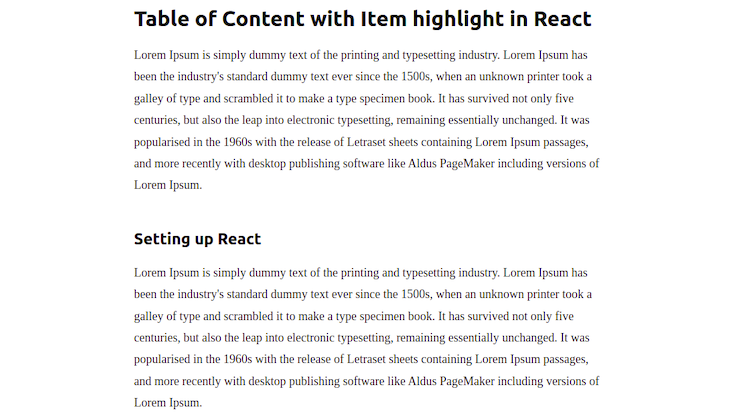
Let’s start by creating our TOC component, which will be sticky and will reside on the right side of our screen.
In the app we cloned earlier, create a TableOfContent.js file and a tableOfContent.css file in the src directory. Add the following lines of code to the TableOfContent.js file:
// src/TableOfContent.js
import './tableOfContent.css'

function TableOfContent() {
  return (
    <nav>
      <ul>
        <li>
          <a href='#'>A heading</a>
        </li>
      </ul>
    </nav>
  )
}
export default TableOfContent
In the code above, notice that we are wrapping the text in an anchor tag <a></a>. In our TOC, we’ll add functionality so that when we click on a heading, it will take us to the corresponding section on our page.
We can do so easily with an anchor tag by passing the ID of the section we want to navigate to in the href attribute. Therefore, all the sections on our page must contain an ID, which I’ve already included in the Content.js file.
Next, add the following lines of code in the tableOfContent.css file:
// src/tableOfContent.css
nav {
  width: 220px;
  min-width: 220px;
  padding: 16px;
  align-self: flex-start;
  position: -webkit-sticky;
  position: sticky;
  top: 48px;
  max-height: calc(100vh - 70px);
  overflow: auto;
  margin-top: 150px;
}

nav ul li {
  margin-bottom: 15px;
}
Now, to display this component, head over to the App.js file and add the following import:
import TableOfContent from './TableOfContent';
Next, modify the App component to look like the following:
// src/App.js
function App() {
  return (
    <div className="wrapper">
      <Content />
      <TableOfContent />
    </div>
  );
}
With the code above, we’ll see a sticky component on the right side of our app.
To find all the headings on our page, we can use the querySelectorAll document method, which returns a NodeList representing a list of elements that match the specified group of selectors.
The example below shows how we’ll use the querySelectorAll method:
const headings = document.querySelectorAll(h2, h3, h4)
We have specified h2, h3, and h4 as the selectors, which are the potential headings used in an article. We are not including h1 because it’s mainly used for the title of a page, and we want our TOC to contain only the subsections of our page.
Now to find the headings, add the following import in the TableOfContent.js file:
import { useEffect, useState } from 'react';
Next, in the component, add the following lines of code before the return statement:
// src/TableOfContent.js
const [headings, setHeadings] = useState([])

useEffect(() => {
  const elements = Array.from(document.querySelectorAll("h2, h3, h4"))
    .map((elem) => ({
      text: elem.innerText,
    }))
  setHeadings(elements)
}, [])
The code above will find all the specified heading elements on our page and then store the text content in the state.
In the code above, we are using the Array.from method to create an array from the NodeList returned by querySelectorAll. We do so because some functions, like map, which we used above, are not implemented on NodeList. To easily work with the heading elements found, we convert them to an array.
Now, to display the headings in the TOC, modify the return statement of the component to look like the following code:
// src/TableOfContent.js
return (
<nav>
<ul>
{headings.map(heading => (
<li key={heading.text}>
<a href='#'>{heading.text}</a>
</li>
))}
</ul>
</nav>
)
Now, when we open the app in our browser, we’ll see the following:
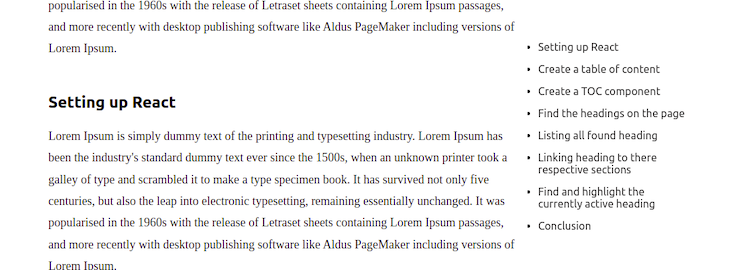
Right now, when we click on a heading in the TOC, it doesn’t take us to the correct section. You’ll notice that they are all in the same line with no indication of which is a main heading or subheading. Let’s fix this.
In the TableOfContent component, modify the useEffect Hook to look like the following code:
// src/TableOfContent.js
useEffect(() => {
  const elements = Array.from(document.querySelectorAll("h2, h3, h4"))
    .map((elem) => ({
      id: elem.id,
      text: elem.innerText,
      level: Number(elem.nodeName.charAt(1))
    }))
  setHeadings(elements)
}, [])
Along with the text from the headings we found, we are also adding an ID and a level property to the state. We’ll pass the ID to the anchor tag of the TOC text so that when we click on it, we’ll be taken to the corresponding section of the page. Then, we’ll use the level property to create a hierarchy in the TOC.
Modify the ul element in the return statement of the TableOfContent component to look like the following:
// src/TableOfContent.js
<ul>
  {headings.map(heading => (
    <li
      key={heading.id}
      className={getClassName(heading.level)}
      >
      <a
        href={`#${heading.id}`}
        onClick={(e) => {
          e.preventDefault()
          document.querySelector(`#${heading.id}`).scrollIntoView({
            behavior: "smooth"
          })}}
        >
        {heading.text}
      </a>
    </li>
  ))}
</ul>
In the code above, along with adding the ID to the href attribute of the anchor tag <a></a>, we also added an onClick event, which, when fired, calls scrollIntoView to make the browser smoothly scroll to the corresponding section.
In the li element, we call getClassName(heading.level) in the className attribute. We’ll use this feature, which we’ll create shortly, to set different class names based on the value of the level property. Therefore, we can give subheadings in the TOC different styling from the main headings.
Next, to create the getClassName function, add the following code outside the TableOfContent component:
// src/TableOfContent.js
const getClassName = (level) => {
  switch (level) {
    case 2:
      return 'head2'
    case 3:
      return 'head3'
    case 4:
      return 'head4'
    default:
      return null
  }
}
Now, add the following lines of code in the in tableOfContent.css file:
// src/tableOfContent.css
.head3{
  margin-left: 10px;
  list-style-type: circle;
}
.head4{
  margin-left: 20px;
  list-style-type: square;
}
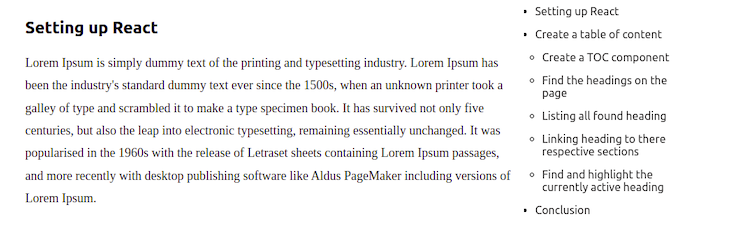
With the code above, when we click on a heading or subheading in our TOC, we’ll be taken to the corresponding section. Now, there is a hierarchy of the headings in our TOC:
When a heading is visible on our page, we want to highlight the corresponding text in the TOC.
To detect the visibility of the headings, we’ll use the Intersection Observer API, which provides a way to monitor a target element, executing a function when the element reaches the pre-defined position.
Using the Intersection Observer API, we’ll create a custom Hook that will return the ID of the active header. Then, we’ll use the ID that is returned to highlight the corresponding text in our TOC.
To do so, in the src directory, create a hook.js file and add the following lines of code:
// src/hooks.js
import { useEffect, useState, useRef } from 'react';

export function useHeadsObserver() {
  const observer = useRef()
  const [activeId, setActiveId] = useState('')

  useEffect(() => {
    const handleObsever = (entries) => {}

    observer.current = new IntersectionObserver(handleObsever, {
      rootMargin: "-20% 0% -35% 0px"}
    )

    return () => observer.current?.disconnect()
  }, [])

  return {activeId}
}
In the code above, we created a new instance of the Intersection Observer. We passed the handleObsever callback and an options object where we have specified the circumstances under which the observer’s callback is executed.
In object using the rootMargin property, we are shrinking the top of the root element by 20 percent, which is currently our entire page, and the bottom by 35 percent. Therefore, when a header is at the top 20 percent and bottom 35 percent of our page, it will not be counted as visible.
Let’s specify the headings we want to observe by passing them to the observe method of the Intersection Observer. We’ll also modify the handleObsever callback function to set the ID of the intersected header in the state.
To do so, modify the useEffect Hook to look like the code below:
// src/hooks.js
useEffect(() => {
  const handleObsever = (entries) => {
    entries.forEach((entry) => {
      if (entry?.isIntersecting) {
        setActiveId(entry.target.id)
      }
    })
  }

  observer.current = new IntersectionObserver(handleObsever, {
    rootMargin: "-20% 0% -35% 0px"}
  )

  const elements = document.querySelectorAll("h2, h3", "h4")
  elements.forEach((elem) => observer.current.observe(elem))
  return () => observer.current?.disconnect()
}, [])
In the TableOfContent.js file, import the created Hook with the following code:
// src/TableOfContent.js
import { useHeadsObserver } from './hooks'
Now, call the Hook after the headings state in the TableOfContent component:
// src/TableOfContent.js
const {activeId} = useHeadsObserver()
With the code above, when a heading element intersects, it will be available with activeId.
To highlight the active headings in our TOC, modify the anchor tag <a></a> of the li element in the returned statement of the TableOfContent component by adding the following style attribute:
style={{
  fontWeight: activeId === heading.id ? "bold" : "normal"
}}
Now, our anchor tag will look like the following:
// src/TableOfContent.js
<a
  href={`#${heading.id}`}
  onClick={(e) => {
    e.preventDefault()
    document.querySelector(`#${heading.id}`).scrollIntoView({
      behavior: "smooth"
    })}}
    style={{
      fontWeight: activeId === heading.id ? "bold" : "normal"
    }}
  >
  {heading.text}
</a>
Now, when a header is active, it will become bold. With this, we’re done creating our table of contents with header highlighting.
There are some considerations to keep in mind when adding item highlighting to a TOC. For one, there is no standard way of adding this feature to a TOC. Therefore, across different sites, the implementation is different, meaning our site’s users will have to learn how our TOC works.
In addition, since every table of contents has a different amount of spacing between each heading based on the text under it, our implementation of the highlighting feature might not be accurate for all headings.
Adding a table of contents to your blog or article creates a better experience for site visitors. In this tutorial, we learned how to create a table of contents with item highlighting to indicate each active header, helping your users navigate through your site and improving your overall UX.
Install LogRocket via npm or script tag. LogRocket.init() must be called client-side, not
server-side
$ npm i --save logrocket

// Code:

import LogRocket from 'logrocket';
LogRocket.init('app/id');
// Add to your HTML:

<script src="https://cdn.lr-ingest.com/LogRocket.min.js"></script>
<script>window.LogRocket && window.LogRocket.init('app/id');</script>
Hey there, want to help make our blog better?
Join LogRocket’s Content Advisory Board. You’ll help inform the type of content we create and get access to exclusive meetups, social accreditation, and swag.
Sign up now
This guide walks you through creating a web UI for an AI agent that browses, clicks, and extracts info from websites powered by Stagehand and Gemini.

This guide explores how to use Anthropic’s Claude 4 models, including Opus 4 and Sonnet 4, to build AI-powered applications.

Which AI frontend dev tool reigns supreme in July 2025? Check out our power rankings and use our interactive comparison tool to find out.

Learn how OpenAPI can automate API client generation to save time, reduce bugs, and streamline how your frontend app talks to backend APIs.


