Editor’s note: This article was most recently updated by Hussain Arif on 17 January 2024 to demonstrate Notifee as an alternative to Expo Notifications, describe how to make push notifications interactive, and explain some common issues and their solutions. It was previously reorganized for clarity on 10 June 2022 and updated to include more up-to-date information on Expo, Firebase, and React Native.

Push notifications have become an important feature to consider including when building mobile apps. Since they’re similar to SMS messages but don’t cost anything to send, many businesses now prefer using push notifications to send out information and alerts to app users.
In this article, we’ll see how to create and send push notifications in React Native apps.
Push notifications are messages or alerts sent from an application to a user who has installed that app. There are two main types of notifications:
Push notifications are popular in the world of mobile app development for many reasons. For example, they:
These benefits make push notifications useful for nearly any type of mobile app, from phone games to ecommerce applications and more.
Before we get into the technical details of how to implement push notifications in a React Native app, it may be helpful to understand how exactly React Native push notifications work. Here is a diagram that simplifies how notification services communicate with the device:
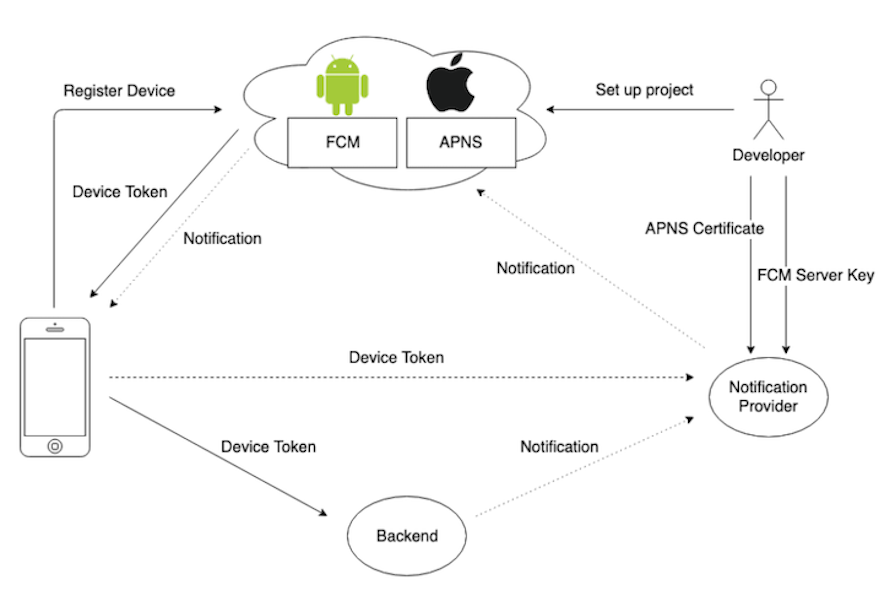
When it comes to push notifications in React Native, there are several ways to set them up:
Let’s learn more about each of these methods, then dive into our demo.
Both Android and iOS platforms offer native platform-specific APIs for receiving push notifications:
We can use the React Native Firebase library to integrate FCM on Android and the push-notification-ios library to integrate APNs on iOS.
The React Native Firebase library also offers a way to send push notifications on iOS through FCM. You can send remote notifications to registered mobile devices with firebase-admin and node-apn from a Node.js server.
Both FCM and APNs are platform-specific native push notification services. If we directly use these native push notification services, we typically have to use different libraries in the app’s frontend and backend.
Since this can be inconvenient, several cloud services offer ways to work with both FCM and APNs with unified source codes. Some popular push notification services are:
These notification services provide an abstraction layer on top of native push notification systems with a managed intermediate push notification server, as you can see in the diagram shown earlier.
Libraries like Notifee and react-native-notifications offer native modules to receive remote notifications and show local notifications easily with a unified library API.
You can use either FCM/APNs directly or a managed push notification service with these libraries. However, keep in mind that we have to use the bare workflow in Expo to use these libraries because these are not included in the Expo app.
To use push notifications in a React Native application, we first need to register the app to get a push notification token. This token is a long string that uniquely identifies each device. Then, we’ll store the token in a database on the server, send a notification, and handle the received notifications we’ve sent.
Before we dive in too deep, we are going to add push notifications to a project that’s already developed. This project is an ecommerce React Native application for selling used items. Using an existing project will allow us to focus on the push notifications aspect of our demo.
To download the project’s source code into your computer, run the following command in your terminal:
git clone https://github.com/codezri/Done-With-It-App.git
Next, we’ll install the dependencies needed for the project and start the React Native development server:
yarn install
yarn start
The above commands install dependencies and start the Expo development server, so you can test your application by using the Expo app on Android or iOS. The sample app looks like below with a working backend:
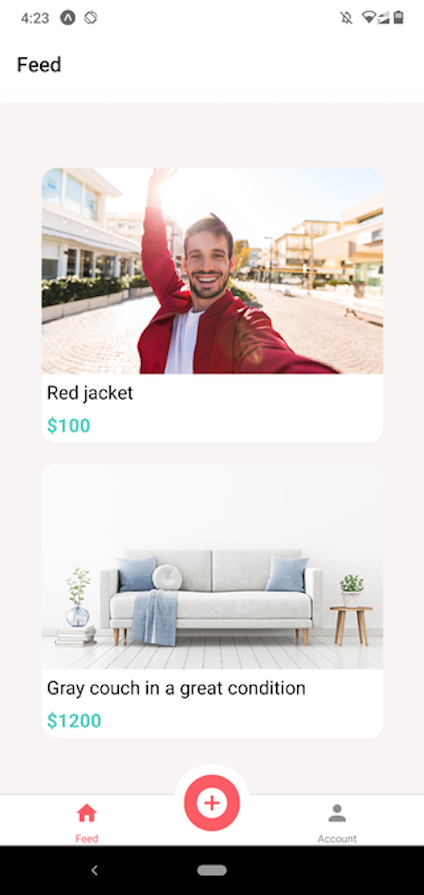
We will set up the app backend after discussing the mobile frontend code.
Next, we’ll get a push notification token from React Native Expo to start receiving notifications to the app.
Remember, to use push notifications in a React Native application, we first need to register the app to get a push notification token. Here, we will be using the notifications API in Expo.
To do this, let’s cd into the navigation directory and the AppNavigator component. Here, we are going to derive a token from Expo. Let’s get the Notifications functions from Expo below:
import * as Notifications from 'expo-notifications';
The above functions help us request user permissions to send a push notification and receive a unique Expo notification token for the particular device.
Now, we will write an async function in the AppNavigator component that will request a token from React Native Expo:
async function registerForPushNotificationsAsync() {
    let token;

    const { status: existingStatus } = await Notifications.getPermissionsAsync();
    let finalStatus = existingStatus;

    if (existingStatus !== 'granted') {
        const { status } = await Notifications.requestPermissionsAsync();
        finalStatus = status;
    }
    if (finalStatus !== 'granted') {
        alert('Failed to get push token for push notification!');
        return;
    }
    token = (await Notifications.getExpoPushTokenAsync()).data;
    console.log(token);

    return token;
}
In the code above, we are using the expo-notifications module that we recently installed to get the user’s permission to receive notifications. The function waits to receive the notification permission status.
Next, we check to see if the permission is granted. If it’s not, we display an alert about the error and return from the function immediately. If the token request process is successful, we return the token from the function. Otherwise, for now, we log the Expo token to the console for development purposes.
To call the above function for our application, we’re going to use the useEffect Hook from React:
const AppNavigator = () => {
    useEffect(() => {
        registerForPushNotificationsAsync();
    }, []);
In the code above, we passed the useEffect Hook that we imported from React and passed a function called registerForPushNotificationsAsync to make sure it’s only called once.
Now, open the application via the Expo app. Once you open the application, you can see the Expo push notification token on the console.
When new users open the app, this unique token will be generated, so we can store these tokens in a server and send notifications to all registered devices programmatically. Save the token somewhere — we will use it soon to test notifications.
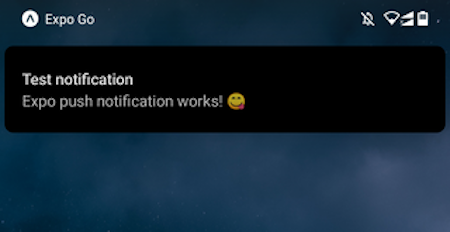
We can send test notifications to the device with the Expo notification tool by adding the push notification token. Go to the Expo notification tool, enter your token, enter a title and description, keep your app in the background, and click the Send a Notification button to send a test notification.
Now you can see the notification on your device, as shown in the following preview:
If you need to show notifications when your app is in the foreground, you can add the following configuration to the AppNavigator.js source file:
Notifications.setNotificationHandler({
  handleNotification: async () => ({
    shouldShowAlert: true
  }),
});

const AppNavigator = () => {
// ----
// ----
Now that we’ve tested Expo notifications manually, let’s store push notification tokens in a server and send notifications programmatically.
To store and use a push notification from our server, we need to configure our application user interface in a way that allows it to register new users and devices.
To achieve this, let’s go to our project’s api directory and open a new file that we will call expoPushTokens.js. Then do the following:
import client from './client';
const register = (pushToken) => client.post('/expoPushTokens', { token: pushToken });
export default {
    register,
}
In the code above, we are first importing the client module, which is also in the api directory.
We define a function register that takes a pushToken.
Now, we’ll post a client or new user to the url that’s on the backend /expoPushToken. In the body of the request, we’re going to add an object token that is set to pushToken. Then, we’ll export as a default object with a register method.
Next, we return to the AppNavigator component. Instead of logging our token on the console, we’ll send it to the server:
const AppNavigator = () => {

    useEffect(() => {
        registerForPushNotificationsAsync()
            .then(token => expoPushTokensApi.register(token));
    }, []);
Now, we’re sending the new user to get a token as well as sending the user info to our backend server. Later, we can use these tokens to send notifications to all registered devices.
To send push notifications to the server, we need to use one of the SDKs provided by Expo. If you visit the Expo documentation, you’ll find information regarding how to implement push notifications on the server in many languages.
In this tutorial, I’ll be working with a Node.js server. You can check out this GitHub repo for the server source code I’ve used in this tutorial. We’ll visit the utilities directory in the server and include the Expo SDK on it. To do this, we first do the following:
# # cd into the newly cloned Git repository.
git clone https://github.com/iamfortune/DoneWithIt-Backend.git
# Next we install the npm packages using this command:
npm install
Next, add your computer’s local network IP address to the React Native app’s baseURL and backend project’s assetsBaseUrl.
Then we start our development server with the following command:
npm start
You can see some pre-included listings in the React Native app if you keep both computer and mobile devices on the same network.
Now, go to the utilities/pushNotifications.js file in the backend project. There, add the Expo SDK to the packages:
npm i expo-server-sdk #install the package
//file name: utilities/pushNotifications.js
const { Expo } = require("expo-server-sdk");
Next, we’ll write a function that will receive our push notifications — both the push tokens and the message we want to send the user. Then, we’ll create a new chunk method to handle the push notifications:
const sendPushNotification = async (targetExpoPushToken, message) => {
  const expo = new Expo();
  const chunks = expo.chunkPushNotifications([
    { to: targetExpoPushToken, sound: "default", body: message }
  ]);
Now you can call the sendPushNotification function anywhere in the server code to send notifications to any device based on the Expo push notification token, as shown below:
const { Expo } = require('expo-server-sdk');
const sendPushNotification = require('../utilities/pushNotifications');
// ----
// ----
if (Expo.isExpoPushToken(expoPushToken)) {
  await sendPushNotification(expoPushToken, message);
}
// ----
You can check an example usage of the sendPushNotification function in the routes/messages.js file. Next, let’s determine how to handle notifications we’ve received in the React Native app.
To handle received notifications, we first need to have an event listener that will be called every time the user taps on a notification. Let’s add an event listener inside of our AppNavigator function that takes in the Notifications object:
const AppNavigator = () => {

    const responseListener = useRef();

    useEffect(() => {
        registerForPushNotificationsAsync()
            .then(token => expoPushTokensApi.register(token));

        // Works when app is foregrounded, backgrounded, or killed
        responseListener.current = Notifications.addNotificationResponseReceivedListener(response => {
            console.log('--- notification tapped ---');
            console.log(response);
            console.log('------');
        });

        // Unsubscribe from events
        return () => {
            Notifications.removeNotificationSubscription(responseListener.current);
        };
    }, []);
// ----
// ----
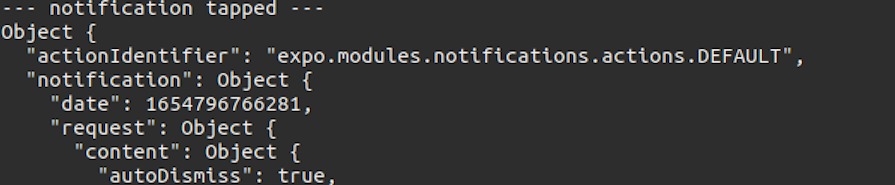
You can send test notifications via the Expo push notification tool and tap on the incoming notifications. Once you do so, you will see notification tap responses on the console:
The Expo notifications package offers a listener to detect incoming notification events if the application is foregrounded. The following code snippet logs a particular notification object once your foregrounded app receives a notification via the Expo push notifications system:
// ----
// ----
Notifications.setNotificationHandler({
handleNotification: async () => ({
shouldShowAlert: true
}),
});
const AppNavigator = () => {
const notificationListener = useRef();
useEffect(() => {
registerForPushNotificationsAsync()
.then(token => expoPushTokensApi.register(token));
notificationListener.current = Notifications.addNotificationReceivedListener(notification => {
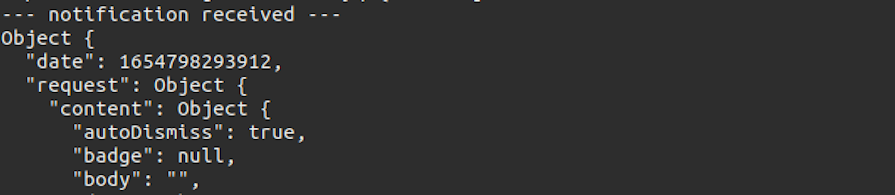
console.log('--- notification received ---');
console.log(notification);
console.log('------');
});
// Unsubscribe from events
return () => {
Notifications.removeNotificationSubscription(notificationListener.current);
};
}, []);
// ----
// ----
The above code logs notification objects if your application is in the foreground. Look at the following preview:
You can browse the complete source code of this React Native application from this GitHub repository. Also, you can browse the complete server-side code from this GitHub repository.
Note that here, I received notifications to my Android device without setting up FCM because I was using the Expo app for development. If you need to test your app without the Expo app or you wish to deploy your app to Google Play or Apple App Store, make sure to generate FCM and APNs credentials properly.
The official Expo documentation can guide you in setting up FCM and APNs for production apps. However, you can develop and test your applications without configuring FCM or APNs thanks to the Expo app.
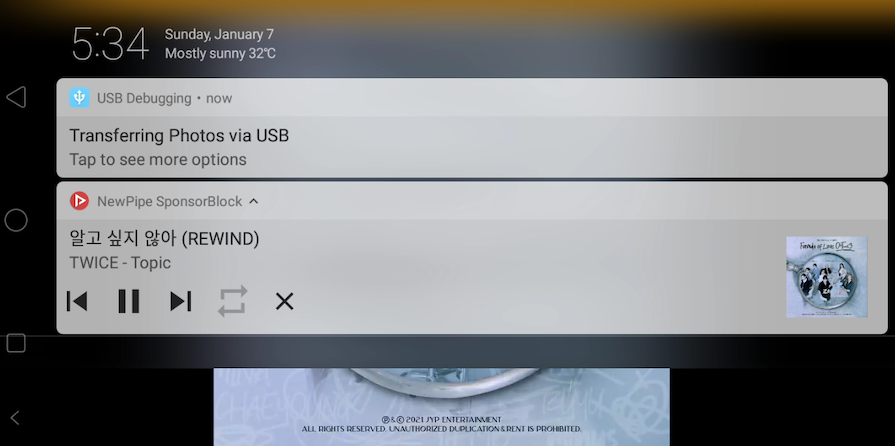
In some cases, developers don’t need a remote server to send notifications. One example of this can be a music player, where the app has to display a notification when a track is playing:
The following block of code shows how to create a local notification:
import { StyleSheet, Text, View, Button } from "react-native";
import * as Notifications from "expo-notifications";

{
  /*Configure our notification settings:*/
}

Notifications.setNotificationHandler({
  handleNotification: async () => ({
    shouldShowAlert: true,
    shouldPlaySound: true,
    shouldSetBadge: true,
  }),
});

const generateNotification = async () => {
  //show the notification to the user
  Notifications.scheduleNotificationAsync({
    //set the content of the notification
    content: {
      title: "Demo title",
      body: "Demo body",
    },
    trigger: null,
  });
};
return (
  <View style={styles.container}>
    {/*When clicked, execute the generateNotification function*/}
    <Button
      title="Generate notification"
      onPress={() => generateNotification()}
    />
  </View>
);
This will be the result of the code:
Other than Expo’s notification service, we can use Notifee to generate push notifications for us. The library boasts many features, some of which include:
style property: Developers can now embed images and large text into a notificationTo start with Notifee, let’s create a blank React Native project and install the notifee module:
npx react-native@latest init notifeeLearn
npm install notifee
Then, to use this library, write this code in the App.tsx file:
import notifee from "@notifee/react-native";

function App(): React.JSX.Element {
  //define our handler function:
  async function onDisplayNotification() {

    // Request permissions (required for iOS)
    await notifee.requestPermission();

    // Create a channel (required for Android)
    const channelId = await notifee.createChannel({
      id: "default",
      name: "Default Channel",
    });

    // Display a notification
    await notifee.displayNotification({
      title: "Notification Title",
      body: "Main body content of the notification",
      android: {
        channelId,
        // pressAction is needed if you want the notification to open the app when pressed
        pressAction: {
          id: "default",
        },
      },
    });
  }
  return (
    <SafeAreaView style={styles.main}>
    {/*Create a button, that when clicked, should display a notification to the user*/}
      <Button
        title="Display Notification"
        onPress={() => onDisplayNotification()}
      />
    </SafeAreaView>
  );
}
This will be the result:

Now that we’ve seen a very basic implementation of Notifee, let’s take a look at a more complex example.
Thanks to Notifee, we can even create background notifications, which get delivered even if the app is closed. This is suitable for situations where we want to send a silent notification that needs to be delivered whether the app is open or not, such as a text message or completed download.
As a first step, we have to configure background events. To make this possible, navigate to the index.js file. Here, write the following code:
//file name: index.js
import notifee, {EventType} from '@notifee/react-native';

//this handler will listen to background events:
notifee.onBackgroundEvent(async ({type, detail}) => {
  const {notification, pressAction} = detail;
  //log out notification data
  console.log('type ', type);
  console.log('notification data ', detail);

  //Check if the user has pressed the notification
  if (type === EventType.PRESS && pressAction.id === 'default') {
    // Do some processing..
    console.log('the default button was pressed');
    // Remove the notification after the event was registered.
    await notifee.cancelNotification(notification.id);
  }
});
Then, when the user clicks on the notification, React takes them back to the app and prints out the notification’s id and the type of interaction:
As mentioned before, we can even configure our notifications to be interactive using Notifee’s Interaction API. To do so, add a title and a pressAction field to the actions array in your displayNotifications function:
//file name: App.tsx
//unnecessary code removed for brevity
await notifee.displayNotification({
  //..further code..
  android: {
    //further code..
    pressAction: {
      /*Further code*/
    },
    //configure actions here:
    actions: [{ title: "Click me", pressAction: { id: "click-me" } }],
  },
});
Now that we have created an action, we now need to create a foreground service handler:
//file name: App.tsx
useEffect(() => {
  //register our foreground event:
  notifee.onForegroundEvent(({ type, detail }) => {
    //if the button on the notification was tapped:
    if (type === EventType.ACTION_PRESS && detail?.pressAction?.id) {
      console.log("detail ", detail);
      //print out the notification's id:
      console.log(
        "User pressed an action with the id: ",
        detail.pressAction.id,
      );
    }
  });
}, []);
This will be the result of the code:
There are many ways you can use interactive notifications. For example:
You can get creative with your interactive notifications to enhance your app’s UX and functionality.
Both Expo and Notifee are excellent open source libraries that perform the same task. Furthermore, they have a similar feature set and learning curve. As a result, this means you don’t need to spend a significant chunk of time trying to learn these libraries.
Here’s a table that compares both of these libraries:
| Feature | Expo Notifications | Notifee |
|---|---|---|
| Notification types | Local and remote notifications | Local and remote notifications |
| Integration | FCM and APN | FCM and OneSignal |
| Customization | Limited customization options | More customization options |
| Performance | Efficient and lightweight | Slightly less efficient than Expo Notifications |
| Documentation | Decent documentation | Excellent documentation |
| Community | Good community support | Strong community support |
| Requires Expo modules? | Yes | No |
| Best use case | Simple notifications | Complex notifications |
If you want to prioritize efficiency and only need simple local and remote notifications, Expo is ideal. However, for more custom or complex notifications, consider using Notifee instead.
There are a couple of common problems developers run into while using Expo Notifications and Notifee. Let’s see what the reasons are for these issues and how you can resolve them:
If you run into other issues while developing, feel free to comment them below. Alternatively, you can look for help in the Issues sections for Notifee and Expo.
In this article, we’ve seen why push notifications are popular. We also learned how to send push notifications in React Native applications by adding notification tokens, sending them from the server, and displaying them on user devices with the Expo notification APIs.
Furthermore, we explored how to display local and interactive notifications via the Notifee library. This library offers ways to customize your push notifications or create more complex notification types.
Push notifications are here to stay in the application world, so it’s a good idea to familiarize yourself with how to create and send them in your React Native apps. This will help you enhance your app’s UX and functionality, increasing user satisfaction and retention.
Thank you so much for reading!

LogRocket's Galileo AI watches sessions for you and and surfaces the technical and usability issues holding back your React Native apps.
LogRocket also helps you increase conversion rates and product usage by showing you exactly how users are interacting with your app. LogRocket's product analytics features surface the reasons why users don't complete a particular flow or don't adopt a new feature.
Start proactively monitoring your React Native apps — try LogRocket for free.

Learn how to use Fallow to analyze AI-generated code, detect dead code, duplicate logic, and complexity issues, and integrate automated code quality checks into your AI-assisted development workflow.

Learn how to protect full-stack projects from NPM supply chain attacks with a practical security checklist.

Explore 15 essential MCP servers for web developers to enhance AI workflows with tools, data, and automation.

Learn how contrast-color() automatically picks accessible text colors using native CSS, without JavaScript.
Would you be interested in joining LogRocket's developer community?
Join LogRocket’s Content Advisory Board. You’ll help inform the type of content we create and get access to exclusive meetups, social accreditation, and swag.
Sign up now

