
In this tutorial, we’ll take a look at the React Native Ignite boilerplate. Specifically, we’ll be building an app with it. By the end of this tutorial, you should be able to use Ignite in your own React Native projects.

We’ll cover the following topics:
The Replay is a weekly newsletter for dev and engineering leaders.
Delivered once a week, it's your curated guide to the most important conversations around frontend dev, emerging AI tools, and the state of modern software.
This tutorial assumes that you already have experience in creating React Native apps and that your machine is already set up with the React Native development environment.
Ignite uses TypeScript, so knowledge of TypeScript will be useful, though you should be able to follow this tutorial without any TypeScript experience.
Ignite is a boilerplate for React Native projects. It was created by the team at Infinite Red mainly because they use React Native in their projects. This means that Ignite contains all the best practices they apply to their own projects.
You can learn more about Ignite from their documentation.
To start off, you can create a new Ignite project using the following command:
npx ignite-cli new HealthTracker
This will generate a new React Native project with all the functionality I mentioned in the intro. Note that this will generate a bare React Native project. If you want to use Expo instead, then specify the --expo option like so:
npx ignite-cli new HealthTracker --expo
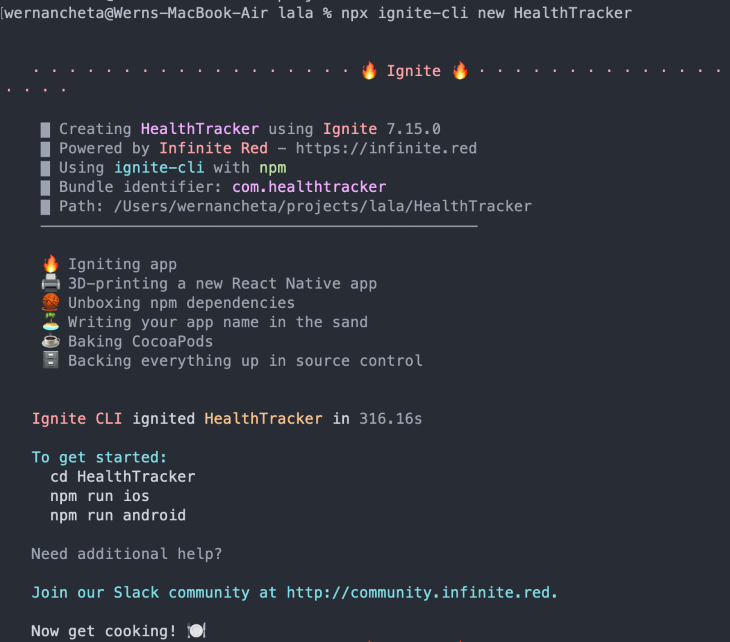
This is what it looks like when you generate a new project:
If you have trouble with the installation, be sure to check out the troubleshooting section on their GitHub repo. Personally, I encountered an issue when initializing an Ignite project because I didn’t have the LTS version of Node installed. At the time of writing, it’s at version 16.6.0.
Once installed, you can now run the app just like you would in a bare React Native project:
npx react-native run-android
npx react-native run-ios
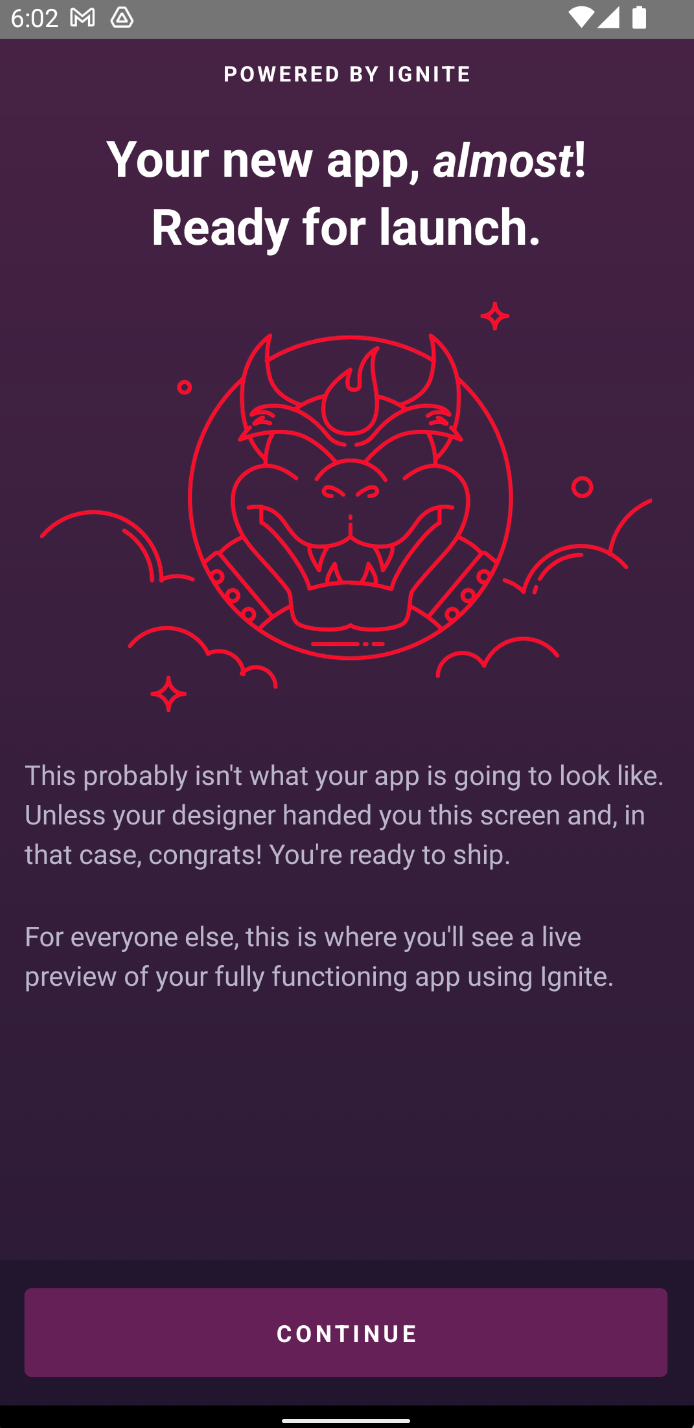
You should be greeted with this welcome screen:
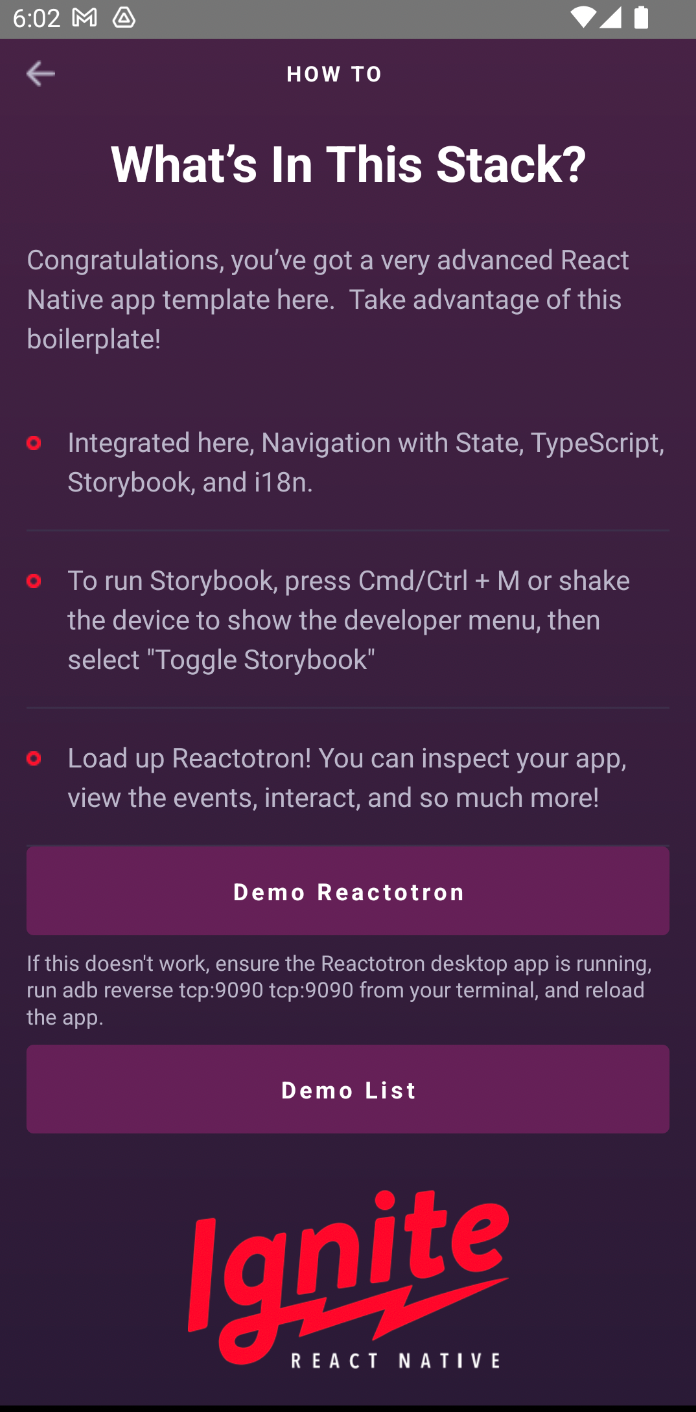
When you press Continue, it will show a quick guide on how to use it:
Aside from the Ignite dependencies, the app itself relies on the following libraries as well:
Here’s the command to install all of those:
npm install date-fns random-id @react-navigation/bottom-tabs react-native-vector-icons
Don’t forget to follow additional instructions on how to set up the library. Those are usually indicated in their GitHub repo, which I’ve linked to above.
The following folders will be present on your newly generated Ignite project. It will already have some files on it. Most of it we don’t need for our project, but it’s useful to leave it there as a reference while building the app.
app — this is where your navigators, config, components, screens, theme, utils, and everything else that has to do with your app directly will reside
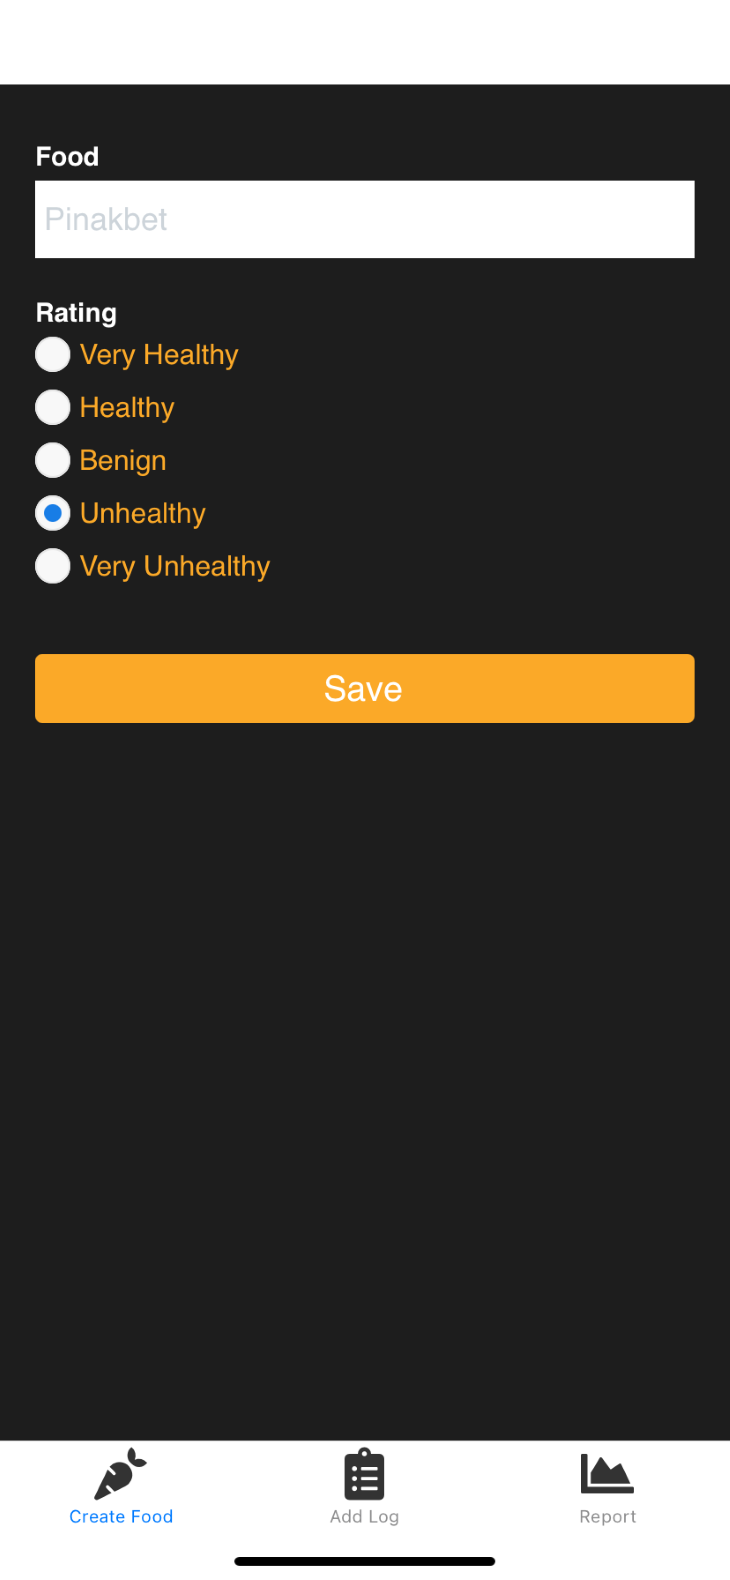
components — this is where all the components will reside. Each component has its own folder and contains both the component file and its story file. If there’s any asset that’s only specific to the component, they can reside here as welli18n — contains the translation files for your appmodels — all your app models and their test file will reside here. If you have other files related to the model such as types, they should reside here as wellnavigators — this is where all the navigators and navigation utilities will residescreens — this is where all the screen components will reside. Each screen has its own folder. Any files that are required directly by the screen should be added within the same foldertheme — this is where the app theme lives. This includes the fonts, typography, color, and spacingutils — where helpers and utilities used throughout the entire app are placedapp.tsx — the entry point to the appbin — contains the setup and post install scripts used by Ignite when you initialize a new appe2e — this is where you will put all the files that have to do with Detox end-to-end testingignite — contains all the Ignite generator templatesstorybook — this is where all the Storybook config and stories will residetest — contains the Jest config and mocksNow that all the basics have been taken care of, let’s now take a look at what we’ll be building in this tutorial. We’ll be building a simple health-tracking app that has three screens.
This screen is for adding foods that the user usually eats. This includes a 1 to 5 rating of how healthy the food is with 1 being the unhealthiest and 5 being the most healthy.
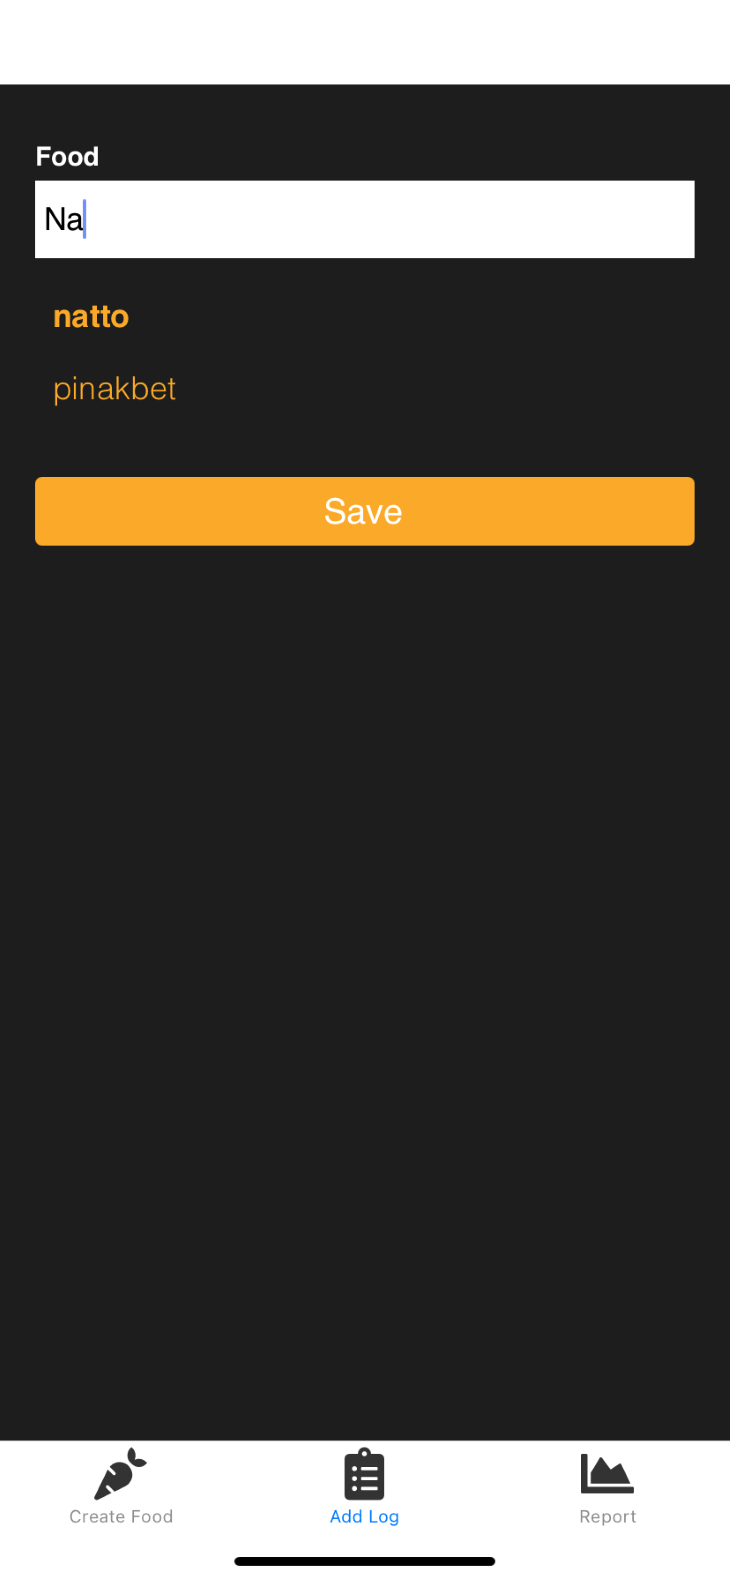
This screen is for logging the foods the user is eating.
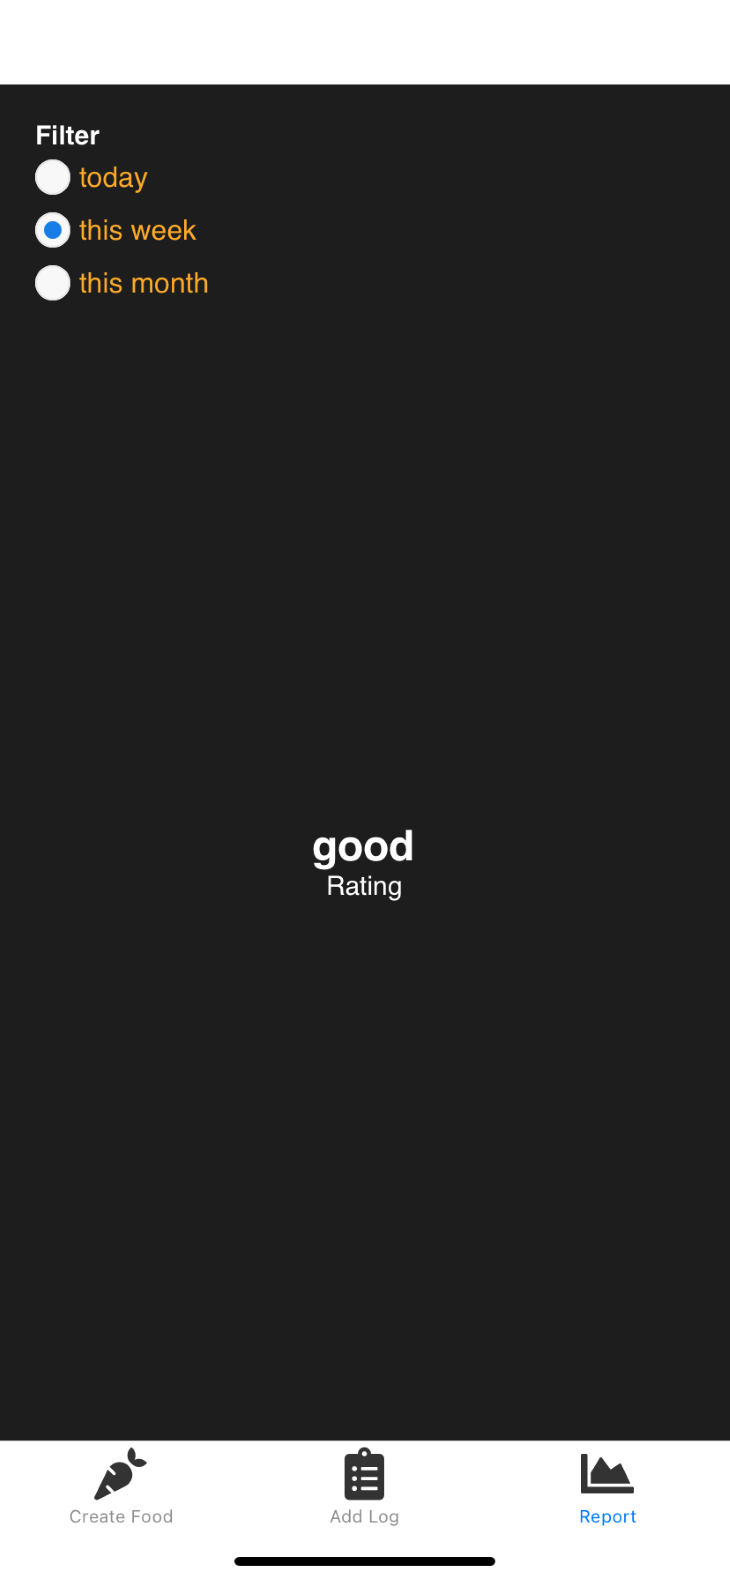
Finally, this screen is for showing an overall rating of the foods that the user ate during a specific period of time.
You can find the full source code of the app on this GitHub repo.
It’s now time to start building the app. First, create the screen for adding new foods:
npx ignite-cli generate screen create-food
This generates the app/screens/create-food/create-food-screen.tsx file. All new screens that you generate using Ignite’s generator will create a new folder inside the app/screens directory. It also automatically adds it to the app/screens/index.ts file.
That’s the power of generators: they make life easy for you since you no longer need to manually create the files for whatever it is you’re trying to create. They also come with some default code already; this makes it easy to follow a specific standard from the very beginning.
But in the case of Ignite, there’s only one standard, and that’s the standard of the folks at Infinite Red. If you want to create your own standard, Ignite also provides a way to create your own generators or at least customize the generators that Ignite already has. But we won’t be covering that one in this tutorial. You can check out the docs for that.
Ignite uses React Navigation to implement navigation. It allows us to show different screens based on where the user is currently navigated to. If you’ve seen the welcome screen earlier, that one uses a stack navigator. You can find the code for that in the app/navigators/app-navigator.tsx file. Here’s a snippet from that file:
// app/navigators/app-navigator.tsx

import { createNativeStackNavigator } from "@react-navigation/native-stack"
import { WelcomeScreen, DemoScreen, DemoListScreen } from "../screens"

export type NavigatorParamList = {
  welcome: undefined
  demo: undefined
  demoList: undefined
  // 🔥 Your screens go here
}

// Documentation: https://reactnavigation.org/docs/stack-navigator/
const Stack = createNativeStackNavigator<NavigatorParamList>()

const AppStack = () => {
  return (
    <Stack.Navigator
      screenOptions={{
        headerShown: false,
      }}
      initialRouteName="welcome"
    >
      <Stack.Screen name="welcome" component={WelcomeScreen} />
      <Stack.Screen name="demo" component={DemoScreen} />
      <Stack.Screen name="demoList" component={DemoListScreen} />
      {/** 🔥 Your screens go here */}
    </Stack.Navigator>
  )
}
It should be simple enough to understand if you’ve worked with React Navigation previously. If not, then you can check out some of the tutorials previously written on the topic:
So to get our newly created screen to show up, we need to import it first:
import { CreateFoodScreen } from "../screens"
Then add it on the NavigatorParamList:
export type NavigatorParamList = {
  CreateFoodScreen: undefined
}
Finally, we add it under the stack navigator and set it as the initial screen:
const AppStack = () => {
  return (
    <Stack.Navigator
      screenOptions={{
        headerShown: false,
      }}
      initialRouteName="createfood"
    >
      <Stack.Screen name="createfood" component={CreateFoodScreen} />
    </Stack.Navigator>
  )
}
That will now show the create food screen. Go ahead and create the rest of the screens:
npx ignite-cli generate screen food-logger
npx ignite-cli generate screen report
We won’t actually be using the stack navigator. We’ll use the bottom tab navigator instead.
Update the app/navigators/app-navigator.tsx file to include and use all of the screens:
// app/navigators/app-navigator.tsx
import Icon from "react-native-vector-icons/FontAwesome5"

import { CreateFoodScreen, FoodLoggerScreen, ReportScreen } from "../screens"

export type NavigatorParamList = {
  createFood: undefined
  foodLogger: undefined
  report: undefined
}

const Tab = createBottomTabNavigator<NavigatorParamList>()

const AppStack = () => {
  return (
    <Tab.Navigator
      screenOptions={{
        headerShown: false,
      }}
      initialRouteName="createFood"
    >
      <Tab.Screen
        name="createFood"
        component={CreateFoodScreen}
        options={{
          tabBarIcon: () => <Icon name="carrot" size={30} color="#333" />,
          title: "Create Food",
        }}
      />

      <Tab.Screen
        name="foodLogger"
        component={FoodLoggerScreen}
        options={{
          tabBarIcon: () => <Icon name="clipboard-list" size={30} color="#333" />,
          title: "Add Log",
        }}
      />

      <Tab.Screen
        name="report"
        component={ReportScreen}
        options={{
          tabBarIcon: () => <Icon name="chart-area" size={30} color="#333" />,
          title: "Report",
        }}
      />
    </Tab.Navigator>
  )
}
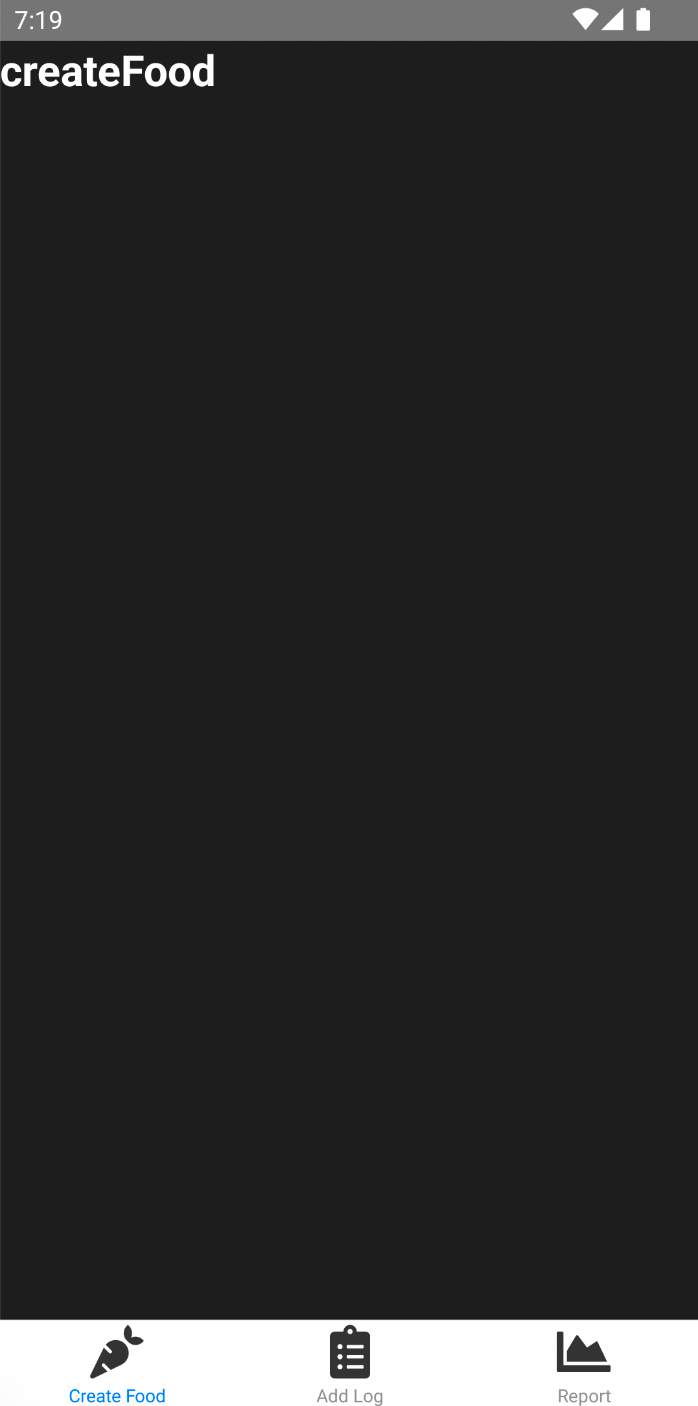
Once that’s done, you should now see all the screens that can be navigated using bottom tab navigation:
Before we add the functionality for the screens, let’s first take a look at how we can create new components with Ignite. Ignite already comes with some components that can be used to build the UI of the app. They’re designed with flexibility and customizability in mind so you should be able to easily apply your own custom design system with it.
You can create new components using the generator:
npx ignite-cli generate component Radio
This creates a new folder under the app/components directory. Inside the folder are two files: one for the component itself and another for Storybook testing. Let’s first add the code for the actual component:
// app/components/radio/radio.tsx
import * as React from "react"
import { TextStyle, View, ViewStyle, TouchableOpacity } from "react-native"
import { observer } from "mobx-react-lite"
import { color, typography } from "../../theme"
import { Text } from "../text/text"
import { RadioProps } from "./radio.props"

const CONTAINER: ViewStyle = {
  flexDirection: "row",
  alignItems: "center",
  marginRight: 45,
  marginBottom: 10,
}

const ICON: ViewStyle = {
  height: 10,
  width: 10,
  borderRadius: 7,
  backgroundColor: "#187DE6",
}

const TEXT: TextStyle = {
  fontFamily: typography.primary,
  fontSize: 16,
  color: color.primary,
  marginLeft: 5,
}

const BODY: ViewStyle = {
  height: 20,
  width: 20,
  backgroundColor: "#F8F8F8",
  borderRadius: 10,
  borderWidth: 1,
  borderColor: "#E6E6E6",
  alignItems: "center",
  justifyContent: "center",
}

/**
 * Describe your component here
 */
export const Radio = observer(function Radio(props: RadioProps) {
  const { style, item, selected, setSelected } = props
  const styles = Object.assign({}, CONTAINER, style)

  return (
    <View style={styles}>
      <TouchableOpacity
        onPress={() => {
          setSelected(item.value)
        }}
        style={BODY}
      >
        {selected ? <View style={ICON} /> : null}
      </TouchableOpacity>
      <TouchableOpacity
        onPress={() => {
          setSelected(item.value)
        }}
      >
        <Text style={TEXT}>{item.title}</Text>
      </TouchableOpacity>
    </View>
  )
})
The prop types are separated from the rest of the code. This serves as documentation on what values (and their type) you can pass in as props. This is one of the reasons why Ignite uses TypeScript by default. Since types are heavily used, it won’t seem like a second-class citizen in the codebase:
// app/components/radio/radio.props.ts
import React from "react"
import { StyleProp, ViewStyle } from "react-native"

export interface RadioProps {
  /**
   * An optional style override useful for padding & margin.
   */
  style?: StyleProp<ViewStyle>

  item?: Object

  selected?: boolean

  setSelected: Function
}
Ignite makes it really easy to customize the look and feel of the app. Everything that has to do with changing the theme of the app in the app/theme folder. Here’s a quick overview of the files:
palette.ts — you can add the color palette of your app herecolor.ts — for giving more descriptive roles to the colors (e.g., primary, error, warning)spacing.ts — for specifying whitespace sizestiming.ts — for animation timingstypography.ts — for changing the font styleYou can also use custom fonts. Copy the custom font into the theme/fonts folder.
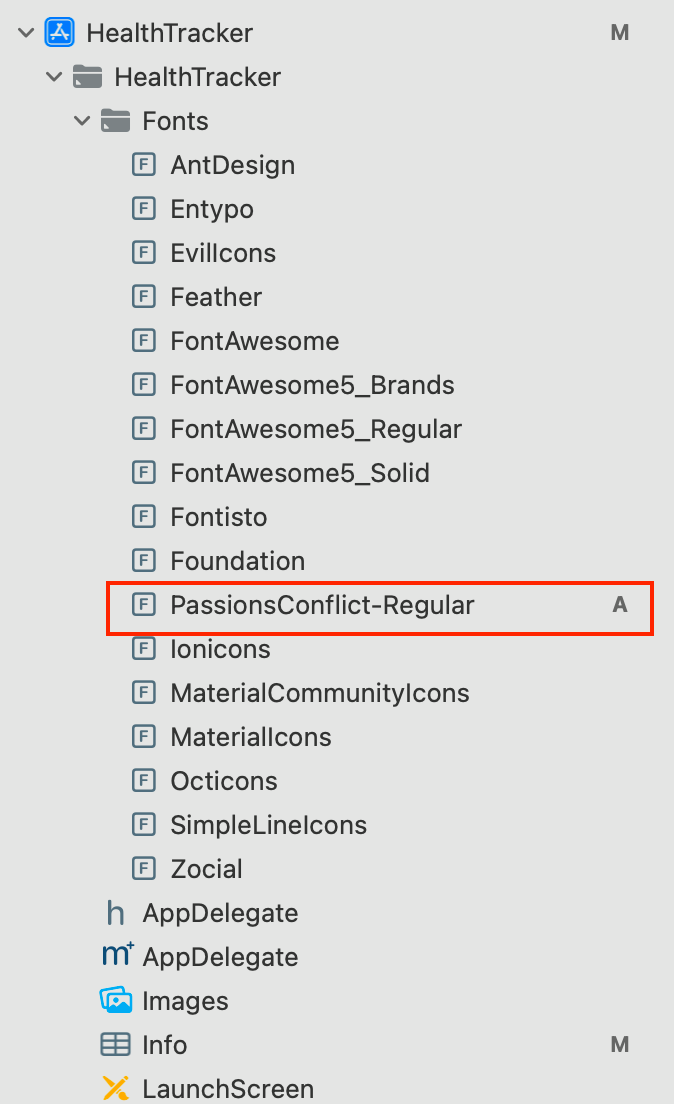
Next, you need to copy it to the Xcode project. You can use the same Fonts folder as the one used by React Native vector icons:
Next, add it to the ios/HealthTracker/Info.plist file under the UIAppFonts field:
<key>UIAppFonts</key>
<array>

  <string>Zocial.ttf</string>
  <string>PassionsConflict-Regular.ttf</string>
</array>
Finally, update the app/theme/typography.ts file with the name of the font. This is case-sensitive, so be sure to use the font’s filename as it is:
// app/theme/typography.ts
export const typography = {
  /**
   * The primary font.  Used in most places.
   */
  primary: Platform.select({
    ios: "PassionsConflict-Regular",
    android: "PassionsConflict-Regular",
  }),
Once that’s done, the custom font is available. Note that this won’t change all the fonts used in the app. As you can see, the bottom tab text is still using the default font. I’ll leave that for you to figure out:
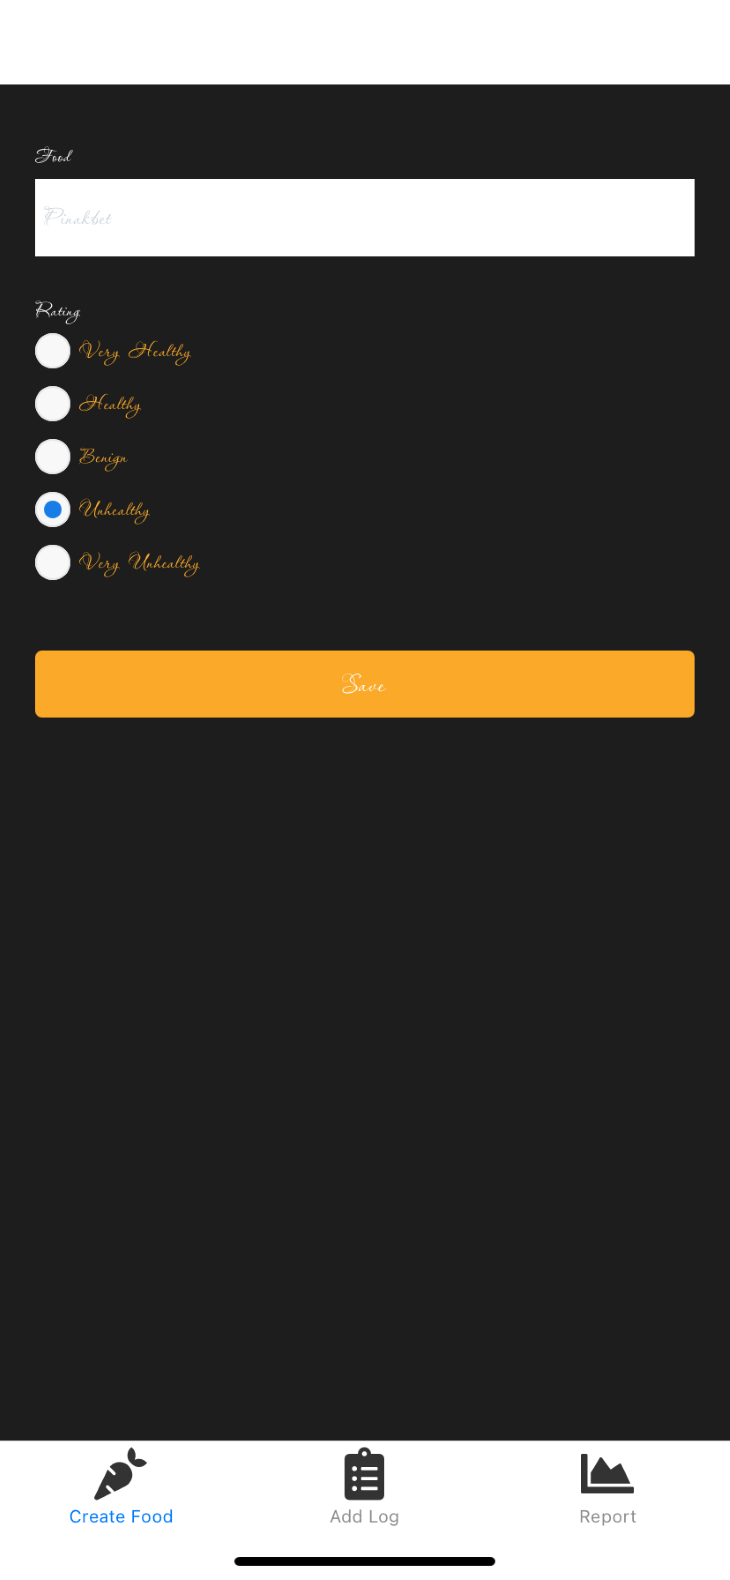
For Android, please consult the assets/fonts/custom-fonts.md file in your project to learn how to use a custom font in Android.
One of the main advantages of using Ignite is that it makes it so easy to adapt best practices in your project.
One of those best practices is isolating component development and testing. The best tool for that job is Storybook. By simply using the component generator, you’re already getting this for free. So all you have to do is update the code to add every possible use case for the component:
// app/components/radio/radio.story.tsx

import * as React from "react"
import { storiesOf } from "@storybook/react-native"
import { StoryScreen, Story, UseCase } from "../../../storybook/views"

import { Radio } from "./radio"

declare let module

storiesOf("Radio", module)
  .addDecorator((fn) => <StoryScreen>{fn()}</StoryScreen>)
  .add("States", () => (
    <Story>
      <UseCase text="Unselected" usage="When not yet selected.">
        <Radio
          item={{ title: "title", value: "value" }}
          setSelected={false}
          setSelected={() => {
            console.log("selected radio")
          }}
        />
      </UseCase>

      <UseCase text="Selected" usage="When selected.">
        <Radio
          item={{ title: "title", value: "value" }}
          selected
          setSelected={() => {
            console.log("selected radio")
          }}
        />
      </UseCase>
    </Story>
  ))
If you’re new to Storybook, be sure to go through the Storybook for React Native tutorial.
To view Storybook, execute the following command on the root directory of the project:
npm run storybook
This opens a new browser window, but we don’t really need that, so you can close it. To view the component within the app, press Ctrl + M (or Command + M) while on the simulator. This shows the React Native dev menu. Click Toggle Storybook:
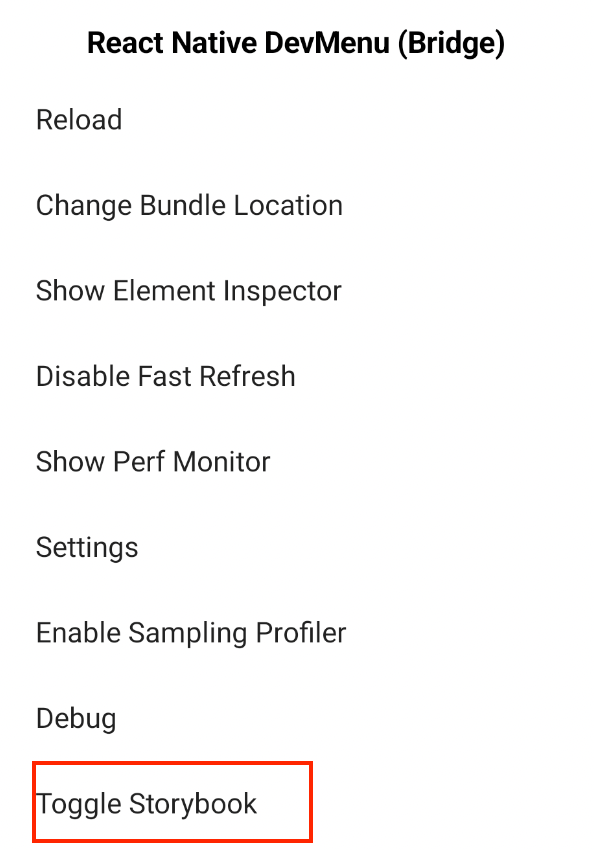
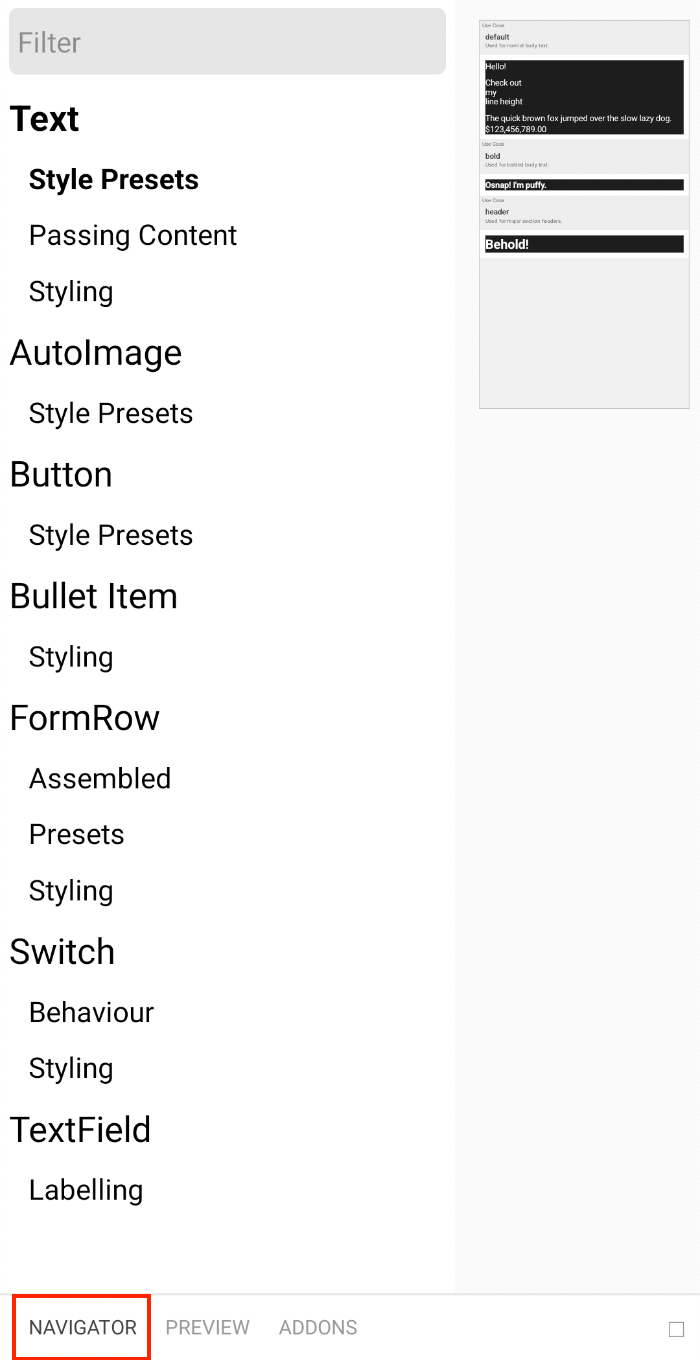
Clicking that will show the default text component. Click on Navigator on the bottom left corner and that will show you all the components that have been added to Storybook. By default, all of Ignite’s inbuilt components are already listed here. You can also use the filter to search for a specific component:
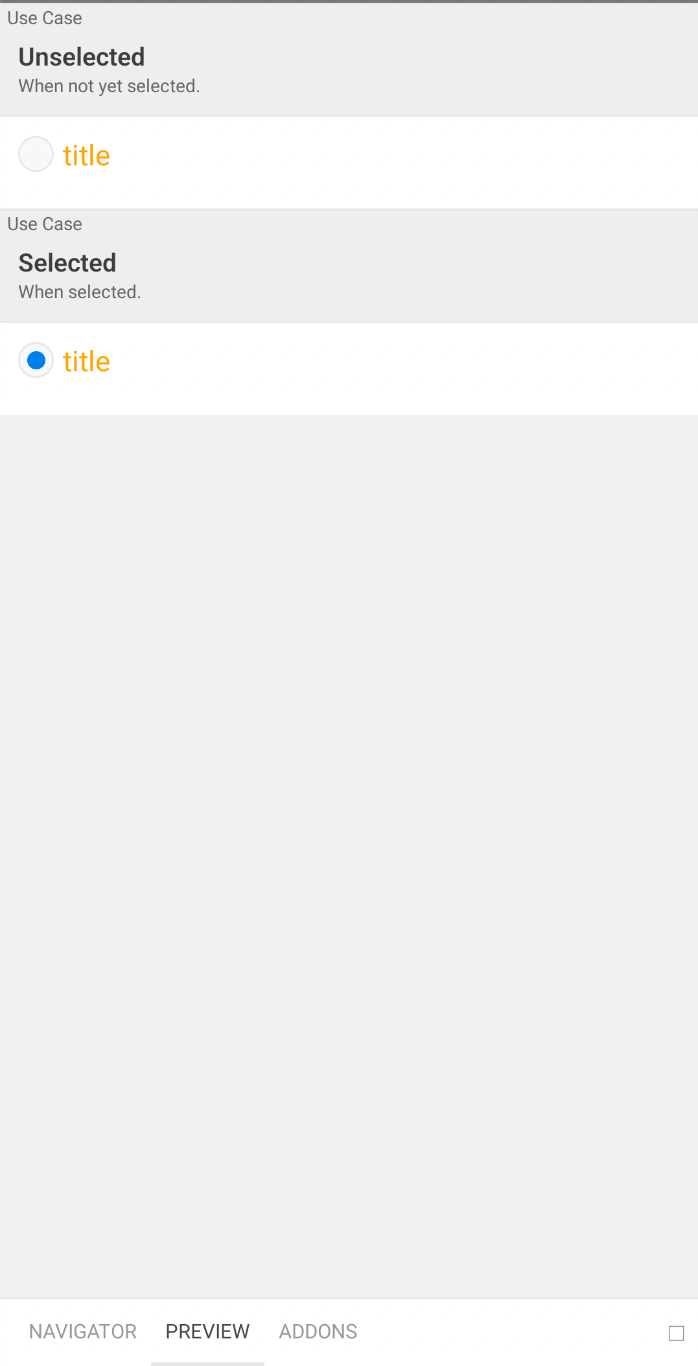
The radio component we’ve just created won’t be listed here. You need to add it to the storybook/storybook-registry.ts file first as it doesn’t automatically get added here when you generate a new component:
// storybook/storybook-registry.ts
require("../app/components/header/header.story")

// add this
require("../app/components/radio/radio.story")
Once that’s done, you should now see the radio component:
Let’s now go back to the create food screen:
// app/screens/create-food/create-food-screen.tsx

import React, { FC, useState, useEffect } from "react"
import { observer } from "mobx-react-lite"
import { ViewStyle } from "react-native"
import { StackScreenProps } from "@react-navigation/stack"

var randomId = require("random-id")

import { NavigatorParamList } from "../../navigators"
import { Screen, Text, TextField, Button, Radio, Spacer } from "../../components"

import { color } from "../../theme"

import { FoodStoreModel } from "../../models/food-store/food-store"

import { food_ratings } from "../../config/app"

import { useStores } from "../../models"

const ROOT_STYLE: ViewStyle = {
  backgroundColor: color.palette.black,
  flex: 1,
  padding: 20,
}

export const CreateFoodScreen: FC<StackScreenProps<NavigatorParamList, "createFood">> = observer(
  ({ navigation }) => {
    const [food, setFood] = useState("")
    const [rating, setRating] = useState(2)

    const [saveButtonText, setSaveButtonText] = useState("Save")

    const { foodStore } = useStores()

    const resetForm = () => {
      setFood("")
      setRating(2)
    }

    const saveFood = () => {
      foodStore.saveFood({
        id: randomId(10),
        name: food,
        rating,
      })

      resetForm()

      setSaveButtonText("Saved!")

      setTimeout(() => {
        setSaveButtonText("Save")
      }, 1800)
    }

    return (
      <Screen style={ROOT_STYLE} preset="scroll">
        <TextField
          onChangeText={(value) => setFood(value)}
          inputStyle={{ color: color.palette.black }}
          value={food}
          label="Food"
          placeholder="Pinakbet"
          testID="food"
        />

        <Spacer size={10} />

        <Text preset="bold" text="Rating" />
        {food_ratings.map((item, index) => {
          const selected = item.rating === rating
          return (
            <Radio
              item={{ title: item.title, value: item.rating }}
              key={index}
              selected={selected}
              setSelected={setRating}
            />
          )
        })}

        <Spacer size={30} />

        <Button text={saveButtonText} preset="large" onPress={saveFood} />
      </Screen>
    )
    // },
  },
)
From the code above, you can see that it follows the usual pattern for screen code in React Native: imports at the top, followed by the styles, then finally the body of the screen. Anything goes as long as you apply the same pattern in all of your screen code.
Please use the GitHub repo as a reference for all the code that‘s used by the code above as we won’t be going through all the code in this tutorial.
In the code for the create food screen, we made use of the FoodStoreModel as a data store. The underlying library that makes this work is MobX-state-tree.
If you’ve already used MobX, the main difference between the two is that MobX-state-tree provides structure to the otherwise unopinionated vanilla MobX. MobX-state-tree allows you to easily implement a centralized store for your app data, take a snapshot of it, and restore the app state from a snapshot.
Still on the app/screens/create-food/create-food-screen.tsx file, here’s how we made use of MobX-state-tree. First, you need to import the store model:
import { FoodStoreModel } from "../../models/food-store/food-store"
Next, import the useStores context. This allows you to access all the stores added to the root store:
import { useStores } from "../../models"
You can then use it to gain access to the foodStore:
const { foodStore } = useStores()
This then allows you to call any of the methods in the store. This includes the method for saving a food:
foodStore.saveFood({
  id: randomId(10),
  name: food,
  rating,
})
You can generate models in Ignite by executing the following command:
npx ignite-cli generate model <name of model>
In this case, we want to generate the food store model:
npx ignite-cli generate model food-store
This creates a new folder named food-store under the app/models directory. Inside the folder are two files: food-store.ts which is the file for the model itself, and food-store.test.ts which is the Jest test for the model. We’ll take a look at how to use Jest for testing models in a later part of this tutorial.
The model is where you’d declare the following:
foods. We can specify the data types for the individual fields by using another model (FoodModel)Here’s the code for the food store model:
// app/models/food-store/food-store.ts
import { Instance, SnapshotIn, SnapshotOut, types } from "mobx-state-tree"

import { FoodModel, FoodSnapshotIn } from "../food/food"
/**
 * Model description here for TypeScript hints.
 */

export const FoodStoreModel = types
  .model("FoodStore")
  .props({
    foods: types.optional(types.array(FoodModel), []),
  })
  .views((self) => ({
    get allFoods() {
      return self.foods
    },
  })) // eslint-disable-line @typescript-eslint/no-unused-vars
  .actions((self) => ({
    saveFood: (foodSnapshot: FoodSnapshotIn) => {
      self.foods.push(foodSnapshot)
    },
  })) // eslint-disable-line @typescript-eslint/no-unused-vars

export interface FoodStore extends Instance<typeof FoodStoreModel> {}
export interface FoodStoreSnapshotOut extends SnapshotOut<typeof FoodStoreModel> {}
export interface FoodStoreSnapshotIn extends SnapshotIn<typeof FoodStoreModel> {}
export const createFoodStoreDefaultModel = () => types.optional(FoodStoreModel, {})
Next, generate the food model:
npx ignite-cli generate model food
Here’s the code for the food model. This allows you to specify the shape of each object that needs to be passed to the food store model:
// app/models/food/food.ts
import { Instance, SnapshotIn, SnapshotOut, types } from "mobx-state-tree"

/**
 * Model description here for TypeScript hints.
 */

export const FoodModel = types
  .model("Food")
  .props({
    id: types.identifier,
    name: types.string,
    rating: types.integer,
  })
  .views((self) => ({})) // eslint-disable-line @typescript-eslint/no-unused-vars
  .actions((self) => ({})) // eslint-disable-line @typescript-eslint/no-unused-vars

export interface Food extends Instance<typeof FoodModel> {}
export interface FoodSnapshotOut extends SnapshotOut<typeof FoodModel> {}
export interface FoodSnapshotIn extends SnapshotIn<typeof FoodModel> {}
export const createFoodDefaultModel = () => types.optional(FoodModel, {})
The final step is to include the food store in the root store. You’ll need to do this for every store that you create if you want to access them globally:
// app/models/root-store/root-store.ts

// ...
import { FoodStoreModel } from "../../models/food-store/food-store" // add this

export const RootStoreModel = types.model("RootStore").props({
  // ...
  // add this
  foodStore: types.optional(FoodStoreModel, {} as any),

})
Jest is a JavaScript testing framework. By default, Ignite already generates a test every time you generate a new model. We already created the food store model earlier, so it should have generated a corresponding test file at app/models/food-store/food-store.test.ts. Add the following code to verify if the API for saving a new food works. We can implement the test in three steps:
saveFood() methodallFoods views with the hardcoded value we’re expectingHere’s the code:
// app/models/food-store/food-store.test.ts

import { FoodStoreModel } from "./food-store"

test("can be created", () => {
  const instance = FoodStoreModel.create()

  instance.saveFood({
    id: "somerandomid123",
    name: "fried chicken",
    rating: 2,
  })

  expect(instance.allFoods).toStrictEqual([
    {
      id: "somerandomid123",
      name: "fried chicken",
      rating: 2,
    },
  ])
})
To run all the tests:
npm run test
This should return the following:
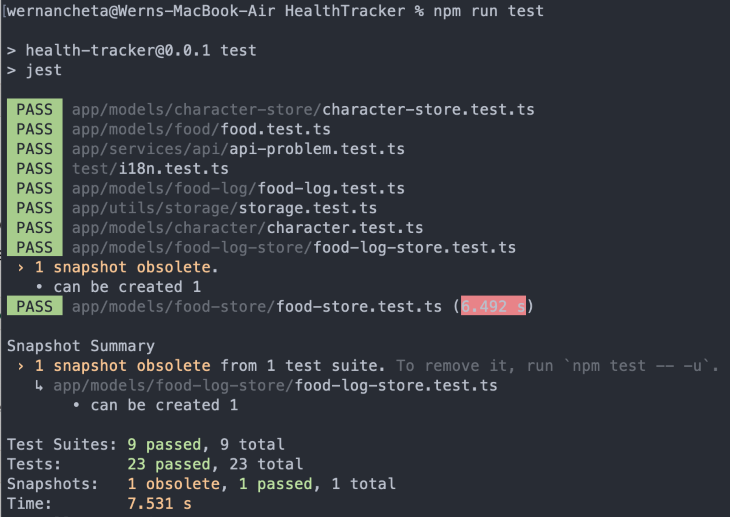
If you want to run a specific test (for example, only the tests in the food store), you can use the name of the file to do so:
npm run test -t 'food-store'
Going back to the screens, the next one we need to implement is the food logger screen:
npx ignite-cli generate screen food-logger
This screen allows the user to search and select the foods added via the create food screen. When saved, it sets the details of the food as well as the date. The date is a crucial part since it’s what’s used to sort the data in the report screen later on. Here’s the code for the food logger screen:
// app/screens/food-logger/food-logger-screen.tsx

import React, { FC, useState } from "react"
import { observer } from "mobx-react-lite"
import { ViewStyle } from "react-native"
import { StackScreenProps } from "@react-navigation/stack"

var randomId = require("random-id")

import { NavigatorParamList } from "../../navigators"
import { Screen, Text, TextField, SelectableText, Button, Spacer } from "../../components"

import { color } from "../../theme"

import { useStores } from "../../models"

const ROOT_STYLE: ViewStyle = {
  backgroundColor: color.palette.black,
  flex: 1,
  padding: 20,
}

export const FoodLoggerScreen: FC<StackScreenProps<NavigatorParamList, "foodLogger">> = observer(
  function FoodLoggerScreen() {
    const { foodStore, foodLogStore } = useStores()

    const [food, setFood] = useState("")
    const [selectedFood, setSelectedFood] = useState(null)

    const filteredFoods = food
      ? foodStore.allFoods.filter((item) => {
          return item.name.toLowerCase().includes(food.toLowerCase())
        })
      : []

    const hasNoFoods = foodStore.allFoods.length === 0
    const hasFoodsButNotFiltered = foodStore.allFoods.length > 0 && filteredFoods.length === 0

    const resetForm = () => {
      setFood("")
      setSelectedFood(null)
    }

    const saveLog = () => {
      const selected_food_data = foodStore.allFoods.find((item) => item.id === selectedFood)

      foodLogStore.saveLog({
        id: randomId(10),
        food_id: selectedFood,
        rating: selected_food_data.rating,
        date: new Date(),
      })

      resetForm()
    }

    return (
      <Screen style={ROOT_STYLE} preset="scroll">
        <TextField
          onChangeText={(value) => setFood(value)}
          inputStyle={{ color: color.palette.black }}
          value={food}
          label="Food"
          placeholder="Pinakbet"
        />

        {hasNoFoods && <Text text="Create some foods first.." />}

        {hasFoodsButNotFiltered && <Text text="Type something.." />}

        {filteredFoods.map((item) => {
          const isSelected = item.id === selectedFood
          return (
            <SelectableText
              text={item.name}
              key={item.id}
              id={item.id}
              setSelected={setSelectedFood}
              isSelected={isSelected}
            />
          )
        })}

        <Spacer size={30} />

        <Button text="Save" preset="large" onPress={saveLog} />
      </Screen>
    )
  },
)
You can view the code for the SelectableText component, food log store, and food log model in the repo.
Lastly, we have the report screen:
npx ignite-cli generate screen report
This allows the user to select from a set list of time ranges in which to base the filtering on. With the help of the date-fns library, the implementation is easier. From there, all we’re doing is using reduce and averaging to find which rating the result falls into:
import React, { FC, useState, useEffect } from "react"
import { observer } from "mobx-react-lite"
import { ViewStyle, View } from "react-native"
import { StackScreenProps } from "@react-navigation/stack"

import { isToday, isThisWeek, isThisMonth } from "date-fns"

import { NavigatorParamList } from "../../navigators"
import { Screen, Text, Radio } from "../../components"

import { isWhatPercentOf } from "../../utils/numbers"

import { color, spacing } from "../../theme"

import { time_ranges, health_ratings } from "../../config/app"

import { useStores } from "../../models"

const ROOT_STYLE: ViewStyle = {
  backgroundColor: color.palette.black,
  flex: 1,
  padding: spacing.large,
}

const RATING_CONTAINER_STYLE: ViewStyle = {
  flex: 1,
  justifyContent: "center",
  alignItems: "center",
}

export const ReportScreen: FC<StackScreenProps<NavigatorParamList, "report">> = observer(
  function ReportScreen({ navigation }) {
    const { foodLogStore } = useStores()

    const [timeRange, setTimeRange] = useState("today")
    const [rating, setRating] = useState("---")

    const getRating = (timeRange) => {
      const filteredLog = foodLogStore.allLogs.filter((item) => {
        const currentDateTime = item.date

        if (timeRange === "today") {
          return isToday(currentDateTime)
        } else if (timeRange === "this week") {
          return isThisWeek(currentDateTime)
        } else if (timeRange === "this month") {
          return isThisMonth(currentDateTime)
        }
        return false
      })

      const ratings = filteredLog.map((item) => {
        return item.rating
      })

      const reduced = ratings.reduce((a, b) => a + b, 0)

      const avg = reduced / ratings.length
      const max_avg = (5 * ratings.length) / ratings.length

      const percent = isWhatPercentOf(avg, max_avg)

      const found = health_ratings.find((item) => {
        return percent >= item.range[0] && percent <= item.range[1]
      })

      if (found) {
        setRating(found.title)
      }
    }

    useEffect(() => {
      const unsubscribe = navigation.addListener("focus", () => {
        getRating(timeRange)
      })

      // Return the function to unsubscribe from the event so it gets removed on unmount
      return unsubscribe
    }, [navigation, timeRange])

    useEffect(() => {
      getRating(timeRange)
    }, [timeRange])

    return (
      <Screen style={ROOT_STYLE} preset="scroll">
        <View>
          <Text preset="bold" text="Filter" />
          {time_ranges.map((item, index) => {
            const selected = item == timeRange
            return (
              <Radio
                item={{ title: item, value: item }}
                key={index}
                selected={selected}
                setSelected={setTimeRange}
              />
            )
          })}
        </View>

        <View style={RATING_CONTAINER_STYLE}>
          <Text preset="header" text={rating} />
          <Text text="Rating" />
        </View>
      </Screen>
    )
  },
)
You know the drill: check out the repo for all the missing code.
There’s nothing wrong with using console.log() for debugging all the things, but for a faster feedback loop, I recommend Reactotron for debugging your React Native apps. Go ahead and install it if you haven’t already.
In order for Reactotron to detect the app, Reactotron has to be the one to launch first before the app. So if you have a running app instance already, stop it, launch Reactotron, then start the app again.
Here’s what Reactotron looks like:
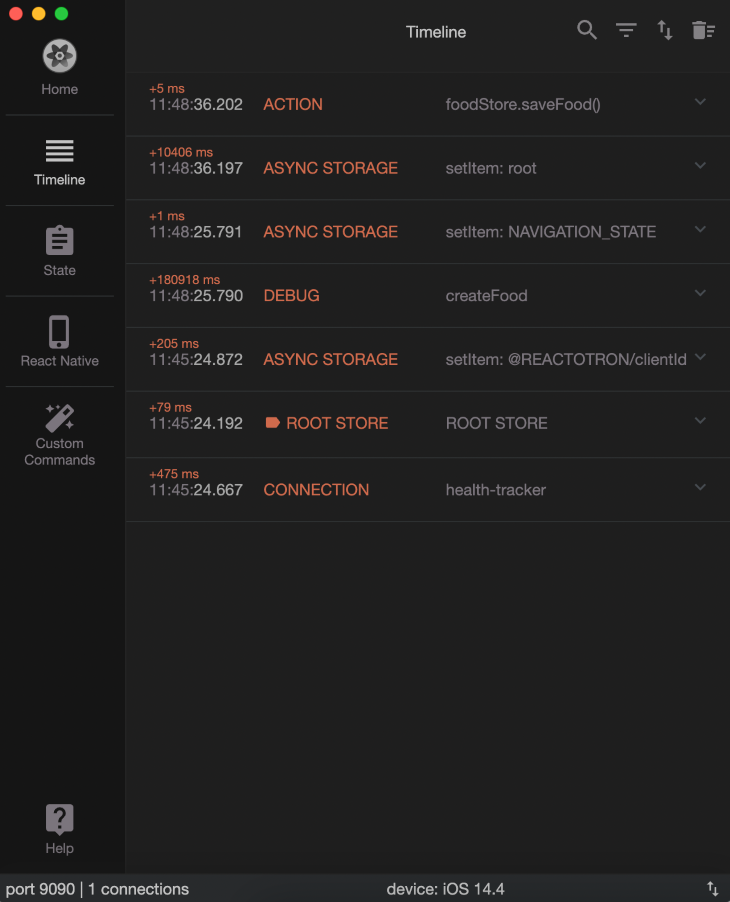
Most of the time, you’ll only reach for the Timeline and the State. From the screenshot above, you can see that it already logs async storage, navigation, and MobX-state-tree store by default.
If you want something similar to console.log(), you can still do it:
import Reactotron from "reactotron-react-native"

Reactotron.log('something')
You can also monitor the store. Here I’ve added foodStore.foods for monitoring so every time I save a new food, it’s appended to this array:
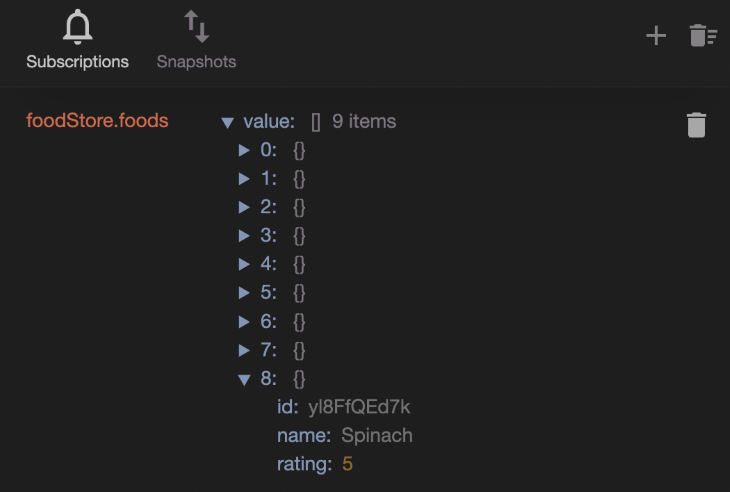
That’s it for a quick tutorial on how to use Reactotron. Be sure to check the Reactotron documentation if you want to learn more about it.
Detox is an end-to-end testing automation framework for React Native apps.
Ignite is only responsible for setting up Detox within the project itself. You still have to set up Detox dependencies in your machine to get it to work. We won’t be covering Detox in detail in this tutorial, so be sure to check out the following guides in order to get set up with it.
Skip the instructions for setting up Detox within your project itself because Ignite has already been taken care of when you generated a new project with Ignite:
Once you’ve set up your machine, open the package.json file at the root of the project directory and update the detox.configurations.ios.sim.debug.build property:
"xcodebuild -workspace ios/HealthTracker.xcworkspace -scheme HealthTracker -sdk iphonesimulator -derivedDataPath ios/build"
You also need to update the device name and os to something that’s installed in your machine. You can list all the available simulators by executing the following command:
xcrun simctl list devices available
That will return something like the following:
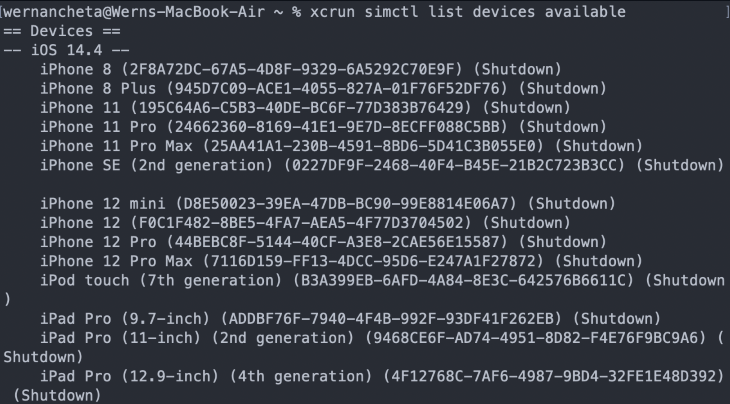
So if you want to use iPhone 11 for testing, your detox config should look something like this:
"detox": {
    "test-runner": "jest",
    "configurations": {
      "ios.sim.debug": {
        "binaryPath": "ios/build/Build/Products/Debug-iphonesimulator/HealthTracker.app",
        "build": "xcodebuild -workspace ios/HealthTracker.xcworkspace -scheme HealthTracker -sdk iphonesimulator -derivedDataPath ios/build",
        "type": "ios.simulator",
        "device": {
          "name": "iPhone 11",
          "os": "iOS 14.4"
        }
      },
    }
  },
Next, you can add the test. We’ll only add the test for the create food screen:
// e2e/firstTest.spec.js

const { reloadApp } = require("./reload")

describe("Example", () => {
  beforeEach(async () => {
    await reloadApp()
  })

  it("should save the food", async () => {
    // check if the food input field is displayed on the screen
    await expect(element(by.text("Food"))).toBeVisible()

    // type "Fries" in the text field for entering the name of the food
    await element(by.id("food")).typeText("Fries")

    // verify if "Fries" has indeed been typed in to the text field
    await expect(element(by.text("Fries"))).toExist()

    // tap on the rating for "Very Healthy"
    await element(by.text("Very Healthy")).tap()

    // tap the save button
    await element(by.text("Save")).tap()

    // check if the text of the save button has changed to "Saved!"
    // indicating that the code for saving has indeed been called
    await expect(element(by.text("Saved!"))).toBeVisible()

    // check if the form has been reset
    await expect(element(by.text("Fries"))).toNotExist()
  })
})
Next, you need to build the app:
npm run build:e2e
If you check the package.json file, this simply calls the detox build -c ios.sim.debug command.
Once it’s done building the app, you can now run the tests:
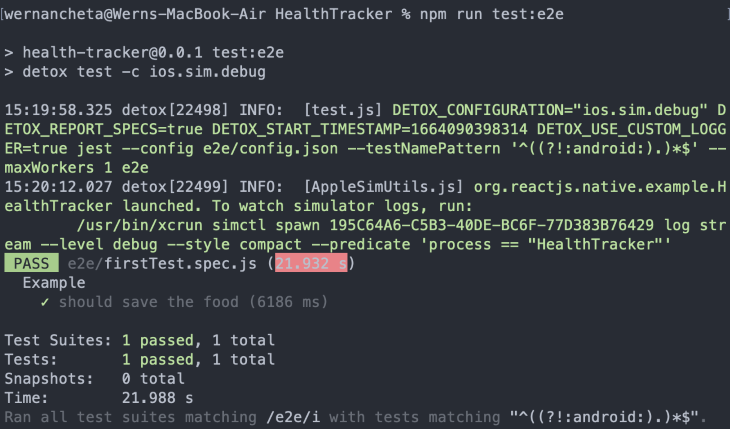
npm run test:e2e
Here’s what it looks like:
We’ve only gone through how to set up and run Detox on the iOS simulator. Be sure to check out the official guide for running Detox on Android if you want to run your tests on Android.
At this point, you should be confident in using Ignite for your own React Native projects. As you have seen, Ignite makes it really easy to follow best practices in developing React Native apps. It saves a lot of time especially when creating new projects since you no longer have to set up everything from scratch.
Ignite comes with an opinion on how things should be done, but it gives you all the tools you need to fully customize the app look and feel as well as how you would write your code.

LogRocket's Galileo AI watches sessions for you and and surfaces the technical and usability issues holding back your React Native apps.
LogRocket also helps you increase conversion rates and product usage by showing you exactly how users are interacting with your app. LogRocket's product analytics features surface the reasons why users don't complete a particular flow or don't adopt a new feature.
Start proactively monitoring your React Native apps — try LogRocket for free.

Learn how LLM routing works in production, when it’s worth the complexity, and how teams choose the right model for each request.

Compare key features of popular meta-frameworks Remix, Next.js, and SvelteKit, from project setup to styling.

Discover what’s new in The Replay, LogRocket’s newsletter for dev and engineering leaders, in the February 4th issue.

AI-first isn’t about tools; it’s about how teams think, build, and decide. Ken Pickering, CTO at Scripta Insights, shares how engineering leaders can adapt.
Would you be interested in joining LogRocket's developer community?
Join LogRocket’s Content Advisory Board. You’ll help inform the type of content we create and get access to exclusive meetups, social accreditation, and swag.
Sign up now