Developing mobile applications involves many moving parts. From styling, functionality, authentication, and session persistence to navigation. The goal of this article is to arm you with the necessary skills and knowledge to build simple and complex navigation systems in React Native-powered apps using React Navigation 5.

React Navigation is a library consisting of components that makes building and connecting screens in React Native easy. It is important to understand how navigation in mobile applications works, and what major differences exist between mobile-based navigation and web-based navigation.
If you’ve designed and developed websites before, navigating between various web pages, and within the same web page is possible through the anchor tag <a>, which consists of various attributes that allow developers to manipulate navigation in web pages. Developers do not have to explicitly define the behavior of the pages, as this can be handled by the browser. With mobile applications, navigation needs to be explicitly handled and defined during the early stages of development. From defining the navigation type to nesting the navigation, navigation in mobile applications requires more effort and can sometimes be quite complex.
This consists of patterns in navigation that require you to use a drawer from the left (sometimes right) side for navigating between and through screens. Typically, it consists of links that provide a gateway to moving between screens. It’s similar to sidebars in web-based applications. Twitter is a popular application that makes use of the drawer navigation.
This is the most common form of navigation in most mobile applications. Navigation is possible through tab-based components. It consists of bottom and top tabs. A popular application that makes use of tab-based navigation is Instagram. You use the home screen for bottom navigation and the profile screen for top tab navigation.
Transition between screens is made possible in the form of stacks. Various screens are stacked on top of each other, and movement between screens involves replacing one screen with another. A popular application that makes use of stack navigation is the WhatsApp chat screen.
Most times, mobile applications make use of all types of navigators to build the various screens and functionalities of the application. This is called nesting navigators. A popular application that makes use of this concept is Twitter. The home screen contains a drawer navigation type, with which you navigate to other screens. The search tab contains a top tab navigation and allows you to move from your Direct Messages (DMs) screen to a chat based on a selected Tweet. This is made possible through the stack navigation.
This article covers how to create these navigations one after the other. Then, we’ll proceed to combine them through nesting.
For the purpose of this tutorial, we’ll be making use of Expo. Expo makes developing mobile applications using React Native very easy. There are loads of other benefits, so you should check the documentation here.
Install the Expo cli using the following command:
npm install expo-cli --global
I have provided a GitHub repository with the basic setup needed to follow through this tutorial. We’ll go through installing our various React Navigation packages together. Clone the repository here.
Install React Navigation using the following command:
npm install @react-navigation/native
Install our dependencies using Expo:
expo install react-native-gesture-handler react-native-reanimated react-native-screens react-native-safe-area-context @react-native-community/masked-view
Note: You can install the dependencies into a project that is not Expo-based. Since we’re making use of Expo, there is a need to use Expo to install these dependencies. Expo will ensure that the versions of the dependencies installed are compatible with the React Native version of our application. For installation in non-Expo based applications, check the documentation.
Let’s take a second to understand the packages we just installed. We installed react-native-gesture-handler to provide Native-driven gesture management APIs for building the best possible touch-based experiences in React Native.
We also installed react-native-reanimated to handle gesture-based animation, react-native-screens to provide Native navigation container components, and react-native-safe-area-context to provide safe areas or boundaries for our components.
You can skip installation and get started on step one of this process. In it, you’d find all we’ve installed above. Run npm i to proceed.
First, you’ll find an App.js file. That’s the entry to our application.
You’ll also find a babel.config.js file, which contains an Expo Babel configuration. You do not need to bother yourself with this, as Expo automatically takes care of this.
An app.json file will also be present that contains the shared configuration of our application for IOS, Android, and other web platforms. Here you can handle splash screen configuration, orientation, version, etc. You should check this guide for an extensive list of configurations available.
In the root directory, create a new folder called src.
mkdir src
Inside, created 3 more directories: mkdir {components,screens,navigation}
The component directory would hold the components, screens would hold each of the screens, and the navigation directory would hold the navigation configurations.
Before we proceed, let’s understand what we need to build.
We have 5 screens with different navigation types: stack, tab and drawer. From the looks of things, we are combining various navigation types to create the application. A drawer navigation that holds our fourth and fifth screen, a combined top and bottom tab navigation in the second screen, a shared bottom navigation for the first screen, and a stack navigation for the third screen.
Now that we understand what we need to do, let’s create four files. Three to hold the 3 types of navigation we have and an index that would serve as the entry of our navigation that combines all 3 together.
Our three files:
cd src/navigation
touch {index,appStackNavigator,appTabNavigator,appDrawerNavigator}.js
cd –
Navigation in React Navigation 5 is made possible by mapping a navigation screen configuration that’s wrapped in a navigation container to the specific screen of your application. To successfully create the navigation, we must have screens to connect them to.
Run the following:
cd src/screens
touch {FirstScreen,SecondScreen,ThirdScreen,FourthScreen,FifthScreen}.js
Navigate into each of the screens and paste the code below.
Ensure you are defining and exporting the correct screen based on the file name:
import React from 'react'
import { View, Text } from 'react-native'

const FirstScreen = ({navigation, route}) => {
    return (
        <View>
            <Text>{} Screen</Text>
        </View>
    )
}

export default FirstScreen
Let’s make use of the react-native-elements package for the styling and icons.
npm install react-native-elements
Let’s proceed with mapping the tab navigation to the tab screens. Install the needed dependencies for tab navigation:
npm install @react-navigation/material-bottom-tabs react-native-paper @react-navigation/material-top-tabs react-native-tab-view
Next, you’ll find these packages installed already. Run npm i.
We would be making use of both top and bottom navigators. Import them along with the first and second screen in the appTabNavigator.js file. We would also be needing icons for the bottom tab. Let’s import it from react-native-vector-icons, which is preinstalled along with Expo. Our bottom tab navigation also makes use of icons. Let’s also import icons from react-native-vector-icons.
import React from "react";
import { createMaterialTopTabNavigator } from "@react-navigation/material-top-tabs";
import
 { createMaterialBottomTabNavigator } from "@react-navigation/material-bottom-tabs";
import Icon from "react-native-vector-icons/FontAwesome5";

import FirstScreen from "../screens/FirstScreen";
import SecondScreen from "../screens/SecondScreen";
Create an instance of the materialtoptabnavigator and materialbottomtabnavigator.
const AppBottomNavigator = createMaterialBottomTabNavigator();
const AppTopNavigator = createMaterialTopTabNavigator();
The second screen contains the top tab navigator, so let’s handle that.
const SecondScreenTopTabNavigator = () => (
  <AppTopNavigator.Navigator
    initialRouteName="CHATS"
    tabBarOptions={{
      style: { backgroundColor: "#490222" },
      labelStyle: { fontSize: 14, fontWeight: "bold" },
      activeTintColor: "#ffffff",
      indicatorStyle: { height: 3, backgroundColor: "#fff", paddingBottom: 6 },
      inactiveTintColor: "#adadad",
      tabStyle: { height: 100, justifyContent: "flex-end" }
    }}
  >
    <AppTopNavigator.Screen component={SecondScreen} name="CHATS" />
    <AppTopNavigator.Screen component={SecondScreen} name="REQUESTS" />
  </AppTopNavigator.Navigator>
);
Each navigation is a React component that is implicitly returned. Various styles and configurations can be applied to the components. We wrap the screens provided to us from the instance of the tab navigation defined above in a navigator component, and define the styles using the tabBarOptions props. The navigator wrappers have various configurations for styling and configuring the navigation.
Here we made the background the color of the UI, and changed the active and inactive state of each tab. Please refer to the documentation of each navigation type to see the list of options available for configuration. The initialRouteName props is what the navigation component would use to identify the specific screen we want to navigate to. This must be unique for all screens.
The instance of the top tab navigator also gives us a Screen component that connects our defined screens to the navigation wrapper. It can take various props, one of which is the component which holds the screen, and the name which serves as a unique identifier for each screen. Refer to the documentation for other configuration options.
Let’s proceed by creating the bottom navigation. Recall that we previously created an instance for the bottom navigation. The bottom navigator would be different because it has icons.
const AllScreenTabNavigator = () => (
  <AppBottomNavigator.Navigator
    initialRouteName="First"
    screenOptions={{
      tabBarColor: "#490222"
    }}
  >
    <AppBottomNavigator.Screen
      name="First"
      component={FirstScreen}
      options={{
        tabBarIcon: () => <Icon name="book-open" size={25} color="#fff" />
      }}
    />
    <AppBottomNavigator.Screen
      name="First Two"
      component={FirstScreen}
      options={{
        tabBarIcon: () => <Icon name="file-alt" size={25} color="#fff" />
      }}
    />
    <AppBottomNavigator.Screen
      name="Second"
      children={SecondScreenTopTabNavigator}
      options={{
        tabBarIcon: () => <Icon name="comment-alt" size={25} color="#fff" />
      }}
    />
    <AppBottomNavigator.Screen
      name="Second Two"
      children={SecondScreenTopTabNavigator}
      options={{
        tabBarIcon: () => <Icon name="user" size={25} color="#fff" />
      }}
    />
  </AppBottomNavigator.Navigator>
);

export { AllScreenTabNavigator };
We have successfully completed the tab navigator. We make use of the Icons through the options props and connect our top tab navigator for the second screen through a child prop. We make use of the child prop instead of the component prop, since the second screen contains navigation components too, and is a child of the bottom navigator.
Go to index.js and paste this to see a working demo of what we have now. We’d revisit this file to understand what’s happening in a short while:
import React from "react";
import { NavigationContainer } from "@react-navigation/native";
import { AllScreenTabNavigator } from "./appTabNavigator";

const RootNavigator = () => (
  <NavigationContainer>
    <AllScreenTabNavigator />
  </NavigationContainer>
);
export default RootNavigator;
Also replace the code in your App.js file with this:
import "react-native-gesture-handler";
import React from "react";
import { StyleSheet } from "react-native";
import RootNavigator from "./src/navigation/index";

export default function App() {
  return (
    <>
      <RootNavigator />
    </>
  );
}

const styles = StyleSheet.create({
  container: {
    flex: 1,
    backgroundColor: "#fff",
    alignItems: "center",
    justifyContent: "center"
  }
});
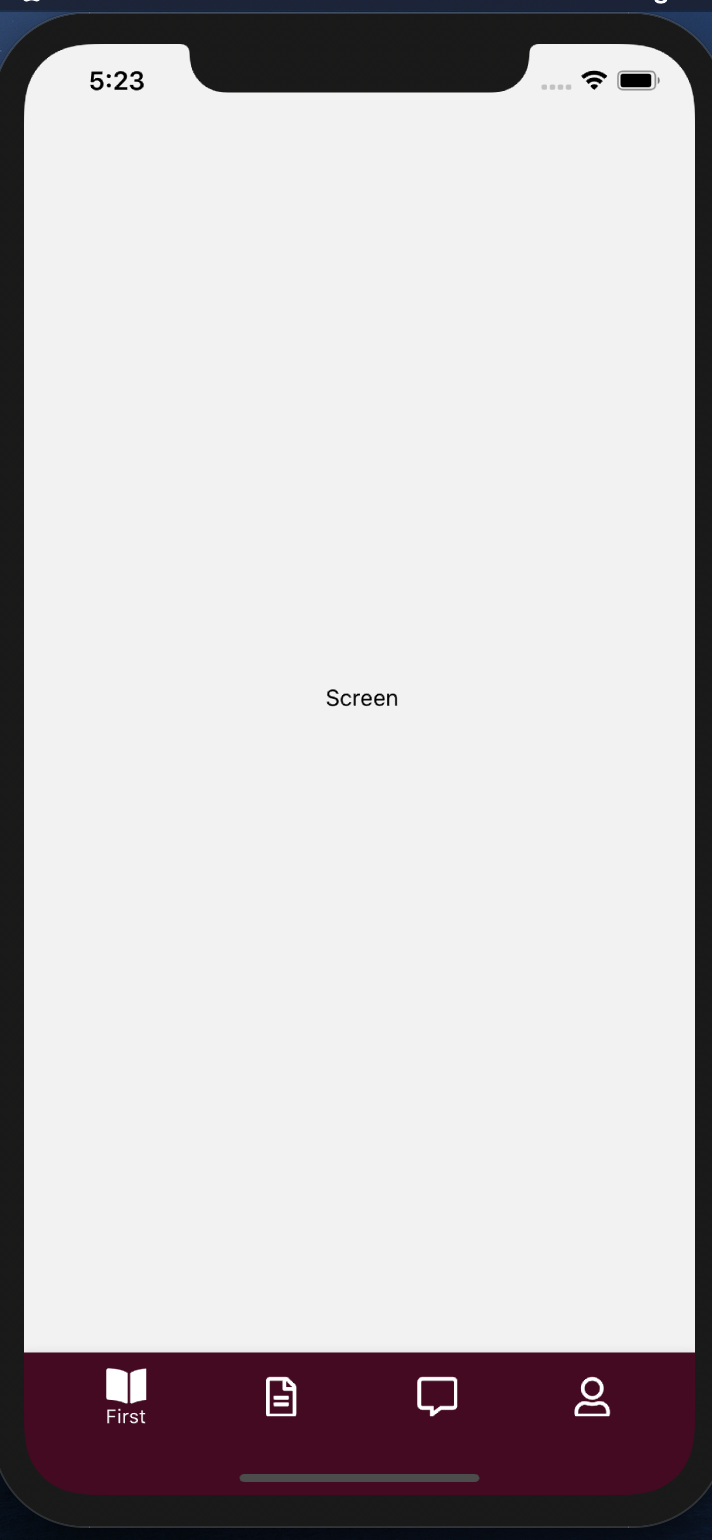
Now you should be able to see this once you run your project using Expo start:

Move to the tab-navigation branch to see the complete code.
Install the drawer navigation package:
npm install @react-navigation/drawer
Import the needed packages and create an instance of the drawer navigator:
import React from 'react';
import { createDrawerNavigator } from '@react-navigation/drawer';
import FourthScreen from '../screens/FourthScreen'
import FifthScreen from '../screens/FifthScreen'

const Drawer = createDrawerNavigator();
The same way we defined the tab navigators as React components is the same way we’d create the drawer navigators:
const AllDrawerNavigation = () => (
    <Drawer.Navigator initialRouteName='Fourth'>
        <Drawer.Screen component={FourthScreen} name='Fourth' />
        <Drawer.Screen component={FifthScreen} name='Fifth' />
    </Drawer.Navigator>
)

export default AllDrawerNavigation;
Export it.
Import it in the navigation/index.js file and replace the AllScreenTabNavigator with AllDrawerNavigation to see it in action.

Checkout to the drawer-navigation branch to see the complete code.
The final screen is the stack navigator.
Install the needed package:
npm install @react-navigation/stack
Import the needed dependencies and create an instance of the stack navigator:
import React from 'react'
import { createStackNavigator } from "@react-navigation/stack";

import ThirdScreen from '../screens/ThirdScreen'

const StackNavigator = createStackNavigator();
Connect the ThirdScreen through the instance of the StackNavigator created above and export it:
const ThirdScreenNavigation = () => (
  <StackNavigator.Navigator
    initialRouteName="Third"
    screenOptions={{
      header: () => null
    }}
  >
    <StackNavigator.Screen component={ThirdScreen} name="Third" />
  </StackNavigator.Navigator>
);

export default ThirdScreenNavigation;
Replace the AllDrawerNavigation in index.js with the exported ThirdScreenNavigation to see it in action.
Checkout to stack-navigation branch to see how it works.

Now let’s combine all navigators. This would be done in the index.js file. Before we proceed, let’s make some major improvements to our screens by exporting the shared UIs between them into a separate component called Layout.js.
In the component directory, create a Layout.js file:
import React from "react";
import { View, Text } from "react-native";

const Layout = props => {
  const { name = "" } = props;
  return (
    <View
      style={{
        justifyContent: "center",
        alignItems: "center",
        flex: 1
      }}
    >
      <Text>{name} Screen</Text>
    </View>
  );
};

export default Layout;
We moved the shared UI between the screens into a separate file. The Layout component is expected to have a name prop. We are destructuring from the props and passing a default value to it, incase no name is passed to it.
Replace all the code in your return statement in the screens with this:
<>
      <Layout />
 </>
Now let’s combine all our navigators.
Checkout the pre-combined-navigation branch to follow up from here.
Import all navigation previously created in React. Also, import the navigation container that would wrap the entire application. This navigation container wraps the entire navigation previously created and acts as the entry of the application:
import React from "react";
import { NavigationContainer } from "@react-navigation/native";
import { AllScreenTabNavigator } from "./appTabNavigator";
import AllDrawerNavigation from "./appDrawerNavigator";
import ThirdScreenNavigation from "./appStackNavigator";
Let’s think about how the app is structured. The first and second screens are tab navigation types that contain the entry into a stack navigation type for the third screen.
This screen also provides an entry to the fourth and fifth screens, which are drawer navigation types. From the look of things, it’s obvious that all 5 screens are connected by a common navigation type: the stack navigation.
Moving from the tab to the stack navigation to the drawer navigation involves replacing each navigation type with another. So, the entire app would be connected by stack navigation wrapped by the navigation container.
Import createStackNavigation and paste the code below:
const AllAppNavigation = createStackNavigator();

const RootNavigator = () => (
  <NavigationContainer>
    <AllAppNavigation.Navigator
      initialRouteName="tab"
      screenOptions={{
        header: () => null
      }}
    >
      <AllAppNavigation.Screen name="tab" children={AllScreenTabNavigator} />
      <AllAppNavigation.Screen name="stack" children={ThirdScreenNavigation} />
      <AllAppNavigation.Screen name="drawer" children={AllDrawerNavigation} />
    </AllAppNavigation.Navigator>
  </NavigationContainer>
);
export default RootNavigator;
Go to the App.js file and replace the code there with this:
import "react-native-gesture-handler";
import React from "react";
import { StyleSheet } from "react-native";
import RootNavigator from "./src/navigation/index";

export default function App() {
  return (
    <>
      <RootNavigator />
    </>
  );
}
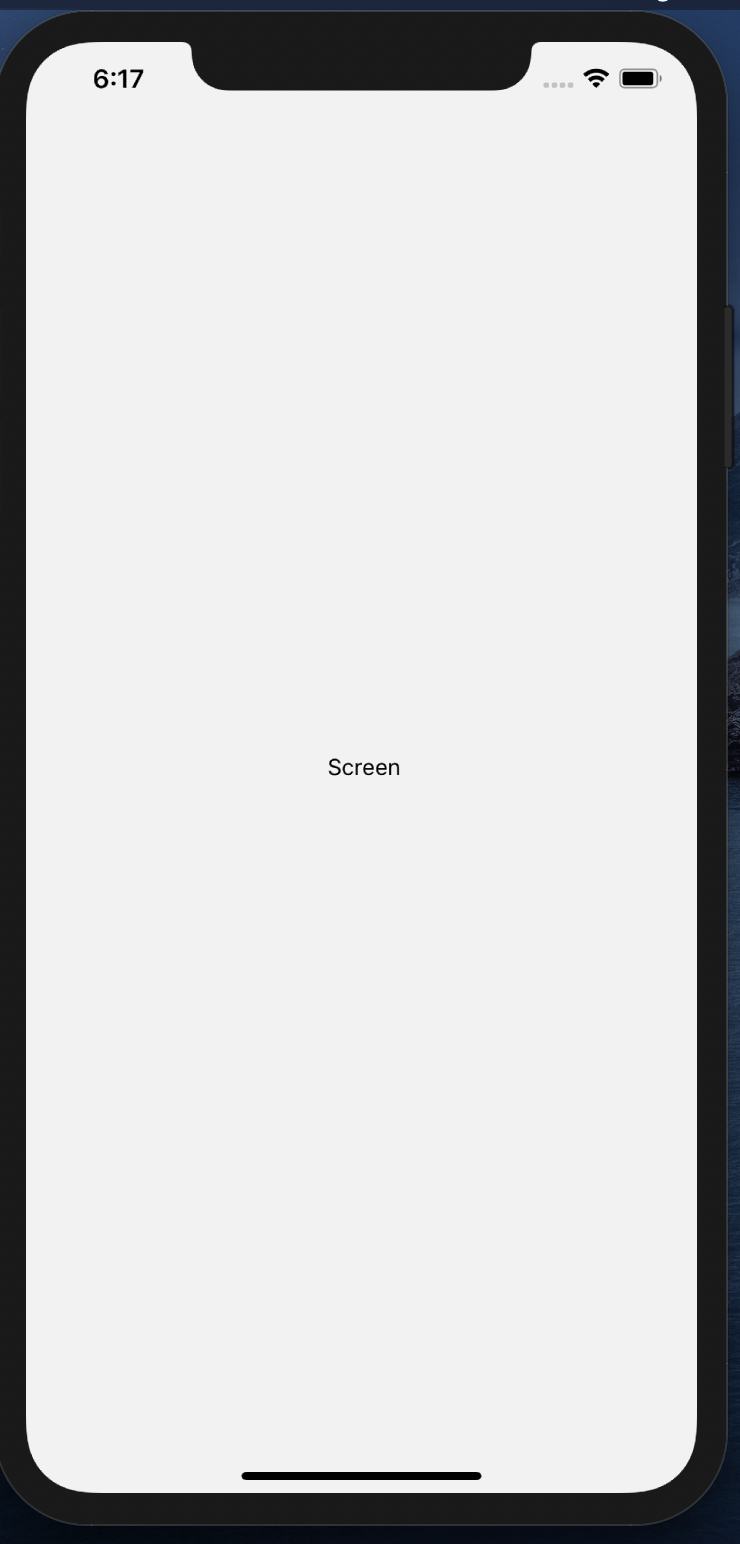
We’ve named each of the navigation components and created tab, stack, and drawer components respectively to enable navigation to each of them when needed. It’s possible to use a different label to represent the navigation children, but for convenience, we use these ones. Check the app now. Everything is connected and working.
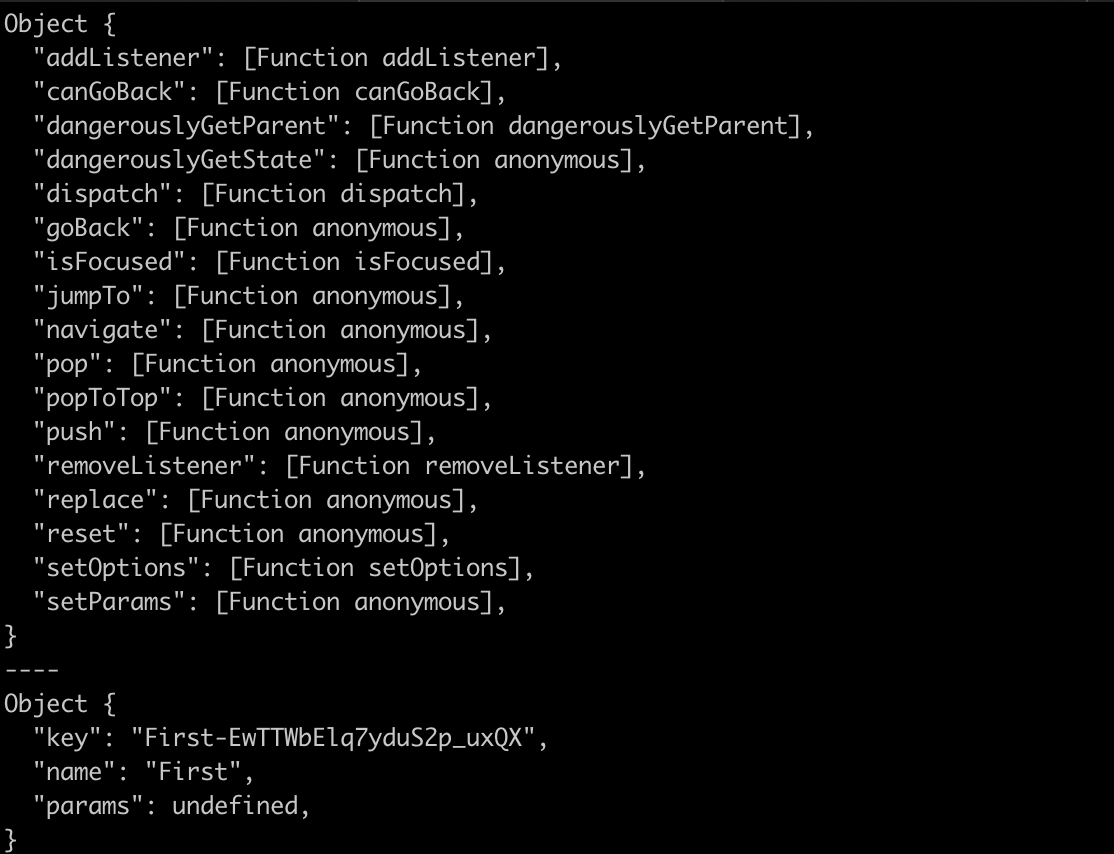
In the FirstScreen, log the navigation and route objects passed to us from our navigation wrapper.
The navigation object has methods and events that make transitioning between screens possible, while the route object contains information about our screens and shared states between screens, if any (params).

Pass the route.name key on the route object to the Layout component. The navigation props would be used to move to other screens. If you log both objects, you would see this. We won’t cover all of them, but we’d cover a few we need to move between different screens.
The navigate method is used to move to another screen.
The goBack method is used to move to the previous screen.
The push method works just like navigate.
setParams is used to pass parameters to other screens. An example is passing the id of a post to get the comments of that post on the comment screen.
The name value on the route is the name given to the screen.
The params passed between screens can be gotten on the route object.
Let’s add a button in the first screen to move to the third screen, at the top of the file, add:
import { Button } from "react-native-elements";
Below your layout component, add:
<Button
        type="solid"
        title="Third Screen"
        containerStyle={{
          justifyContent: "center",
          alignItems: "center",
          height: 200
        }}
        buttonStyle={{
          borderColor: "#490222",
          backgroundColor: "#490222",
          width: 160,
          borderWidth: 1.3
        }}
        titleStyle={{
          color: "#fff"
        }}
        onPress={() => navigation.navigate("stack")}
      />
We pass the label we gave to the third screen when combining our screens to the navigate method on the navigation object.
In the third screen, let’s add a button to move to the fourth screen. Repeat the step above but change the title of the button to the fourth screen and pass the drawer as the argument to the navigate method.
We have successfully covered creating screens and navigating between them in React Native. This guide has armed you with most of the knowledge and tools you need to build simple and complex navigation for your project. Remember, defining and structuring the navigation should be part of the first things you work on.
Do you have any questions? Is there something you would have preferred I covered? Feel free to leave a comment.
Install LogRocket via npm or script tag. LogRocket.init() must be called client-side, not
server-side
$ npm i --save logrocket

// Code:

import LogRocket from 'logrocket';
LogRocket.init('app/id');
// Add to your HTML:

<script src="https://cdn.lr-ingest.com/LogRocket.min.js"></script>
<script>window.LogRocket && window.LogRocket.init('app/id');</script>
Would you be interested in joining LogRocket's developer community?
Join LogRocket’s Content Advisory Board. You’ll help inform the type of content we create and get access to exclusive meetups, social accreditation, and swag.
Sign up now
A breakdown of the wrapper and container CSS classes, how they’re used in real-world code, and when it makes sense to use one over the other.

This guide walks you through creating a web UI for an AI agent that browses, clicks, and extracts info from websites powered by Stagehand and Gemini.

This guide explores how to use Anthropic’s Claude 4 models, including Opus 4 and Sonnet 4, to build AI-powered applications.

Which AI frontend dev tool reigns supreme in July 2025? Check out our power rankings and use our interactive comparison tool to find out.
2 Replies to "A complete guide to React Navigation 5"
Amazing tutorial, can you please make the result avaible on Gitgub? Thanks
Thanks so much for reading. As noted in the article, you can find the repo here: https://github.com/themmyloluwaa/reactNavigation5