In this tutorial, we’ll introduce you to Glide and demonstrate how to build a simple photo app. We’ll outline the basics of Glide, including why it exists and what problems it is designed to solve. Then, we’ll examine some practical code examples to see Glide in action.

By the end of the tutorial, you will know how to implement Glide in your Android app from scratch using Kotlin. The finished app will look like this:
Glide is an Android image loading and caching library. It is designed to simplify the process of loading an image from the server or elsewhere on the internet. Just one line of code and, boom! Your image is loaded from the server.
Without Glide, it can be a nightmare to handle all the actions associated with loading and caching an image from the server manually. Glide enables you to focus on building a high-quality Android application for your users.
To start building our Android photo app with Glide, we must first create a new project in Android Studio.
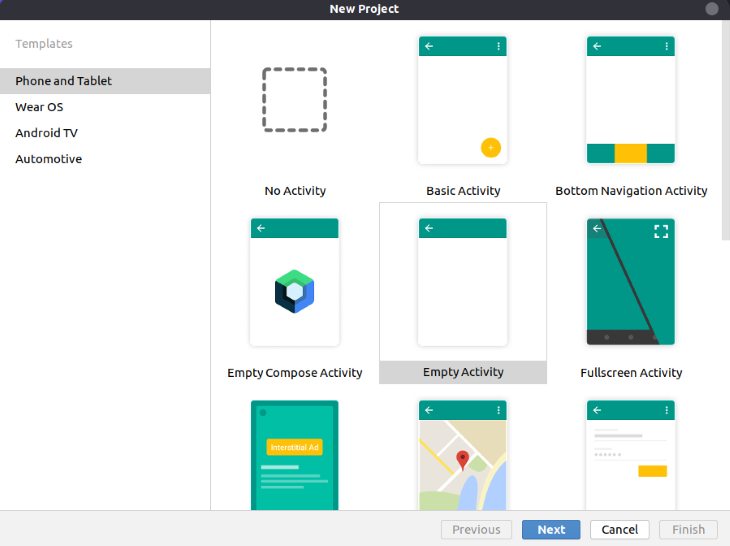
Launch Android Studio and create a new project. Choose Empty Activity.
After that, choose your application name.
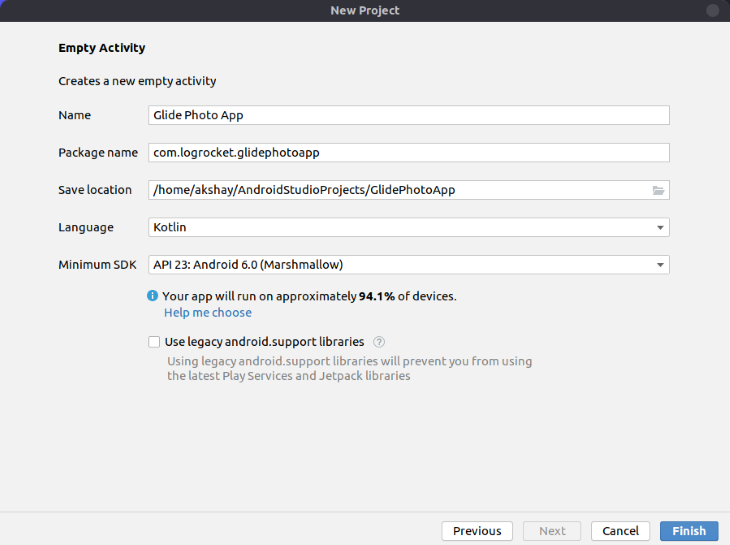
Also, choose your Android minimum SDK as per your need.
Now that we’ve created a new project in Android Studio, it’s time to add our dependencies.
Open your build.gradle file (module level) and add the following dependencies in your dependencies block:
implementation 'com.github.bumptech.glide:glide:4.12.0'
annotationProcessor 'com.github.bumptech.glide:compiler:4.12.0'
implementation 'com.amitshekhar.android:android-networking:1.0.2'
The first two lines are for the Glide library and the last library is for networking. We will make the API calls using the Unsplash Image API for fetching image links.
We’ll make a grid layout to show image thumbnails. To create grid layout, we’ll use RecyclerView in our app.
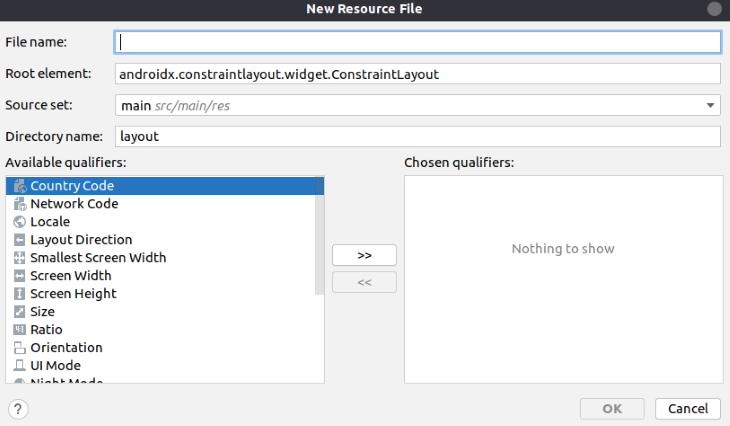
To create a RecyclerView item layout file, right-click the layout folder and select New, then Layout Resource File.
After that, fill in the name of the file.
After creating the file, we’ll create our item layout using CardView.
<?xml version="1.0" encoding="utf-8"?>
<androidx.constraintlayout.widget.ConstraintLayout xmlns:android="http://schemas.android.com/apk/res/android"
    android:layout_width="wrap_content"
    android:layout_height="wrap_content"
    xmlns:app="http://schemas.android.com/apk/res-auto"
    android:padding="10dp"
    >

    <androidx.cardview.widget.CardView
        android:layout_width="180dp"
        android:layout_height="180dp"
        app:cardCornerRadius="7dp"
        android:elevation="4dp"
        android:id="@+id/image_card">
        <ImageView
            android:layout_width="match_parent"
            android:layout_height="match_parent"
            android:scaleType="centerCrop"
            android:id="@+id/image_view"
            android:src="@drawable/logrocket"
            />
    </androidx.cardview.widget.CardView>

</androidx.constraintlayout.widget.ConstraintLayout>
Now we need to create the data class to store the image URLs. We’ll store only two URL links: one for the thumbnail URL and another for the URL of the high-resolution image. This way, we only need to store two strings.
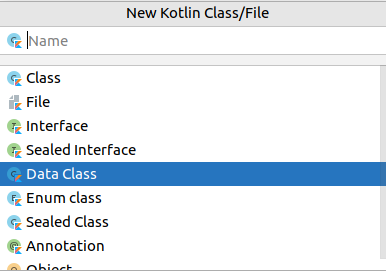
Right-click on your package folder and choose New. Then, click New Kotlin Class/File.
After that, click Data Class and type your class name.
In the file, we’ll create a construct like below:
package com.logrocket.glidetutorial

data class ImageLinks(var thumbnailUrl: String, var fullImageUrl: String)
In the above code, we are accepting two strings: one for the thumbnail URL and another for the full image URL.
RecyclerView and AdapterNow it’s time to add RecyclerView in your main activity layout and create an Adatper class for it.
First, add RecyclerView in main activity. Open your main activity layout file and run the following code:
<?xml version="1.0" encoding="utf-8"?>
<androidx.constraintlayout.widget.ConstraintLayout xmlns:android="http://schemas.android.com/apk/res/android"
    xmlns:app="http://schemas.android.com/apk/res-auto"
    xmlns:tools="http://schemas.android.com/tools"
    android:layout_width="match_parent"
    android:layout_height="match_parent"
    tools:context=".MainActivity">


    <androidx.recyclerview.widget.RecyclerView
        android:layout_width="match_parent"
        android:layout_height="match_parent"
        android:id="@+id/recycler_view"
        />

</androidx.constraintlayout.widget.ConstraintLayout>
We have given the recycler_view id and recyclerview element.
Now, create a new Kotlin class for the Adapter class.
Right-click on the Package folder and select New, then Kotlin File / Class. Give it the name ImageAdapter.
After creating the Adapter class, we need to extend the RecyclerView.Adapter class and pass the custom view holder class as generic.
Your code should look like this:
class ImageAdapter(): RecyclerView.Adapter<ImageAdapter.ViewHolder>() {
....
}
At this point, you’ll see an error prompting you to implement the members for the adapter. So let’s implement the members.
The Adapter class has three methods:
onCreateViewHolderonBindViewHoldergetItemCountBefore implementing these methods, let’s create a construct where we will get the data from our main activity.
We’ll need image links and context for the activity. We need to change our code like this:
class ImageAdapter(private var context: Context, private var imageURLList : ArrayList<ImageLinks>): RecyclerView.Adapter<ImageAdapter.ViewHolder>() {
....
}
The first parameter accepts the context and the second accepts the array list of our data class where we will store the links data.
Now let’s implement the Adapter methods and also create a custom ViewHolder class.
class ImageAdapter(private var context: Context, private var imageURLList : ArrayList<ImageLinks>): RecyclerView.Adapter<ImageAdapter.ViewHolder>() {

    override fun onCreateViewHolder(parent: ViewGroup, viewType: Int): ViewHolder {

    }

    override fun onBindViewHolder(holder: ViewHolder, position: Int) {

    }

    override fun getItemCount(): Int {
    }


    class ViewHolder(itemView: View): RecyclerView.ViewHolder(itemView) {
    }
}
As you can see, in the custom ViewHolder class, we have extended the class with RecyclerViewand its constructor and passed itemView.
Our custom ViewHolder will accept a layout, which we created before as the RecyclerView item.
Now let’s complete the adapter code:
class ImageAdapter(private var context: Context, private var imageURLList : ArrayList<ImageLinks>): RecyclerView.Adapter<ImageAdapter.ViewHolder>() {

    override fun onCreateViewHolder(parent: ViewGroup, viewType: Int): ViewHolder {
        val itemView = LayoutInflater.from(parent.context).inflate(R.layout.image_list_item, parent, false);
        return  ViewHolder(itemView);
    }

    override fun onBindViewHolder(holder: ViewHolder, position: Int) {
        val imageUrls = imageURLList[position]
        val imageView = holder.imageView
        Glide.with(context)
            .load(imageUrls.thumbnailUrl)
            .into(imageView)
        imageView.setOnClickListener {
            run {
                val intent = Intent(context, FullScreenImage().javaClass)
                intent.putExtra("fullImageUrl", imageUrls.fullImageUrl)
                context.startActivity(intent)
            }
        }
    }

    override fun getItemCount(): Int {
        return imageURLList.size
    }

    class ViewHolder(itemView: View): RecyclerView.ViewHolder(itemView) {
        var imageView: ImageView = itemView.findViewById(R.id.image_view)
    }
}
In the above code, the onCreateViewHolder method enables us to inflate a view to load the RecyclerView item layout and return ViewHolder.
In the ViewHolder, we’re using the itemView and finding imageView using its ID.
In the onBindViewHolder method, we are binding our data with the viewholder’s view that is imageview. This is the main logic where we are using Glide library to load the image from the url and show them in image view.
The line Glide.with(context).load(imageUrls.thumbnailUrl).into(imageView) enables us to load the image. The first function, with, takes the context of the activity, the load function takes the URL of the image, and, finally, the into function passes our image view.
Also, we have added a click listener on image view to open a new activity where we will show the image in full screen. We are passing the full screen image link with the intent using putExtra method.
After doing this, don’t forget to return the number of images in the getItemCount method.
That’s it for the RecyclerView adapter. Now we need to attach this adapter with our main activity’s RecyclerView.
Adapter to RecyclerViewIn the main activity, we have to do two things:
Adapter to RecyclerView with our image links dataTo make an API request call, we’ll use the Fast Android Networking library, which we’ll add as a dependency.
class MainActivity : AppCompatActivity() {
    private lateinit var  recyclerView: RecyclerView
    private var imageList: ArrayList<ImageLinks> = arrayListOf()
    var RANDOM_IMAGE_URL: String = "https://api.unsplash.com/photos"
    var ACCESS_ID = "UNSPLASH_ACCESS_ID"
    val context: Context = this;

    override fun onCreate(savedInstanceState: Bundle?) {
        super.onCreate(savedInstanceState)
        setContentView(R.layout.activity_main)
        AndroidNetworking.initialize(applicationContext)

        AndroidNetworking.get(RANDOM_IMAGE_URL)
            .addHeaders("Authorization", "Client-ID $ACCESS_ID")
            .build()
            .getAsJSONArray(object : JSONArrayRequestListener{
                override fun onResponse(response: JSONArray?) {
                // handle response here
                }
                override fun onError(anError: ANError?) {
                    // handle error here
                }
            })
    }
}
In the above snippet, we first initialize the Android network library using AndroidNetworking.initialize(applicationContext). We also need to pass the application context.
After initializing, we can use get function of networking library. In the parameter, we need to pass the API URL. To add request headers, we can use addHeaders and pass whatever you want to set in the request header. In our case, we are setting authorization and pass our access ID.
Now we can call build a function to make a call to the URL and get a response using getAsJSONArray.
We need to pass an interface that overrides two methods:
onResponse, which is invoked when we successfully receive a response from the serveronError, which is invoked when the server returns an errorWe’ll focus on the onResponse method. In this method, we will get our data and pass it to Adapter, like so:
        AndroidNetworking.get(RANDOM_IMAGE_URL)
            .addHeaders("Authorization", "Client-ID $ACCESS_ID")
            .build()
            .getAsJSONArray(object : JSONArrayRequestListener{
                override fun onResponse(response: JSONArray?) {

                    val length: Int? = response?.length()
                    for (i in 0 until length!!){
                        val jsonObject: JSONObject = response.getJSONObject(i)
                        val urlJson: JSONObject = jsonObject.getJSONObject("urls")
                        val thumbnailUrl = urlJson.getString("thumb")
                        val fullImageUrl = urlJson.getString("regular")
                        val imageLinks = ImageLinks(thumbnailUrl, fullImageUrl)
                        imageList.add(imageLinks)
                    }

                    recyclerView = findViewById(R.id.recycler_view)
                    recyclerView.layoutManager = GridLayoutManager(applicationContext, 2)
                    recyclerView.adapter = ImageAdapter(context, imageList)

                }
                override fun onError(anError: ANError?) {
                    // handle error here
                }
            })
    }
}
In the onResponse method, we are looping to the response and storing the thumbnail and full image URL from the response. This is how our response is coming from the Unsplash API:
[
    {
        ...
        "urls": {
            "regular": "https://images.unsplash.com/photo-1524758631624-e2822e304c36?crop=entropy\u0026cs=tinysrgb\u0026fit=max\u0026fm=jpg\u0026ixid=MnwyNzU1MjN8MXwxfGFsbHwxfHx8fHx8Mnx8MTYzNjg4NjU4OA\u0026ixlib=rb-1.2.1\u0026q=80\u0026w=1080",
            "thumb": "https://images.unsplash.com/photo-1524758631624-e2822e304c36?crop=entropy\u0026cs=tinysrgb\u0026fit=max\u0026fm=jpg\u0026ixid=MnwyNzU1MjN8MXwxfGFsbHwxfHx8fHx8Mnx8MTYzNjg4NjU4OA\u0026ixlib=rb-1.2.1\u0026q=80\u0026w=200"
        }
      ...
    }
....
]
After getting the image links and storing them in an array list, the next step is to attach Adapter to RecyclerView and pass that array list of image links.
But before attaching Adapter, we need to specify which type of layout we want for our RecyclerView. We have two to choose from:
For our application design, we need to use Grid Layout Manager to set the number of columns.
Finally, we need to attach the Adapter, set the Adapter property of RecyclerView, and set the ImageAdapter object. While calling the adapter constructor, we have to pass the required parameters — that is, the activity context and image array list.
Now if we run our app, we can see our list of images. But when clicking on any image, we need to open our full screen activity.
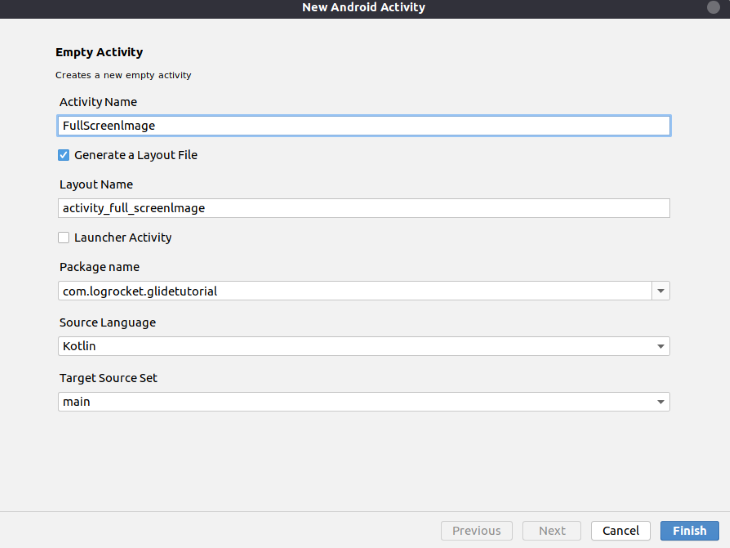
To do that, first we need to create a new activity in our project.
Right-click on the app folder and select New, Activity, and then Empty Activity.
After that, we need to set the activity name. We’ll set this sctivity name as “FullScreenImage.”
Open the layout file of this activity and add an ImageView to all over the screen, like this:
<?xml version="1.0" encoding="utf-8"?>
<androidx.constraintlayout.widget.ConstraintLayout xmlns:android="http://schemas.android.com/apk/res/android"
    xmlns:app="http://schemas.android.com/apk/res-auto"
    xmlns:tools="http://schemas.android.com/tools"
    android:layout_width="match_parent"
    android:layout_height="match_parent"
    tools:context=".FullScreenImage">

    <ImageView
        android:layout_width="match_parent"
        android:layout_height="match_parent"
        android:id="@+id/fullImageView"
        android:scaleType="centerCrop"
        />

</androidx.constraintlayout.widget.ConstraintLayout>
After adding the ImageView, set the clicked image in this activity.
Open the class file and add the following code:
class FullScreenImage : AppCompatActivity() {
    override fun onCreate(savedInstanceState: Bundle?) {
        super.onCreate(savedInstanceState)
        setContentView(R.layout.activity_full_screen_image)

        val fullImageUrl = intent.getStringExtra("fullImageUrl")
        val fullImageView: ImageView = findViewById(R.id.fullImageView)

        Glide.with(this)
            .load(fullImageUrl)
            .into(fullImageView)

    }
}
This is very straightforward. First, we get the full image URL from the intent’s getStringExtra (remember, we are passing the full image URL).
After getting the image URL, we access our image view and use Glide to load the image from the URL and show it in image view, as we did earlier in the code for the custom adapter.
At this point, our photo application built using Glide is complete!
In this tutorial, we demonstrated how to use RecyclerView with CardView and more. We also showed you how to use the Glide Image Library to build an Android photo application with just a single line of code.
LogRocket is an Android monitoring solution that helps you reproduce issues instantly, prioritize bugs, and understand performance in your Android apps.
LogRocket's Galileo AI watches sessions for you, instantly identifying and explaining user struggles with automated monitoring of your entire product experience.
LogRocket also helps you increase conversion rates and product usage by showing you exactly how users are interacting with your app. LogRocket's product analytics features surface the reasons why users don't complete a particular flow or don't adopt a new feature.
Start proactively monitoring your Android apps — try LogRocket for free.
Install LogRocket via npm or script tag. LogRocket.init() must be called client-side, not
server-side
$ npm i --save logrocket

// Code:

import LogRocket from 'logrocket';
LogRocket.init('app/id');
// Add to your HTML:

<script src="https://cdn.lr-ingest.com/LogRocket.min.js"></script>
<script>window.LogRocket && window.LogRocket.init('app/id');</script>

Learn how to protect full-stack projects from NPM supply chain attacks with a practical security checklist.

Explore 15 essential MCP servers for web developers to enhance AI workflows with tools, data, and automation.

Learn how contrast-color() automatically picks accessible text colors using native CSS, without JavaScript.

Learn how to build a harness-style AI workflow using Claude Code with specialized Dev, QE, and Ops subagents, gated handoffs, MCP telemetry, and LEARNING.md.
Hey there, want to help make our blog better?
Join LogRocket’s Content Advisory Board. You’ll help inform the type of content we create and get access to exclusive meetups, social accreditation, and swag.
Sign up now

