Editor’s note: This React Router and Redux navigation state tutorial was last updated on 31 March 2021.

Navigation is a fundamental component of traditional applications and single-page applications (SPAs) alike. Put simply, navigation refers to the ability to move from one page to another.
In this React Router and Redux tutorial, we’ll show you the nuances of navigating within your React/Redux applications and demonstrate how to do so declaratively. You’ll also learn how to maintain state across your React app’s navigation switches.
We’ll go over the following:
To follow along with this tutorial, you should have a basic understanding of how Redux works.
The Replay is a weekly newsletter for dev and engineering leaders.
Delivered once a week, it's your curated guide to the most important conversations around frontend dev, emerging AI tools, and the state of modern software.


React Router is a popular declarative way of managing routes in React applications. It takes away all of the stress that comes with manually setting routes for all of the pages and screens in your React application. React Router exports three major components that help us make routing possible — Route, Link, and BrowserRouter.
If you’re new to React Router, check out this video tutorial to help you get started:
No Title
Check out my courses and become more creative!
Redux is a predictable state container designed to help you write JavaScript apps that behave consistently across client, server, and native environments and are easy to test.
While it’s mostly used as a state management tool with React, you can use it with any other JavaScript framework or library. It’s lightweight at 2KB (including dependencies), so you don’t have to worry about it making your application’s asset size bigger.
With Redux, the state of your application is kept in a store, and each component can access any state that it needs from this store.
If you’re just getting started with Redux, the video below is a great resource for beginners.
No Title
Check out my courses and become more creative!
To make this tutorial as pragmatic as possible, I set up a simple application called EmojiLand (not to be confused with the off-Broadway musical of the same name).
Here’s what the example app looks like:

EmojiLand is a simple app, but it’s enough to help you digest the very important tips I’ll be sharing in this article.
Notice how the app stays on a current route, but when the button is clicked, it performs some fake action and redirects to another route upon completion of the fake action.
In the real world, this fake action could be a network request to fetch a resource or any other async action.
Just so we’re on the same page, let’s explore how the EmojiLand app is built.
To follow along, grab the application’s repo from GitHub. If you’re feeling lazy, feel free to skip this step.
Clone the repo: git clone https://github.com/ohansemmanuel/nav-state-react-router.git
Move into the directory:
cd nav-state-react-router
Install the dependencies:
yarn install
or
npm install
Then run the application:
yarn start
or
npm start
The app is a basic React with Redux setup. A very minimal setup with react-router is also included.
In containers/App.js, you’ll find the six routes contained in this application.
Below’s the full code representation:
const App = () => (
  <Router>
    <Switch>
      <Route exact path="/" component={AngryDude} />
      <Route path="/quiet" component={KeepQuiet} />
      <Route path="/smile" component={SmileLady} />
      <Route path="/think" component={ThinkHard} />
      <Route path="/thumbs" component={ThumbsUp} />
      <Route path="/excited" component={BeExcited} />
    </Switch>
  </Router>
);
Each route leads to an emoji component. /quiet renders the KeepQuiet component.
Here’s what the KeepQuiet component looks like:
import React from "react";
import EmojiLand from "../components/EmojiLand";
import keepQuietImg from "../Images/keepquiet.png";
import emojiLand from "./emojiLand";

const KeepQuiet = ({ appState, handleEmojiAction }) => (
    <EmojiLand
      EmojiBg="linear-gradient(120deg, #a6c0fe 0%, #f68084 100%)"
      EmojiImg={keepQuietImg}
      EmojiBtnText="Keep Calm and Stay Quiet."
      HandleEmojiAction={handleEmojiAction}
      appState={appState}
    />
  );

export default emojiLand(KeepQuiet);
It’s a simple functional component that renders an EmojiLand component. The construct of the EmojiLand component is in components/EmojiLand.js. It’s pretty simple; you can have a look on GitHub.
What’s important is that it takes in some props such as a background gradient, image, and button text. The exported component is more delicate.
Please have a look at the last line of the code block above.
export default emojiLand(KeepQuiet);emojiLand right there is a higher-order component. All it does is make sure that when you click a button in any of the emoji components, it simulates a fake action for about 1000ms. Remember that in practice this may be a network request.
The emojiLand higher-order component does this by passing the appState props into the emoji components. In this example, KeepQuiet
When any of the emoji components is first rendered, appState is an empty string, "". After about 1000ms, appState is changed to DO_SOMETHING_OVER, where DO_SOMETHING_OVER is represented as a constant, just as shown below.
In constants/action-types:
export const DO_SOMETHING_OVER = "DO_SOMETHING_OVER";
This is how every emoji component in this app works.
Also remember that at each route, a separate EmojiLand component is rendered.


Upon the completion of the fake process, let’s assume you wanted to redirect/move to another route within the EmojiLand application.
First, remember that on hitting the home route, theAngryDude component is rendered.

The more declarative approach for handling redirects is to use the Redirect component from React-router.
Let me show you how.
Since we want to redirect from the AngryDude component, first, you import the Redirect component within containers/AngryDude.js like this:
import { Redirect } from "react-router-dom";
For redirects to work, it has to be rendered like a regular component. In our particular example, we’ll be redirecting when the appState holds the value, DO_SOMETHING_OVER i.e the fake action has been completed.
Now, here’s the code for that:
const AngryDude = ({ appState, handleEmojiAction }) => {
    return appState === DO_SOMETHING_OVER ? (
<Redirect to="/thumbs" />
    ) : (
      <EmojiLand
        EmojiBg="linear-gradient(-180deg, #611A51 0%, #10096D 100%)"
        EmojiImg={angryDudeImg}
        EmojiBtnText="I'm so pissed. Click me"
        HandleEmojiAction={this._handleEmojiAction}
        appState={this.props.appState}
 />
Now, if appState is equal to DO_SOMETHING_OVER, the Redirect component is rendered.
<Redirect to="/thumbs" />
Note that a required to prop is added to the Redirect component. This prop is required to know where to redirect to.
With that in place, here’s that in action:

If you do the same for the other route components, you can successfully redirect through all the routes:

That was easy, right?
There’s a bit of a problem though, and I’ll address that in the next section.
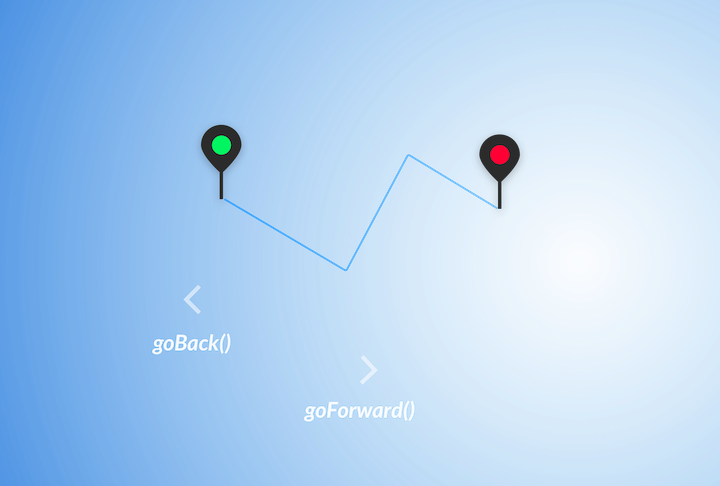
I’ll open up a new browser and click through the app, but at some point, I’ll attempt to go back — i.e., by using the back browser button:

Note that when I click the back button, it doesn’t go back to the previous route but takes me back to my browser’s homepage. Why?
By default, using the Redirect component will replace the current location in the browser’s history stack. So even though we cycled multiple routes, the routes replaced each other in the browser’s “records.”
To the browser, we only visited one route. Thus, hitting the back button took me back to the homepage. It’s like having an array , but instead of pushing to the array, you replace the current value in the array.
There’s a fix, though.
The Redirect component can take a push prop that deactivates this behaviour. With the push prop, each route is pushed unto the browser’s history stack and NOT replaced.
Here’s how that looks in code:
return appState === DO_SOMETHING_OVER ? (
    <Redirect push to="/thumbs" />
  ) : (
    <EmojiLand
      EmojiBg="linear-gradient(-180deg, #611A51 0%, #10096D 100%)"
      EmojiImg={angryDudeImg}
      EmojiBtnText="I'm so pissed. Click me"
      HandleEmojiAction={handleEmojiAction}
      appState={appState}
    />
  );
And here’s the result of that.

Note how we can now navigate back to previously visited routes!
As you move from one route to another, variables in the previous route aren’t carried over to the next route. They are gone!
Yes gone, except you do some work on your end.
What’s interesting is that the Redirect component makes this quite easy.
As opposed to passing a string to prop into Redirect, you could also pass in an object.

What’s interesting is that with the object representation, you can also pass in a state object.
Within the state object you may now store any key value pairs you wish to carry over to the route being redirected to.

to prop.Let’s see an example in code.
When redirecting from the AngryDude component to ThumbsUp, let’s pass in some values into the state field.
Here’s what we had before:
<Redirect push to="/thumbs" />
That’s to be changed to this:
<Redirect
      push
to={{
        pathname: "/thumbs",
        state: {
          humanType: "Cat Person",
          age: 12,
          sex: "none"
        }
      }}
    />
Now, I have passed in 3 different key value pairs! humanType, age, and sex
But upon redirecting to the /thumbs route, how do I receive these values?
For route components, react-router makes available a certain location prop. Within this location prop, you may access the state object like this, location.state or this.props.location.state
NB: Route components are components rendered by the react-router’s <Route> component . They are usually in the signature, <Route component= {Component} />
Here’s an example of me logging the state object received in the new route, /thumbs i.e within the newly rendered Thumbs component
const ThumbsUp = ({ appState, handleEmojiAction, location }) => {
console.log(location.state);
  return appState === DO_SOMETHING_OVER ? (
    <Redirect push to="/quiet" />
  ) : (
    <EmojiLand
      EmojiBg="linear-gradient(-225deg, #DFFFCD 0%, #90F9C4 48%, #39F3BB 100%)"
      EmojiImg={thumbsUpImg}
      EmojiBtnText="You rock. Thumbs up!"
      HandleEmojiAction={handleEmojiAction}
      appState={appState}
    />
  );
};
Note how the location prop is deconstructed and then there’s the console.log(location.state)
After been redirected, and the dev console inspected, the state object is indeed right there!

You may even go a little further and actually render some UI component based on the passed-in state.
Here’s what I did:

By grabbing the state passed into ThumbsUp, I mapped over it and rendered the values below the button. If you care about how I did that, have a look at the source code in components/EmojiLand.js.
Now we’ve made some decent progress!
This is cool, but is it practical in the real world?
There are many use cases, but one very common one is where you have a list of results rendered in a table. However, each row in this table is clickable, and upon clicking a row, you want to display even more information about the clicked values.
You could use the concepts here to redirect to the new route and also pass in some values from the table row to the new route! All by using the redirect’s state object within the to prop!
But wait — there’s another solution!
In the dev world, there are usually multiple ways to solve a problem. I want this article to be as pragmatic as possible, so I’ll show you the other possible way to navigate between routes.
Assume that we wanted to be redirected to from the /thumbs route to the quiet route after performing some action. In this case, we want to do this without using the Redirect component.
How would you go about this?
Unlike the previous solution where we rendered the Redirect component, you could use the slightly more imperative method shown below:
history.push("/quiet)
or
this.props.history.push("/quiet")
Okay, but where does this history object come from?
Just like location in the previous example, react-router also passes down a history prop into route components.
Here’s what we had in containers/Thumbs.js :
const ThumbsUp = ({ appState, handleEmojiAction, location }) => {
  return appState === DO_SOMETHING_OVER ? (
    <Redirect push to="/quiet" />
  ) : (
    <EmojiLand
      EmojiBg="linear-gradient(-225deg, #DFFFCD 0%, #90F9C4 48%, #39F3BB 100%)"
      EmojiImg={thumbsUpImg}
      EmojiBtnText="You rock. Thumbs up!"
      HandleEmojiAction={handleEmojiAction}
      appState={appState}
      locationState={location.state}
    />
  );
};
Now, we may use the history object like this:
const ThumbsUp = ({ appState, handleEmojiAction, location, history }) => {
  if (appState === DO_SOMETHING_OVER) {
history.push("/quiet");
  }
  return (
    <EmojiLand
      EmojiBg="linear-gradient(-225deg, #DFFFCD 0%, #90F9C4 48%, #39F3BB 100%)"
      EmojiImg={thumbsUpImg}
      EmojiBtnText="You rock. Thumbs up!"
      HandleEmojiAction={handleEmojiAction}
      appState={appState}
      locationState={location.state}
    />
  );
};
And now, the results are just the same:

Just as expected, the redirection was still possible.
It’s important to note that you can also pass in some state values like this:
history.push("/quiet", {
 hello: "state value"
})
Simply pass in a second object parameter into the history.push function.
Best of all, we got this all out of the box. We didn’t have to do any “extra” work on the Redux side of things?
All we had to do was learn the APIs react-router makes available. This is good, and it explains the fact that react-router and redux work just fine out of the box.
This app uses redux, but that’s not a problem.
There’s nothing wrong with the approaches we’ve discussed so far. They work just fine! However, there are a few caveats, and depending on how you like to work and the project you’re working on, these methods may or may not be suitable.
Mind you, I have worked with the previous patterns on large-scale project and, again, they work just fine. That said, some Redux purists would prefer to be able to navigate routes by dispatching actions since that’s the primary way of provoking a state change. Others prefer to synchronize the routing data with the Redux store — i.e., to have the route data saved within the Redux store. And then some people just want to enjoy support for time travel debugging in their Redux devtools as you navigate various routes.
None of this is possible without a deeper integration between React Router and Redux.
Let’s explore how to do that.
conntected-react-router?In the past, react-router offered the library, react-router-redux for this purpose. However, at the time of writing, the project has been deprecated and is no longer maintained.
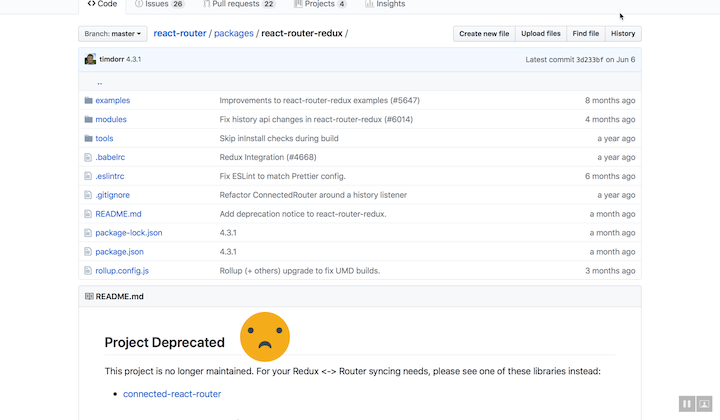
The react-router-redux maintainers advise using Connected React Router.
Connected React Router is a Redux binding for React Router v4 and v5. It synchronizes router state with Redux store via a unidirectional flow and uses react-hot-loader to facilitate hot reloading of functional components while preserving state.
Let’s see how that works, and what we may learn from integrating that into our project, Emojiland.
Debugging React applications can be difficult, especially when there is complex state. If you’re interested in monitoring and tracking Redux state for all of your users in production, try LogRocket. 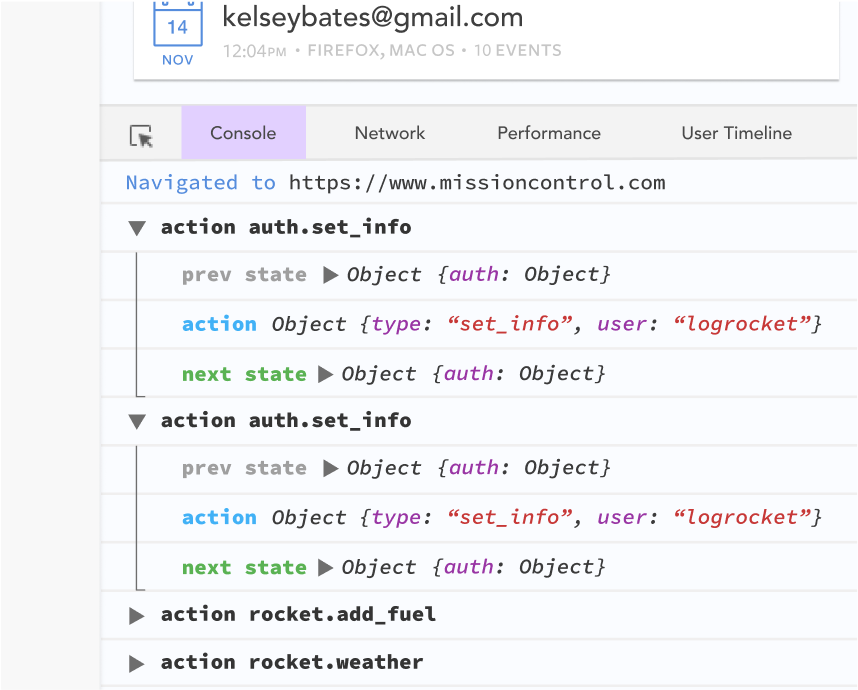 https://logrocket.com/signup/
LogRocket is like a DVR for web apps, recording literally everything that happens on your site. Instead of guessing why problems happen, you can aggregate and report on what state your application was in when an issue occurred.
The LogRocket Redux middleware package adds an extra layer of visibility into your user sessions. LogRocket logs all actions and state from your Redux stores.
Modernize how you debug your React apps – Start monitoring for free.
The first set of things to do are with the Redux store.
1. Create a history object
Technically, there’s a DOM history object for manipulating the browser’s history session.
Let’s programmatically create one ourselves.
To do this, import createBrowserHistory from history
In store/index.js:
...
import { createBrowserHistory } from 'history'
...
history is a dependency of the react-router-dom package, and It’s likely already installed when you use react-router in your app.
After importing createBrowserHistory, create the history object like this:
..
const history = createBrowserHistory()
Still in the store/index.js file.
Before now, the store was created very simply, like this:
const store = createStore(reducer);
Where the reducer refers to a reducer function in reducers/index.js, but that won’t be the case very soon.
2. Wrap the root reducer
Import the following helper function from the connected-react-router library
import { connectRouter } from 'connected-react-router'
The root reducer must now be wrapped as shown below:
const store = createStore(connectRouter(history)(reducer));
Now the reducer will keep track of the router state. Don’t worry, you’ll see what that means in a bit.
In order to see the effect of we’ve done has so far, in index.js I have exported the redux store globally, like this:
window.store = store;
Now, within the browser console, you can check what’s in the redux state object with store.getState()
Here’s that in action:
router field now in the Redux stateAs you can see, there’s now a router field in the redux store! This router field will always hold information about the current route via a location object e.g pathname, state etc.
We aren’t done yet.
In order to dispatch route actions, we need to apply a custom middleware from the connected-react-router library.
That’s explained next
3. Including a custom middleware
To include the custom middleware for handling dispatched actions, import the needed routerMiddleware middleware from the library:
...
import { connectRouter, routerMiddleware } from 'connected-react-router'
Then use the applyMiddleware function from redux:
...
import { createStore, applyMiddleware } from "redux";
...
const store = createStore(
  connectRouter(history)(reducer),
applyMiddleware(routerMiddleware(history))
);
Now, we’re almost done. Just one more step.
4. Use the Connected Router!
Remember that react-redux gives us a Route component. However, we need to wrap these Route components in a ConnectedRouter component from the connected-react-router library.
Here’s how:
First, in index.js you import the ConnectedRouter component.
import { ConnectedRouter } from 'connected-react-router'
...
Here’s the render function of the index.js file:
render(
  <Provider store={store}>
    <App />
  </Provider>,
  document.getElementById("root")
);
Remember that App renders the different routes in the app.
const App = () => (
  <Router>
    <Switch>
      <Route exact path="/" component={AngryDude} />
      <Route path="/quiet" component={KeepQuiet} />
      <Route path="/smile" component={SmileLady} />
      <Route path="/think" component={ThinkHard} />
      <Route path="/thumbs" component={ThumbsUp} />
      <Route path="/excited" component={BeExcited} />
    </Switch>
  </Router>
);
Now, in index.js , wrap the App component with the ConnectedRouter component. The ConnectedRouter component should be placed second only to the Provider component from react-router
Here’s what I mean:
render(
  <Provider store={store}>
 <ConnectedRouter>
      <App />
</ConnectedRouter>
  </Provider>,
  document.getElementById("root")
);
One more thing!
Right now, the app won’t work as expected because the ConnectedRouter requires a history prop i.e the history object we created earlier.
Since we need the same object in more than one place, we need it as an exported module.
A quick fix is to create a new file store/history.js
import { createBrowserHistory } from "history";
const history = createBrowserHistory();
export default history;
Now, this exported history object will be used in the both places where it is needed.
In index.js it is imported like this:
import history from "./store/history";
And then passed into the ConnectedRouter component as shown below:
render(
  <Provider store={store}>
    <ConnectedRouter history={history}>
      <App />
    </ConnectedRouter>
  </Provider>,
  document.getElementById("root")
);
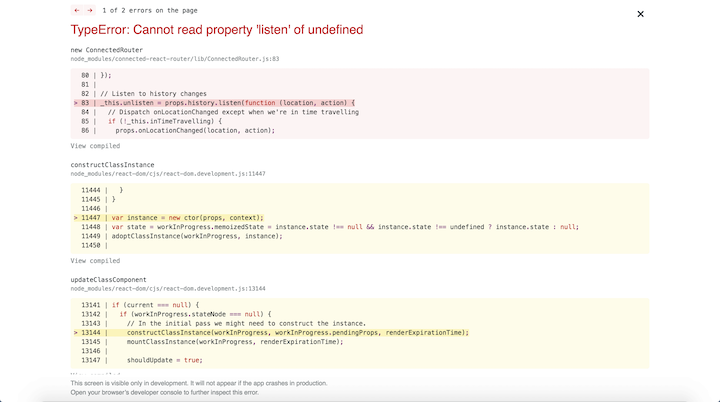
With this, the setup is done, and the app works — without the pesky errors we saw earlier!
Keep in mind I have only set up the connected-react-router but I encourage you check out the more advanced usage of this library.
There’s more you can do with the connected-react-router library and most of those are documented in the official FAQs. Also, if you have a more robust set up with the Redux devtools, and a logger middleware, be sure to take advantage of time travel and the action logger!
I hope this has been as much fun as it was for me!
If you’ve got any questions, be sure to drop them in the comment section and I’ll be happy to help.
Go build something awesome, and I’ll catch you later!

TSRX adds first-class control flow, conditional hooks, and scoped styles to React via a TypeScript compiler extension — no new framework required.

Learn how to build a full React Native auth system using Better Auth and Expo — with email/password login, Google OAuth, session persistence, and protected routes.

Compare the top AI development tools and models of June 2026. View updated rankings, feature breakdowns, and find the best fit for you.

Learn how Bloom filters reduce database lookups for username availability checks while preserving correctness at scale.
Hey there, want to help make our blog better?
Join LogRocket’s Content Advisory Board. You’ll help inform the type of content we create and get access to exclusive meetups, social accreditation, and swag.
Sign up now

