Across the tech ecosystem, developers are constantly building new tools and technologies to make life easier for us. We use many such tools today, significantly improving our productivity and efficiency.

In this article, we will learn about another excellent dev tool called Chunk. Chunk was recently released and comes with benefits for developers, particularly those who write server-side code. Let’s get started.
Jump ahead:
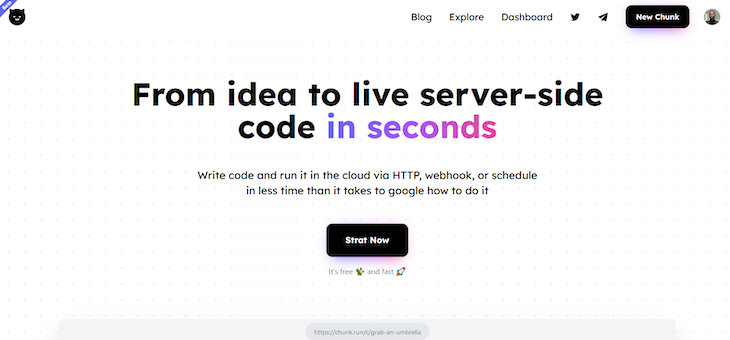
Chunk.run is an online platform that allows us to write server-side code without deploying them. Instead of deploying, Chunk runs the code for us on its platform; hence the name Chunk.run. Chunk gives us different methods for running code. We can do it manually, use webhooks, or schedule it using cron jobs.
A great thing about Chunk is that its easy-to-use interface takes away the complexity of writing and running server-side code. Instead, it makes it easier for us.
To use the Chunk platform properly, we must understand what a chunk is. A chunk is a project on Chunk that contains some code and exports a single function called run(). The run() function acts as the entry point to the chunk. From there, a chunk can take in JSON as input and return JSON as its output.
This is a simple chunk that sends back some JSON data. Here’s a code snippet of what a chunk looks like:
export const run: RunFunction = async (context: RunContext) => {
    return { message: `Hello world!` };
};
Let’s have a quick rundown of the Chunk platform. Its UI comprises a profile page, an online editor, and an explore section where we can review the chunks of other developers.
The user profile page allows us to see and access all the chunks created on our profile page or dashboard. The image below shows us what the user profile page looks like:

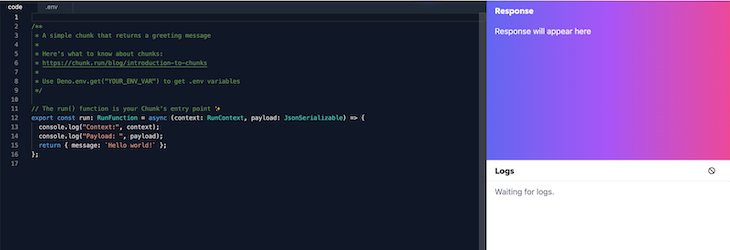
The Chunk.run editor is broken into three parts: the editor on the left, the Response section on the top right, and the Logs section on the bottom right. The left side of the editor has two tab sections: the code section for writing code and the env section for environment variables.
Note, if
envsare present, we will need to use Deno to access them in the code section
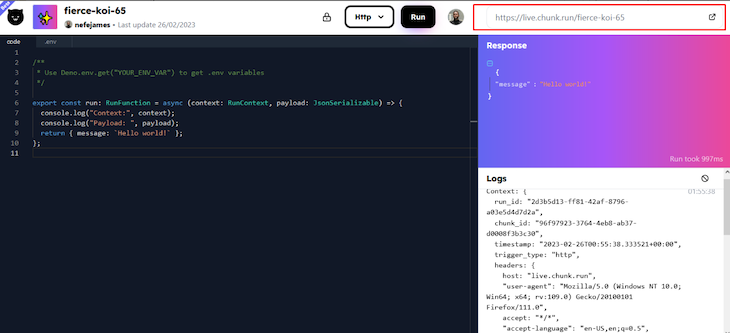
In the top right corner of the editor, there is a link we can use to access the data a chunk returns to us. The image below shows us the editor:
Chunk is a platform for running server-side code. This means there are so many possibilities for its applications that are only limited by our imagination or the problem we are trying to solve. We can use Chunk for web scraping, creating bots, developing APIs and utilities, setting up automated processes, and much more.
Chunk provides a few starter templates that cover some specific use cases, and we can use these templates to get started quickly. It also offers several community chunks, which are projects that other developers have created.
Note, that if we want our chunks to be added to the community, we must change the visibility settings in the online editor.
We’ve learned a bit about Chunk and its applications. Now, let’s use it to create a simple ecommerce products API that we will later consume. Here’s a sample of the product data we will create:
const products = [
  {
    id: 1,
    title: "Laptop Backpack",
    price: 109.95,
    description: "A cool laptop backpack",
    image: "https://fakestoreapi.com/img/81fPKd-2AYL._AC_SL1500_.jpg",
    rating: 3.9,
  },
  ....
]
Follow along by getting the complete data for the API from this GitHub gist, or use the chunk I created here. Here’s the complete code for the products API:
export const run: RunFunction = async () => {
  const products = [
    {
      id: 1,
      title: "Laptop Backpack",
      price: 109.95,
      description: "A cool laptop backpack",
      image: "https://fakestoreapi.com/img/81fPKd-2AYL._AC_SL1500_.jpg",
      rating: 3.9,
    },
    ....
  ];
  return { products };
};
That’s it! With that, we have a working API.
This products API chunk returns an array of products. We can access this data through the chunk’s link. Here’s mine. Now, let’s consume the API. Enter the following code:
import { useEffect, useRef, useState } from "react";

function App() {
  const [products, setProducts] = useState([]);

  useEffect(() => {
    async function fetchData() {
      const res = await fetch("https://live.chunk.run/product-api");
      const data = await res.json();
      setProducts(data.products);
    }

    fetchData();
  }, []);

    return (
      <main>
        {products.map((product) => (
          <div class="card" key={product.id}>
            <div class="img-box">
              <img src={product.image} alt={product.name} />
            </div>
            <p class="prod-title">{product.title}</p>
            <p class="prod-description">{product.description}</p>

            <ul>
              <li>Price: {product.price}</li>
              <li>Rating: {product.rating}</li>
            </ul>
          </div>
        ))}
      </main>
    );
  }
}
In the code above, we used the useEffect Hook to fetch the data from the chunk API, we stored the data in the products state, mapped through the array, and displayed the different products in the UI. Here’s the full project:
See the Pen
logrocket chunk products api by Emadamerho Nefe (@nefejames)
on CodePen.
Chunk is an excellent tool for creating simple projects and demos. It has an easy-to-use interface and removes the complexities of running server-side code. No complex setup or installations are required on our end.
As of this writing, the only issue I spotted with Chunk is the poor approach to product education, as no documentation exists. This makes it difficult to truly understand what Chunk is, how it works, its inner workings, and how to use it best. Chunk currently expects the user to find their way. It makes some assumptions about the technical knowledge users should have, and ultimately the responsibility rests on the user to learn how to use Chunk properly. Explore some of the chunks that the Chunk community has built here.
Install LogRocket via npm or script tag. LogRocket.init() must be called client-side, not
server-side
$ npm i --save logrocket

// Code:

import LogRocket from 'logrocket';
LogRocket.init('app/id');
// Add to your HTML:

<script src="https://cdn.lr-ingest.com/LogRocket.min.js"></script>
<script>window.LogRocket && window.LogRocket.init('app/id');</script>

Learn how contrast-color() automatically picks accessible text colors using native CSS, without JavaScript.

Learn how to build smooth staggered animations in CSS using modern features like sibling-index(), complete with practical examples, fallbacks, and accessibility tips.

Compare the top AI development tools and models of July 2026. View updated rankings, feature breakdowns, and find the best fit for you.

Learn how to detect unused and ghost dependencies in JavaScript projects using Knip, a project-level linter that keeps your dependency graph accurate.
Would you be interested in joining LogRocket's developer community?
Join LogRocket’s Content Advisory Board. You’ll help inform the type of content we create and get access to exclusive meetups, social accreditation, and swag.
Sign up now
