Automation can save time by improving and streamlining processes and repetitive tasks. In a unix-like system, you can automate tasks using cron jobs.

The Replay is a weekly newsletter for dev and engineering leaders.
Delivered once a week, it's your curated guide to the most important conversations around frontend dev, emerging AI tools, and the state of modern software.
A cron job is a unix term for a system process (cron) that allows you to schedule tasks to run at a later date under a specified set of privileges. Essentially, it’s a scheduler that enables applications to schedule a job to run automatically at a certain date or time. In this article, we’ll integrate a cron job into a Deno application.
If you don’t have Deno already installed on your local machine, you can install it using Homebrew:
brew install deno
When the installation is complete, run deno on your terminal to confirm that the installation was successful.
Deno has a smart job scheduler library that we will be using. We will start by creating a directory for our application in our home directory:
cd desktop && mkdir denocron && cd denocron
touch index.ts
To implement cron jobs in our application, we have to import the module into our application:
import {cron, daily, monthly, weekly} from 'https://deno.land/x/deno_cron/cron.ts';
Apart from defining a custom time for a task to run, Deno cron already provides some methods to create weekly, monthly, and daily schedules.
We can use this module to create a custom time for a task to run by using the cron method. This method schedules tasks using the cron pattern, which has a format like this:
cron('* * * * * *', () => {
    // run some task
});
Let me explain what is happening here.
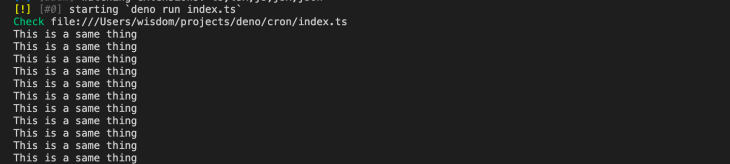
We can write a simple job that will run every second:
cron('*/1 * * * * *', () => {
    // run some task
    console.log('This is a same thing')
});
To run our application, open up the terminal and run deno run index.ts.
Just like Node.js has nodemon, Deno also has denon package that reloads our application whenever a change is made.
To install this, open up your terminal and run this command:
deno install -qAf --unstable https://deno.land/x/[email protected]/denon.ts
This command will install the denon package globally on our development machine.
Now that we can run our application, we can use this command: denon index.ts. If you are using a MacBook, you might run into an error saying command not found: denon, like so:
![]()
If you encounter this error, you can do one of the following:
If you are using a zsh terminal, you can configure this by running:
export PATH="/Users/<user>/.deno/bin:$PATH"
Where the <user> directory is the name of your account on your local machine.
And if you are using a bash terminal, you can use this command to configure it:
echo 'export PATH="$HOME/.deno/bin:$PATH"' >> ~/.bashrc
A common use case for cron jobs is creating automated sending of emails and newsletters. We can write a simple function that is capable of executing a function every first day of the month at midnight. We will use the cron method for this:
cron('1 0 0 1 */1 *', () => {
    // run a function
});
This method takes the schedule configuration and the method to be called when the schedule is due to run.
We can write a simple cron job that will run every 30 seconds:
let task = cron('*/30 * * * * *', () => {
    // run some task
    console.log('This is a same thing')
});
And here’s a simple job that will run every 30 minutes:
cron('1 */30 * * * *', () => {
    checkStock();
});
Apart from defining custom jobs, Deno cron comes with its own built-in method. For example, we have the daily, weekly, and monthly methods, which will run at the specified time:
daily(() => {
    console.log('I run on daily basis')
});

weekly(() => {
console.log('This method will run on weekly bases')
});

everyMinute(()=> {
  console.log('This method will run on 60 seconds')
})
To use this method, we have to import it first:
import { cron, everyMinute, daily, weekly } from 'https://deno.land/x/deno_cron/cron.ts';
To stop all cron jobs, we can use the stop() method. To start all cron jobs, use the start() method.
To see how this works, let’s set some boolean values. First, import this method:
import { cron, start,stop } from 'https://deno.land/x/deno_cron/cron.ts';
let task = cron('*/1 * * * * *', () => {
    // run some task
    console.log('This is the same thing')
});
let someBool = false
if (someBool) {
    start()
} else {
    stop()
}
We start by importing the cron , start, and stop method from the url and then use the cron method to create a job that will run every minute.
To run the application, set the value of someBool to true. Once this is done, the job will log This is the same thing on the console every one minute. Also notice that the start and stop methods are used to control the flow of the job.
Cron jobs can come in handy when building a large scale application where you want to send scheduled newsletters to all your customers, automate any of your messages, or complete automated tasks.
Here’s the source code of this project.
Install LogRocket via npm or script tag. LogRocket.init() must be called client-side, not
server-side
$ npm i --save logrocket

// Code:

import LogRocket from 'logrocket';
LogRocket.init('app/id');
// Add to your HTML:

<script src="https://cdn.lr-ingest.com/LogRocket.min.js"></script>
<script>window.LogRocket && window.LogRocket.init('app/id');</script>

TSRX adds first-class control flow, conditional hooks, and scoped styles to React via a TypeScript compiler extension — no new framework required.

Learn how to build a full React Native auth system using Better Auth and Expo — with email/password login, Google OAuth, session persistence, and protected routes.

Compare the top AI development tools and models of June 2026. View updated rankings, feature breakdowns, and find the best fit for you.

Learn how Bloom filters reduce database lookups for username availability checks while preserving correctness at scale.
Would you be interested in joining LogRocket's developer community?
Join LogRocket’s Content Advisory Board. You’ll help inform the type of content we create and get access to exclusive meetups, social accreditation, and swag.
Sign up now

