Editor’s note: This article was last updated on 25 July 2023 to include information about customizing React menu bar applications using the MenuItem object. For a comprehensive guide to Electron.js, check out “Advanced Electron.js architecture.”
A menu bar is a standard component of many desktop applications that allows users to access frequently used commands and features without navigating a complex UI. Menu bars typically contain a list of commands, such as File, Edit, View, and Help. Each command can perform a specific action, such as opening a file, editing text, or viewing help documentation.
Electron.js is a framework that allows you to create cross-platform desktop applications using web technologies. This means you can use HTML, CSS, and JavaScript to create an application that runs on Windows, macOS, and Linux. Electron.js is based on Node.js, meaning you can use Node APIs in your Electron applications.
In this tutorial, we will demonstrate how to create a menu bar using Electron and React. Our code project will communicate between the rendered and main processes in Electron, as well as store data using the electron-store.
Jump ahead:
For those who are unsure how to configure the project, I have prepared a boilerplate for Electron with React. You can clone or download it to start the project, or use your favorite boilerplate instead.
Electron has two processes: renderer and main. You can think of them as the client and server side, respectively. The renderer process defines what to render inside the windows, as the name suggests, and the main process defines what windows to create, and how to interact with them, as well as other backend-related functionalities.
These two processes are not aware of each other. To make them communicate, we can use the ipcMain and ipcRenderer modules, which are EventEmitters. For now, let’s start with the basic imports to the src/server/main.js file.
I am referring to the directory structure of the boilerplate I provided at the top of the article, so this might change for your setup. electron-util is a useful package to conditionally enable things, such as devTools, when you are in development mode. Don’t forget to install electron-util before importing:
const { app, BrowserWindow } = require('electron');
const { is } = require('electron-util');
const path = require('path');
In Electron, the BrowserWindow API creates a browser window with the specified options, and loads a desired URL to display. Let’s create a function called createMainWindow and create a BrowserWindow function in it:
let mainWindow = null;

const createMainWindow = () => {
  mainWindow = new BrowserWindow({
    backgroundColor: '#FFF',
    width: 250,
    height: 150,
    webPreferences: {
      devTools: is.development,
      nodeIntegration: true,
    }
  });
  if (is.development) {
    mainWindow.webContents.openDevTools({ mode: 'detach' });
    mainWindow.loadURL('http://localhost:3000');
  } else {
    mainWindow.loadURL(`file://${path.join(__dirname, '../../build/index.html')}`);
  }
};
The reason I declared the mainWindow variable out of the createMainWindow function is that we will create a class to create a Tray object out of this BrowserWindow function later, so we need to access the variable globally.
I won’t got into too much detail about all of the available settings, because the API documentation helps you determine that. However, we will use is.development to open devTools and loadURL from the local development server. You can also use the build folder if it is built for production.
To create the BrowserWindow instance, we must wait until the app is ready. Therefore, we need to use the ready event, which is emitted when Electron has finished initializing:
app.on('ready', () => {
  createMainWindow();
});
So far, we have only created BrowserWindow and specified what to display. However, we don’t have any renderer process running. If you run npm run client, this will start a server on localhost port 3000, which is the specific port loaded by the loadURL method in development mode.
Because there is already a component rendering a text, you can run npm run server in another terminal instance. This will run the Electron app. As a result, you should see the following application window:
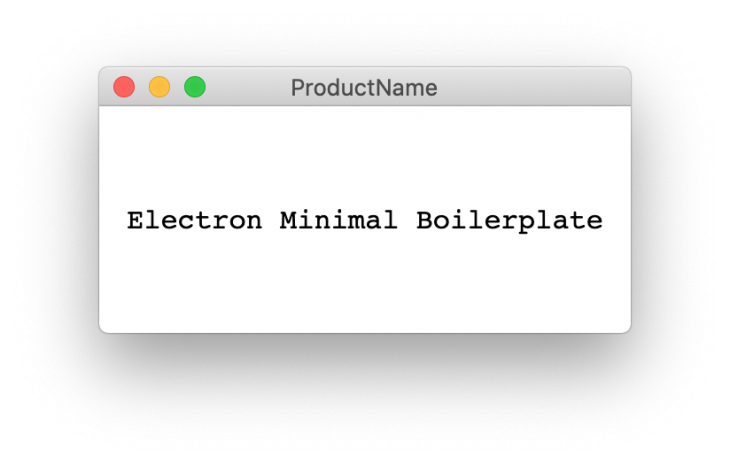
Editing src/client/components/App/index.js will re-render the component and automatically update the contents of mainWindow.
The mainWindow object we created appears in the middle of the screen, but we want to create an icon in the menu bar and toggle this window when it’s clicked. To do that, we first need to create a Tray object, which displays the specified icon in the menu bar.
Because we need to position and toggle our mainWindow object and also preferably be able to show a system menu when right-clicked on the Tray icon, it is more convenient to create a class that bundles all the functionalities inside. So, let’s create a file named TrayGenerator.js under src/server.
In the TrayGenerator class, we need the following functions, along with a constructor that accepts a BrowserWindow object, which is the mainWindow variable in our case:
getWindowPosition: Calculates the x and y coordinates of BrowserWindow so that it is centered and right relative to the Tray iconshowWindow: Sets the position of the mainWindow object using the getWindowPosition() functiontoggleWindow: Toggles the visibility of the mainWindow objectrightClickMenu: Creates an array of options for the context menu shown when the user right-clicks on the Tray iconcreateTray: Creates a Tray object and attaches the toggleWindow() function to the click event listener of the Tray object. It also attaches the rightClickMenu() function to the right-click event listener of the Tray objectconst { Tray, Menu } = require("electron");
const path = require("path");
class TrayGenerator {
constructor(mainWindow) {
this.tray = null;
this.mainWindow = mainWindow;
}
getWindowPosition = () => {
const windowBounds = this.mainWindow.getBounds();
const trayBounds = this.tray.getBounds();
const x = Math.round(
trayBounds.x + trayBounds.width / 2 - windowBounds.width / 2
);
const y = Math.round(trayBounds.y + trayBounds.height);
return { x, y };
};
showWindow = () => {
const position = this.getWindowPosition();
this.mainWindow.setPosition(position.x, position.y, false);
this.mainWindow.show();
this.mainWindow.setVisibleOnAllWorkspaces(true);
this.mainWindow.focus();
this.mainWindow.setVisibleOnAllWorkspaces(false);
};
toggleWindow = () => {
if (this.mainWindow.isVisible()) {
this.mainWindow.hide();
} else {
this.showWindow();
}
};
rightClickMenu = () => {
const menu = [
{
role: "quit",
accelerator: "Command+Q",
},
];
this.tray.popUpContextMenu(Menu.buildFromTemplate(menu));
};
createTray = () => {
this.tray = new Tray(path.join(__dirname, "./assets/IconTemplate.png"));
this.tray.setIgnoreDoubleClickEvents(true);
this.tray.on("click", this.toggleWindow);
this.tray.on("right-click", this.rightClickMenu);
};
}
module.exports = TrayGenerator;
And with that, we are done with the TrayGenerator class. Now, it’s time to instantiate it and then call the createTray method on it. But first, import the TrayGenerator class at the top of the main.js file:
const TrayGenerator = require('./TrayGenerator');
Then, initialize TrayGenerator by passing mainWindow and calling the createTray() method on its instance to generate a Tray object. We do this right after calling createMainWindow(), which creates and assigns an instance of BrowserWindow to the mainWindow variable:
app.on('ready', () => {
  createMainWindow();
  const Tray = new TrayGenerator(mainWindow);
  Tray.createTray();
});
If you run npm run client and then npm run server , you will notice that mainWindow still appears in the middle of the screen and disappears when you click the Tray icon. And if you click the Tray icon again, it repositions itself below the icon, like we wanted to happen. This is because we didn’t hide mainWindow initially.
So, the following options passed to BrowserWindow ensure that:
show: false,
frame: false,
fullscreenable: false,
resizable: false,
You may have noticed that, although we have a Tray icon in the menu bar, the application icon is still visible in the dock. If you don’t want this, you can call the following line to hide it:
app.dock.hide();
So, after all the adjustments, the final code in main.js looks as follows:
// eslint-disable-next-line import/no-extraneous-dependencies
const { app, BrowserWindow } = require('electron');
const { is } = require('electron-util');
const path = require('path');
const TrayGenerator = require('./TrayGenerator');

let mainWindow = null;

const createMainWindow = () => {
  mainWindow = new BrowserWindow({
    backgroundColor: '#FFF',
    width: 300,
    height: 150,
    show: false,
    frame: false,
    fullscreenable: false,
    resizable: false,
    webPreferences: {
      devTools: is.development,
      nodeIntegration: true,
    }
  });
  if (is.development) {
    mainWindow.webContents.openDevTools({ mode: 'detach' });
    mainWindow.loadURL('http://localhost:3000');
  } else {
    mainWindow.loadURL(`file://${path.join(__dirname, '../../build/index.html')}`);
  }
};

app.on('ready', () => {
  createMainWindow();
  const Tray = new TrayGenerator(mainWindow);
  Tray.createTray();
});

app.dock.hide();
Whether you want to store user preferences or application state, there is a handy npm package called electron-store to persist data on the main process. Let’s use this package to store a user preference, which is important for menu bar applications: “Launch at startup.”
Install and import the package and then create a store with a schema in main.js:
const Store = require('electron-store');
const schema = {
  launchAtStart: true
}
const store = new Store(schema);
The next thing we want to do is to be able to toggle this value. This can be done in the renderer process, or we can add this functionality to contextMenu, which we created earlier, triggered by right-clicking on the Tray icon.
Now, let’s change the TrayGenerator class slightly so that it also accepts a store object and shows a toggle option for “Launch at startup.” Then, we can add a new menu item, which has the type checkbox. Its state should depend on the launchAtStart key, which we defined in the schema that we used to initialize the store. So, to fetch this value, we use the get method on the store object.
Now, whenever we click this menu item, we get the value of the checkbox and store it as the value of the launchAtStart key by using the set method. So, the final version of the TrayGenerator.js file looks like this:
constructor(mainWindow, store) {
  this.tray = null;
  this.store = store;
  this.mainWindow = mainWindow;
}

rightClickMenu = () => {
  const menu = [
    {
      label: 'Launch at startup',
      type: 'checkbox',
      checked: this.store.get('launchAtStart'),
      click: event => this.store.set('launchAtStart', event.checked),
    },
    {
      role: 'quit',
      accelerator: 'Command+Q'
    },
  ];
  this.tray.popUpContextMenu(Menu.buildFromTemplate(menu));
}
Don’t forget to pass the store object as the second argument when creating the TrayGenerator instance:
const Tray = new TrayGenerator(mainWindow, store);
Now you should be able to see the “Launch at startup” option in contextMenu opened through right-click. Although we store the value of the checkbox in the store object under the name launchAtStart key, we didn’t use it to add our application to the system’s login items list. This is done by calling the setLoginItemSettings method on app with an object, which has the key of openAtLogin with the value of the launchAtStart store item:
app.setLoginItemSettings({
  openAtLogin: store.get('launchAtStart'),
});
To communicate between the main and renderer processes, we can use the ipcMain and ipcRenderer modules from Electron. These modules allow us to send and receive messages across processes using event listeners and emitters.
Let’s build a very basic React app and store its state data on the electron-store we created in the previous section. The React app is a basic counter where you can increase or decrease a number by clicking the buttons:
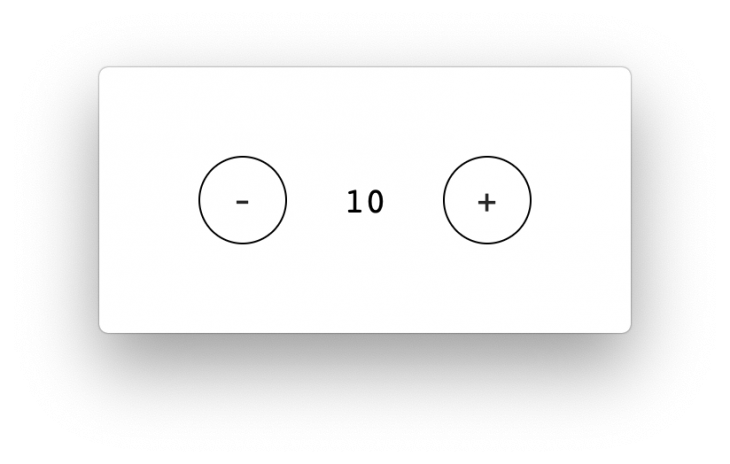
I am just sharing the component code and styling without going into any details because it is very basic. But I’ll go into the details of the IPC connection:
import React from 'react';
import styles from './styles.sass';
class App extends React.Component {
  constructor() {
    super();
    this.state = {
      counter: 0
    };
  }

  increase = () => {
    this.setState(prevState => ({ counter: prevState.counter + 1 }));
  }

  decrease = () => {
    const { counter } = this.state;
    if (counter) {
      this.setState(prevState => ({ counter: prevState.counter - 1 }));
    }
  }

  render() {
    const { counter } = this.state;
    return (
      <div className={styles.app}>
        <button
          type="button"
          className={styles.button}
          onClick={this.decrease}
        >
          -
        </button>
        <div className={styles.counter}>{counter}</div>
        <button
          type="button"
          className={styles.button}
          onClick={this.increase}
        >
          +
        </button>
      </div>
    );
  }
}
export default App;
body
  margin: 0
.app
  align-items: center
  display: flex
  font-family: monospace
  font-size: 16px
  height: 100vh
  justify-content: space-around
  padding: 0 40px

  .counter
    font-size: 20px

  .button
    align-items: center
    border: 1px solid black
    border-radius: 50%
    cursor: pointer
    display: flex
    font-size: 20px
    height: 50px
    justify-content: center
    outline: none
    width: 50px
Let’s include ipcRenderer from Electron and use it to send messages:
const { ipcRenderer } = window.require('electron');

...

sendCounterUpdate = (data) => {
      ipcRenderer.send('COUNTER_UPDATED', data);
    }

    increase = () => {
  this.setState(prevState => (
    { counter: prevState.counter + 1 }
  ), () => {
    this.sendCounterUpdate(this.state.counter);
  });
}

decrease = () => {
  const { counter } = this.state;
  if (counter) {
    this.setState(prevState => (
      { counter: prevState.counter - 1 }
    ), () => {
      this.sendCounterUpdate(this.state.counter);
    });
  }
}
Now, let’s include ipcMain from Electron and use it to receive messages:
const { app, BrowserWindow, ipcMain } = require('electron');

...

const schema = {
  launchAtStart: true,
  counterValue: 0
}
app.on('ready', () => {
  createMainWindow();
  const Tray = new TrayGenerator(mainWindow, store);
  Tray.createTray();

  ipcMain.on('COUNTER_UPDATED', (event, data) => {
    store.set('counterValue', data);
  });
});
And here’s what it would look like to send messages using the ipcMain module:
app.on('ready', () => {
  createMainWindow();
  const Tray = new TrayGenerator(mainWindow, store);
  Tray.createTray();

  ipcMain.on('COUNTER_UPDATED', (event, data) => {
    store.set('counterValue', data);
  });

  mainWindow.webContents.on('did-finish-load', () => {
    mainWindow.webContents.send('INITIALIZE_COUNTER', store.get('counterValue'));
  });
});
In the React app, we use the componentDidMount lifecycle hook to start listening for the INITIALIZE_COUNTER message. It also sets the counter state with the received data whenever this message is sent from the main process, which happens only once, right after the renderer process is finished loading:
componentDidMount() {
  ipcRenderer.on('INITIALIZE_COUNTER', (event, counter) => {
    this.setState({ counter });
  });
}
The final versions of both main.js and the React component are below:
main.js:
const { app, BrowserWindow, ipcMain } = require('electron');
const Store = require('electron-store');
const { is } = require('electron-util');
const path = require('path');
const TrayGenerator = require('./TrayGenerator');

const schema = {
  launchAtStart: true,
  counterValue: 0
};

const store = new Store(schema);
let mainWindow = null;

const createMainWindow = () => {
  mainWindow = new BrowserWindow({
    backgroundColor: '#FFF',
    width: 300,
    height: 150,
    show: false,
    frame: false,
    fullscreenable: false,
    resizable: false,
    webPreferences: {
      devTools: is.development,
      nodeIntegration: true,
    }
  });
  if (is.development) {
    mainWindow.webContents.openDevTools({ mode: 'detach' });
    mainWindow.loadURL('http://localhost:3000');
  } else {
    mainWindow.loadURL(`file://${path.join(__dirname, '../../build/index.html')}`);
  }
};

app.on('ready', () => {
  createMainWindow();
  const Tray = new TrayGenerator(mainWindow, store);
  Tray.createTray();
  ipcMain.on('COUNTER_UPDATED', (event, data) => {
    store.set('counterValue', data);
  });
  mainWindow.webContents.on('did-finish-load', () => {
    mainWindow.webContents.send('INITIALIZE_COUNTER', store.get('counterValue'));
  });
});

app.dock.hide();
React component:
import React from 'react';
import styles from './styles.sass';
const { ipcRenderer } = window.require('electron');

class App extends React.Component {
  constructor() {
    super();
    this.state = {
      counter: 0
    };
  }

  componentDidMount() {
    ipcRenderer.on('INITIALIZE_COUNTER', (event, counter) => {
      this.setState({ counter });
    });
  }

  sendCounterUpdate = (data) => {
    ipcRenderer.send('COUNTER_UPDATED', data);
  }

  increase = () => {
    this.setState(prevState => (
      { counter: prevState.counter + 1 }
    ), () => {
      this.sendCounterUpdate(this.state.counter);
    });
  }

  decrease = () => {
    const { counter } = this.state;

    if (counter) {
      this.setState(prevState => (
        { counter: prevState.counter - 1 }
      ), () => {
        this.sendCounterUpdate(this.state.counter);
      });
    }
  }

  render() {
    const { counter } = this.state;

    return (
      <div className={styles.app}>
        <button
          type="button"
          className={styles.button}
          onClick={this.decrease}
        >
          -
        </button>
        <div className={styles.counter}>{counter}</div>
        <button
          type="button"
          className={styles.button}
          onClick={this.increase}
        >
          +
        </button>
      </div>
    );
  }
}

export default App;
Now, you can create custom menu items to handle specific interactions. For example, you can create a menu item to minimize, maximize, or close the window, or open a specific menu action.
To create a custom menu item, create a new MenuItem object. The MenuItem object has a number of properties that you can use to customize the menu item. For example, you can set the label, the click handler, the enabled state, and the accelerator of the menu item.
The label property is the text displayed for the menu item. The click handler is a function that will be called when the menu item is clicked. The enabled state property determines whether the menu item is enabled or disabled, and the accelerator property is a keyboard shortcut that can activate the menu item.
Here is an example of how to create a custom menu item to minimize the window:
const minimizeMenuItem = new MenuItem({
  label: 'Minimize',
  click: () => {
    mainWindow.minimize();
  },
});
This code creates a new MenuItem object with the label 'Minimize'. The click handler for the menu item is set to the minimize() function. The minimize() function minimizes the mainWindow object. The accelerator property is set to Command+M. This means that the menu item can be activated by pressing the Command and M keys at the same time.
Once you have created a custom menu item, you can add it to the menu bar using the menuBar.add() method. To add the minimizeMenuItem to the menu bar, you would use the following code:
menuBar.add(minimizeMenuItem);
This code adds the minimizeMenuItem to the menu bar. The minimizeMenuItem will now be displayed in the menu bar. You can also customize the appearance of the menu bar by setting the properties of the MenuBar object. You can set the background color, font, and menu item spacing of the menu bar.
Here is an example of how to set the background color of the menu bar:
menuBar.backgroundColor = '#ffffff';
Refer to the Electron documentation for more information about customizing the menu bar. Here are some additional ideas for custom menu items that you could create:
After you complete implementation, the final step is to distribute your app. There are several different packages for distributing an Electron app, but I use electron-builder, which I shared at the beginning of this article, and is already included in the boilerplate.
If you are using the boilerplate, all you have to do is run npm run build to create a production build of the React app, and then run npm run dist to distribute your Electron app.
In this article, we learned how to create a menu bar application with Electron and React. We saw how to use the menubar and electron-store packages to simplify the development process and add functionality to our app. We also learned how to use React lifecycle hooks and custom components to create a user interface that responds to user actions and preferences. By following this tutorial, you should be able to build your own menu bar applications with Electron and React and explore the possibilities of this powerful combination.
Install LogRocket via npm or script tag. LogRocket.init() must be called client-side, not
server-side
$ npm i --save logrocket

// Code:

import LogRocket from 'logrocket';
LogRocket.init('app/id');
// Add to your HTML:

<script src="https://cdn.lr-ingest.com/LogRocket.min.js"></script>
<script>window.LogRocket && window.LogRocket.init('app/id');</script>
Hey there, want to help make our blog better?
Join LogRocket’s Content Advisory Board. You’ll help inform the type of content we create and get access to exclusive meetups, social accreditation, and swag.
Sign up now
Discover how to use Gemini CLI, Google’s new open-source AI agent that brings Gemini directly to your terminal.

This article explores several proven patterns for writing safer, cleaner, and more readable code in React and TypeScript.

A breakdown of the wrapper and container CSS classes, how they’re used in real-world code, and when it makes sense to use one over the other.

This guide walks you through creating a web UI for an AI agent that browses, clicks, and extracts info from websites powered by Stagehand and Gemini.


5 Replies to "Building a menu bar application with Electron and React"
TypeError: TrayGenerator is not a constructor – what am I doing wrong?
Hey Ian,
It’s hard to tell what the problem is without a code snippet. Are you sure you created `TrayGenerator.js` and imported it correctly?
Hi, do you have a finished version of this on GitHub?
Thank you for doing this! A finished version on git like mentioned above would be very helpful. I went through the steps and got to this stage: If you run npm run client and then npm run server , you will notice that the mainWindow still appears in the middle of the screen and then disappears when you click the Tray icon.
The icon doesn’t appear.
I found a little bug: if you don’t add `type: ‘panel’` in mainWindow settings, once you open the window clicking on the tray icon, the dock icon reappears.