The web development landscape is shifting back toward server-side rendering and away from JavaScript-heavy client-side architectures. This trend has been fueled by tools like React Server Components and the app directory in frameworks like Next.js, which simplifies server-side routing and rendering.

In response to this shift, tools like htmx are gaining popularity for building interactive web experiences with minimal JavaScript. The HTML-based htmx allows for server-side rendering using AJAX. In this article, we’ll explore how to build a high-performance website using htmx and Go, a backend language known for its speed and efficiency.
htmx is a lightweight JavaScript library that enables building large, dynamic sites with minimal reliance on client-side JavaScript.
htmx injects various AJAX-like attributes and is rendered to simple HTML on the server, which allows developers to achieve AJAX-like updates and dynamic interactions on the pages.
Let’s see a quick example straight from the docs to demonstrate how htmx handles dynamic interactions:
<button hx-post="/clicked"
    hx-trigger="click"
    hx-target="#parent-div"
    hx-swap="outerHTML">
    Click Me!
</button>
Here, a button element is given various attributes. When clicked, the hx-post="/clicked" attribute sends an HTTP POST request to the /clicked API. Afterward, the button click will swap the targeted div with an ID of #parent-div with the response received from the API.
This is how htmx handles typical dynamic interactions. As you can see, the page or the element in this case will be server-rendered, thus quite quick in terms of interactivity, while saving on client-side JavaScript bundles.
Golang, or Go, is a high-performance, typed programming language. Its automatic garbage collection, efficient concurrency model, and rapid execution make it a popular choice for building scalable backends.
Setting up a Go server is the first step in building a backend with Go. Go’s specification makes it easy to quickly spin up a server by using its built-in net/http package. Assuming you have Go set up in your system, you can create a Go project in a directory and start by creating a file called main. go.
In this file, you have to import the fmt for string and log formatting and net/http for initiating the server:
package main
import (
  "fmt"
  "net/http"
)
This creates the main function with the following server code:
package main
import (
"fmt"
"net/http"
)
func main() {
http.HandleFunc("/", func(w http.ResponseWriter, r *http.Request) {
fmt.Fprintln(w, "Hello, World!")
})
fmt.Println("Server running at http://localhost:8080")
http.ListenAndServe(":8080", nil)
}
This will run your server at 8080 port and print “Hello World!” in your terminal.
You can go a step further and, instead of printing the log, you can render a simple UI by changing the main function:
http.HandleFunc("/", func(w http.ResponseWriter, r *http.Request) {
// Set the Content-Type header to HTML
w.Header().Set("Content-Type", "text/html")
// Write an HTML response
fmt.Fprintln(w, `
<!DOCTYPE html>
<html lang="en">
<head>
<meta charset="UTF-8">
<meta name="viewport" content="width=device-width, initial-scale=1.0">
<title>Hello, World</title>
</head>
<body>
<h1>Hello, World!</h1>
<p>Welcome to your first Go web server.</p>
</body>
</html>
`)
})
Now, at the root /, this HTML will be rendered instead. The key thing to note here is that w.Header().Set("Content-Type", "text/html") sets the response header to indicate the content type is HTML. Finally, you can execute this file by running the command go run main.go where main.go is the filename.
You can use htmx to render the same HTML snippet with htmx-specific attributes that will allow you to add interactions to the page.
You can integrate htmx in this project by just using a CDN, and including it in your script wherever you are rendering:
<script src="https://unpkg.com/htmx.org"></script>
In this example, you can update your main() function to include the htmx syntax:
func main() {
// Handler for the main page
http.HandleFunc("/", func(w http.ResponseWriter, r *http.Request) {
w.Header().Set("Content-Type", "text/html")
fmt.Fprintln(w, `
<!DOCTYPE html>
<html lang="en">
<head>
<meta charset="UTF-8">
<meta name="viewport" content="width=device-width, initial-scale=1.0">
<title>HTMX Demo</title>
<script src="https://unpkg.com/htmx.org"></script>
</head>
<body>
<h1>HTMX Demo</h1>
<div id="content">
<p>Click the button to fetch updated content!</p>
</div>
<button hx-get="/update" hx-target="#content" hx-swap="innerHTML">
Get Updated Content
</button>
</body>
</html>
`)
})
You can see the script tag that now allows you to write the htmx-specific syntax and hence the attributes. What is really happening here?
Well, as you have seen in the first section of this article, the hx-get="/update" attribute will get a response from the /update API and will swap the innerHTML due to hx-swap="innerHTML". This new response will update the div with an ID of #content" due to the hx-target="#content" attribute.
For all of this to happen, you need to have the /update endpoint that will send a content response that is supposed to replace the existing HTML content. In Go, you can create such a handler like so:
http.HandleFunc("/update", func(w http.ResponseWriter, r *http.Request) {
w.Header().Set("Content-Type", "text/html")
fmt.Fprintln(w, `<p>Content updated at: `+r.RemoteAddr+`</p>`)
})
This handler will send the HTML response of <p>Content updated at: +r.RemoteAddr+</p>, i.e. printing the IP address of the user.
Now that you understand the basic implementation with Go, we’re going to go a little deeper and build a small to-do list app.
First things first, create a directory/folder on your system and create a main.go file. Alternatively, you can run the following code:
go mod init todo-app
Here, the todo-app will be your project name, which will create the main.go file where you will write all the backend logic. Now, you need something to store your entries to ensure data persistence.
You can use SQL to store your creds and the items that your to-do app will contain. You’ll need to import this library by running the following:
go get -u github.com/go-sql-driver/mysql
Finally, in your main.go file, import the following libraries:
package main
import (
    "database/sql"
    "fmt"
    "html/template"
    "log"
    "net/http"
    _ "github.com/go-sql-driver/mysql"
)
Now, you need to define the schema for your to-do items. Any to-do items will have an ID and a status to track if it is completed or not. In Go, you can have this schema typed in as follows:
type Todo struct {
    ID int `json:"id"`
    Title string `json:"title"`
    Completed bool `json:"completed"`
}
With the schema set, you now need to have an indexHandler function that will render an HTML file to the browser, and with that, the rest of your backend logic will mutate the rendered HTML based on the new to-do items or its status of being completed:
func indexHandler(w http.ResponseWriter, r *http.Request) {
    tmpl, err := template.ParseFiles("index.html")
    if err != nil {
        http.Error(w, "Unable to load index.html", http.StatusInternalServerError)
        return
}
    tmpl.Execute(w, nil)
}
With indexHandler added, the next step is to define API endpoints and their corresponding functions:
getTodosHandler: Gets all the to-do items from the SQL backendaddTodoHandler: Adds an input from the user by entering the HTML input fielddeleteTodoHandler: Deletes items by handling the delete button clickcompleteTodoHandler: Toggles the item status and marks it as completedYou can find the complete main.go backend logic here:
package main
import (
    "database/sql"
    "fmt"
    "html/template"
    "log"
    "net/http"
    _ "github.com/go-sql-driver/mysql"
)
type Todo struct {
    ID int `json:"id"`
    Title string `json:"title"`
    Completed bool `json:"completed"`
}
var db *sql.DB
func main() {
    var err error
    dsn := "root:Thecityofroma@123@tcp(localhost:3306)/todo_app"
    db, err = sql.Open("mysql", dsn)
    if err != nil {
        log.Fatalf("Error connecting to the database: %v", err)
}
    defer db.Close()
    if err = db.Ping(); err != nil {
        log.Fatalf("Error pinging the database: %v", err)
}
    http.HandleFunc("/", indexHandler)
    http.HandleFunc("/api/todos", func(w http.ResponseWriter, r *http.Request) {
        if r.Method == http.MethodGet {
            getTodosHandler(w, r)
} else if r.Method == http.MethodPost {
            addTodoHandler(w, r)
} else {
            http.Error(w, "Method not allowed", http.StatusMethodNotAllowed)
}
})
    http.HandleFunc("/api/delete-todo", deleteTodoHandler)
    http.HandleFunc("/api/complete-todo", completeTodoHandler)
    log.Println("Server is running on http://localhost:8080")
    if err := http.ListenAndServe(":8080", nil); err != nil {
        log.Fatalf("Error starting server: %v", err)
}
}
func indexHandler(w http.ResponseWriter, r *http.Request) {
    tmpl, err := template.ParseFiles("index.html")
    if err != nil {
        http.Error(w, "Unable to load index.html", http.StatusInternalServerError)
        return
}
    tmpl.Execute(w, nil)
}
func renderTodoHTML(todo Todo) string {
    completedStatus := ""
    bgColor := "white"
    buttonText := "Complete"
    if todo.Completed {
        completedStatus = " (Completed)"
        bgColor = "#f0f0f0" // Light grey background for completed tasks
        buttonText = "Uncomplete"
}
    return fmt.Sprintf(`
<div class="todo-item" id="todo-%d" style="background-color: %s;">
<p><strong>%s</strong>%s</p>
<button hx-post="/api/delete-todo"
hx-target="#todo-%d"
hx-swap="outerHTML"
hx-include="#todo-%d [name=id]"
type="button">
Delete
</button>
<button hx-post="/api/complete-todo"
hx-target="#todo-%d"
hx-swap="outerHTML"
hx-include="#todo-%d [name=id]"
type="button">
                %s
</button>
<input type="hidden" name="id" value="%d">
</div>`, todo.ID, bgColor, todo.Title, completedStatus, todo.ID, todo.ID, todo.ID, todo.ID, buttonText, todo.ID)
}
func getTodosHandler(w http.ResponseWriter, r *http.Request) {
    rows, err := db.Query("SELECT id, title, completed FROM todos")
    if err != nil {
        http.Error(w, "Unable to fetch TODO items", http.StatusInternalServerError)
        return
}
    defer rows.Close()
    var todos []Todo
    for rows.Next() {
        var todo Todo
        if err := rows.Scan(&todo.ID, &todo.Title, &todo.Completed); err != nil {
            http.Error(w, "Error reading TODO items", http.StatusInternalServerError)
            return
}
        todos = append(todos, todo)
}
    var html string
    for _, todo := range todos {
        html += renderTodoHTML(todo)
}
    w.Header().Set("Content-Type", "text/html")
    w.Write([]byte(html))
}
func addTodoHandler(w http.ResponseWriter, r *http.Request) {
    if err := r.ParseForm(); err != nil {
        http.Error(w, "Invalid form data", http.StatusBadRequest)
        return
}
    title := r.FormValue("title")
    if title == "" {
        http.Error(w, "Title is required", http.StatusBadRequest)
        return
}
    // Insert new TODO into the database
    result, err := db.Exec("INSERT INTO todos (title, completed) VALUES (?, false)", title)
    if err != nil {
        http.Error(w, "Unable to add TODO item", http.StatusInternalServerError)
        return
}
    // Get the last inserted ID
    id, err := result.LastInsertId()
    if err != nil {
        http.Error(w, "Unable to fetch inserted ID", http.StatusInternalServerError)
        return
}
    // Fetch the newly added TODO from the database
    todo := Todo{
        ID: int(id),
        Title: title,
        Completed: false,
}
    // Render the newly added TODO item as HTML
    html := renderTodoHTML(todo)
    // Return the generated HTML for the new todo
    w.Header().Set("Content-Type", "text/html")
    w.Write([]byte(html))
}
// deleteTodoHandler deletes a TODO item by ID.
func deleteTodoHandler(w http.ResponseWriter, r *http.Request) {
    if r.Method != http.MethodPost {
        http.Error(w, "Method not allowed", http.StatusMethodNotAllowed)
        return
}
    if err := r.ParseForm(); err != nil {
        http.Error(w, "Invalid form data", http.StatusBadRequest)
        return
}
    id := r.FormValue("id")
    if id == "" {
        http.Error(w, "ID is required", http.StatusBadRequest)
        return
}
    // Execute the delete query
    _, err := db.Exec("DELETE FROM todos WHERE id = ?", id)
    if err != nil {
        http.Error(w, "Unable to delete TODO item", http.StatusInternalServerError)
        return
}
    // Respond with an empty string to indicate successful deletion.
    w.Header().Set("Content-Type", "text/html")
    w.Write([]byte(""))
}
// completeTodoHandler toggles the completed status of a TODO item by ID.
func completeTodoHandler(w http.ResponseWriter, r *http.Request) {
    if r.Method != http.MethodPost {
        http.Error(w, "Method not allowed", http.StatusMethodNotAllowed)
        return
}
    if err := r.ParseForm(); err != nil {
        http.Error(w, "Invalid form data", http.StatusBadRequest)
        return
}
    id := r.FormValue("id")
    if id == "" {
        http.Error(w, "ID is required", http.StatusBadRequest)
        return
}
    // Toggle the completed status
    var completed bool
    err := db.QueryRow("SELECT completed FROM todos WHERE id = ?", id).Scan(&completed)
    if err == sql.ErrNoRows {
        http.Error(w, "TODO item not found", http.StatusNotFound)
        return
} else if err != nil {
        http.Error(w, "Unable to fetch TODO item", http.StatusInternalServerError)
        return
}
    // Update the completed status
    _, err = db.Exec("UPDATE todos SET completed = ? WHERE id = ?", !completed, id)
    if err != nil {
        http.Error(w, "Unable to update TODO item", http.StatusInternalServerError)
        return
}
    // Fetch the updated TODO item
    var todo Todo
    err = db.QueryRow("SELECT id, title, completed FROM todos WHERE id = ?", id).Scan(&todo.ID, &todo.Title, &todo.Completed)
    if err == sql.ErrNoRows {
        http.Error(w, "Updated TODO item not found", http.StatusNotFound)
        return
} else if err != nil {
        http.Error(w, "Unable to fetch updated TODO item", http.StatusInternalServerError)
        return
}
    // Render and return the updated TODO item's HTML
    html := renderTodoHTML(todo)
    w.Header().Set("Content-Type", "text/html")
    w.Write([]byte(html))
}
To make sure your to-do items are persisted, you have to save them to a local database. In this example, I’ll use SQL. Just spin up a new terminal, assuming you have SQL installed on your system, you can create a new database by running:
create DATABASE todo_app;
Now create a schema on the database called todo_app with the described types and keys:
CREATE TABLE todos (
id INT AUTO_INCREMENT PRIMARY KEY,
title VARCHAR(255) NOT NULL,
completed BOOLEAN DEFAULT FALSE
);
Here, the id is our primary key.
To make sure your database has been created, you can run show databases;; it will render all your databases as follows:
+--------------------+
| Database |
+--------------------+
| information_schema |
| mysql              |
| performance_schema |
| sys                |
| testdb             |
| todo_app.          | -> this is your database
+--------------------+
To check the entries in your app, run SELECT id, title, details FROM todos;, which will render all the to-do items entries.
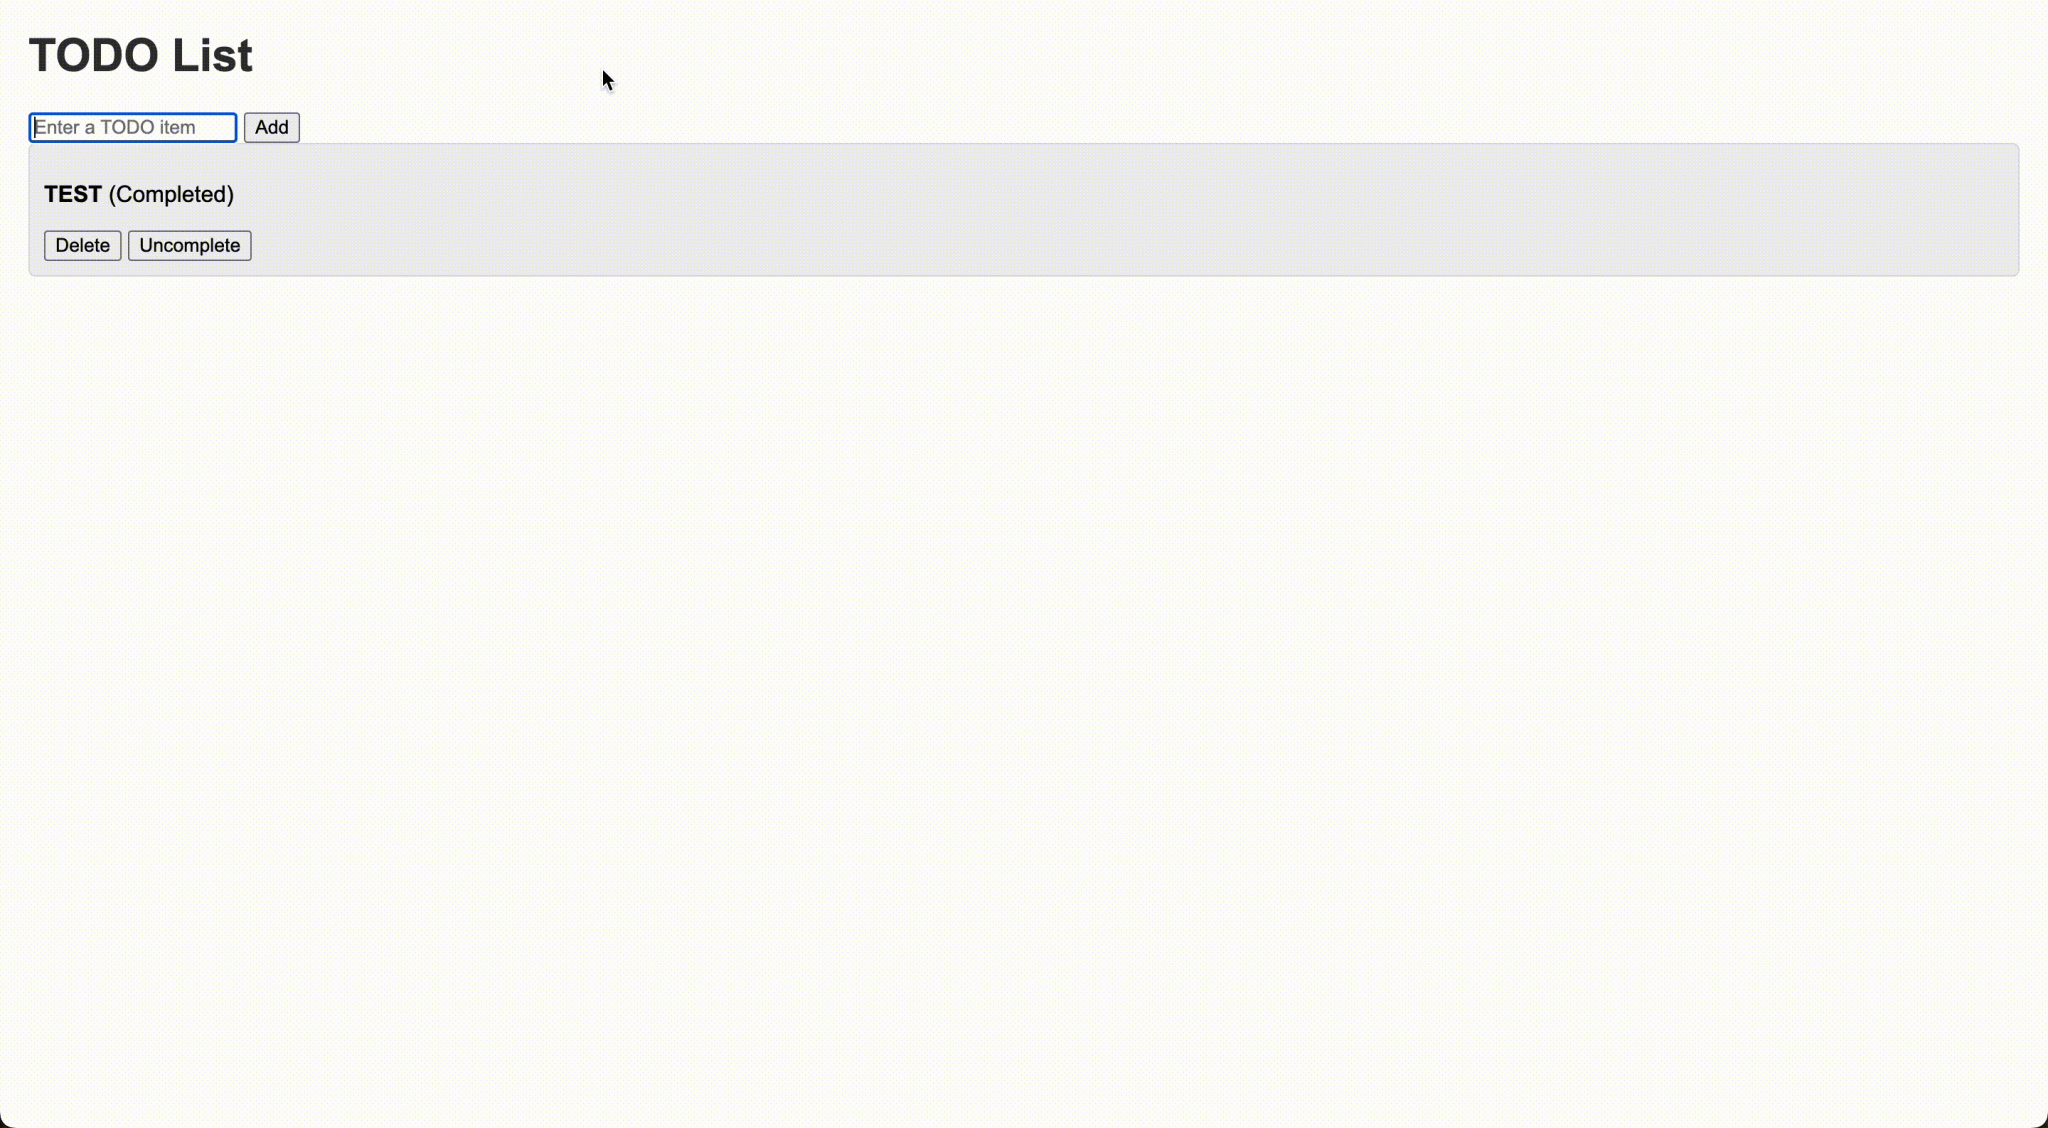
Now, with the main.go and the SQL logic set in, you can move over to the HTML part and create a file called index.html. It will be responsible for rendering out and swapping items based on the mutation from the backend logic from the main.go file:
<!DOCTYPE html>
<html lang="en">
<head>
    <meta charset="UTF-8">
    <meta name="viewport" content="width=device-width, initial-scale=1.0">
    <title>TODO List</title>
    <script src="https://unpkg.com/htmx.org"></script>
    <style>
        body {
            font-family: Arial, sans-serif;
            margin: 20px;
}
        h1 {
            color: #333;
}
        .todo-item {
            border: 1px solid #ddd;
            padding: 10px;
            margin-bottom: 10px;
            border-radius: 5px;
}
    </style>
</head>
<body>
    <h1>TODO List</h1>

    <!-- Form to add a new TODO -->
    <form id="add-todo-form" hx-post="/api/todos" hx-swap="beforeend" hx-target="#todo-list">
        <input type="text" name="title" placeholder="Enter a TODO item" required>
        <button type="submit">Add</button>
    </form>
    <div id="todo-list"
         hx-get="/api/todos"
         hx-trigger="load"
         hx-swap="innerHTML">
        <!-- TODO items will be loaded here dynamically -->
    </div>
</body>
</html>
Notice that the CSS is being written in the same file, but you can move to a CSS file of its own based on your preference. You can move the styling part to its own file and import the file in HTML itself. Find the complete code in this GitHub repository.
Make sure you have SQL set up on your system for the application to work correctly. You can see the preview here:
In a typical htmx and Go setup, you already have an application that is quite fast as it leverages server-side rendering, but you can still use a series of steps on both the frontend and backend as you scale up your application. Below are a few optimization methods I recommend.
Backend optimization ensures smooth API delivery and scales an application’s performance. Go is built with optimal performance and scalability in mind.
Go offers quick database interactions that result in fast performance. It provides both native database drivers and sqlx for simplified querying. As you have seen in this article, you have used native database driver, SQL just by importing a package straight from GitHub. Similarly, you can use sqlx to have reduced boilerplate and more built-in features like struct mapping.
Go offers several approaches to caching to reduce computation and not overburden the database. You can use in-memory caching techniques such as sync.Map for lightweight, easy-to-use key-value pair-styled caching:
import "sync"
var cache sync.Map
// setting a value in in-memory cache
func setCache(key, value string) {
cache.Store(key, value)
}
Similarly, for more advanced use cases, you can use Redis. All you have to do is import the package from GitHub and get started:
import ( "github.com/redis/go-redis/v9" "context" )
It would be unfair to talk about Go and not mention concurrency. Goroutines, when paired with concurrency, can be quite powerful. Goroutines are small lightweight threads that can be run programmatically to manage by Go’s runtime:
func doTask(ID int) {
    fmt.Printf("Processing")
}
func main() {
    for i := 1; i <= 10; i++ {
        go doTask(i)
    }
}
In this application, you optimized HTML by using htmx, an external third-party library that relies heavily on server-side rendering. htmx not only makes it easier to develop applications with Go but it also minimizes the payload.
It uses some of the very smart and well-thought-out attributes, such as hx-trigger="revealed", to lazy load the content. If you are developing a scalable app with server-side rendering, htmx is probably the missing piece if not using any other server-rendering libraries.
As web development trends shift toward optimizing performance and reducing JavaScript overhead, the htmx and Go stack provides an efficient alternative to traditional frontend-heavy frameworks.
When building an app with htmx and Go, you can maintain a clear separation between backend logic and UI updates, which can save you a lot of time when working across different teams.
While htmx is relatively new and may have a learning curve, developers with a solid Go background will find it a powerful choice for building fast, server-rendered applications.

Learn how to use Fallow to analyze AI-generated code, detect dead code, duplicate logic, and complexity issues, and integrate automated code quality checks into your AI-assisted development workflow.

Learn how to protect full-stack projects from NPM supply chain attacks with a practical security checklist.

Explore 15 essential MCP servers for web developers to enhance AI workflows with tools, data, and automation.

Learn how contrast-color() automatically picks accessible text colors using native CSS, without JavaScript.
Would you be interested in joining LogRocket's developer community?
Join LogRocket’s Content Advisory Board. You’ll help inform the type of content we create and get access to exclusive meetups, social accreditation, and swag.
Sign up now

