Data tables are an absolute necessity when building enterprise-like applications. Generally, they are useful for a variety of applications. This article is geared towards helping you give your users more control over how their data can be displayed. This will improve user experience in your app.

To this end, we will build a data table whose headers can be modified using the well-known material design framework for Vue.js: Vuetify.
The Replay is a weekly newsletter for dev and engineering leaders.
Delivered once a week, it's your curated guide to the most important conversations around frontend dev, emerging AI tools, and the state of modern software.
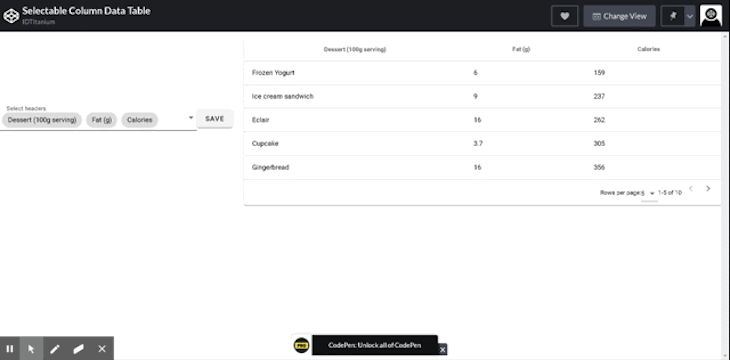
A user is able to select which columns they want the table to display on the left, and they can immediately see the change on the right.
Then, they can click the Save button, which saves the configuration they have chosen in the browser. As a result, when the user reloads that page or comes back to that page after a while, the columns that the user has selected remain the same.
I will be using CodePen for my demo, but if you are implementing this in a Vue.js project, then you probably already have Vue.js and the Vue CLI installed. You can install Vuetify using Vue CLI with this:
vue add vuetify
This will make the required changes to your project to enable you to use Vuetify. You can read more about the Vuetify installation in the Vuetify documentation.
For this CodePen demo, I will be importing Vue and Vuetify directly with HTML script tags:
<html>

<head>
  <link href="https://fonts.googleapis.com/css?family=Roboto:100,300,400,500,700,900" rel="stylesheet">
  <link href="https://cdn.jsdelivr.net/npm/@mdi/[email protected]/css/materialdesignicons.min.css" rel="stylesheet">
  <link href="https://cdn.jsdelivr.net/npm/[email protected]/dist/vuetify.min.css" rel="stylesheet">
  <meta name="viewport" content="width=device-width, initial-scale=1, maximum-scale=1, user-scalable=no, minimal-ui">
</head>

<body>

  <script src="https://cdn.jsdelivr.net/npm/[email protected]/dist/vue.js"></script>
  <script src="https://cdn.jsdelivr.net/npm/[email protected]/dist/vuetify.js"></script>
</body>

</html>
Now that we have our setup in place, we can begin writing some code.
First, we need data that we will use to populate our data table. I will use sample data from the Vuetify docs.
In the JavaScript part of our pen, we will have the following code:
new Vue({
      el: '#app',
      vuetify: new Vuetify(),
      data () {
      return {
        headers: [
          {
            text: 'Dessert (100g serving)',
            align: 'start',
            sortable: false,
            value: 'name',
          },
          { text: 'Calories', value: 'calories' },
          { text: 'Fat (g)', value: 'fat' },
          { text: 'Carbs (g)', value: 'carbs' },
          { text: 'Protein (g)', value: 'protein' },
          { text: 'Iron (%)', value: 'iron' },
        ],
        desserts: [
          {
            name: 'Frozen Yogurt',
            calories: 159,
            fat: 6.0,
            carbs: 24,
            protein: 4.0,
            iron: '1%',
          },
          {
            name: 'Ice cream sandwich',
            calories: 237,
            fat: 9.0,
            carbs: 37,
            protein: 4.3,
            iron: '1%',
          },
          {
            name: 'Eclair',
            calories: 262,
            fat: 16.0,
            carbs: 23,
            protein: 6.0,
            iron: '7%',
          },
          {
            name: 'Cupcake',
            calories: 305,
            fat: 3.7,
            carbs: 67,
            protein: 4.3,
            iron: '8%',
          },
          {
            name: 'Gingerbread',
            calories: 356,
            fat: 16.0,
            carbs: 49,
            protein: 3.9,
            iron: '16%',
          },
          {
            name: 'Jelly bean',
            calories: 375,
            fat: 0.0,
            carbs: 94,
            protein: 0.0,
            iron: '0%',
          },
          {
            name: 'Lollipop',
            calories: 392,
            fat: 0.2,
            carbs: 98,
            protein: 0,
            iron: '2%',
          },
          {
            name: 'Honeycomb',
            calories: 408,
            fat: 3.2,
            carbs: 87,
            protein: 6.5,
            iron: '45%',
          },
          {
            name: 'Donut',
            calories: 452,
            fat: 25.0,
            carbs: 51,
            protein: 4.9,
            iron: '22%',
          },
          {
            name: 'KitKat',
            calories: 518,
            fat: 26.0,
            carbs: 65,
            protein: 7,
            iron: '6%',
          },
        ],
      }
    },
})
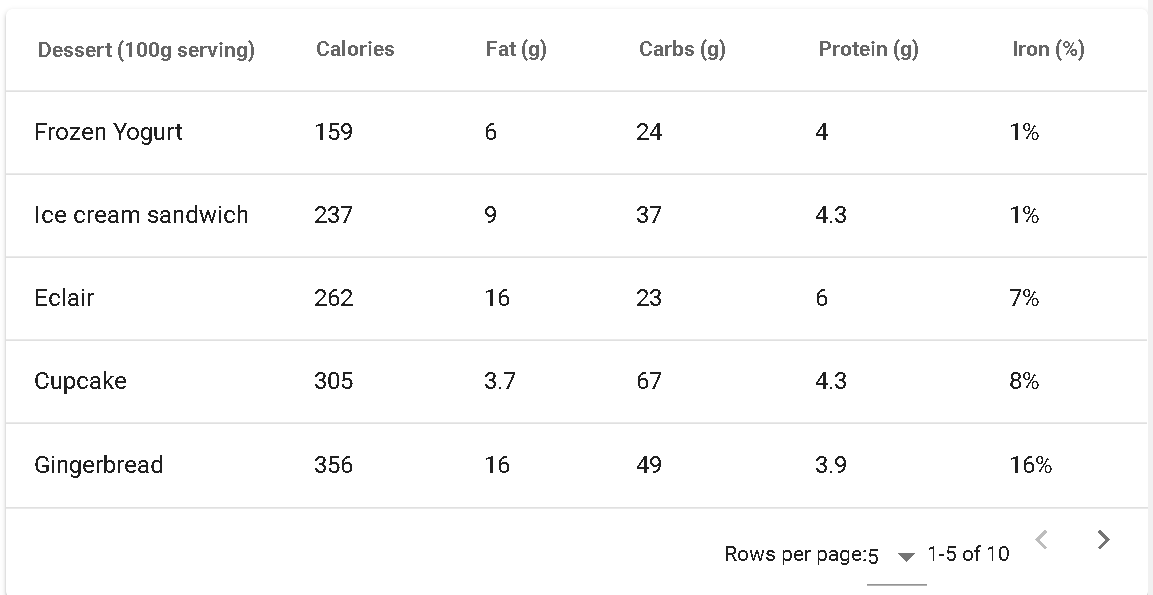
This is the data we will feed to our data-table component, which Vuetify readily provides.
In the HTML part of our pen, we will use the data table componen: V-data-table:
<v-row>
  <v-col md="8" sm="12">
    <v-data-table :headers="headers" :items="desserts" :items-per-page="5" class="elevation-1"></v-data-table>
  </v-col>
</v-row>
Notice that the headers array, which is bound to the headers props, was defined in the data property above. This contains objects with text and value keys. This is the format for header objects that the v-data-table requires. The text is what will be displayed, and the value is the unique value of each header. This also acts as an identifier for each header.
The desserts array carries the content of the table, and it is bound to the items props, which tells the data table what to display as content. Other things like items-per-page determine how many records you want to view in one page. The class prop adds a CSS class.
With this, our data table should look like the following:
In our HTML, we will use another Vuetify component known as v-autocomplete. This is basically a select dropdown with the ability to search.
<v-autocomplete :items="headers" v-model="headersSelected" return-object label="Select headers" multiple chips></v-autocomplete>
Notice that we are passing the headers array (defined earlier) into the items prop of this component. This means that the dropdown will be populated with the headers for the table. The v-model for this component is bound to a new variable called headersSelected. This means, since all the headers are on the dropdown, any header selected will be pushed into the headersSelected variable. We will define this as an empty array.
In the JavaScript portion, we will add this to the data property:
...
headersSelected: [],
...
Now, we can go back to our data table component in HTML to bind the headers prop to the headersSelected variable. This will allow the headers of the data table to be dynamic.
...
<v-data-table :headers="headersSelected" :items="desserts" :items-per-page="5" class="elevation-1"></v-data-table>
Now, because headersSelected is an empty array by default, we need to populate it with data on page load to enable users to see data on the first load. To accomplish that, we will use a method:
...
methods: {
        populateHeaders(){
          let headers = JSON.parse(localStorage.getItem('headers'))
          if(!headers){
            this.headersSelected = this.headers
          }else{
            this.headersSelected = headers
          }
        },
}
...
The above method checks localStorage for the presence of the headers property. If it is not available, it assigns the defaults headers (this.headers) to the headersSelected variable.
Then, we can call the method in the created() lifecycle Hook.
created(){
        this.populateHeaders()
      },
Now, our table headers will be selectable. Next, we will look at saving the selection in localStorage. But first, let’s view the complete HTML and JavaScript code up to this point.
<html>

<head>
  <link href="https://fonts.googleapis.com/css?family=Roboto:100,300,400,500,700,900" rel="stylesheet">
  <link href="https://cdn.jsdelivr.net/npm/@mdi/[email protected]/css/materialdesignicons.min.css" rel="stylesheet">
  <link href="https://cdn.jsdelivr.net/npm/[email protected]/dist/vuetify.min.css" rel="stylesheet">
  <meta name="viewport" content="width=device-width, initial-scale=1, maximum-scale=1, user-scalable=no, minimal-ui">
</head>

<body>
  <div id="app" data-app>
    <template>
      <v-row align="center">
        <v-col class="d-flex" cols="12" sm="12" md="4">
<!--Select dropdown -->
          <v-autocomplete :items="headers" v-model="headersSelected" return-object label="Select headers" multiple chips></v-autocomplete>
        </v-col>

        <v-col md="8" sm="12">
<!--Data table-->
          <v-data-table :headers="headersSelected" :items="desserts" :items-per-page="5" class="elevation-1"></v-data-table>
        </v-col>
      </v-row>

    </template>
  </div>

  <script src="https://cdn.jsdelivr.net/npm/[email protected]/dist/vue.js"></script>
  <script src="https://cdn.jsdelivr.net/npm/[email protected]/dist/vuetify.js"></script>
</body>

</html>
Javascript:
new Vue({
      el: '#app',
      vuetify: new Vuetify(),
      data () {
      return {
        headers: [
          {
            text: 'Dessert (100g serving)',
            align: 'start',
            sortable: false,
            value: 'name',
          },
          { text: 'Calories', value: 'calories' },
          { text: 'Fat (g)', value: 'fat' },
          { text: 'Carbs (g)', value: 'carbs' },
          { text: 'Protein (g)', value: 'protein' },
          { text: 'Iron (%)', value: 'iron' },
        ],
        desserts: [
          {
            name: 'Frozen Yogurt',
            calories: 159,
            fat: 6.0,
            carbs: 24,
            protein: 4.0,
            iron: '1%',
          },
          {
            name: 'Ice cream sandwich',
            calories: 237,
            fat: 9.0,
            carbs: 37,
            protein: 4.3,
            iron: '1%',
          },
          {
            name: 'Eclair',
            calories: 262,
            fat: 16.0,
            carbs: 23,
            protein: 6.0,
            iron: '7%',
          },
          {
            name: 'Cupcake',
            calories: 305,
            fat: 3.7,
            carbs: 67,
            protein: 4.3,
            iron: '8%',
          },
          {
            name: 'Gingerbread',
            calories: 356,
            fat: 16.0,
            carbs: 49,
            protein: 3.9,
            iron: '16%',
          },
          {
            name: 'Jelly bean',
            calories: 375,
            fat: 0.0,
            carbs: 94,
            protein: 0.0,
            iron: '0%',
          },
          {
            name: 'Lollipop',
            calories: 392,
            fat: 0.2,
            carbs: 98,
            protein: 0,
            iron: '2%',
          },
          {
            name: 'Honeycomb',
            calories: 408,
            fat: 3.2,
            carbs: 87,
            protein: 6.5,
            iron: '45%',
          },
          {
            name: 'Donut',
            calories: 452,
            fat: 25.0,
            carbs: 51,
            protein: 4.9,
            iron: '22%',
          },
          {
            name: 'KitKat',
            calories: 518,
            fat: 26.0,
            carbs: 65,
            protein: 7,
            iron: '6%',
          },
        ],
        headersSelected: [],
      }
    },
      methods: {
        populateHeaders(){
          let headers = JSON.parse(localStorage.getItem('headers'))
          if(!headers){
            this.headersSelected = this.headers
          }else{
          this.headersSelected = headers
          }
        },
      },
      created(){
        this.populateHeaders()
      },
    })
Vue.use(Vuetify);
To save, we need a button and a method. We will use the v-btn button component from Vuetify, HTML:
<v-btn @click="save" class="mt-3">Save</v-btn>
The @click is an event listener for that component. This will listen for the click event that will be emitted by that button once it is clicked, and will call the save method.
Now, let’s define the save method:
methods: {
        ...
        save(){
          localStorage.setItem('headers', JSON.stringify(this.headersSelected))
        alert('Table format saved')
        }
}
Notice that we are saving the selected headers contained in this.headersSelected as a JSON string with the key headers into localStorage.
This way, when the save button is clicked, the selected headers at that point get saved into localStorage. If the user makes another selection and clicks Save, the new selection will overwrite the previous selection.
User experience is an important consideration when building applications. Data tables are typically used to serve a large amount of information to users at a glance. Granting your users the ability to determine which column of data they want to see is a good way to improve their experience.
That’s it!
Full code and demo here:
Selectable Column Data Table
No Description
Debugging Vue.js applications can be difficult, especially when users experience issues that are difficult to reproduce. If you’re interested in monitoring and tracking Vue mutations and actions for all of your users in production, try LogRocket.

LogRocket lets you replay user sessions, eliminating guesswork by showing exactly what users experienced. It captures console logs, errors, network requests, and pixel-perfect DOM recordings — compatible with all frameworks.
With Galileo AI, you can instantly identify and explain user struggles with automated monitoring of your entire product experience.
Modernize how you debug your Vue apps — start monitoring for free.

Claude Code vs. OpenCode in a real Next.js refactor: benchmark results, mistakes, prompts, and when to use each CLI agent.

Every time you explain your team’s coding standards to Claude, you are doing work that should be reusable. The same […]

Learn how to move beyond one-shot prompting in Claude with structured workflows for AI-assisted coding, debugging, PR reviews, documentation, testing, and automation.

Learn how to build advanced Next.js forms with rule engines, client-side previews, Server Actions, and server-validated form logic.
Hey there, want to help make our blog better?
Join LogRocket’s Content Advisory Board. You’ll help inform the type of content we create and get access to exclusive meetups, social accreditation, and swag.
Sign up now

