Blitzjs is a Rails-like framework for building a fullstack React application. Basically, it helps you develop a monolith application in an easy and efficient way. Blitz.js is built on top of Next.js.

Sometimes you might need to build a product or minimum viable product (MVP) in a short span of time. You might end up writing a repetitive CRUD API and setting up backend and frontend over and over again.
Well, Blitz.js will help you avoid those pain points. It helps you to build a monolith or MVP as soon as possible. I feel Blitz.js wins in that situation.
It’s time to see it in action.
Note: if you want to learn about the concept or brief introduction to blitzjs, checkout this article.
$ npm install -g blitz
$ blitz new recipe-app
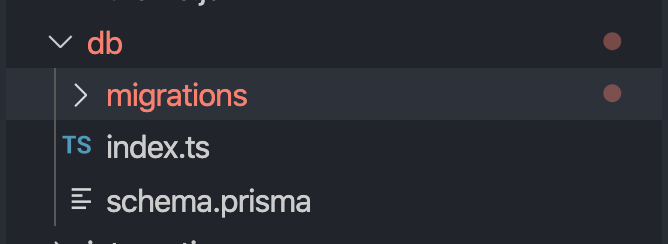
The above command installs Blitz and bootstraps the application with scaffold code. Our application directory will look like this:
mysite
├── app
│   ├── components
│   │   └── ErrorBoundary.tsx
│   ├── layouts
│   └── pages
│       ├── _app.tsx
│       ├── _document.tsx
│       └── index.tsx
├── db
│   ├── migrations
│   ├── index.ts
│   └── schema.prisma
├── integrations
├── jobs
├── node_modules
├── public
│   ├── favicon.ico
│   └── logo.png
├── utils
├── .babelrc.js
├── .env
├── .eslintrc.js
├── .gitignore
├── .npmrc
├── .prettierignore
├── README.md
├── blitz.config.js
├── package.json
├── tsconfig.json
└── yarn.lock
To learn more about the basic tutorial, checkout the official documentation.
Okay, enough scaffold code. What are we going to build in this tutorial? Well, let me show you a demo.
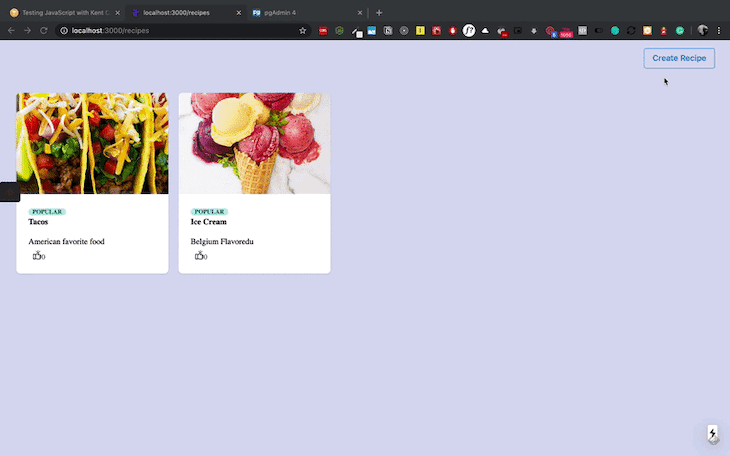
Here, we are going to build a simple recipe app which explains most of the concepts in Blitz.js.
In the above example, we have a recipe list and a form to add a recipe to the list. It’s all about the recipe model.
Let’s set up a database for our application before generating the code. We will be using Postgres as our database for this application. Blitz.js explicitly uses Prisma for managing databases for our application.
Prisma helps you generate database tables from your business model. It can also provide GraphQL schema from the model. So, it’s easy to create a database table or GraphQL from the domain model.
Add the following code inside schema.prisma:
datasource postgresql {
  provider = "postgres"
  url      = "postgresql://postgres:mysecretpassword@localhost:5432/docapp"
}
generator client {
  provider = "prisma-client-js"
}
model Recipe {
  id          Int      @default(autoincrement()) @id
  name        String
  imageUrl    String
  description String
  likes       Int
  addedAt     DateTime @default(now())
}
Datasource defines the database that we are using. Here, we are using Postgres as our data source.
After that, we’ll define a model based on the business domain model. It’s similar to how we design our database. Most of the time, we need to define the model for our application before creating databases and tables.
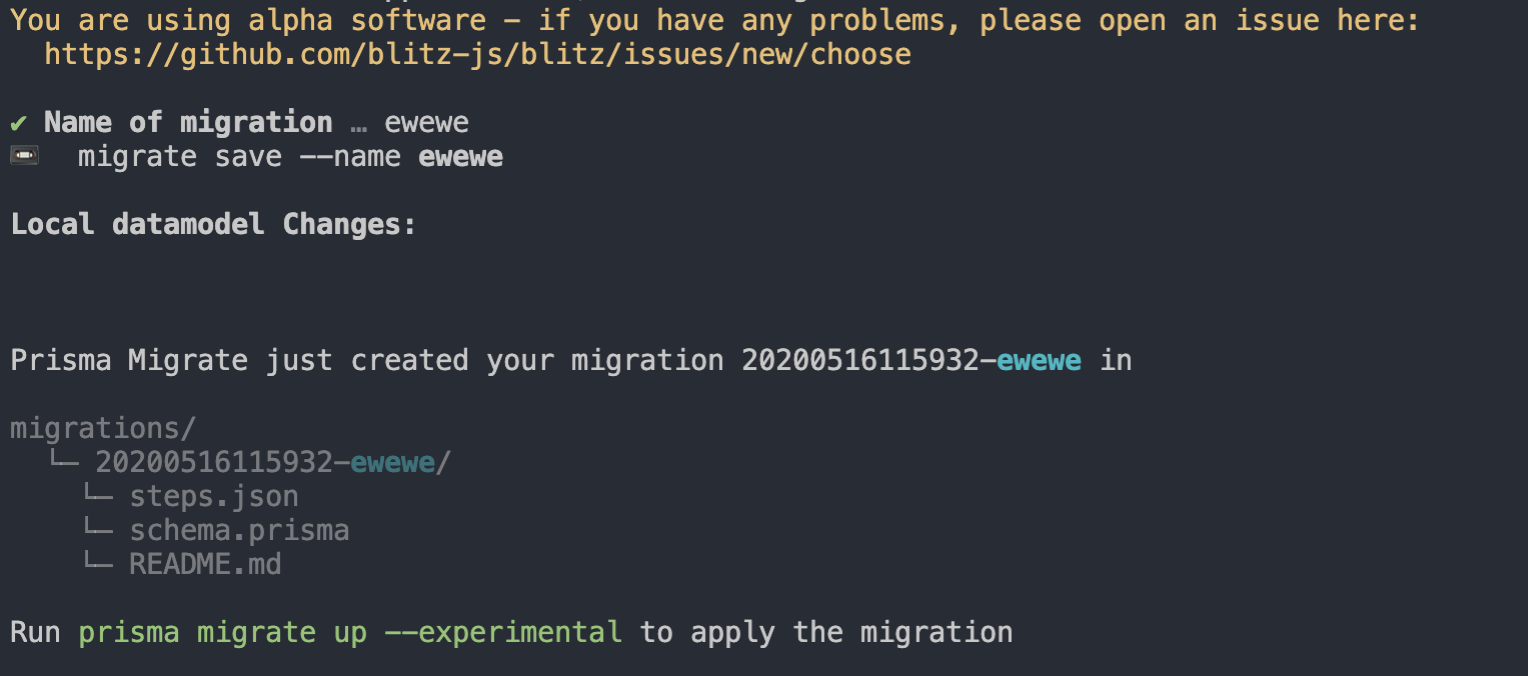
Here, we have a recipe model with all the fields in the database. Once we define the mode, we need to migrate it into our Postgres database.
Blitz helps us do this with the following command:
blitz db migrate
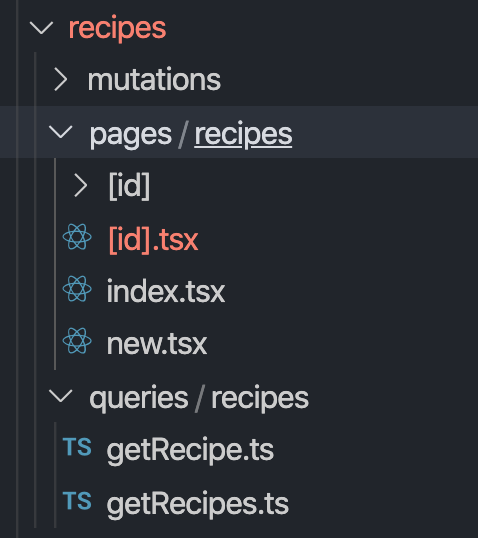
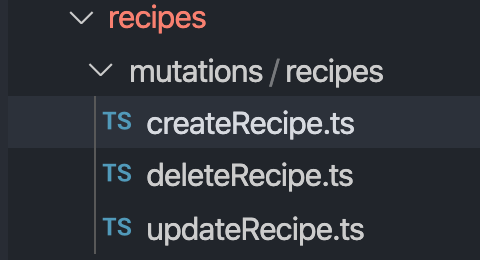
Now, we need to create all the queries and mutations for recipes. We don’t need to manually create queries and mutations for recipes. Blitz will generate scaffold code for us.
blitz generate all recipe
It will create directories and files for our recipes domain.
add the following code in page/recipe/index.tsx:
import { Suspense, Fragment, useState, useEffect } from "react"
import { Head, Link, useQuery } from "blitz"
import { Flex, Button, Box, Spinner } from "@chakra-ui/core"
import getRecipes from "app/recipes/queries/recipes/getRecipes"
import updateRecipe from "app/recipes/mutations/recipes/updateRecipe"
import RecipeItem from "app/components/RecipeItem"

const [recipesState, setRecipeState] = useState([])
  const [recipes] = useQuery(getRecipes)
  useEffect(() => {
    if (recipes.length > 0) {
      setRecipeState(recipes)
    }
  }, [recipes])

export const RecipesList = () => {
  return (
    <Fragment>
      {recipesState.map((recipe) => (
        <RecipeItem
          id={recipe.id}
          title={recipe.name}
          imageUrl={recipe.imageUrl}
          description={recipe.description}
          likes={recipe.likes}
          onLike={async (id, likes) => {
            //on recipe like logic comes here
          }}
        />
      ))}
    </Fragment>
  )
}
const RecipesPage = () => {
  return (
    <Flex flexDirection="column" bg="background" w="100vw" h="100vh">
      <Box marginLeft="auto" marginRight="30px">
        <p>
          <Link href="/recipes/new">
            <Button variantColor="blue" variant="outline" cursor="pointer">
              Create Recipe
            </Button>
          </Link>
        </p>
      </Box>
      <Flex p={8} flexWrap="wrap">
        <Suspense fallback={<Spinner size="xl" margin="auto" />}>
          <RecipesList />
        </Suspense>
      </Flex>
    </Flex>
  )
}
export default RecipesPage
Here, we get the data from the database using useQuery React Hooks and set state the data using useState:
import { Head, Link, useQuery } from "blitz"
import getRecipes from "app/recipes/queries/recipes/getRecipes"

const [recipes] = useQuery(getRecipes)
Basically, we get the data from a Prisma client, which connects with a Postgres database and provides us with the data.
If you see the code in pages/recipes/queries/recipes/getRecipes.ts, you can see the query to get the data:
import db, { FindManyRecipeArgs } from "db"
export default async function getRecipes(args: FindManyRecipeArgs) {
  const recipes = await db.recipe.findMany(args)
  return recipes
}
Once we get the data, we render it in our application just like we do in our React applications. In the list component, we have a button that routes to the create recipe component:
<Link href="/recipes/new">
  <Button variantColor="blue" variant="outline" cursor="pointer">
      Create Recipe
  </Button>
</Link>
Add the following code in pages/recipes/new.tsx:
import { Head, Link, useRouter } from "blitz"
import { useState } from "react"
import createRecipe from "app/recipes/mutations/recipes/createRecipe"
import {
  FormControl,
  FormLabel,
  FormErrorMessage,
  Button,
  Input,
  Box,
  Stack,
  Image,
  Text,
  Spinner,
  Flex,
} from "@chakra-ui/core"
import { Field, Formik, Form } from "formik"
const NewRecipePage = () => {
  const router = useRouter()
  const [state, setState] = useState({
    name: "",
    description: "",
    imageUrl: "",
    uploadingState: "NONE",
  })
  const validationName = (value) => {
    let error
    // if (!value) {
    //   error = "Name is required"
    // }
    return error
  }
  const validateDescription = (value) => {
    let error
    // if (!value) {
    //   error = "Description is required"
    // }
    return error
  }
  const uploadFile = async (e) => {
    console.log("Uploading....")
    setState({ ...state, uploadingState: "UPLOADING" })
    const files = e.target.files
    const data = new FormData()
    data.append("file", files[0])
    data.append("upload_preset", "qy3oxqkx")
    const res = await fetch("https://api.cloudinary.com/v1_1/ganeshimaginary/image/upload", {
      method: "POST",
      body: data,
    })
    const file = await res.json()
    setState({ ...state, imageUrl: file.secure_url, uploadingState: "UPLOADED" })
  }
  const onChange = (e) => {
    setState({ ...state, [e.target.name]: e.target.value })
  }
  return (
    <Flex flexDirection="column" bg="background" w="100vw" h="100vh">
      <Box marginLeft="auto" marginRight="30px">
        <p>
          <Link href="/recipes">
            <Button variantColor="blue" variant="outline" cursor="pointer">
              Back
            </Button>
          </Link>
        </p>
      </Box>
      <Box
        rounded="lg"
        maxW="sm"
        margin="auto"
        display="flex"
        justifyContent={"center"}
        alignItems={"center"}
        height="100%"
      >
        <Formik
          initialValues={{ name: "", description: "", imageUrl: "" }}
          onSubmit={async (values, actions) => {
            await createRecipe({
              data: {
                name: state.name,
                description: state.description,
                imageUrl: state.imageUrl,
                likes: 0,
              },
            })
            router.push("/recipes")
          }}
        >
          {(props) => (
            <Form style={{ backgroundColor: "white", padding: "20px", borderRadius: "8px" }}>
              <Field name="name" validate={validationName}>
                {({ field, form }) => (
                  <FormControl isInvalid={props.errors.name && props.touched.name}>
                    <FormLabel htmlFor="name">Recipe Name</FormLabel>
                    <Input
                      {...field}
                      id="name"
                      placeholder="Enter Recipe name"
                      value={state.name}
                      onChange={onChange}
                      boxSizing="border-box"
                    />
                    <FormErrorMessage> {props.errors.name}</FormErrorMessage>
                  </FormControl>
                )}
              </Field>
              <Field name="description" validate={validateDescription}>
                {({ field, form }) => (
                  <FormControl isInvalid={props.errors.description && props.touched.description}>
                    <FormLabel htmlFor="description">Description</FormLabel>
                    <Input
                      {...field}
                      id="description"
                      value={state.description}
                      placeholder="Enter Description"
                      onChange={onChange}
                      boxSizing="border-box"
                    />
                    <FormErrorMessage>{props.errors.description}</FormErrorMessage>
                  </FormControl>
                )}
              </Field>
              <FormControl>
                <FormLabel>Upload Images</FormLabel>
                <Input type="file" name="file" onChange={uploadFile} boxSizing="border-box" />
                <Stack isInline>
                  {state.uploadingState === "NONE" ? (
                    <Text>Waiting to upload</Text>
                  ) : state.uploadingState === "UPLOADING" ? (
                    <Spinner />
                  ) : (
                    <Image size="100px" objectFit="cover" src={state.imageUrl} alt="recipe" />
                  )}
                </Stack>
              </FormControl>
              <Button
                mt={4}
                variantColor={"teal"}
                boxSizing="border-box"
                isLoading={props.isSubmitting}
                type="submit"
              >
                Submit
              </Button>
            </Form>
          )}
        </Formik>
      </Box>
    </Flex>
  )
}
export default NewRecipePage
Well, there are lot of packages used in this component. Let’s break it down one by one:
Mainly, we have a form here. On submitting, we store the data in our Postgres database and route back to our recipe list.
One thing that we need to note here is how Blitz.js calls the API and stores the data. Once the user submits the form, we call the createRecipe function:
await createRecipe({
              data: {
                name: state.name,
                description: state.description,
                imageUrl: state.imageUrl,
                likes: 0,
              },
})
createRecipe function will be inside mutations/recipes/createRecipe.ts:
import db, {RecipeCreateArgs} from 'db'
export default async function createRecipe(args: RecipeCreateArgs) {
  const recipe = await db.recipe.create(args)
  return recipe
}
We can change the functionality if we want to. It creates the data in the database and returns it. Also, Blitz creates delete and update mutations for you.
Once you complete all the functionality, you can run your application using this command:
blitz start
Or this command:
npm run start
To deploy your application, you can build your application and deploy in the same way you deploy your React or Nextj.s application:
npm run deploy
In summary, Blitz.js helps build fullstack applications in a short period of time with all codegen and commands. My personal opinion is that using Blitz.js is helpful if you’re planning to use Next.js in your application.
See the complete source code here.
Install LogRocket via npm or script tag. LogRocket.init() must be called client-side, not
server-side
$ npm i --save logrocket

// Code:

import LogRocket from 'logrocket';
LogRocket.init('app/id');
// Add to your HTML:

<script src="https://cdn.lr-ingest.com/LogRocket.min.js"></script>
<script>window.LogRocket && window.LogRocket.init('app/id');</script>

AI tools generate working React code fast, but miss race conditions, empty states, debouncing, and accessibility. Here’s how to catch bugs before production.

Learn how to use Gemini CLI subagents to delegate frontend, backend, testing, and docs tasks to specialized agents with guardrails and clear ownership.

Learn how next-browser gives AI agents runtime context for debugging Next.js apps, including React props, hydration, PPR, forms, and performance.

Build dynamic LLM routing in Next.js with OpenRouter, TanStack AI, task classification, model fallbacks, and cost-aware routing.
Would you be interested in joining LogRocket's developer community?
Join LogRocket’s Content Advisory Board. You’ll help inform the type of content we create and get access to exclusive meetups, social accreditation, and swag.
Sign up now

