React Native speech-to-text functionality is a common use case for developers today. Whether for general use or accessibility, the need for speech-to-text in your projects is something that’s more than likely to come up at some point or another and is a feature we as developers should be prepared to implement in our apps.

This article will show you how to build a speech-to-text dictation application using React Native.
To run your application on iOS, you need macOS and Xcode to compile and run the simulator.
For Android, you can use Android Emulator from Android Studio or simply connect an Android device to run it. In addition, we are also going to use VS Code to build the application.
When it comes to building a mobile application using React Native, there are two typical methods.
One uses Expo — a set of tools built around React Native meant to improve development efficiency. Another way is to use React Native CLI, which is basically like starting from scratch without any set of tools supporting React Native development.
In this tutorial, we’ll use Expo, so the development process is more manageable.
Let’s get started:
npm install -g expo-cli
Once you’ve installed the Expo CLI globally, you can initialize a project by using the following command:
expo init <Name of Project>
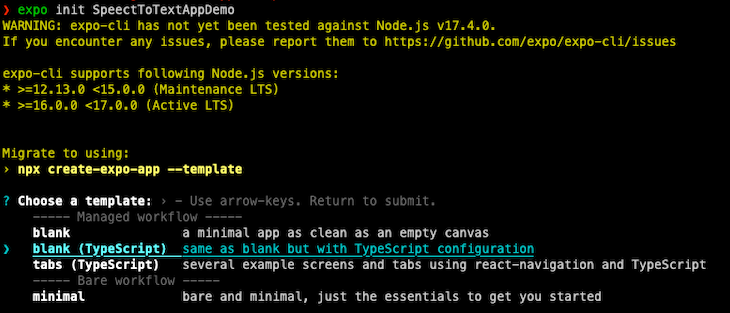
Here, we will choose a blank project with a TypeScript configuration. You can also create a JavaScript version with some pre-defined functionalities if you wish.
Once it scaffolds the project, you can run the application for Android or iOS. Navigate to the directory and run one of the following npm commands:
- cd SpeechToTextAppDemo
- npm run android
- npm run ios
- npm run web
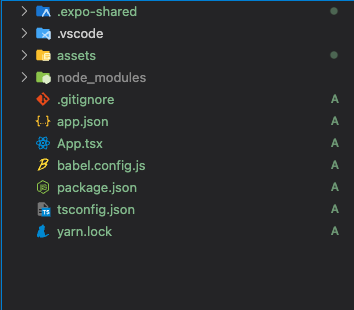
As you can see in the folder structure, App.tsx is an entry point for the application. app.json is an Expo configuration that configures how the project loads and generates rebuilds for Android and iOS.
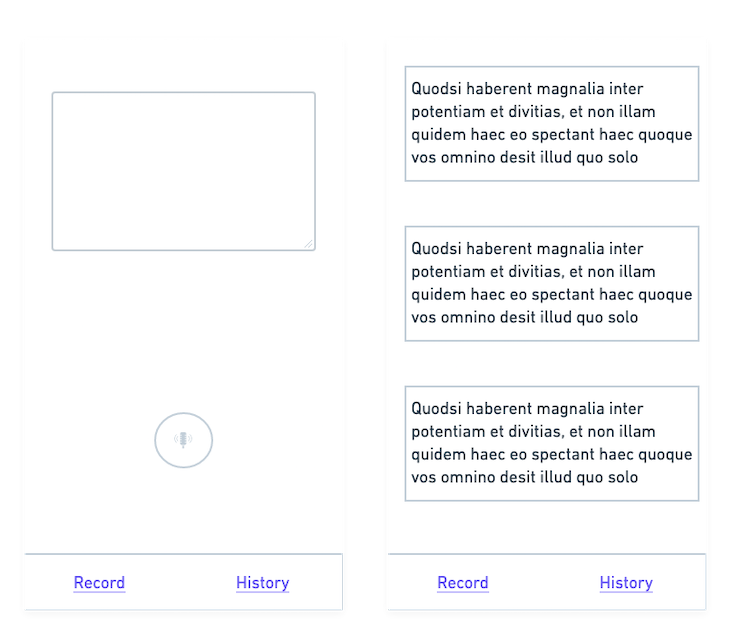
Shown above is a simple wireframe that we will use to build the UI for the application.
We made it simple because we want to focus on the functionalities — once we’ve built the application, you may customize it as you like and practice on top of it.
Let’s start by building navigation into our application.
To implement navigation in a React Native app, we need to install the following packages:
npm install @react-navigation/bottom-tabs @react-navigation/native @expo/vector-icons
Since we will implement navigation at the bottom, we need to install the @react-navigation/bottom-tabs and @react-navigation/native core packages.
Additionally, to add support for icons and text, we need the @expo/vector-icons package.
With navigation, there are three components:
NavigationContainerTab.NavigatorTab.ScreenWrap everything inside NavigationContainer. Tab.Navigator helps to navigate between different components, while Tab.Screen renders the component itself.
Now, we will change the App.tsx, including the navigation functionality:
import { StatusBar } from "expo-status-bar";
import { FontAwesome5 } from "@expo/vector-icons";
import { StyleSheet, Text, View } from "react-native";
import { createBottomTabNavigator } from "@react-navigation/bottom-tabs";
import { NavigationContainer } from "@react-navigation/native";
import Home from "./components/Home";
import Notes from "./components/Notes";
const Tab = createBottomTabNavigator();
export default function App() {
  return (
    <NavigationContainer>
      <Tab.Navigator
        screenOptions={({ route }) => ({
          tabBarIcon: () => {
            let iconName = "record";
            if (route.name === "Record") {
              iconName = "record-vinyl";
            } else if (route.name === "History") {
              iconName = "history";
            }
            return <FontAwesome5 name={iconName} size={24} color="black" />;
          },
        })}
      >
        <Tab.Screen name="Record" component={Home} />
        <Tab.Screen name="History" component={Notes} />
      </Tab.Navigator>
    </NavigationContainer>
  );
}
const styles = StyleSheet.create({
  container: {
    flex: 1,
    backgroundColor: "#fff",
    alignItems: "center",
    justifyContent: "center",
  },
});
Create the Home and Notes components by adding the following code:
Home/index.tsximport { useState, useEffect } from "react";
import {
View,
Text,
TextInput,
StyleSheet,
Button,
Pressable,
} from "react-native";
export default function Home() {
return (
<View style={styles.container}>
<Text>Home Screen</Text>
</View>
);
}
const styles = StyleSheet.create({
container: {},
});
Notes/index.tsximport { useState, useEffect } from "react";
import {
View,
Text,
TextInput,
StyleSheet,
Button,
Pressable,
} from "react-native";
export default function Notes() {
return (
<View style={styles.container}>
<Text>Notes Screen</Text>
</View>
);
}
const styles = StyleSheet.create({
container: {},
});
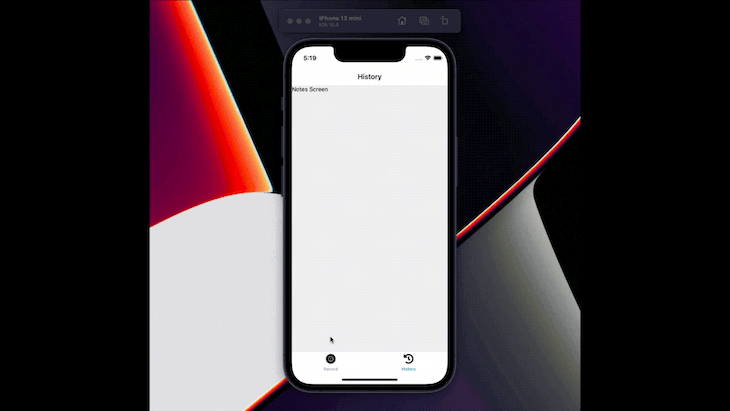
Now, we have a navigation bar at the bottom of the application. Let’s run the application and see how it works. To run the app, do one of the following:
expo start, which will build and run the application in both iOS and Android simulatorsnpx expo run:<ios| Android>, which will build projects for iOS and Android, create native code in the project directory, and run itHere, we will follow the second approach, as we have a voice library that needs to interact with custom native code. When you don’t have such a requirement, it’s easier and simpler to go with the expo start command, as we don’t need to manage native code builds ourselves.
When you run the application with the npx expo run:ios command, you will see the following error:
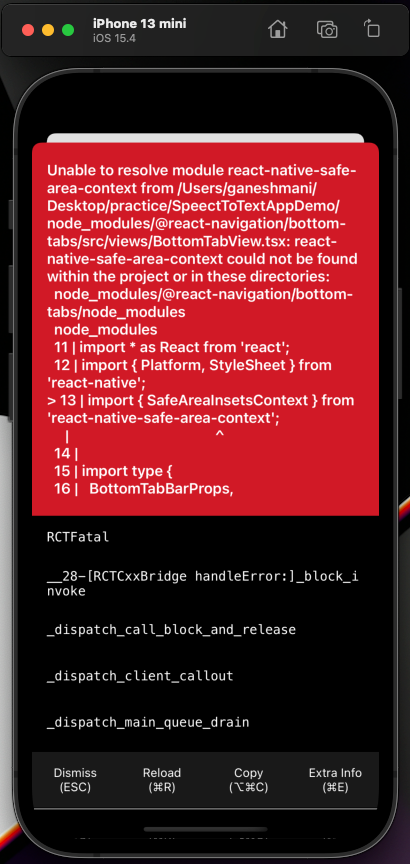
This error is because Navigation uses some core utilities we skipped installing while setting up Navigation. So, let’s install them and re-run the application:
npm install react-native-safe-area-context react-native-gesture-handler react-native-screens react-native-web
Now, we have screen navigation in our application. So, let’s integrate a voice library for speech-to-text functionality in the application.
First and foremost, install the react-native-voice library in the application, like so:
npm i @react-native-voice/voice --save
After installing the npm package, add the config plugin inside the plugin array of app.json:
{
  "expo": {
    "plugins": ["@react-native-voice/voice"]
  }
}
Then, add permissions inside the app.json configuration:
"ios": {
      "supportsTablet": true,
      "bundleIdentifier": "com.anonymous.SpeectToTextApp",
 "infoPlist": {
        "NSSpeechRecognitionUsageDescription": "This app uses speech recognition to convert your speech to text.",
        "NSCameraUsageDescription": "This app uses the camera to let user put a photo in his profile page."
      }
    },
    "android": {
      "adaptiveIcon": {
        "foregroundImage": "./assets/adaptive-icon.png",
        "backgroundColor": "#FFFFFF"
      },
      "permissions": ["android.permission.RECORD_AUDIO"],
      "package": "com.anonymous.SpeectToTextApp"
    },
Let’s build a UI integrated with the react-native-voice library in the Home component.
Just before we get into that, the UI needs some animation for record/stop functionality. So, let’s install react-native-reanimated and @motify/components to implement that:
npm i @motify/components react-native-reanimated
Add the react-native-reanimated plugin in the Babel configuration:
module.exports = function (api) {
  api.cache(true);
  return {
    presets: ["babel-preset-expo"],
    plugins: ["react-native-reanimated/plugin"],
  };
};
Once you install react-native-reanimated, implement voice recognition functionality in Record/index.tsx:
import React, { Component } from "react";
import { FontAwesome } from "@expo/vector-icons";
import { MotiView } from "@motify/components";
import {
  StyleSheet,
  Text,
  View,
  Image,
  TouchableHighlight,
} from "react-native";
import Voice, {
  SpeechRecognizedEvent,
  SpeechResultsEvent,
  SpeechErrorEvent,
} from "@react-native-voice/voice";
import { Easing } from "react-native-reanimated";
type Props = {
  onSpeechStart: () => void;
  onSpeechEnd: (result: any[]) => void;
};
type State = {
  recognized: string;
  pitch: string;
  error: string;
  end: string;
  started: boolean;
  results: string[];
  partialResults: string[];
};
class VoiceTest extends Component<Props, State> {
  state = {
    recognized: "",
    pitch: "",
    error: "",
    end: "",
    started: false,
    results: [],
    partialResults: [],
  };
  constructor(props: Props) {
    super(props);
    Voice.onSpeechStart = this.onSpeechStart;
    Voice.onSpeechRecognized = this.onSpeechRecognized;
    Voice.onSpeechEnd = this.onSpeechEnd;
    Voice.onSpeechError = this.onSpeechError;
    Voice.onSpeechResults = this.onSpeechResults;
    Voice.onSpeechPartialResults = this.onSpeechPartialResults;
    Voice.onSpeechVolumeChanged = this.onSpeechVolumeChanged;
  }
  componentWillUnmount() {
    Voice.destroy().then(Voice.removeAllListeners);
  }
  onSpeechStart = (e: any) => {
    console.log("onSpeechStart: ", e);
    this.setState({
      started: true,
    });
  };
  onSpeechRecognized = (e: SpeechRecognizedEvent) => {
    console.log("onSpeechRecognized: ", e);
    this.setState({
      recognized: "√",
    });
  };
  onSpeechEnd = (e: any) => {
    console.log("onSpeechEnd: ", e);
    this.setState({
      end: "√",
      started: false,
    });
    this.props.onSpeechEnd(this.state.results);
  };
  onSpeechError = (e: SpeechErrorEvent) => {
    console.log("onSpeechError: ", e);
    this.setState({
      error: JSON.stringify(e.error),
    });
  };
  onSpeechResults = (e: SpeechResultsEvent) => {
    console.log("onSpeechResults: ", e);
    this.setState({
      results: e.value!,
    });
  };
  onSpeechPartialResults = (e: SpeechResultsEvent) => {
    console.log("onSpeechPartialResults: ", e);
    this.setState({
      partialResults: e.value!,
    });
  };
  onSpeechVolumeChanged = (e: any) => {
    console.log("onSpeechVolumeChanged: ", e);
    this.setState({
      pitch: e.value,
    });
  };
  _startRecognizing = async () => {
    this.setState({
      recognized: "",
      pitch: "",
      error: "",
      started: false,
      results: [],
      partialResults: [],
      end: "",
    });
    try {
      await Voice.start("en-US");
      this.props.onSpeechStart();
    } catch (e) {
      console.error(e);
    }
  };
  _stopRecognizing = async () => {
    try {
      await Voice.stop();
    } catch (e) {
      console.error(e);
    }
  };
  _cancelRecognizing = async () => {
    try {
      await Voice.cancel();
    } catch (e) {
      console.error(e);
    }
  };
  _destroyRecognizer = async () => {
    try {
      await Voice.destroy();
    } catch (e) {
      console.error(e);
    }
    this.setState({
      recognized: "",
      pitch: "",
      error: "",
      started: false,
      results: [],
      partialResults: [],
      end: "",
    });
  };
  render() {
    return (
      <View style={styles.container}>
        {this.state.started ? (
          <TouchableHighlight onPress={this._stopRecognizing}>
            <View
              style={{
                width: 75,
                height: 75,
                borderRadius: 75,
                backgroundColor: "#6E01EF",
                alignItems: "center",
                justifyContent: "center",
              }}
            >
              {[...Array(3).keys()].map((index) => {
                return (
                  <MotiView
                    from={{ opacity: 1, scale: 1 }}
                    animate={{ opacity: 0, scale: 4 }}
                    transition={{
                      type: "timing",
                      duration: 2000,
                      easing: Easing.out(Easing.ease),
                      delay: index * 200,
                      repeatReverse: false,
                      loop: true,
                    }}
                    key={index}
                    style={[
                      StyleSheet.absoluteFillObject,
                      { backgroundColor: "#6E01EF", borderRadius: 75 },
                    ]}
                  />
                );
              })}
              <FontAwesome name="microphone-slash" size={24} color="#fff" />
            </View>
          </TouchableHighlight>
        ) : (
          <TouchableHighlight onLongPress={this._startRecognizing}>
            <View
              style={{
                width: 75,
                height: 75,
                borderRadius: 75,
                backgroundColor: "#6E01EF",
                alignItems: "center",
                justifyContent: "center",
              }}
            >
              <FontAwesome name="microphone" size={24} color="#fff" />
            </View>
          </TouchableHighlight>
        )}
      </View>
    );
  }
}
const styles = StyleSheet.create({
  button: {
    width: 50,
    height: 50,
  },
  container: {},
  welcome: {
    fontSize: 20,
    textAlign: "center",
    margin: 10,
  },
  action: {
    textAlign: "center",
    color: "#0000FF",
    marginVertical: 5,
    fontWeight: "bold",
  },
  instructions: {
    textAlign: "center",
    color: "#333333",
    marginBottom: 5,
  },
  stat: {
    textAlign: "center",
    color: "#B0171F",
    marginBottom: 1,
  },
});
export default Record;
@react-native-voice provides a Voice class with functionality to start and stop speech recordings and recognition. Some of the important methods are:
Voice.start("en-US");Voice.stop();Voice.cancel();Voice.destroy();Here, we have two main functions: _startRecognizing and _stopRecognizing — these are to handle the starting and stopping of the speech recognition functionality.
Another important function to note is onSpeechEnd, which passes the speech result as text to the function via props.
onSpeechEnd = (e: any) => {
    console.log("onSpeechEnd: ", e);
    this.setState({
      end: "√",
      started: false,
    });
    this.props.onSpeechEnd(this.state.results);
  };
After this, we import that voice Record component into Home/index.tsx:
import { useState, useEffect } from "react";
import {
  View,
  Text,
  TextInput,
  StyleSheet,
  Button,
  Pressable,
} from "react-native";
import Record from "../Record";
export default function Home() {
  const [speechText, setSpeechText] = useState("");
  return (
    <View style={styles.container}>
      <View style={styles.inputContainer}>
        <Text style={styles.label}>Speech Text</Text>
        <TextInput
          multiline
          style={styles.textInput}
          numberOfLines={6}
          value={speechText}
          maxLength={500}
          editable={true}
        />
        <View
          style={{
            alignItems: "flex-end",
            flex: 1,
            flexDirection: "row",
            justifyContent: "space-between",
          }}
        >
          <Button
            title="Save"
            color={"#007AFF"}
            onPress={async () => {
              console.log("save");
            }}
          />
          <Button
            title="Clear"
            color={"#007AFF"}
            onPress={() => {
              setSpeechText("");
            }}
          />
        </View>
      </View>
      <View style={styles.voiceContainer}>
        <Record
          onSpeechEnd={(value) => {
            setSpeechText(value[0]);
          }}
          onSpeechStart={() => {
            setSpeechText("");
          }}
        />
      </View>
    </View>
  );
}
const styles = StyleSheet.create({
  container: {
    flex: 1,
    flexDirection: "column",
    justifyContent: "center",
    alignItems: "center",
    width: "100%",
    backgroundColor: "#F5FCFF",
  },
  label: {
    fontWeight: "bold",
    fontSize: 15,
    paddingTop: 10,
    paddingBottom: 10,
  },
  inputContainer: {
    height: "50%",
    width: "100%",
    flex: 1,
    padding: 10,
    justifyContent: "center",
  },
  textInput: {
    padding: 10,
    borderColor: "#d1d5db",
    borderWidth: 1,
    height: 200,
    borderRadius: 5,
  },
  saveButton: {
    right: 0,
  },
  voiceContainer: {
    height: "50%",
    width: "100%",
    alignItems: "center",
    justifyContent: "space-around",
  },
});

Now, we can access the results in speechText, inside Home/index.tsx. Let’s implement save functionality to store it in the database. We are going to use a fake JSON server for API mocking by using the following command:
json-service -watch db.json
Create db.json and add the structure for it:
{
  "notes": []
}
We will use react-query in our application for data fetching and API calls.
npm install react-query axios
To create and fetch notes, we can create custom hooks to handle the query and mutation:
hooks/useCreateNote.tsimport { QueryClient, useMutation } from "react-query";
import axios from "axios";
const createNote = async (note: string) => {
const { data } = await axios.post("http://localhost:3000/notes", {
note,
});
return data;
};
const useCreateNote = () =>
useMutation(createNote, {
onSuccess: (response) => {
},
});
export default useCreateNote;
hooks/useNotes.tsimport { useQuery } from "react-query";
import axios from "axios";
const fetchNotes = async () => {
const { data } = await axios.get("http://localhost:3000/notes");
return data;
};
const useNotes = () => useQuery("notes", fetchNotes);
export default useNotes;
Add useCreateNote hooks inside Home/index.tsx.
import { useState, useEffect } from "react";
import {
  View,
  Text,
  TextInput,
  StyleSheet,
  Button,
  Pressable,
} from "react-native";
import { useMutation, useQueryClient } from "react-query";
import useCreateNote from "../../hooks/useCreateNote";
import Record from "../Record";
export default function Home() {
  const [speechText, setSpeechText] = useState("");
  const { mutate, isError, isLoading, isSuccess } = useCreateNote();
  const queryClient = useQueryClient();
  useEffect(() => {
    if (isSuccess) {
      setSpeechText("");
      queryClient.invalidateQueries(["notes"]);
    }
  }, [isSuccess]);
  return (
    <View style={styles.container}>
      <View style={styles.inputContainer}>
        <Text style={styles.label}>Speech Text</Text>
        <TextInput
          multiline
          style={styles.textInput}
          numberOfLines={6}
          value={speechText}
          maxLength={500}
          editable={true}
        />
        <View
          style={{
            alignItems: "flex-end",
            flex: 1,
            flexDirection: "row",
            justifyContent: "space-between",
          }}
        >
          <Button
            title="Save"
            color={"#007AFF"}
            onPress={async () => {
              console.log("save");
              try {
                await mutate(speechText);
              } catch (e) {
                console.log(e);
              }
            }}
          />
          <Button
            title="Clear"
            color={"#007AFF"}
            onPress={() => {
              setSpeechText("");
            }}
          />
        </View>
      </View>
      <View style={styles.voiceContainer}>
        <Record
          onSpeechEnd={(value) => {
            setSpeechText(value[0]);
          }}
          onSpeechStart={() => {
            setSpeechText("");
          }}
        />
      </View>
    </View>
  );
}
const styles = StyleSheet.create({
  container: {
    flex: 1,
    flexDirection: "column",
    justifyContent: "center",
    alignItems: "center",
    width: "100%",
    backgroundColor: "#F5FCFF",
  },
  label: {
    fontWeight: "bold",
    fontSize: 15,
    paddingTop: 10,
    paddingBottom: 10,
  },
  inputContainer: {
    height: "50%",
    width: "100%",
    flex: 1,
    padding: 10,
    justifyContent: "center",
  },
  textInput: {
    padding: 10,
    borderColor: "#d1d5db",
    borderWidth: 1,
    height: 200,
    borderRadius: 5,
  },
  saveButton: {
    right: 0,
  },
  voiceContainer: {
    height: "50%",
    width: "100%",
    alignItems: "center",
    justifyContent: "space-around",
  },
});
Add the following code inside Note/index.tsx:
import React from "react";
import {
  View,
  StyleSheet,
  FlatList,
  TouchableOpacity,
  Text,
} from "react-native";
import useNotes from "../../hooks/useNotes";
export const Posts = ({}) => {
  const { data, isLoading, isSuccess } = useNotes();
  console.log(data);
  return (
    <View style={styles.container}>
      {isLoading && (
        <React.Fragment>
          <Text>Loading...</Text>
        </React.Fragment>
      )}
      {isSuccess && (
        <React.Fragment>
          <Text style={styles.header}>All Notes</Text>
          <FlatList
            data={data}
            style={styles.wrapper}
            keyExtractor={(item) => `${item.id}`}
            renderItem={({ item }) => (
              <TouchableOpacity onPress={() => {}} style={styles.post}>
                <View style={styles.item}>
                  <Text style={styles.postTitle}>{item.note}</Text>
                </View>
              </TouchableOpacity>
            )}
          />
        </React.Fragment>
      )}
    </View>
  );
};
const styles = StyleSheet.create({
  container: {
    flex: 1,
    // backgroundColor: colors.white,
    padding: 10,
  },
  wrapper: {
    flex: 1,
    paddingVertical: 30,
  },
  item: {
    paddingVertical: 10,
    paddingHorizontal: 20,
  },
  header: {
    textAlign: "center",
    textTransform: "capitalize",
    fontWeight: "bold",
    fontSize: 30,
    // color: colors.primary,
    paddingVertical: 10,
  },
  post: {
    // backgroundColor: colors.primary,
    padding: 15,
    borderRadius: 10,
    marginBottom: 20,
  },
  postTitle: {
    color: "#000",
    textTransform: "capitalize",
  },
});
export default Posts;
Here, we fetch the data using the useNotes hook and render them inside a FlatList.
In this article, we have covered how to build a speech-to-text dictation application using React Native.
When you build a mobile application that needs hardware access or access to core libraries, it’s important to understand how to access those resources using a mobile framework like React Native.
We looked into these in detail in this article and I hope you now have a greater understanding of how to implement them in your projects moving forward. You can find the complete source code here.

LogRocket is a React Native monitoring solution that helps you reproduce issues instantly, prioritize bugs, and understand performance in your React Native apps.
LogRocket also helps you increase conversion rates and product usage by showing you exactly how users are interacting with your app. LogRocket's product analytics features surface the reasons why users don't complete a particular flow or don't adopt a new feature.
Start proactively monitoring your React Native apps — try LogRocket for free.
Hey there, want to help make our blog better?
Join LogRocket’s Content Advisory Board. You’ll help inform the type of content we create and get access to exclusive meetups, social accreditation, and swag.
Sign up now
Get to know RxJS features, benefits, and more to help you understand what it is, how it works, and why you should use it.

Explore how to effectively break down a monolithic application into microservices using feature flags and Flagsmith.

Native dialog and popover elements have their own well-defined roles in modern-day frontend web development. Dialog elements are known to […]

LlamaIndex provides tools for ingesting, processing, and implementing complex query workflows that combine data access with LLM prompting.


One Reply to "Build a React Native speech-to-text dictation app"
Hi there ! when I run ios and android.
I got error as below , If you don’t mind , would you let me know the solutions. Thank You.
** About The / Speech-to-text dictation app **
==================
Reloading apps
iOS Bundling complete 3500ms
ERROR [Reanimated] Couldn’t determine the version of the native part of Reanimated. Did you forget to re-build the app after upgrading react-native-reanimated? If you use Expo Go, you must use the exact version which is bundled into Expo SDK.
ERROR Invariant Violation: Your JavaScript code tried to access a native module that doesn’t exist.
If you’re trying to use a module that is not supported in Expo Go, you need to create a development build of your app. See https://docs.expo.dev/development/introduction/ for more info.
ERROR Invariant Violation: Failed to call into JavaScript module method AppRegistry.runApplication(). Module has not been registered as callable. Registered callable JavaScript modules (n = 11): Systrace, JSTimers, HeapCapture, SamplingProfiler, RCTLog, RCTDeviceEventEmitter, RCTNativeAppEventEmitter, GlobalPerformanceLogger, JSDevSupportModule, HMRClient, RCTEventEmitter.
A frequent cause of the error is that the application entry file path is incorrect. This can also happen when the JS bundle is corrupt or there is an early initialization error when loading React Native.
=================