Editor’s note: This post was last updated on 30 August 2021 to improve code, images, and any outdated information. However, it may still contain information that is out of date.

A progress bar, sometimes referred to as a progress indicator, is a visual representation of a task’s progress. This can include operations like downloading, file transfers or uploads, installations, program executions, or completed steps in profile setup.
Software with a UX that integrates progress bars lets users know if there are processes running, expected run times, and when portions of work are complete.
Progress bars can be determinate or indeterminate. Determinate progress bars show completed and incomplete data while indeterminate progress bars are used when metrics can’t be immediately determined.
In this article, we will learn how to build a determinate progress bar for React Native.
While there are a few React Native packages for progress bars already, such as react-native-progress-bar-animated and react-native-progress, ultimately, it comes down to personal preferences and creating something that you can tweak to meet your requirements.
React Native also has a progress bar component, ProgressBarAndroid, which is only available for Android. If you want your iOS app to have a progress bar, you must use an existing npm package or build one yourself.
This article assumes that you are familiar with React Native or, at the very least, React, and React Hooks.
To get started, use Expo CLI or React Native CLI to bootstrap your project. For the purposes of this article, we will use Snack, which allows us to try React Native directly in a web browser.
We will make our changes in the App.js file. Let’s clear what we already have and add the following code to App.js:
import React, { useEffect, useState, useRef } from 'react';
import { Text, View, StyleSheet } from 'react-native';
import Constants from 'expo-constants';


const App = () => {
 return (
   <View style={styles.container}>
     <Text>
       We Will Start Here
     </Text>
   </View>
 );
}

export default App;

const styles = StyleSheet.create({
 container: {
   flex: 1,
   justifyContent: 'center',
   alignItems: 'center',
   paddingTop: Constants.statusBarHeight,
   backgroundColor: '#ecf0f1',
   padding: 8,
 },
});
This renders the View component with some text in it. The device simulator should update automatically.

Before we start building the progress bar, we must determine what it will look like and what we need to show. A simple progress bar usually has descriptive text, like loading, and the actual bar representing the progress of the operation.
We must also add some text that shows what percentage of the operation is complete. Let’s create the skeleton of our progress bar. In our App.js, change the text in our Text component to Loading.....:
<Text>
  Loading.....
</Text>
We want the Loading..... text to be above the progress bar and the completion percentage below the bar. So, change the container styling to align the child components in a column.
Let’s add the flexDirection: 'Column' property to our container styles. Below this, add the following styles to a new styles object called progressBar:
<View style={styles.container}>
  <Text>
    Loading.....
  </Text>
  <View style={styles.progressBar}></View>
</View>

const styles = StyleSheet.create({
  container: {
   flex: 1,
   flexDirection: "column", //column direction
   justifyContent: 'center',
   alignItems: 'center',
   paddingTop: Constants.statusBarHeight,
   backgroundColor: '#ecf0f1',
   padding: 8,
 },
  progressBar: {
   height: 20,
   width: '100%',
   backgroundColor: 'white',
   borderColor: '#000',
   borderWidth: 2,
   borderRadius: 5
 }
});
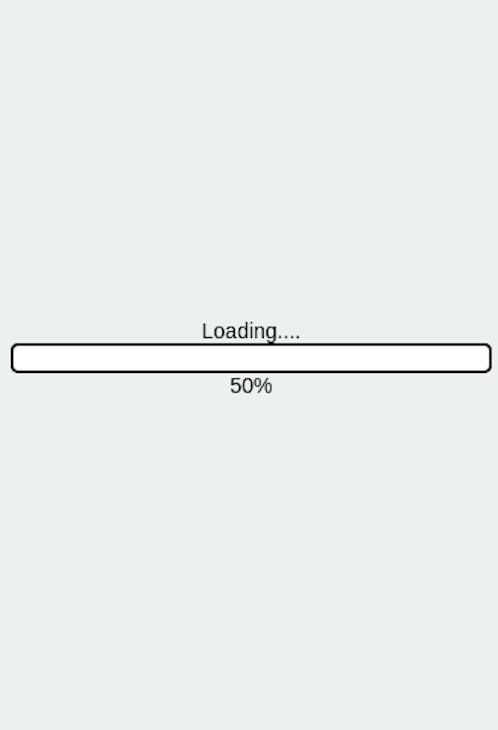
To display the current progress of a task’s execution, add a text field with the percentage completion below the progress bar. We can hardcode it at 50% for now:
<View style={styles.container}>
  <Text>
    Loading.....
  </Text>
  <View style={styles.progressBar}></View>
  <Text>50%</Text>
</View>
Here is what our progress bar should look like so far:
We can now start working on the actual progress bar. By adding a child View to the View progress bar container, the child View shows the percentage of progress. Since we must align the child View across the horizontal plane, the progress bar container needs the styling property flexDirection:"Row".
Add this property to the progressBar styles. In the end, your progressBar styles should look like this:
progressBar: {
   height: 20,
   flexDirection: "row",
   width: '100%',
   backgroundColor: 'white',
   borderColor: '#000',
   borderWidth: 2,
   borderRadius: 5
 }
Our objective is to have an animated View that will use the StyleSheet.absoluteFill object. This creates an overlay with position absolute with zero positioning.
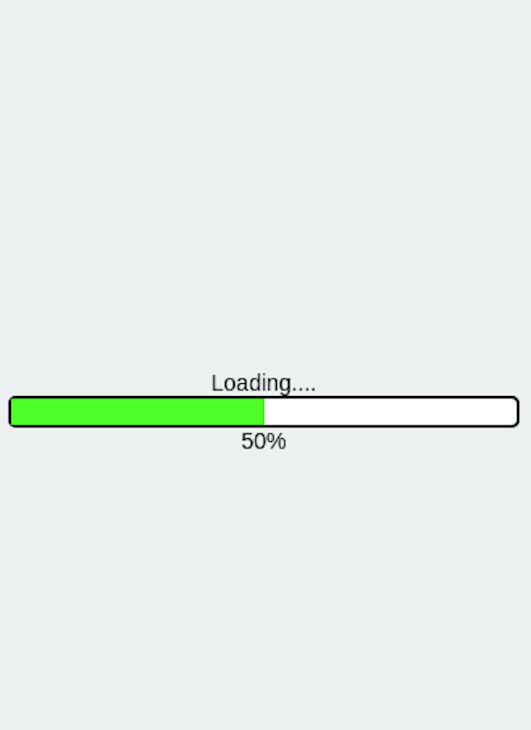
Moreover, we must give the View a fill color. We’ll use a shade of green and add a width of 50%:
<View style={styles.progressBar}>
  <Animated.View style={[StyleSheet.absoluteFill], {backgroundColor: "#8BED4F", width: “50%”}}/>
</View>
Here, we used the Animated.View component, meaning this element can perform animations.
Our app now looks like this:
For our progress bar to show changing completion, we must add a counter. The easiest way to do this is by using setInterval:
const countInterval = useRef(null);
  const [count, setCount] = useState(0);

  useEffect(() => {
    countInterval.current = setInterval(() => setCount((old) => old + 5), 1000);
    return () => {
      clearInterval(countInterval); //when user exits, clear this interval.
    };
  }, []);
In this piece of code, we told React to increment the count Hook by 5 every second. This occurs as soon as the component mounts to the DOM.
To begin animating our progress bar, we must create an animated value by using the useRef Hook. This will help in animating our loader value:
const loaderValue = useRef(new Animated.Value(0)).current;
const load = (count) => {
    Animated.timing(loaderValue, {
      toValue: count, //final value
      duration: 500, //update value in 500 milliseconds
      useNativeDriver: true,
    }).start();
};
In this block of code, we used the Animated API to change the value of loaderValue to count in half a second. The Animated.timing() method takes the current value of the animation ref and a configuration object. The animation then runs by calling start(). Furthermore, we also used the useNativeDriver property, which provides a smoother user interface.
Next, add the following snippet:
useEffect(() => {
    load(count)
    if (count >= 100) {
      setCount(100);
      clearInterval(countInterval);
    }
  }, [count]);
A few inferences from this code:
count changes, invoke the load method to run the animationcount Hook exceeded 100. If this condition is true, React removes this interval and stops incrementing the state variableNext, set a width for the progress bar by creating an interpolated value from the animation:
const width = animation.current.interpolate({
  inputRange: [0, 100],
  outputRange: ["0%", "100%"],
  extrapolate: "clamp"
})
TheinputRange property represents the range of values that we receive from the progress. The outputRange defines the range of values that output.
Typically, an interpolation maps input ranges to output ranges using a linear interpolation. By default, it extrapolates the curve beyond the ranges given. To ensure that the output values do not extend beyond the provided range, we pass a property extrapolate "clamp" to the configuration object.
Now, pass out the interpolated width to the animated progress bar:
<View style={styles.progressBar}>
  <Animated.View style={[StyleSheet.absoluteFill], {backgroundColor: "#8BED4F", width }}/>
</View>
The percentage progress value that we hardcoded earlier must now match the updating progress bar. Since our values range from 0 to 100, let’s construct the text using a template string:
<View style={styles.container}>
  ...
  <View style={styles.progressBar}>
    ...
  </View>
  <Text>{`${progress}%`}</Text>
</View>
And there we have it; our progress bar is complete!
This is by no means a perfect progress bar and there are many improvements that can be made to it, especially regarding animation. To challenge yourself further, you can try uploading a file and displaying the progress.
If you have any questions, comments, or feedback, please let me know. You can find me on Twitter.

LogRocket's Galileo AI watches sessions for you and and surfaces the technical and usability issues holding back your React Native apps.
LogRocket also helps you increase conversion rates and product usage by showing you exactly how users are interacting with your app. LogRocket's product analytics features surface the reasons why users don't complete a particular flow or don't adopt a new feature.
Start proactively monitoring your React Native apps — try LogRocket for free.
Hey there, want to help make our blog better?
Join LogRocket’s Content Advisory Board. You’ll help inform the type of content we create and get access to exclusive meetups, social accreditation, and swag.
Sign up now
Which AI frontend dev tool reigns supreme in July 2025? Check out our power rankings and use our interactive comparison tool to find out.

Learn how OpenAPI can automate API client generation to save time, reduce bugs, and streamline how your frontend app talks to backend APIs.

Discover how the Interface Segregation Principle (ISP) keeps your code lean, modular, and maintainable using real-world analogies and practical examples.

<selectedcontent> element improves dropdowns

 Find the final product here.

3 Replies to "Build a React Native progress bar"
Nice, but would be great to see someone try to tackle this with `useNativeDriver`, because otherwise the animation will just be choppy
Your timer won’t be cleared.
Need to add clearInterval(countInterval.current) instead clearInterval(countInterval)
First of all thank you for the above treasure.
What is the variable “animation” please specify.