Interactivity can be complicated to implement on a blog without using specific libraries that enable it. These libraries provide a simple interface for interacting with various parts of the blog.

People set up blogs for various reasons, ranging from building documentation for a package, library or framework, to writing a personal blog. Many of these blogs also display various ways to use their tools using code snippets that are static and are not interactive.
In this article, I will introduce a way to make code examples more interactive on a blog using Sandpack, CodeSandbox’s newly open-sourced component toolkit for interactive code samples. We will build a blog with React and use Sandpack to make it interactive.
This tutorial assumes that you have the following:
Sandpack is a component toolkit that can be used for creating and displaying live coding samples. It is an open source tool built and maintained by the team behind CodeSandbox — it is actually the same in-browser bundler that powers CodeSandbox.
Sandbox includes the following features:
Sandpack has quickly gained acceptance in the tech ecosystem since its release in December 2021, and it’s already being used on some platforms! You can see it in action at the following places:
Before we start building our blog, let’s review some of the important Sandpack concepts.
These concepts include a brief overview of the sandpack-react package and some of its components. You can check out the full list of Sandpack components and properties in their documentation.
Before we start, let’s bootstrap a React application in which we will demo Sandpack and later use it for building our blog.
We’ll use Vite to bootstrap our React application.
# npm 6.x
npm init vite@latest sandpack-blog --template react

# npm 7+, extra double-dash is needed:
npm init vite@latest sandpack-blog -- --template react
This command creates a React application named sandpack-blog. Once the application has been created successfully, switch into the application directory using:
# switch into app directory
cd sandpack-blog
Install all dependencies using the npm install command.
sandpack-reactnpm i @codesandbox/sandpack-react
Once we are done installing the dependencies, we can run our app.
npm run dev
On your browser, navigate to localhost:3000. If the React application has been created correctly, you should see this in your browser:

Now, let’s review the major Sandpack components we will be using in our project.
The Sandpack component is a preset component. It wraps other individual sandpack components and provides us with a preconfigured component that is ready to be used. This means the Sandpack component requires little to no configuration.
Let’s see how it works in our React app. Open the bootstrapped application in your favorite code editor, go to /src/App.jsx, and replace what we have there with the following:
import React from 'react';
import { Sandpack } from "@codesandbox/sandpack-react";
import "@codesandbox/sandpack-react/dist/index.css";

function App() {
  return (
    <>
      <h1>My Sandpack blog</h1>
      <Sandpack />
    </>
  )
}
export default App;
This should render a Sandpack editor and a preview panel for us. The code in the code editor is a vanilla JavaScript code template, which is the default template used by the Sandpack component.
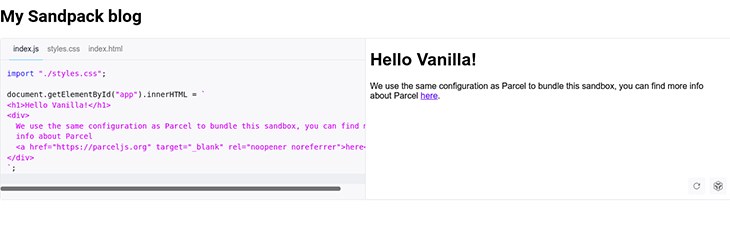
Let’s go over the code in our /src/App.jsx;
import React from 'react';
import { Sandpack } from "@codesandbox/sandpack-react";
import "@codesandbox/sandpack-react/dist/index.css";
Here, we import React, Sandpack, and the Sandpack css style sheet which includes styling for the standard Sandpack components.
function App() {
  return (
    <>
      <h1>My Sandpack blog</h1>
      <Sandpack />
    </>
  )
}
export default App;
Here, we have our functional App component, which contains a fragment that wraps the <h1> and the Sandpack component. Fragments enable us to return multiple elements without adding extra nodes to the DOM.
Sandpack accepts various props for customizing the editor. Let’s look at a few of them:
template: The template prop enables us to specify the predefined template we want our app to use. Sandpack presently supports the following templates:
"vanilla" — this is the default"angular""react""react-ts""vanilla-ts""vue""vue3""svelte"theme: The theme prop enable us to change the theme of the code editor we are using. Sandpack presently comes with the following predefined templates:
"light" — this is the default"dark""sandpack-dark""night-owl""aqua-blue""github-light""monokai-pro"options: The option prop enables us to configure some of the internal components of Sandpack. It accepts a lot of different options; let’s look at a few of them:
showLineNumbers: toggles the editor’s line numbers; you can pass either true or false, but it’s false by defaultshowInlineErrors: highlights inline errors; you can pass either true or falseshowTabs: toggles the visibility of the file tabs on the editor; you can pass either true or false. File tabs are only shown by default if more than one file is open, and the showTabs props can be used to force the visibility of the tabsexternalResources: an array of external resources, such as static links to external CSS or JS resources, that are injected into the head of your HTML and are then globally availablecustomSetup: enables us to have a custom Sandpack configuration; if we don’t want to make use of Sandpack's predefined template, we can make our ownfiles: this is an object containing all custom files to be used in the editor. The file path is set as the key and the code as the valuedependencies: this is a dependency object that contains a list of in-use npm packages. The key should be the name of the package, while the value is the version, in exactly the same format as it would be inside package.json
...
<Sandpack
...
customSetup={{
  files: {
    '/App.js' : `
      export default function App() {
        return <h1>Custom setup</h1>
      }
    `
  },
  dependencies: {
    react: "17.0.2",
    "@mdx-js/mdx": "^1.6.22",
  }
}}
/>
...
Let’s continue to build our blog now that we have a basic understanding of how Sandpack works. You can check out this CodeSandbox demo for various configurations.
We will be using MDX to build our blog. MDX is a markdown language that enables us to use JSX, which allows us to use reusable components in our markdown.
We’ll cover the following steps:
MDX pluginsMDXInstall the following dependencies in our bootstrapped React application:
@mdx-js/rollup: This is the MDX plugin that serves as the bundler for Vite
npm install @mdx-js/rollup@next
@mdx-js/react: This serves as a context-based component provider for combining React with MDX that enables us to pass all our components at one point, so we don’t have to import them into all our MDX files. It is not compulsory as components can be imported directly into each file
npm install @mdx-js/react@next
react-router-dom: This is used to create a router in React
npm install react-router-dom@6
unist-util-visit: This is a unist utility that we’ll use to create a plugin for MDX so we can use metadata from our code
npm install unist-util-visit
@vitejs/plugin-react-refresh: This is another Vite plugin that is easier to use with mdx than the default Vite plugin that comes with the bootstrapped app
npm install -D @vitejs/plugin-react-refresh
MDX pluginsWe will be configuring the MDX plugins now. This enables Vite to understand the mdx syntax.
Add the following lines of code to the vite.config.js file:
import { defineConfig } from "vite";
import reactRefresh from '@vitejs/plugin-react-refresh';
import mdx from "@mdx-js/rollup";
import { visit } from "unist-util-visit";

function rehypeMetaAsAttributes() {
  return (tree) => {
    visit(tree, "element", (node) => {
      if (node.tagName === "code" && node.data && node.data.meta) {
        node.properties.meta = node.data.meta;
      }
    });
  };
};

// https://vitejs.dev/config/
export default defineConfig({
  plugins: [
    reactRefresh(),
    mdx({
      rehypePlugins: [rehypeMetaAsAttributes],
      providerImportSource: "@mdx-js/react",
    }),
  ],
});
Three things are happening here:
rehypeMetaAsAttributes that enables us to set metadata we can pass to code blocks to the properties of the compiled code. We will see the importance of this later when we create our Sandpack componentAt this point, our app might be breaking with an error: Error [ERR_REQUIRE_ESM]. This is because the mdx package is published as an ES module only.
So, to make this work for us, we can solve this using a few different methods:
We could add a module type to our package.json file:
{
  "name": "sandpack-blog",
  "version": "0.0.0",
  "type" : "module",
  "scripts": {
    ...
  },
  "dependencies": {
    ...
  },
  "devDependencies": {
    ...
  }
}
Or, we could change the name of the vite.config.js file to vite.config.mjs.
Either of the above options work, but I will be using the first.
We will have two main folders that hold our project. The first is the components folder, where we will be building our reusable components, and the second is the pages folder, which contains all our pages.
Add the following folders to the src folder:
src
├── components
|  ├── Blog
|  |  |  └── index.jsx
|  ├── CodeEditor
|  |  |  └── index.jsx
|  ├── ErrorBoundary
|  |  |  └── index.jsx
|  └── Navbar
|  |  |  └── index.jsx
├── pages
|  ├── blog
|  |  ├──Blogs.jsx
|  |  ├── intro-to-react.mdx
|  |  ├── javascript-classes.mdx
|  |  ├── index.js
|  |  └── intro-to-tailwind.mdx
   └── index.mdx
Now, we fill up the files with content that will make up our blog. In the /App.jsx file, add the following;
import React from 'react';
import {
  BrowserRouter,
  Routes,
  Route,
} from "react-router-dom";
import "@codesandbox/sandpack-react/dist/index.css";
import Home from './pages/index.mdx'
import Blogs from './pages/blog/Blogs.jsx'
import { MDXProvider } from '@mdx-js/react';
import CodeEditor from './components/CodeEditor';
import Blog from './components/Blog';
import Navbar from './components/Navbar'
import './App.css'

function App() {
  const components = {
  CodeEditor
}

  return (
  <main>
    <MDXProvider components={components}>
      <BrowserRouter>
        <Navbar />
        <Routes>
          <Route path="/" element={<Home />} />
          <Route path="blog">
            <Route path="" element={<Blogs />} />
            <Route path=":title" element={<Blog />}/>
          </Route>
          <Route path="*" element={<p>404</p>}/>
        </Routes>
      </BrowserRouter>
    </MDXProvider>
  </main>
  );
}

export default App;
First, we import our package and files, then we create a router. This router will enable us to navigate to different routes. We also have the MDXProvider, which is the provider for MDX. We are passing our blog components to it so we don’t have to import them in each MDX file.
In the /components/Navbar/index.jsx file, add the following;
import React, { Component } from 'react';
import { NavLink } from "react-router-dom";


const Nav = () => {
  let activeStyle = {
    fontWeight: 'bold',
    color: 'black',
    fontSize: '18px'
  };

    return (
      <nav className="navbar">
        <h1>My Blog</h1>
        <div>
          <NavLink
            to='/'
            style={({ isActive }) =>
              isActive ? activeStyle : undefined
            }
          >
            Home
          </NavLink>

          <NavLink
            to='/blog'
            style={({ isActive }) =>
              isActive ? activeStyle : undefined
            }
          >
            Blog
          </NavLink>
        </div>
      </nav>
    )
}

export default Nav;
This creates our Navbar. We first imported all packages here, then we created the Nav. The NavLink component we imported from react-router-dom is used to create our navigation links.
In the /components/Blog/index.jsx file, add the following;
import React, { lazy, Suspense } from 'react';
import { useParams } from "react-router-dom";
import ErrorBoundary from '../ErrorBoundary'

export default function Blog(){
  let { title } = useParams();

  const Blog = lazy(()=> import(`../../pages/blog/${title}.mdx`))

  return(
    <ErrorBoundary fallback={<p>404</p>}>
      <Suspense fallback={<p>Loading.....</p>}>
        <Blog />
      </Suspense>
    </ErrorBoundary>
  )
}
This component will dynamically fetch our posts for us and render them. Here, we import our packages, then we create the blog component. Using the useParams Hooks, we get the title params from each post URL.
The title serves as the name of each of the files, and we are able to lazy-load it dynamically using React’s Lazy component. We also have our ErrorBoundary, which serves as the fallback if an error occurs or the title doesn’t exist. Suspense also serves as a fallback during lazy loading.
In the /components/ErrorBoundary/index.jsx file, add the following;
import React from "react";
import ReactDOM from "react-dom";

class ErrorBoundary extends React.Component {
    constructor(props) {
    super(props);
    this.state = { error: false };
  }
  static getDerivedStateFromError(error) {
    return { error };
  }

  componentDidCatch(error) {
    // Log or store the error
    console.error(error);
  }

  render() {
    if(this.state.error){
      return this.props.fallback
    }
    return this.props.children;
  }
}

export default ErrorBoundary;
This is the ErrorBoundary component that lets us catch errors anywhere in our component tree and display a fallback UI. It’s important for our implementation because the user might enter a wrong or nonexistent title in the URL. If an error is thrown, our component handles it and displays a fallback. You can read more about the ErrorBoundary in the React documentation.
In the /components/CodeEditor/index.jsx file, add the following;
import React from "react";
import { nightOwlTheme, Sandpack } from "@codesandbox/sandpack-react";

export default function CodeEditor(props) {
  let { children, template = "react", externalResources = [] } = props;

  // convert the children to an array
  let codeSnippets = React.Children.toArray(children);

  // using the array.reduce method to reduce the children to an object containing
  // filename as key then other properties like the code, if the file is hidden as
  // properties
  const files = codeSnippets.reduce((result, codeSnippet) => {
    if (codeSnippet.type !== "pre") {
      return result;
    }

    const { props } = codeSnippet.props.children;
    let filePath; // path in the folder structure
    let fileHidden = false; // if the file is available as a tab
    let fileActive = false; // if the file tab is shown by default

    if (props.meta) {
      // get our metadata from the prop
      const [name, ...params] = props.meta.split(" ");
      filePath = (template === "react" ? "/" : "/src/") + name;
      if (params.includes("hidden")) {
        fileHidden = true;
      }
      if (params.includes("active")) {
        fileActive = true;
      }
    } else {
      // if no name is given to the file, we give them defaults based on
      // the language
      if (props.className === "language-js") {
        filePath = "/App.js";
      } else if (props.className === "language-css") {
        filePath = "/styles.css";
      } else if (props.className === "language-vue") {
        filePath = "/src/App.vue";
      } else {
        throw new Error(`Code block is missing a filename: ${props.children}`);
      }
    }

    if (result[filePath]) {
      throw new Error(
        `File ${filePath} was defined multiple times. Each file snippet should have a unique path name`
      );
    }

    result[filePath] = {
      code: props.children,
      hidden: fileHidden,
      active: fileActive,
    };
    return result;
  }, {});

  return (
    <Sandpack
      template={template}
      theme={nightOwlTheme}
      customSetup={{
        files,
        dependencies: {},
      }}
      options={{
        showLineNumbers: true,
        showInlineErrors: false,
        showTabs: true,
        externalResources,
      }}
    />
  );
}
This is the CodeEditor component that will be used in our blogs. The file starts with an import of all packages used. Then in the component, we destructure our props.
The children props, which hold the content inside a React component, will be the content of our code editor depending on what we pass to it. This means we can use our CodeEditor component by directly passing the code in between its tag; everything in between the tag is the children.
// line 3 to 15 is the children in this example
<CodeEditor>
```js App.js
import React from 'react';
import ReactDOM from 'react-dom';

export default function App() {
  return (
    <div>
      <h1>Hello World</h1>
    </div>
  );
}

```
</CodeEditor>
The template prop is the template of our code editor, same as with the Sandbox template above. By default, it’s set to react, so if nothing is passed, react is used. The externalResources prop takes an array of all external resources used.
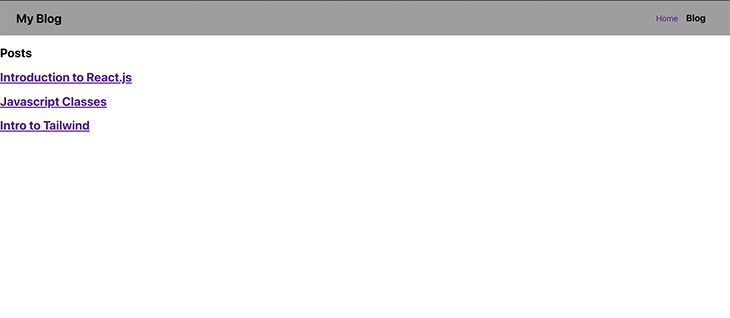
mdxNow, we can start writing our posts in Markdown and see the result of each page. In the /pages/index.mdx file, add the following:
# Home

Lorem ipsum dolor sit amet, consectetur adipiscing elit. Suspendisse nec arcu a felis hendrerit blandit. Integer orci libero, gravida sit amet enim et, tempor mattis diam. Donec augue ipsum, semper ac elit mollis, posuere maximus turpis. Pellentesque faucibus varius vulputate. Sed placerat mi tincidunt diam ullamcorper, aliquam tincidunt nisl sagittis. Nunc velit est, vulputate non purus vitae, vehicula finibus lacus. Curabitur blandit efficitur dignissim. In hac habitasse platea dictumst. Etiam volutpat eleifend tortor, nec cursus turpis aliquet ac. Fusce eget suscipit nisi.

Duis commodo pretium metus, ac pulvinar justo lobortis quis. Lorem ipsum dolor sit amet, consectetur adipiscing elit. Integer ullamcorper luctus eros in aliquam. Integer congue urna vitae quam rhoncus tristique. Vestibulum semper, arcu nec pellentesque gravida, sapien tortor feugiat purus, at auctor elit mauris ut purus. Quisque odio nibh, elementum vitae tellus hendrerit, vestibulum placerat ex. Duis non sapien ante.

## Section 2

Nunc ultrices tellus consequat, eleifend neque nec, pellentesque dui. Quisque hendrerit scelerisque dui, nec sagittis quam varius ac. Nunc eget vulputate neque. Morbi a vulputate sapien. Sed non tristique elit, eu rutrum nulla. Sed fringilla diam eu tempus tincidunt. Lorem ipsum dolor sit amet, consectetur adipiscing elit.
This page displays a list of all posts on the /blog route.
In the /pages/blog/intro-to-react.mdx file, add the following:
export const meta = {
title: 'Introduction to React.js',
description: 'Getting started with React framework',
date: 'Jan 02, 2022',
readTime: 2,
file: 'intro-to-react'
}
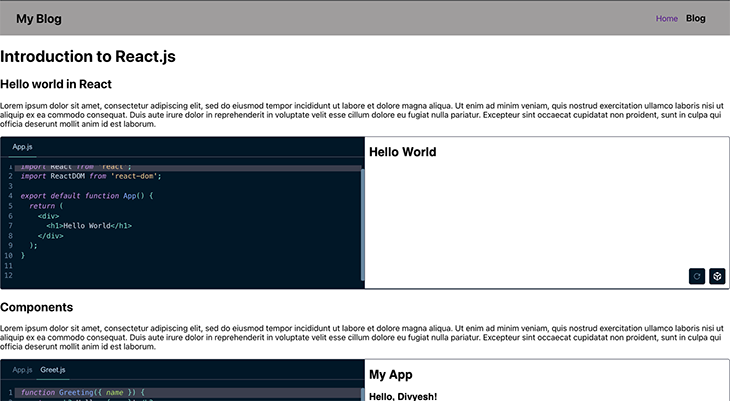
# {meta.title}
## Hello world in React
Lorem ipsum dolor sit amet, consectetur adipiscing elit, sed do eiusmod tempor incididunt ut labore et dolore magna aliqua. Ut enim ad minim veniam, quis nostrud exercitation ullamco laboris nisi ut aliquip ex ea commodo consequat. Duis aute irure dolor in reprehenderit in voluptate velit esse cillum dolore eu fugiat nulla pariatur. Excepteur sint occaecat cupidatat non proident, sunt in culpa qui officia deserunt mollit anim id est laborum.
<CodeEditor>
```js
import React from 'react';
import ReactDOM from 'react-dom';
export default function App() {
return (
<div>
<h1>Hello World</h1>
</div>
);
}
```
</CodeEditor>
## Components
Lorem ipsum dolor sit amet, consectetur adipiscing elit, sed do eiusmod tempor incididunt ut labore et dolore magna aliqua. Ut enim ad minim veniam, quis nostrud exercitation ullamco laboris nisi ut aliquip ex ea commodo consequat. Duis aute irure dolor in reprehenderit in voluptate velit esse cillum dolore eu fugiat nulla pariatur. Excepteur sint occaecat cupidatat non proident, sunt in culpa qui officia deserunt mollit anim id est laborum.
<CodeEditor>
```js App.js
import Greet from './Greet.js';
export default function MyApp() {
return (
<div>
<h1>My App</h1>
<Greet />
</div>
);
}
```
```js Greet.js active
function Greeting({ name }) {
return <h3>Hello, {name}!</h3>;
}
export default function Greet() {
return (
<div>
<Greeting name="Divyesh" />
<Greeting name="Sarah" />
<Greeting name="Taylor" />
</div>
);
}
```
```js Expo.js hidden
function Greeting({ name }) {
return <h1>Hello, {name}!</h1>;
}
export default function Expo() {
return (
<div>
<Greeting name="Divyesh" />
<Greeting name="Sarah" />
<Greeting name="Taylor" />
</div>
);
}
```
</CodeEditor>
## Props
<CodeEditor />
## Conclusion
Lorem ipsum dolor sit amet, consectetur adipiscing elit, sed do eiusmod tempor incididunt ut labore et dolore magna aliqua. Iaculis at erat pellentesque adipiscing commodo. Sodales ut etiam sit amet nisl purus in mollis nunc. Aliquam eleifend mi in nulla posuere sollicitudin aliquam ultrices sagittis. Tellus orci ac auctor augue mauris augue neque gravida. Risus viverra adipiscing at in tellus. Ultrices vitae auctor eu augue. Tempus urna et pharetra pharetra massa massa ultricies. Elementum facilisis leo vel fringilla. Quis blandit turpis cursus in hac habitasse. Elit duis tristique sollicitudin nibh sit amet commodo nulla facilisi. Massa id neque aliquam vestibulum morbi blandit cursus risus at. Vitae sapien pellentesque habitant morbi tristique senectus. Elementum nisi quis eleifend quam adipiscing vitae proin. Aliquam nulla facilisi cras fermentum.
In the /pages/blog/javascript-classes.mdx file, add the following:
export const meta = {
  title: "Javascript Classes",
  description: "Classes in Javascript",
  date: "Jan 01, 2022",
  readTime: 2,
  file: "javascript-classes",
};

# {meta.title}

Lorem ipsum dolor sit amet, consectetur adipiscing elit, sed do eiusmod tempor incididunt ut labore et dolore magna aliqua. Ut enim ad minim veniam, quis nostrud exercitation ullamco laboris nisi ut aliquip ex ea commodo consequat. Duis aute irure dolor in reprehenderit in voluptate velit esse cillum dolore eu fugiat nulla pariatur. Excepteur sint occaecat cupidatat non proident, sunt in culpa qui officia deserunt mollit anim id est laborum.

<CodeEditor>
```js class.js active
Class Person {
  constructor(name) {
    this.name = name;
  }
  sayName() {
    console.log(this.name);
  }
}
```
</CodeEditor>

Lorem ipsum dolor sit amet, consectetur adipiscing elit, sed do eiusmod tempor incididunt ut labore et dolore magna aliqua. Ut enim ad minim veniam, quis nostrud exercitation ullamco laboris nisi ut aliquip ex ea commodo consequat. Duis aute irure dolor in reprehenderit in voluptate velit esse cillum dolore eu fugiat nulla pariatur. Excepteur sint occaecat cupidatat non proident, sunt in culpa qui officia deserunt mollit anim id est laborum.
In the /pages/blog/intro-to-tailwind.mdx file, add the following:
export const meta = {
title: "Intro to Tailwind",
description: "Tailwind CSS",
date: "Jan 01, 2022",
readTime: 2,
file: "intro-to-tailwind",
};
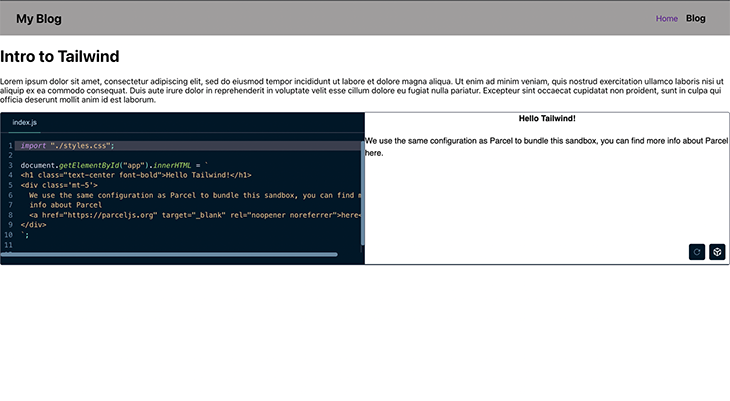
# {meta.title}
Lorem ipsum dolor sit amet, consectetur adipiscing elit, sed do eiusmod tempor incididunt ut labore et dolore magna aliqua. Ut enim ad minim veniam, quis nostrud exercitation ullamco laboris nisi ut aliquip ex ea commodo consequat. Duis aute irure dolor in reprehenderit in voluptate velit esse cillum dolore eu fugiat nulla pariatur. Excepteur sint occaecat cupidatat non proident, sunt in culpa qui officia deserunt mollit anim id est laborum.
<CodeEditor template="vanilla" externalResources={['https://cdn.tailwindcss.com']} >
```js index.js
import "./styles.css";
document.getElementById("app").innerHTML = `
<h1 class="text-center font-bold">Hello Tailwind!</h1>
<div class='mt-5'>
We use the same configuration as Parcel to bundle this sandbox, you can find more
info about Parcel
<a href="https://parceljs.org" target="_blank" rel="noopener noreferrer">here</a>.
</div>
`;
```
</CodeEditor>
In the /pages/blog/index.js file, add the following:
import * as post1 from './intro-to-react.mdx'
import * as post2 from './javascript-classes.mdx'
import * as post3 from './intro-to-tailwind.mdx'

export default [
  post1,
  post2,
  post3
]
This file will be where we export all our posts. We are doing this manually because we can’t read the file system on the client side, but this would be easier and can be easily made dynamic with Next.js, and Gatsby makes fetching posts easy, too.
Right now, we should have three posts, each with its own respective content.
Check out a demo on CodeSandbox and see our blog. I included a CodeViewer component in the demo, this works for situation where we only want to view the code without editing.
We have built a blog with React, MDX, and Sandpack to make our code examples more interactive. I hope you have been able to learn something new from this article!
Visit Sandpack’s official website to learn more about how to further customize your code samples.
Leave me a message in the comments if you have any questions or more insights into the topic. I would also love to see what you build.
Install LogRocket via npm or script tag. LogRocket.init() must be called client-side, not
server-side
$ npm i --save logrocket

// Code:

import LogRocket from 'logrocket';
LogRocket.init('app/id');
// Add to your HTML:

<script src="https://cdn.lr-ingest.com/LogRocket.min.js"></script>
<script>window.LogRocket && window.LogRocket.init('app/id');</script>

Learn how to set up Meilisearch, index documents, and build keyword, semantic, and hybrid search with AI-powered retrieval.

Compare pnpm and npm across security defaults, disk usage, dependency strictness, and workspace policy to decide which package manager fits your project.

I migrated 20 production-style components from Tailwind to StyleX. Here’s what the data showed about LOC, CSS bundle size, build time, and type safety.

A guide for using JWT authentication to prevent basic security issues while understanding the shortcomings of JWTs.
Would you be interested in joining LogRocket's developer community?
Join LogRocket’s Content Advisory Board. You’ll help inform the type of content we create and get access to exclusive meetups, social accreditation, and swag.
Sign up now

