Today, nearly every SaaS website or application utilizes a chatbot. Chatbots provide consistent information, round-the-clock service, and a fast response time. These tools have been shown to reduce business costs and increase customer satisfaction.

One of the primary applications for chatbots is answering a simple query, but they can also be used for many other functions:
In this article, we’ll cover how to set up a Telegram bot and then integrate it with Flask to build a customized dictionary app quickly and deploy it to Heroku.
Telegram is a multimedia online messaging application with standard core functionalities. Users are able to create group conversations, send videos and photos, message other users, and make voice and video calls to contacts.
One aspect that sets Telegram apart from other messaging platforms is that its chatbots are especially easy to set up, program, and manage. Telegram bots can be used for a variety of purposes.
To set up a Telegram bot, start by logging in to your Telegram profile. If you haven’t yet created a profile on Telegram, you can sign up here.
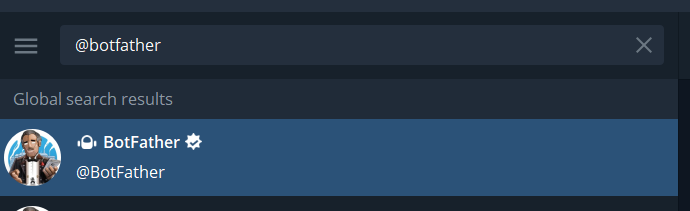
Next, look up BotFather by pasting @BotFather into Telegram’s search bar. BotFather is Telegram’s admin bot, and it enables users to create and manage bots.

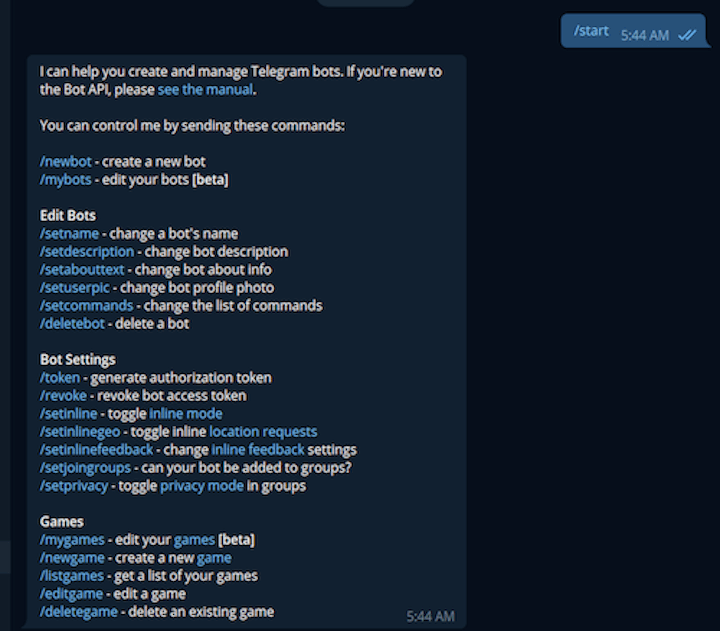
After launching BotFather, click on the START button or type the command /start in the input field of the user interface to start a conversation.
BotFather will respond to /start with a list of other commands that can be invoked to perform different operations:
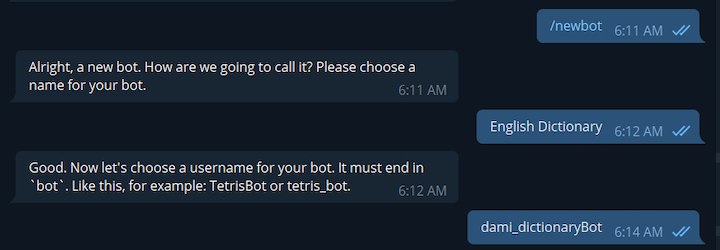
To create a new bot, type the /newbot command in the input field. BotFather will respond, asking for details about the new bot:
Next, you’ll receive a message from BotFather containing an HTTP token. Do not expose this token. Anyone with access to the token will be able to make modifications to your bot.
We’ll use this token to interact with the new bot through the Telegram API from our Flask application.
Flask is an open source Python web framework. Its light codebase makes it suitable for building web apps quickly.
For this example, we’ll build a Flask app that functions as a dictionary. Our app will receive an English word as a request and will respond with information about the word, such as its definition(s), an example, synonyms, and antonyms. For this application, we’ll utilize a free Dictionary API.
First, create a folder, Flask_Telegram, to contain the application and cd into the directory.
mkdir Flask_Telegram
cd Flask_Telegram
Install the requests library to send HTTP requests to the external Directory API:
pip install requests
Next, create a dictionary.py file that will contain the logic for providing information about the requested word. Then, add the following code snippet:
import os
import requests
from flask import Flask

app = Flask(__name__)


@app.route('/')
def get_info(word):

    url = 'https://api.dictionaryapi.dev/api/v2/entries/en/{}'.format(word)

    response = requests.get(url)

# return a custom response if an invalid word is provided
    if response.status_code == 404:
        error_response = 'We are not able to provide any information about your word. Please confirm that the word is ' \
                         'spelled correctly or try the search again at a later time.'
        return error_response

    data = response.json()[0]

    print(data)
    return data


get_info("food")


if __name__ == "__main__":
    port = int(os.environ.get('PORT', 5000))
    app.run(debug=True, host='0.0.0.0', port=port)
In the above example dictionary.py file, @app.route('/') is the entry point into the application.
When a user requests information about a word, that value is passed into the get_info() function. We then append the function to the url variable before sending the request to the dictionary API.
Before performing any additional operations, we first check if the request is a valid English word. A successful request to the dictionary API returns JSON data in the form of a list. We then extract the JSON data from the list and return it to the client. However, in the case of an invalid word request, a 404 code status is returned and a custom message is shown to the user.
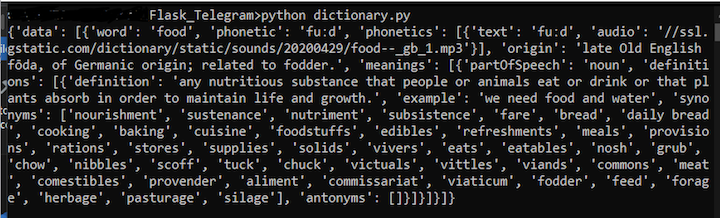
Here’s the expected response when the application receives a request for information about food:
Let’s finalize the application by integrating our Flask dictionary script with our Telegram bot.
First, create a new Python file, bot.py, and add the following code snippet:
import telegram
from telegram.ext import Updater, MessageHandler, Filters
from telegram.ext import CommandHandler
from dictionary import get_info

telegram_bot_token =

updater = Updater(token=telegram_bot_token, use_context=True)
dispatcher = updater.dispatcher


# set up the introductory statement for the bot when the /start command is invoked
def start(update, context):
    chat_id = update.effective_chat.id
    context.bot.send_message(chat_id=chat_id, text="Hello there. Provide any English word and I will give you a bunch "
                                                   "of information about it.")


# obtain the information of the word provided and format before presenting.
def get_word_info(update, context):
    # get the word info
    word_info = get_info(update.message.text)

    # If the user provides an invalid English word, return the custom response from get_info() and exit the function
    if word_info.__class__ is str:
        update.message.reply_text(word_info)
        return

    # get the word the user provided
    word = word_info['word']

    # get the origin of the word
    origin = word_info['origin']
    meanings = '\n'

    synonyms = ''
    definition = ''
    example = ''
    antonyms = ''

    # a word may have several meanings. We'll use this counter to track each of the meanings provided from the response
    meaning_counter = 1

    for word_meaning in word_info['meanings']:
        meanings += 'Meaning ' + str(meaning_counter) + ':\n'

        for word_definition in word_meaning['definitions']:
            # extract the each of the definitions of the word
            definition = word_definition['definition']

            # extract each example for the respective definition
            if 'example' in word_definition:
                example = word_definition['example']

            # extract the collection of synonyms for the word based on the definition
            for word_synonym in word_definition['synonyms']:
                synonyms += word_synonym + ', '

            # extract the antonyms of the word based on the definition
            for word_antonym in word_definition['antonyms']:
                antonyms += word_antonym + ', '

        meanings += 'Definition: ' + definition + '\n\n'
        meanings += 'Example: ' + example + '\n\n'
        meanings += 'Synonym: ' + synonyms + '\n\n'
        meanings += 'Antonym: ' + antonyms + '\n\n\n'

        meaning_counter += 1

    # format the data into a string
    message = f"Word: {word}\n\nOrigin: {origin}\n{meanings}"

    update.message.reply_text(message)

# run the start function when the user invokes the /start command
dispatcher.add_handler(CommandHandler("start", start))

# invoke the get_word_info function when the user sends a message
# that is not a command.
dispatcher.add_handler(MessageHandler(Filters.text, get_word_info))
updater.start_polling()
In this example, we first import the Telegram modules and the dictionary script into the bot.py file. Next, we initialize the Telegram updater with our unique HTTP token.
The start(update, context) function contains logic to render a custom welcome message when the bot’s /start command is run. We initiate a conversation with the user through the context.bot.send_message function, using chat_id to identify where to direct the response.
In the get_word_info function, we perform logic to format the data obtained from the get_info function in the dictionary.py script.
If the user provides a valid English word, the get_info function returns a dictionary data type: dict. With this data type, we perform further operations, extracting the data we want to display to the user. The extracted values are then formatted into a string and are stored in the message variable.
However, if the user provides an invalid English word, the get_info function will return a string data type: str. When this occurs, a custom message, created in the dictionary.py file, is shown to the user.
As a last step, we tell the Telegram bot to perform the start function when a user invokes the /start command and to perform the get_word_info function when a user sends a message that is not a command.
Let’s deploy our application to a remote server. We’ll use the Heroku cloud platform to host our application.
If you don’t already have an account with Heroku, you can create one here.
To deploy the Telegram bot, follow these six steps:
requirements.txt fileThe requirements.txt file contains the dependencies and respective versions that the application requires to run successfully.
Run the following command to generate a requirements.txt file containing the dependencies that were used to build the Telegram bot:
pip freeze > requirements.txt
The requirements.txt file should contain the following packages, at a minimum:
python-telegram-bot==13.8.1
telegram==0.0.1
requests==2.25.1
Depending on the type of application, the requirements.txt file may contain more packages and possibly different version numbers.
ProcfileThe Procfile is a text file that defines the command that should run on Heroku when the application starts.
For this example, create a file in the application root directory and name it Procfile. Then add the following code snippet:
web: python bot.py $PORT
Use the following command to instruct Heroku to create an application with a specified name:
heroku create
After successfully running this command, Heroku will provide two URLs: the application URL and the remote Git URL through which Heroku will deploy the application to its server.
To view the application, go to the Heroku dashboard. In the Settings tab, click on the Add buildpack and select the heroku/python option:


bot.py fileBefore deploying the bot to Heroku, we need to make a minor modification to the updater.start_polling() portion of the bot.py file.
This step is essential because the updater.start_polling() method monitors the Telegram API for new messages. Since we’ll be launching the bot on a remote web server, we need to instruct Telegram to communicate with the web server directly.
Replace updater.start_polling() with the following code snippet:
updater.start_webhook(listen="0.0.0.0",
                      port=int(os.environ.get('PORT', 5000)),
                      url_path=telegram_bot_token,
                      webhook_url=  + telegram_bot_token
                      )
Use the following commands to deploy the Telegram app to Heroku:
git add .
git commit -m "first commit"
git push heroku main
In this article, we demonstrated how to quickly build a dictionary app by integrating a Telegram bot and Flask. This project is available on GitHub, and you can interact with the dictionary bot we created here.

I migrated 20 production-style components from Tailwind to StyleX. Here’s what the data showed about LOC, CSS bundle size, build time, and type safety.

A guide for using JWT authentication to prevent basic security issues while understanding the shortcomings of JWTs.

Discover how to build, render, and automate product demo videos with Remotion, replacing traditional screen recordings with reusable React code.

Chrome’s Modern Web Guidance embeds modern web platform skills into AI coding agents, helping them choose native HTML, CSS, and browser APIs over legacy patterns.
Hey there, want to help make our blog better?
Join LogRocket’s Content Advisory Board. You’ll help inform the type of content we create and get access to exclusive meetups, social accreditation, and swag.
Sign up now

