If you’ve ever built a web application with Python, chances are that you used a framework to achieve this, one of which could be Flask. Flask is an open-source, beginner-friendly web framework built on the Python programming language. Flask is suitable when you want to develop an application with a light codebase rapidly.

Docker is an open-source tool that enables you to containerize your applications. It aids in building, testing, deploying, and managing your applications within an isolated environment, and we’ll use it to do everything except test in this article.
Let’s proceed to create a simple Flask application that renders a message on the browser. Create a folder with the name flask_docker to contain your application.
mkdir flask_docker
Next, cd into the flask_docker directory and run the below command to install Flask.
pip install Flask
After successfully installing Flask, the next step is to create a Python file that receives and responds to requests in our application. Create a view.py file that will contain the Python code snippet below:
from flask import Flask, render_template
import os

app = Flask(__name__)


@app.route('/')
def home():
    return render_template('index.html')


if __name__ == "__main__":
    port = int(os.environ.get('PORT', 5000))
    app.run(debug=True, host='0.0.0.0', port=port)
In the code snippet above, the @app.route annotation serves to direct the request to a mapped URL. In this case, the provided URL is /, which represents the homepage.
This annotation also has a method parameter that takes a list of HTTP methods to specify the permitted method for the provided URL. By default (as illustrated), the GET method is the only permitted HTTP method.
Here is an example of how you can specify that your route should permit both GET and POST HTTP methods:
@app.route('/', methods=['POST', 'GET'])
The home() function bound to the URL provided in the @app.route annotation will run when you send a GET request to this route. The function returns a call to render_template that in turn renders the content of the index.html file, which we will create in the next section.
port = int(os.environ.get('PORT', 5000))
app.run(debug=True, host='0.0.0.0', port=port)
The above portion of the view.py file is required when we deploy this application to Heroku, which we will demonstrate in the subsequent section. Not including this will cause your application to crash on Heroku.
The next step is to create the index.html file and provide the content we want to render on the browser when you invoke the home() function in the view.py file.
Within the root directory, create a templates directory, then create the index.html file. Add the below code snippet to the HTML file:
<!DOCTYPE html>

<html lang="en">
<head>
    <meta charset="UTF-8">
    <title>Flask Docker</title>
</head>
<body>
    <h1>This is a Flask App containerised with Docker</h1>
</body>
</html>
If you’ve ever explored any published Python project, you may have noticed a requirement.txt file. This file contains the list of packages and dependencies that you need to run your project and their respective versions.
Within the root directory, run the below command in the terminal:
pip freeze > requirements.txt
This will generate the names of the packages and their respective versions that you have installed, as well as some other inbuilt dependencies that run your Flask application. Then, it stores them in a .txt file named requirements.
Depending on the complexity of your project and the packages you have installed, the content of this file will vary from project to project.
You can also install the packages contained in this file in another project by copying the requirements.txt file to your desired project and running the following command:
pip install -r requirements.txt
The advantage of doing this is that you don’t have to run the pip install command for each package repeatedly.
Your requirements.txt file should contain at least the following content:
click==8.0.3
colorama==0.4.4
Flask==2.0.2
itsdangerous==2.0.1
Jinja2==3.0.3
MarkupSafe==2.0.1
Werkzeug==2.0.2
gunicorn==20.1.0
The version numbers generated in the requirements file may be different from what is written here because, again, this depends on the type of application you’re building and the versions of the packages you have installed when building your app.
A nice thing about containerizing with Docker is that you get to package your application with all of the runtime dependencies that are required to make it self-sufficient. Therefore, your application runs without you needing to worry about incompatibilities with its host environment.
You can test that the application works before you proceed to containerize it. Run this command on your terminal within the root directory to perform this test:
python view.py
If you don’t have Docker installed on your machine, you can follow these instructions to get started.
Create a file and name it Dockerfile. Add the following code snippet to the file:
# start by pulling the python image
FROM python:3.8-alpine

# copy the requirements file into the image
COPY ./requirements.txt /app/requirements.txt

# switch working directory
WORKDIR /app

# install the dependencies and packages in the requirements file
RUN pip install -r requirements.txt

# copy every content from the local file to the image
COPY . /app

# configure the container to run in an executed manner
ENTRYPOINT [ "python" ]

CMD ["view.py" ]
Let’s go over the instructions in this Dockerfile:
FROM python:3.8-alpine: Since Docker allows us to inherit existing images, we install a Python image and install it in our Docker image. Alpine is a lightweight Linux distro that will serve as the OS on which we install our imageCOPY ./requirements.txt /app/requirements.txt: Here, we copy the requirements file and its content (the generated packages and dependencies) into the app folder of the imageWORKDIR /app: We proceed to set the working directory as /app, which will be the root directory of our application in the containerRUN pip install -r requirements.txt: This command installs all the dependencies defined in the requirements.txt file into our application within the containerCOPY . /app: This copies every other file and its respective contents into the app folder that is the root directory of our application within the containerENTRYPOINT [ "python" ]: This is the command that runs the application in the containerCMD [ "view.py" ]: Finally, this appends the list of parameters to the EntryPoint parameter to perform the command that runs the application. This is similar to how you would run the Python app on your terminal using the python view.py commandLet’s proceed to build the image with the command below:
docker image build -t flask_docker .
After successfully building the image, the next step is to run an instance of the image. Here is how to perform this:
docker run -p 5000:5000 -d flask_docker
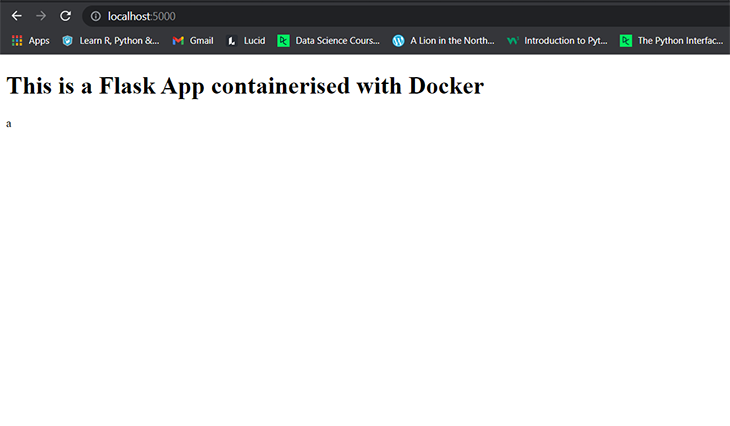
This command runs the container and its embedded application, each on port 5000 using a port-binding approach. The first 5000 is the port that we allocate to the container on our machine. The second 5000 is the port where the application will run on the container.
Here is the output of our application when we send a request to localhost:5000 on our browser:
Docker Registry, also known as Docker Hub, is a community of repositories where Docker users create, test, and manage containers. If you’ve worked with GitHub, this section will be very familiar to you.
Follow the next sequence of steps to deploy the image we built to Docker Hub so that you can access it anywhere.
If you don’t already have an account, proceed to sign up on Docker Hub. After successfully creating an account, log in and click the Repositories tab on the navbar.

Follow the steps on the page and create a new repository named flask-docker.
The next step is to log in on your local machine to create a connection between your machine and Docker Hub.
docker login
When pushing an image to Docker Hub, there is a standard format that your image name has to follow. This format is specified as:
<your-docker-hub-username>/<repository-name>.
Here is the command for renaming the image:
docker tag flask_docker <your-docker-hub-username>/flask-docker
The final step is to push the image to Docker Hub by using the following command:
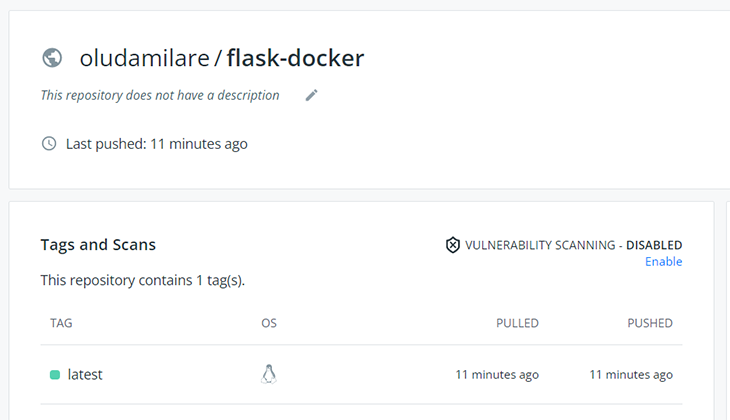
docker push <your-docker-hub-username>/flask-docker
This is what you should see upon successful deployment:
Heroku is a cloud platform where developers can build and run applications in the cloud. If you don’t already have an account with Heroku, you can create one here.
Let’s proceed to deploy our containerized application to Heroku with the following steps:
heroku login
If you’ve not previously logged in to your Docker Hub account, you’ll be required to do this to proceed.
docker login --username=<your-username> --password=<your-password>
heroku create <app-name>
A Procfile contains commands that your application runs on Heroku when starting up.
Create a file and name it Procfile without an extension. Then add the following to the file:
web: gunicorn app:app
heroku container:push web --app <app-name>
heroku container:release web --app <app-name>
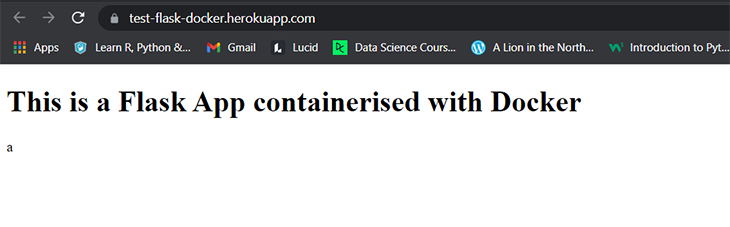
You can now proceed to view your application on Heroku with the URL:
https://<app-name>.herokuapp.com/
In this tutorial, we built a simple Flask app and containerized it with Docker. We also deployed the created and pushed the image to Docker Hub as well as the containerized application to Heroku. Just as demonstrated with a Flask application, you can also explore how to containerize other applications here. This project is available on my GitHub repo for more insights.
For more information on integrating Docker with your application, the Docker documentation is a helpful resource you can begin with.
If you’re also interested in growing your skill in the Python Flask framework, here is the documentation for the Flask framework that can help guide you through.
Cheers!
Install LogRocket via npm or script tag. LogRocket.init() must be called client-side, not
server-side
$ npm i --save logrocket

// Code:

import LogRocket from 'logrocket';
LogRocket.init('app/id');
// Add to your HTML:

<script src="https://cdn.lr-ingest.com/LogRocket.min.js"></script>
<script>window.LogRocket && window.LogRocket.init('app/id');</script>
Hey there, want to help make our blog better?
Join LogRocket’s Content Advisory Board. You’ll help inform the type of content we create and get access to exclusive meetups, social accreditation, and swag.
Sign up now
This guide walks you through creating a web UI for an AI agent that browses, clicks, and extracts info from websites powered by Stagehand and Gemini.

This guide explores how to use Anthropic’s Claude 4 models, including Opus 4 and Sonnet 4, to build AI-powered applications.

Which AI frontend dev tool reigns supreme in July 2025? Check out our power rankings and use our interactive comparison tool to find out.

Learn how OpenAPI can automate API client generation to save time, reduce bugs, and streamline how your frontend app talks to backend APIs.


