As the name suggests, the Google Sheets API lets you connect an existing spreadsheet, parse its available data, and pass it to your web application. The latest is version 4.0, which provides the user control over many other properties — such as complete access to cell formatting, including setting colors, text styles, and more. Imagine having a completely free database with an intuitive user interface that helps you view your data and organize it according to your needs while acting as a CMS. How cool is that?
Without further ado, let’s jump right into creating your own CRUD API using the Google Sheets API.
Here’s what we’ll cover in this article:
As with accessing any API service, we must first set up authentication and authorization. Head over to Google Cloud and sign up if you haven’t made an account yet. Then, follow the steps below to make a new project.
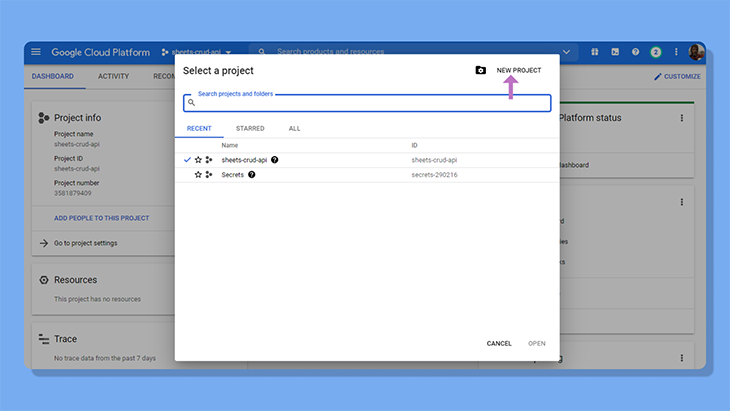
Click New Project, give it a suitable name, and click Create.
Next, click the navigation menu and go to APIs and Services.
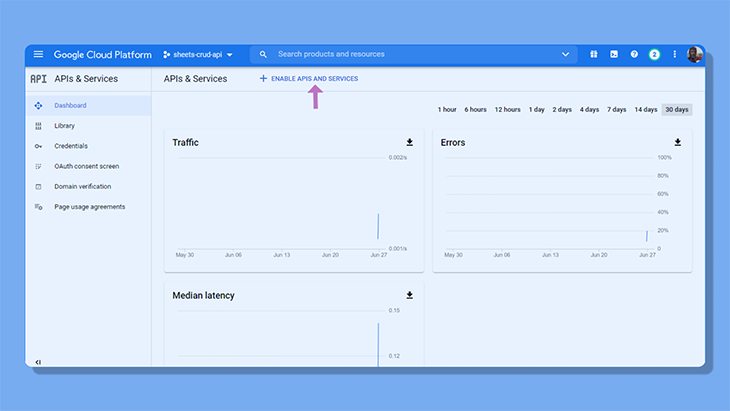
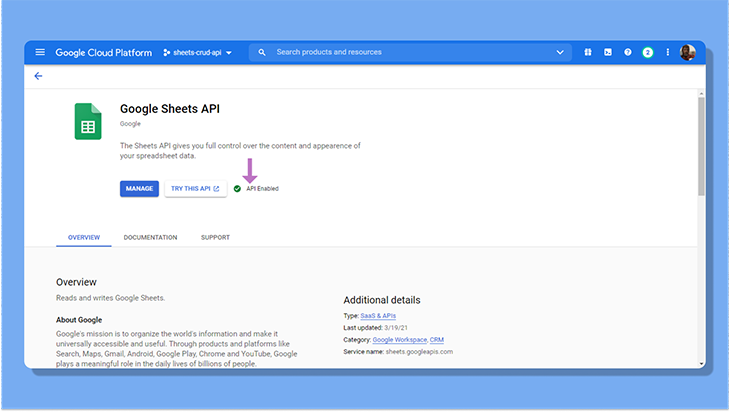
You will be then redirected to the API library. Search for the Google Sheets API and enable it.
Head back to the APIs and Services dashboard. Go to Credentials and create a new credential.
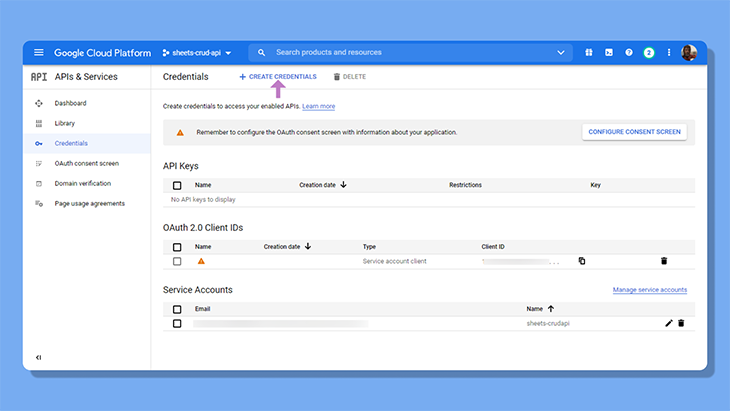
Click Service Account. Give it a name, set the rest as it is, and click Done.
You have now created a bot account for the spreadsheet that has permissions to read and write operations on the sheet.
Copy the service email we created. This will come into use when we connect the spreadsheet to the Google Cloud project.
Click the service account email, and then move along to Keys.
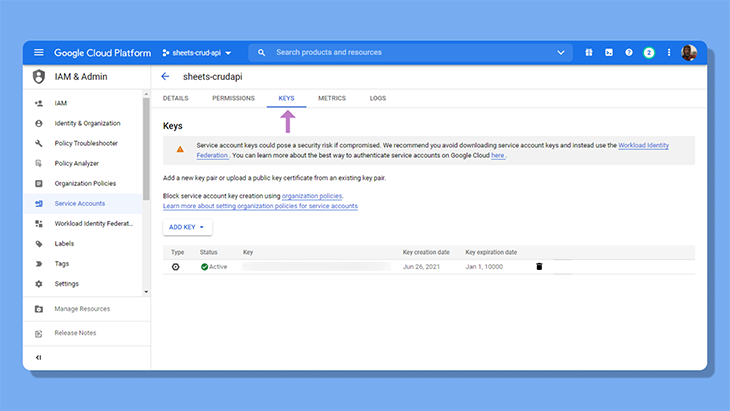
Go ahead and create a new key, setting the file type as JSON. A file will be downloaded shortly, and if possible you should move it to the folder where you expect to set up the starting files.
Now we’ll connect our spreadsheet to the Google Cloud project. Head over to Google Docs and make a new spreadsheet. Name the spreadsheet.
Enter in some dummy data so that we have something to fetch while testing the API.
Now, let’s add the service account and assign it the Editor role, which gives it permissions to read, write, update, and delete data.
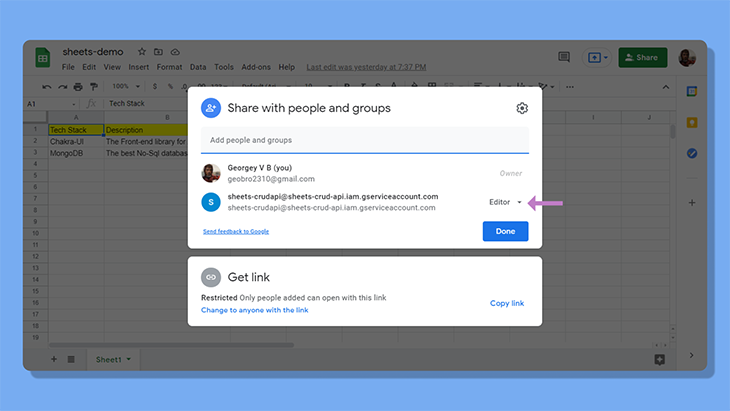
Click Share and add the service email we recently copied, make sure you give it editor access, and un-check Notify People.
That’s all you have to do! Now let’s head over to the code editor and set up the starting files for the API.
We’ll be using a couple of packages for the API: Express, dotEnv, and googleapis. Before we download those, let’s initialize npm using the following command:
npm init -y
Now install the packages:
npm install express dotenv googleapis
Add nodemon as a dev dependency (this will ensure the development server restarts whenever we make any code changes):
npm install nodemon --save-dev
With all that done, create a new file called index.js.
Start by requiring dotenv and then initialize express.
require('dotenv').config();
const express = require('express');
const app = express();

app.listen(3000 || process.env.PORT, () => {
  console.log('Up and running!!');
});
Create a new script in the package.json file:
"dev": "nodemon index.js"
And if all works fine, nodemon will restart the server every time we save the file.
npm run dev
With all that done, let’s see whether or not our spreadsheet is actually linked with the Google Cloud project.
Import the following from the googleapis package:
const { google } = require('googleapis');
Create a GET route:
app.get('/', async (req, res) => {
  res.send("Hello Google!");
});
Create an auth token next, consisting of a keyFile that points to the credentials.json file we downloaded and scopes that provide complete access to perform read and write operations.
const auth = new google.auth.GoogleAuth({
  keyFile: 'credentials.json',
  scopes: 'https://www.googleapis.com/auth/spreadsheets'
});
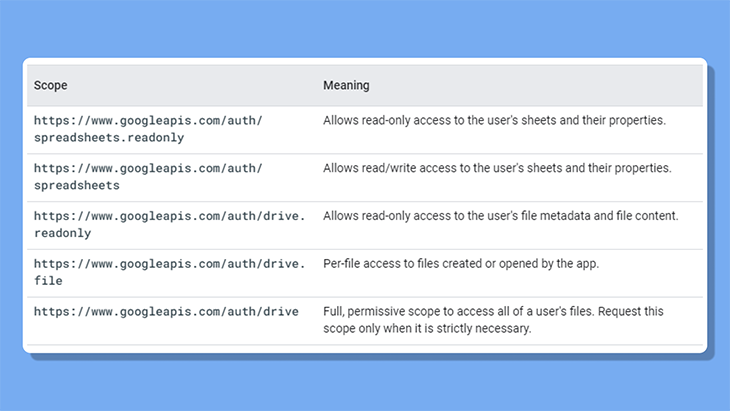
You can always refer to the official Google Developers documentation for additional help with this.
Next up, define client, the latest version of the API, and the spreadsheetId.
const client = await auth.getClient();
const googleSheet = google.sheets({ version: 'v4', auth: client });
const spreadsheetId = your_spreadsheetid
Get the spreadsheet ID from the URL of the Google spreadsheet, like so:
https://docs.google.com/spreadsheets/d/{_your_database_id_}/edit#gid=0
In the above example, gid is the sheet ID.
You should probably store this sensitive information in an environment file. Create a .env file and store the spreadsheet ID as shown:
SPREADSHEET_ID=your_spreadsheet_id
And finally, point it out to the environment variable:
const spreadsheetId = process.env.SPREADSHEET_ID
With all that done, let’s now finally make a request!
const getMetaData = await googleSheet.spreadsheets.get({
  auth,
  spreadsheetId,
  range: 'Sheet1!A:B'
});

res.send(getMetaData);
Make sure you name the variables as we did above because it is also the shorthand for writing auth: auth.
Every API call takes in two parameters, which are auth and the spreadsheetId. The range defines the range of cells to be edited. If you’re not sure of the values, you can always make use of the spreadsheet’s interface. We’ll be using when it comes to reading cell values in the next section.
For now, go ahead and make a GET request to the root URL on localhost:3000. If you have followed through with all the steps, you’ll get a long response back from the API.
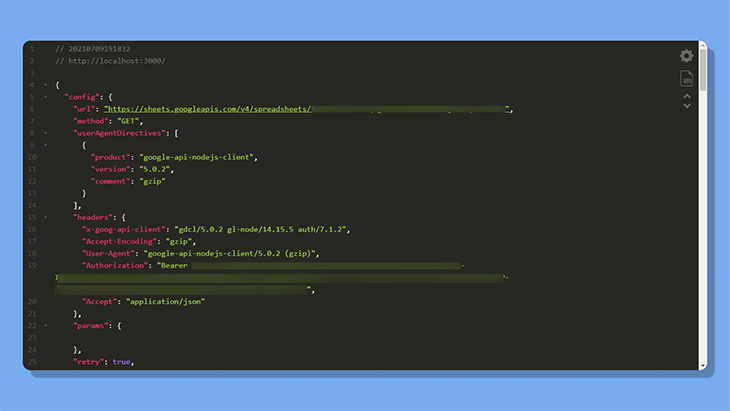
For now, comment out the previous request, and let’s actually read the cell values we have entered.
To read cell values, we’ll use the spreadsheets.values.get method.
const getSheetData = await googleSheet.spreadsheets.values.get({
  auth,
  spreadsheetId,
  range: 'Sheet1!A:B'
});

res.send(getSheetData);
As I said before, the method always takes in auth and spreadsheetId. The range parameter defines the cell area to read and write upon. In this case, we’ll only make changes to the first two columns, A and B.
Go ahead and make a GET request.
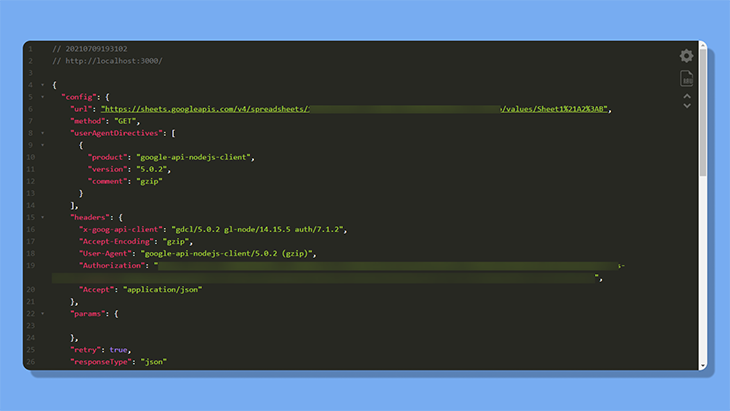
The response contains a bunch of information, including the cell values, the color of the cells, geo-location, and time zone. Let’s target the cell values here.
res.send(getSheetData.data.values);
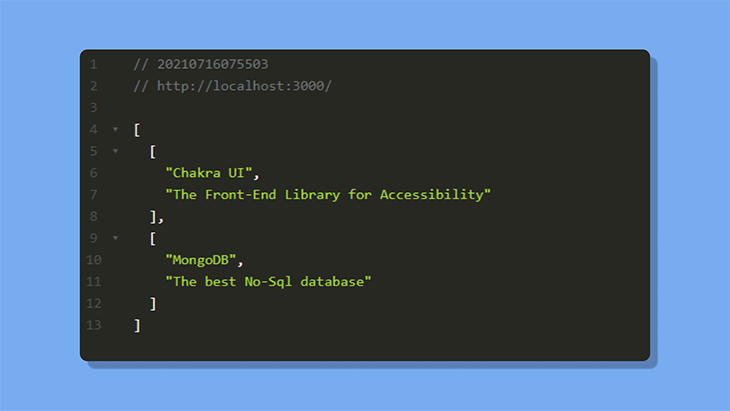
The response looks much more concise now.
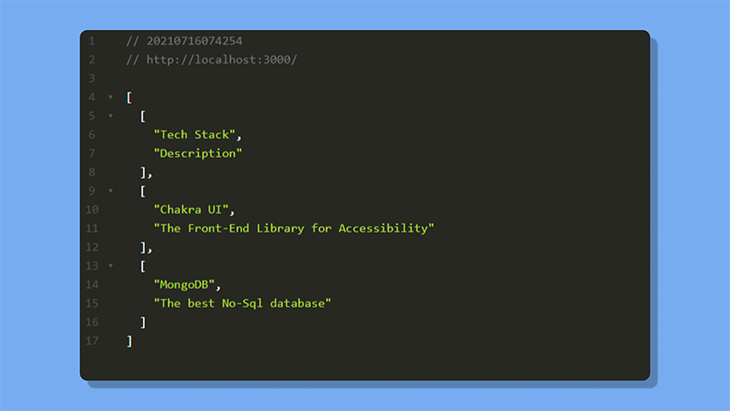
Note that we are also getting the actual column headings in these results. You may want to omit those and send back only the cell values underneath the first row.
Here’s how we can change the range. Select the area you want to include in your response. The selected area is denoted by a range. In our example, it’s from column A to column B.
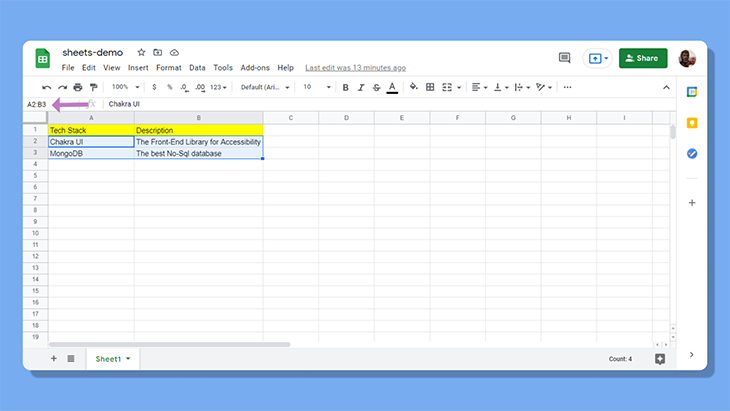
Since we need to include the cell values under the column headings in row one, we can start selecting from row two instead. Hence, the new range is now Sheet1!A2:B.
The response looks much better now!
With that done, let’s move on to posting data into the spreadsheet.
Set up a POST route:
app.post('/post', async (req, res) => {
  res.send("Data submitted!");
});
Follow the same procedure as above, setting up the auth token and defining the spreadsheet ID.
To post data, we’ll use the spreadsheets.values.append method. The Google API will append values into the spreadsheet depending on the number of values passed into the request.
The method remains the same. We’ll pass in auth, spreadsheetId, and a range. Along with that, we now pass in two more properties: valueInputOption and resource.
const response = await googleSheet.spreadsheets.values.append({
  auth,
  spreadsheetId,
  range: 'Sheet1!A2:B',
  valueInputOption: 'USER_ENTERED',
  resource: {
    values: [['NextJS', 'The framework for Production']]
  }
});

res.send(response)
valueInputOption can take two options, "RAW" or "USER_ENTERED". If "RAW", then whatever the user has entered will be stored as it is. If you use "USER_ENTERED", the user input will always be parsed when passed — if the user enters a number, it’ll be parsed as a number.
This is really helpful in certain use cases — for instance, let’s say you’re building a React form that sends in the submitted data to a spreadsheet. I’ll use the example of a simple spreadsheet with a score corresponding to each subject.
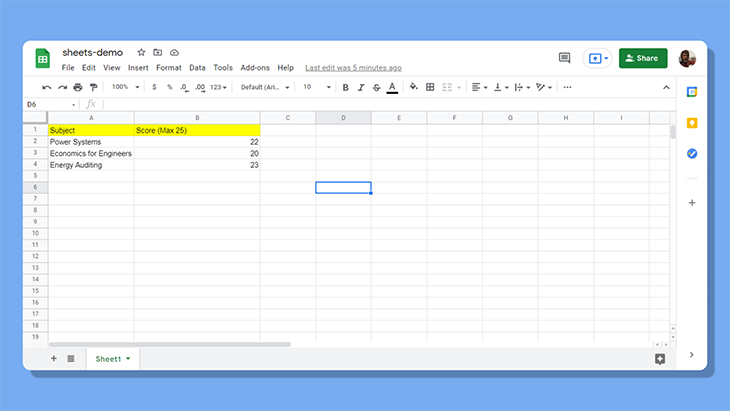
If the valueInputOption is set to "USER_ENTERED", the data gets posted and is recognized as a number. But if I set the parameter to "RAW" and pass the score as a string, the data gets posted, but Google Sheets doesn’t appear to treat the score as a number.
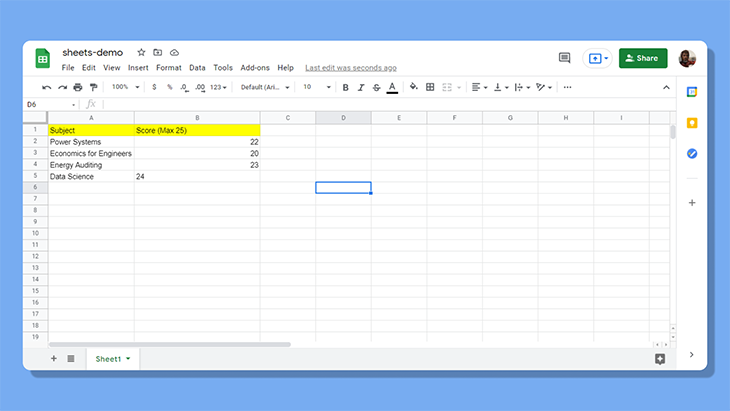
The resource takes in the cell values to be added to the spreadsheet. You can also enter multiple entries by adding another set of arrays.
resource: {
  values: [
        ['NextJS', 'The framework for Production'],
        ['Jest', 'The testing framework for React']
  ]
}
Go ahead and make a POST request. You can make use of any API tester like Postman for help with this.
To update cell values, we will use the spreadsheets.values.update method.
Go ahead and make a PUT route.
app.put('/update', async (req, res) => {
  res.send("Updated cell!");
});
The method takes in auth and spreadsheetId as usual. Make sure the range points out to a single row only, unless you’re updating multiple rows.
Here, I will specify range: "Sheet1!A2:B2", which is the second row only. The rest all remains the same. You can set valueInputOption to either "RAW" or "USER_ENTERED". And finally, enter the cell values you want to replace through resource.
const response = await googleSheet.spreadsheets.values.update({
  auth,
  spreadsheetId,
  range: 'Sheet1!A2:B2',
  valueInputOption: 'USER_ENTERED',
  resource: {
    values: [['Jamstack', 'Future of the Web']]
  }
});

res.send(response)
Go ahead and make a PUT request on the API tester. The cell values should be updated now.
The Sheets API recommends using a POST request in order to use the spreadsheets.values.clear method.
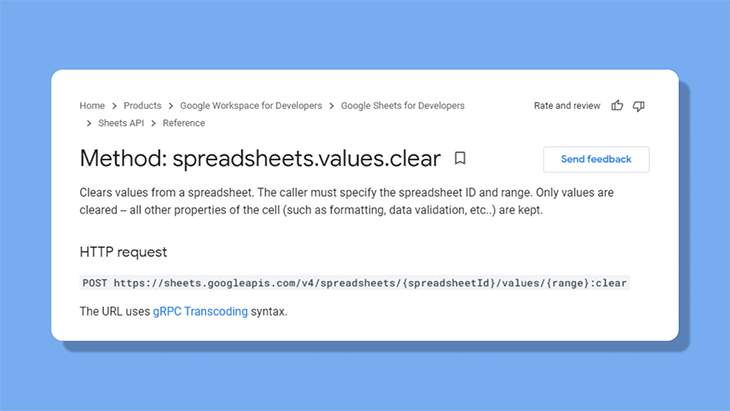
So, we’ll make a new POST route.
app.post('/delete', async (req, res) => {
  res.send("Deleted Cell successfully!");
});
This method is quite straightforward. All you need to do is specify the spreadsheet row and column through the range property.
const response = await googleSheet.spreadsheets.values.clear({
  auth,
  spreadsheetId,
  range: "Sheet1!A5:B5"
});
Make a new request to the /delete route to see the changes.
Well, congratulations! That’s something new! We have implemented CRUD operations using Google Sheets. If you ever get stuck, you can take a look at this repo on my GitHub.
Looks like we discovered a whole new database that is free and has a clean interface for managing data. You can use it with a range of languages, including Python, Go, Ruby, and many more.
Although there is a limit on the number of requests you can make — 100 requests per 100 seconds — if you look at the bright side, the Google Sheets API provides a great way for you to start learning APIs and can be used to integrate small-scale projects.
Install LogRocket via npm or script tag. LogRocket.init() must be called client-side, not
server-side
$ npm i --save logrocket

// Code:

import LogRocket from 'logrocket';
LogRocket.init('app/id');
// Add to your HTML:

<script src="https://cdn.lr-ingest.com/LogRocket.min.js"></script>
<script>window.LogRocket && window.LogRocket.init('app/id');</script>
Would you be interested in joining LogRocket's developer community?
Join LogRocket’s Content Advisory Board. You’ll help inform the type of content we create and get access to exclusive meetups, social accreditation, and swag.
Sign up now
Learn how to integrate MediaPipe’s Tasks API into a React app for fast, in-browser object detection using your webcam.

Integrating AI into modern frontend apps can be messy. This tutorial shows how the Vercel AI SDK simplifies it all, with streaming, multimodal input, and generative UI.

Interviewing for a software engineering role? Hear from a senior dev leader on what he looks for in candidates, and how to prepare yourself.

Set up real-time video streaming in Next.js using HLS.js and alternatives, exploring integration, adaptive streaming, and token-based authentication.
One Reply to "Build a CRUD API using the Google Sheets API"
You can also save static website forms to google sheet with https://fabform.io