
In mobile applications, users frequently make purchases by entering their credit card details. We’ve likely all had the frustrating experience of entering those 16 digits manually into our smartphones.

Many applications are adding automation to simplify this process. Therefore, to enter payment details, users can either take a photo of their credit card, or upload a photo from their device’s photo gallery. Cool, right?
In this article, we’ll learn how to implement a similar function in a React Native app using the Text Recognition API, an ML kit-based API that can recognize any latin-based character set. We‘ll use the on-device text recognition API and cover the following:
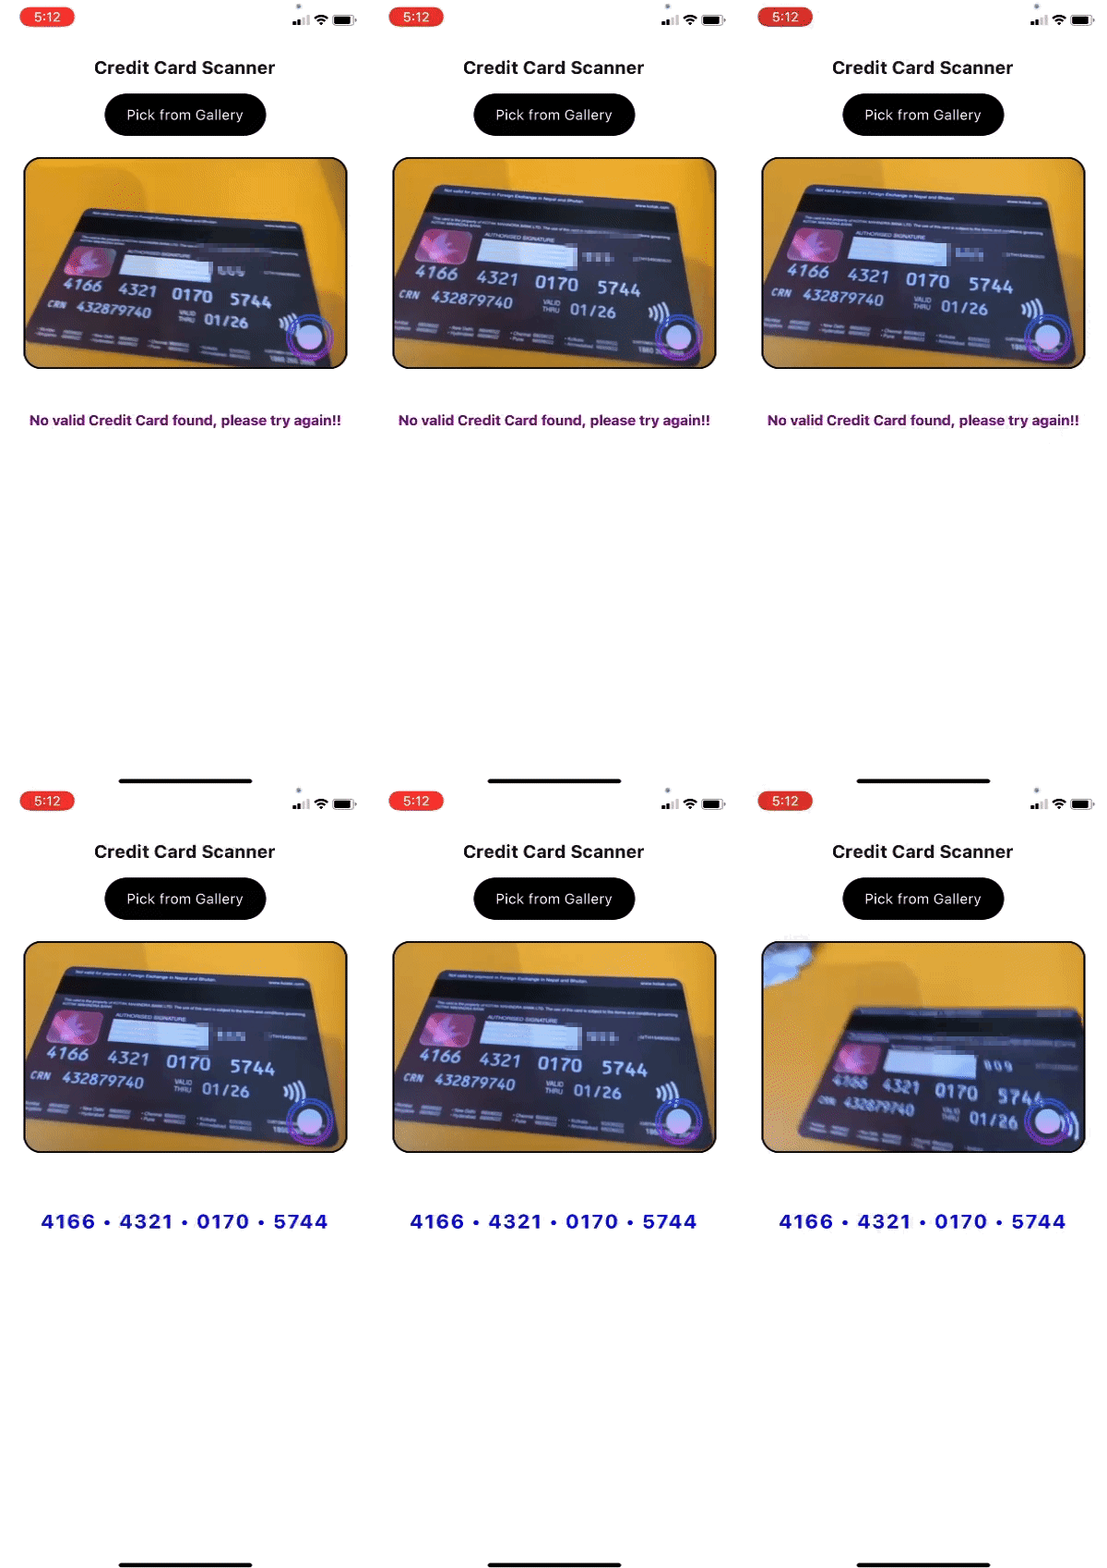
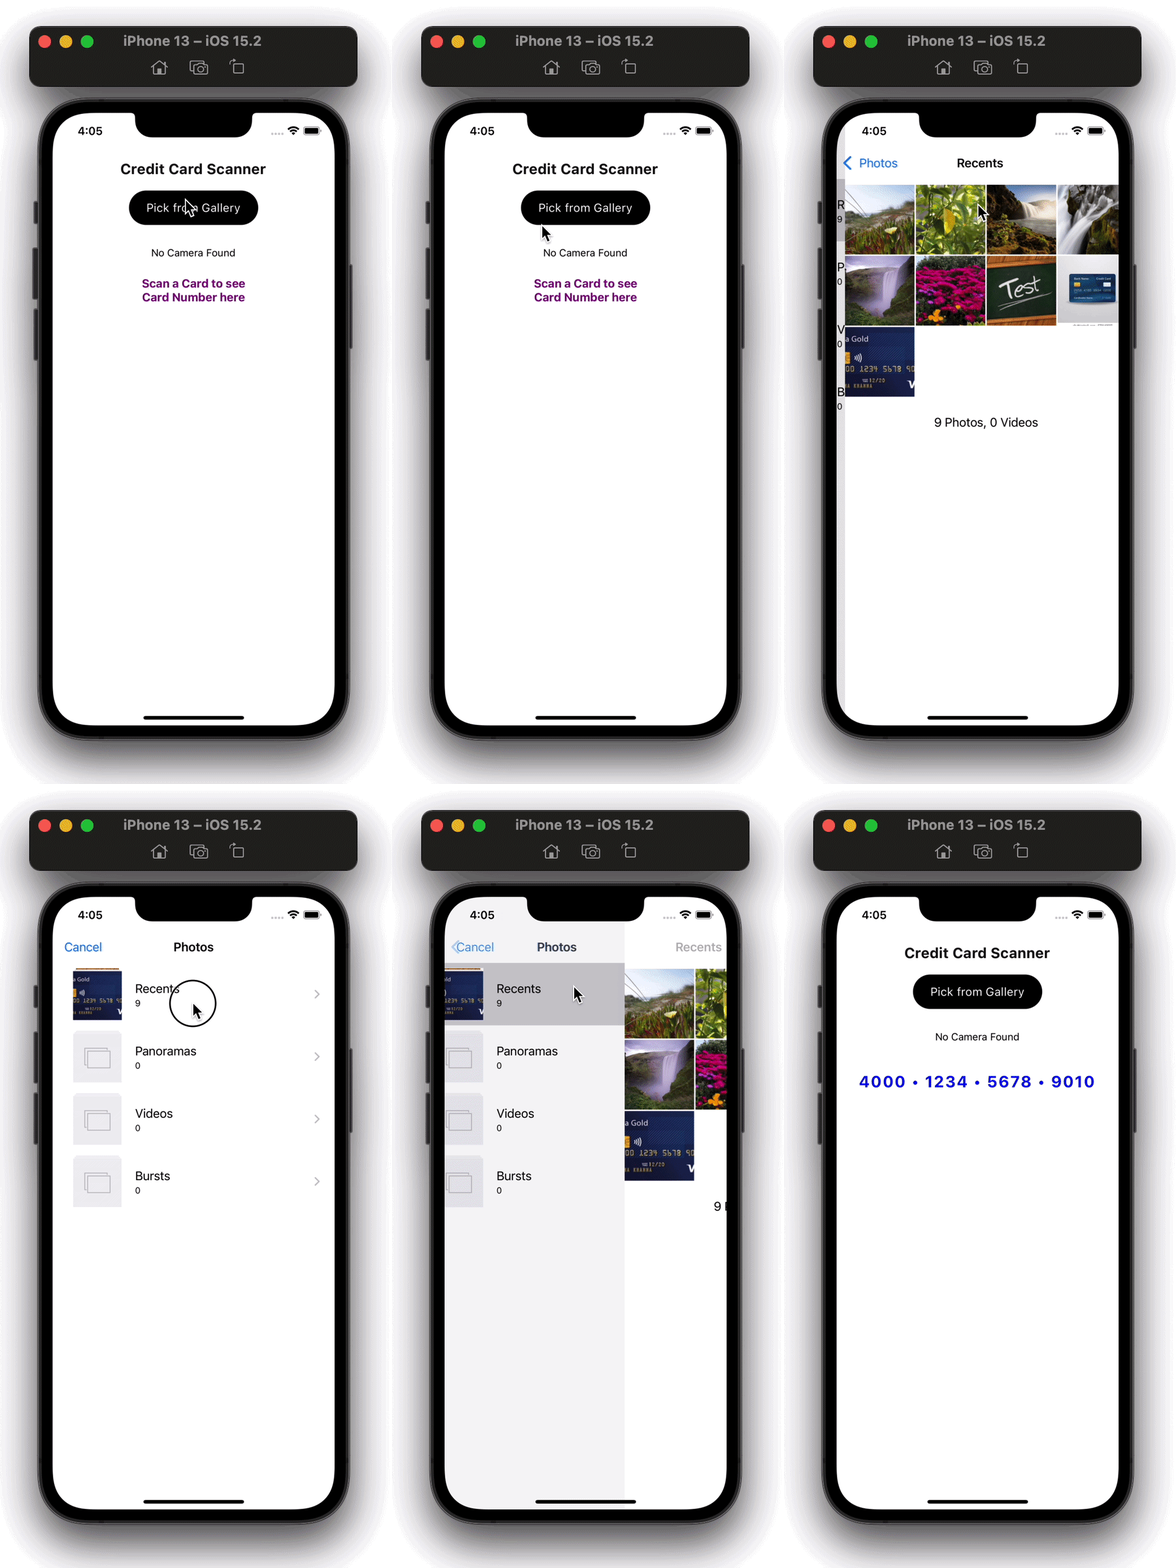
You can find the complete code for this tutorial in this GitHub repository. Our final UI will look like the gifs below:
The Replay is a weekly newsletter for dev and engineering leaders.
Delivered once a week, it's your curated guide to the most important conversations around frontend dev, emerging AI tools, and the state of modern software.
First, we’ll create a new React Native project. If you want to add the credit card scanning feature to your existing project, feel free to skip this part.
In your preferred folder directory, run the command below in your terminal to create a new React Native project:
npx react-native init <project-name> --template react-native-template-typescript
Open the project in your preferred IDE and replace the code in the App.tsx file with the code below:
import React from 'react';
import {SafeAreaView, Text} from 'react-native';

const App: React.FC = () => {
  return (
    <SafeAreaView>
      <Text>Credit Card Scanner</Text>
    </SafeAreaView>
  );
};

export default App;
Now, let’s run the app. For iOS, we need to install pods before building the project:
cd ios && pod install && cd ..
Then, we can build the iOS project:
yarn ios
For Android, we can directly build the project:
yarn android
The step above will start Metro server as well as iOS and Android simulators, then run the app on them. Currently, with the code above in App.tsx, we’ll see only a blank screen with text reading Credit Card Scanner.
react-native-cardscan is a wrapper library around CardScan, a minimalistic library for scanning debit and credit cards. react-native-cardscan provides simple plug and play usage for credit card scanning in React Native applications. However, at the time of writing, react-native-cardscan is no longer maintained and is deprecated to use. Stripe is integrating react-native-cardscan into its own payment solutions for mobile applications. You can check out the new repository on GitHub, however, it is still under development at the time of writing.
Since this library is deprecated, we’ll create our own custom credit card scanning logic with react-native-text-recognition.
react-native-text-recognition is a wrapper library built around the Vision framework on iOS and Firebase ML on Android. If you are implementing card scanning in a production application, I would suggest that you create your own native module for text recognition. However, for the simplicity of this tutorial, I’ll use this library.
Let’s write the code to scan credit cards. Before we integrate text recognition, let’s add the other helper libraries we’ll need, react-native-vision-camera and react-native-image-crop-picker. We’ll use these libraries to capture a photo from our device’s camera and pick images from the phone gallery, respectively:
yarn add react-native-image-crop-picker react-native-vision-camera
// Install pods for iOS
cd ios && pod install && cd ..
If you are on React Native ≥v0.69, react-native-vision-camera will not build due to changes made in newer architectures. Please follow the changes in this PR for the resolution.
Now that our helper dependencies are installed, let’s install react-native-text-recognition:
yarn add react-native-text-recognition
pod install
With our dependencies set up, let’s start writing our code. Add the code below to App.tsx to implement image picking functionality:
....
<key>NSPhotoLibraryUsageDescription</key>
<string>Allow Access to Photo Library</string>
....
We also need permission to access a user’s photo gallery on iOS. For that, add the code below to your iOS project’s info.plist file:
import React from 'react';
import {SafeAreaView, Text, StatusBar, Pressable} from 'react-native';
import ImagePicker, {ImageOrVideo} from 'react-native-image-crop-picker';

const App: React.FC = () => {

  const pickAndRecognize: () => void = useCallback(async () => {
    ImagePicker.openPicker({
      cropping: false,
    })
      .then(async (res: ImageOrVideo) => {
        console.log('res:', res);
      })
      .catch(err => {
        console.log('err:', err);
      });
  }, []);

  return (
    <SafeAreaView style={styles.container}>
      <StatusBar barStyle={'dark-content'} />
      <Text style={styles.title}>Credit Card Scanner</Text>
      <Pressable style={styles.galleryBtn} onPress={pickAndRecognize}>
        <Text style={styles.btnText}>Pick from Gallery</Text>
      </Pressable>
    </SafeAreaView>
  );
};

const styles = StyleSheet.create({
  container: {
    flex: 1,
    alignItems: 'center',
    backgroundColor: '#fff',
  },
  title: {
    fontSize: 20,
    fontWeight: '700',
    color: '#111',
    letterSpacing: 0.6,
    marginTop: 18,
  },
  galleryBtn: {
    paddingVertical: 14,
    paddingHorizontal: 24,
    backgroundColor: '#000',
    borderRadius: 40,
    marginTop: 18,
  },
  btnText: {
    fontSize: 16,
    color: '#fff',
    fontWeight: '400',
    letterSpacing: 0.4,
  },
});

export default App;
In the code above, we’ve added some text and styles to our view, but the main part is where we declared the pickAndRecognize function. Keep in mind that we’re not doing anything related to recognizing in this function; we named it this because we’ll add the Text Recognition logic in this function later.
For now, the output of the code above will look like the following:
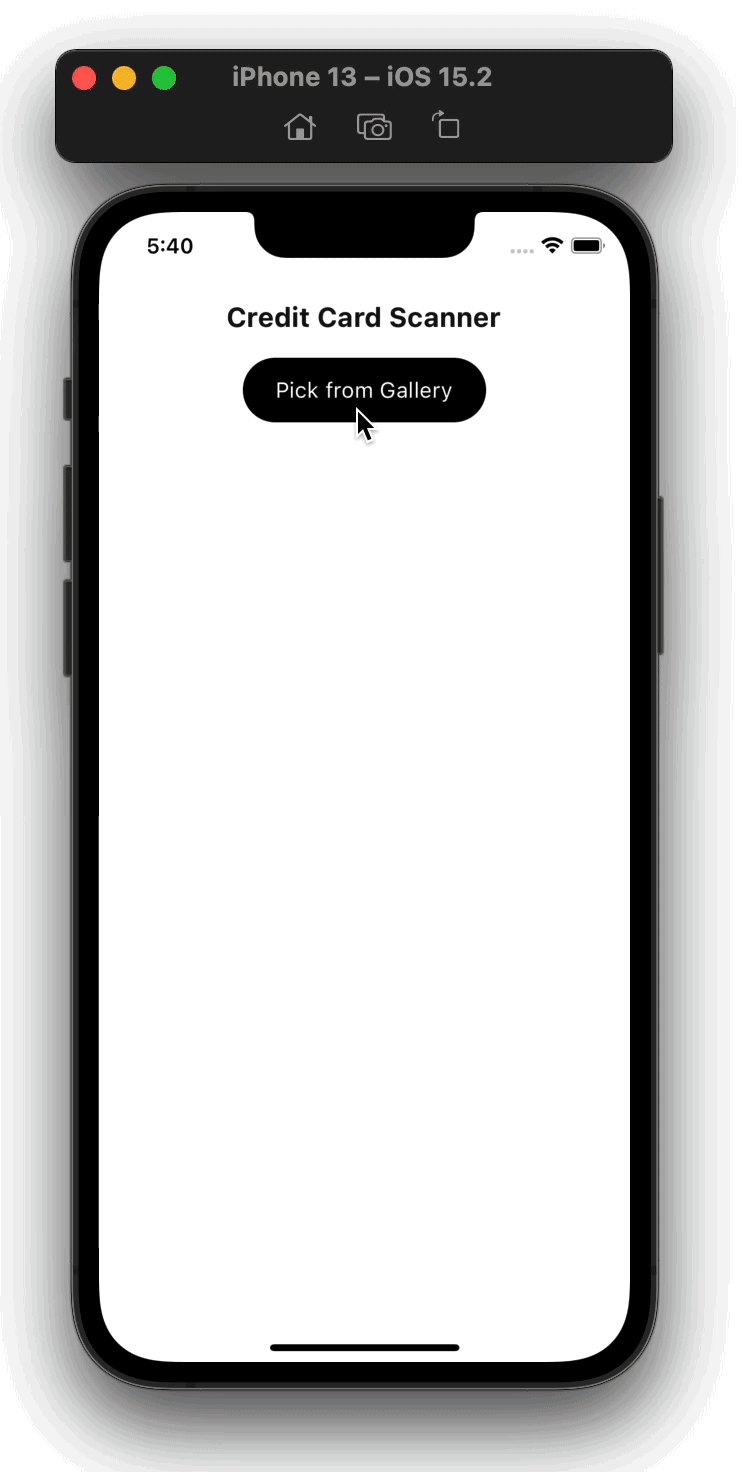
Now, we’re able to pick images from our user’s photo gallery. Let’s also add the functionality for capturing an image from the camera and viewing the camera preview on the UI.
Add the code below to your App.tsx return statement:
// Export the asset from a file like this or directly use it.
import {Capture} from './assets/icons';
....
<SafeAreaView style={styles.container}>
      ....
      {device && hasPermissions ? (
        <View>
          <Camera
            photo
            enableHighQualityPhotos
            ref={camera}
            style={styles.camera}
            isActive={true}
            device={device}
          />
          <Pressable
            style={styles.captureBtnContainer}
            // We will define this method later
            onPress={captureAndRecognize}>
            <Image source={Capture} />
          </Pressable>
        </View>
      ) : (
        <Text>No Camera Found</Text>
      )}
</SafeAreaView>
Add the relevant styles:
const styles = StyleSheet.create({
....
  camera: {
    marginVertical: 24,
    height: 240,
    width: 360,
    borderRadius: 20,
    borderWidth: 2,
    borderColor: '#000',
  },
  captureBtnContainer: {
    position: 'absolute',
    bottom: 28,
    right: 10,
  },
....
});
We also need to create some state variables and refs:
const App: React.FC = () => {
  const camera = useRef<Camera>(null);
  const devices = useCameraDevices();
  let device: any = devices.back;
  const [hasPermissions, setHasPermissions] = useState<boolean>(false);
  ....
}
We are showing an Image on the camera view to select pictures. You can go ahead and download the asset.
Before we preview the camera, we need to add permissions to access our device’s camera. To do so, add the strings below to your iOS project’s info.plist file:
....
<key>NSCameraUsageDescription</key>
<string>Allow Access to Camera</string>
....
For Android, add the code below to your AndroidManifest.xml file:
....
    <uses-permission android:name="android.permission.CAMERA"/>
....
When our app is loaded, we need to request permissions from the user. Let’s write the code to do that. Add the code below to your App.tsx file:
....
  useEffect(() => {
    (async () => {
      const cameraPermission: CameraPermissionRequestResult =
        await Camera.requestCameraPermission();
      const microPhonePermission: CameraPermissionRequestResult =
        await Camera.requestMicrophonePermission();
      if (cameraPermission === 'denied' || microPhonePermission === 'denied') {
        Alert.alert(
          'Allow Permissions',
          'Please allow camera and microphone permission to access camera features',
          [
            {
              text: 'Go to Settings',
              onPress: () => Linking.openSettings(),
            },
            {
              text: 'Cancel',
            },
          ],
        );
        setHasPermissions(false);
      } else {
        setHasPermissions(true);
      }
    })();
  }, []);
....
Now, we have a working camera view in our app UI:

Now that our camera view is working, let’s add the code to capture an image from the camera.
Remember the captureAndRecognize method we want to trigger from our capture button? Let’s define it now. Add the method declaration below in App.tsx:
....
  const captureAndRecognize = useCallback(async () => {
    try {
      const image = await camera.current?.takePhoto({
        qualityPrioritization: 'quality',
        enableAutoStabilization: true,
        flash: 'on',
        skipMetadata: true,
      });
      console.log('image:', image);
    } catch (err) {
      console.log('err:', err);
    }
  }, []);
....
Similar to the pickAndRecognize method, we haven’t yet added the credit card recognition logic in this method. We’ll do so in the next step.
We are now able to get images from both our device’s photo gallery and camera. Now, we need to write the logic, which will do the following:
No Valid Credit Card FoundThe steps are very straightforward. Let’s write the method:
const findCardNumberInArray: (arr: string[]) => string = arr => {
  let creditCardNumber = '';
  arr.forEach(e => {
    let numericValues = e.replace(/\D/g, '');
    const creditCardRegex =
      /^(?:4\[0-9]{12}(?:[0-9]{3})?|[25\][1-7]\[0-9]{14}|6(?:011|5[0-9\][0-9])\[0-9]{12}|3[47\][0-9]{13}|3(?:0\[0-5]|[68\][0-9])[0-9]{11}|(?:2131|1800|35\d{3})\d{11})$/;
    if (creditCardRegex.test(numericValues)) {
      creditCardNumber = numericValues;
      return;
    }
  });
  return creditCardNumber;
};

const validateCard: (result: string[]) => void = result => {
    const cardNumber = findCardNumberInArray(result);
    if (cardNumber?.length) {
      setProcessedText(cardNumber);
      setCardIsFound(true);
    } else {
      setProcessedText('No valid Credit Card found, please try again!!');
      setCardIsFound(false);
    }
};
In the code above, we have written two methods, validateCard and findCardNumberInArray. The validateCard method takes one argument of a string[] or an array of strings. Then, it passes that array to the findCardNumberInArray method. If a credit card number string is found in the array, this method returns it. If not, it returns an empty string.
Then, we check if we have a string in the cardNumber variable. If so, we set some state variables, otherwise, we set the state variables to show an error.
Let’s see how the findCardNumberInArray method works. This method also takes one argument of a string[]. Then, it loops through the each element in the array and strips all the non-numeric values from the string. Finally, it checks the string with a regex, which checks if a string is a valid credit card number.
If the string matches the regex, then we return that string as credit card number from the method. If no string matches the regex, then we return an empty string.
You’ll also notice that we have not yet declared these new state variables in our code. Let’s do that now. Add the code below to your App.tsx file:
....
  const [processedText, setProcessedText] = React.useState<string>(
    'Scan a Card to see\nCard Number here',
  );
  const [isProcessingText, setIsProcessingText] = useState<boolean>(false);
  const [cardIsFound, setCardIsFound] = useState<boolean>(false);
....
Now, we just need to plug the validateCard method in our code. Edit your pickAndRecognize and captureAndRecognize methods with the respective codes below:
....
  const pickAndRecognize: () => void = useCallback(async () => {
    ....
      .then(async (res: ImageOrVideo) => {
        setIsProcessingText(true);
        const result: string[] = await TextRecognition.recognize(res?.path);
        setIsProcessingText(false);
        validateCard(result);
      })
      .catch(err => {
        console.log('err:', err);
        setIsProcessingText(false);
      });
  }, []);

  const captureAndRecognize = useCallback(async () => {
    ....
      setIsProcessingText(true);
      const result: string[] = await TextRecognition.recognize(
        image?.path as string,
      );
      setIsProcessingText(false);
      validateCard(result);
    } catch (err) {
      console.log('err:', err);
      setIsProcessingText(false);
    }
  }, []);
....
With that, we’re done! We just need to show the output in our UI. To do so, add the code below to your App.tsx return statement:
....
      {isProcessingText ? (
        <ActivityIndicator
          size={'large'}
          style={styles.activityIndicator}
          color={'blue'}
        />
      ) : cardIsFound ? (
        <Text style={styles.creditCardNo}>
          {getFormattedCreditCardNumber(processedText)}
        </Text>
      ) : (
        <Text style={styles.errorText}>{processedText}</Text>
      )}
....
The code above displays an ActivityIndicator or loader if there is some text processing going on. If we have found a credit card, then it displays it as a text. You’ll also notice we are using a getFormattedCreditCardNumber method to render the text. We’ll write it next. If all conditions are false, then it means we have an error, so we show text with error styles.
Let’s declare the getFormattedCreditCardNumber method now. Add the code below to your App.tsx file:
....

const getFormattedCreditCardNumber: (cardNo: string) => string = cardNo => {
  let formattedCardNo = '';
  for (let i = 0; i < cardNo?.length; i++) {
    if (i % 4 === 0 && i !== 0) {
      formattedCardNo += ` • ${cardNo?.[i]}`;
      continue;
    }
    formattedCardNo += cardNo?.[i];
  }
  return formattedCardNo;
};
....
The method above takes one argument, cardNo, which is a string. Then, it iterates through cardNo and inserts a • character after every four letters. This is just a utility function to format the credit card number string.
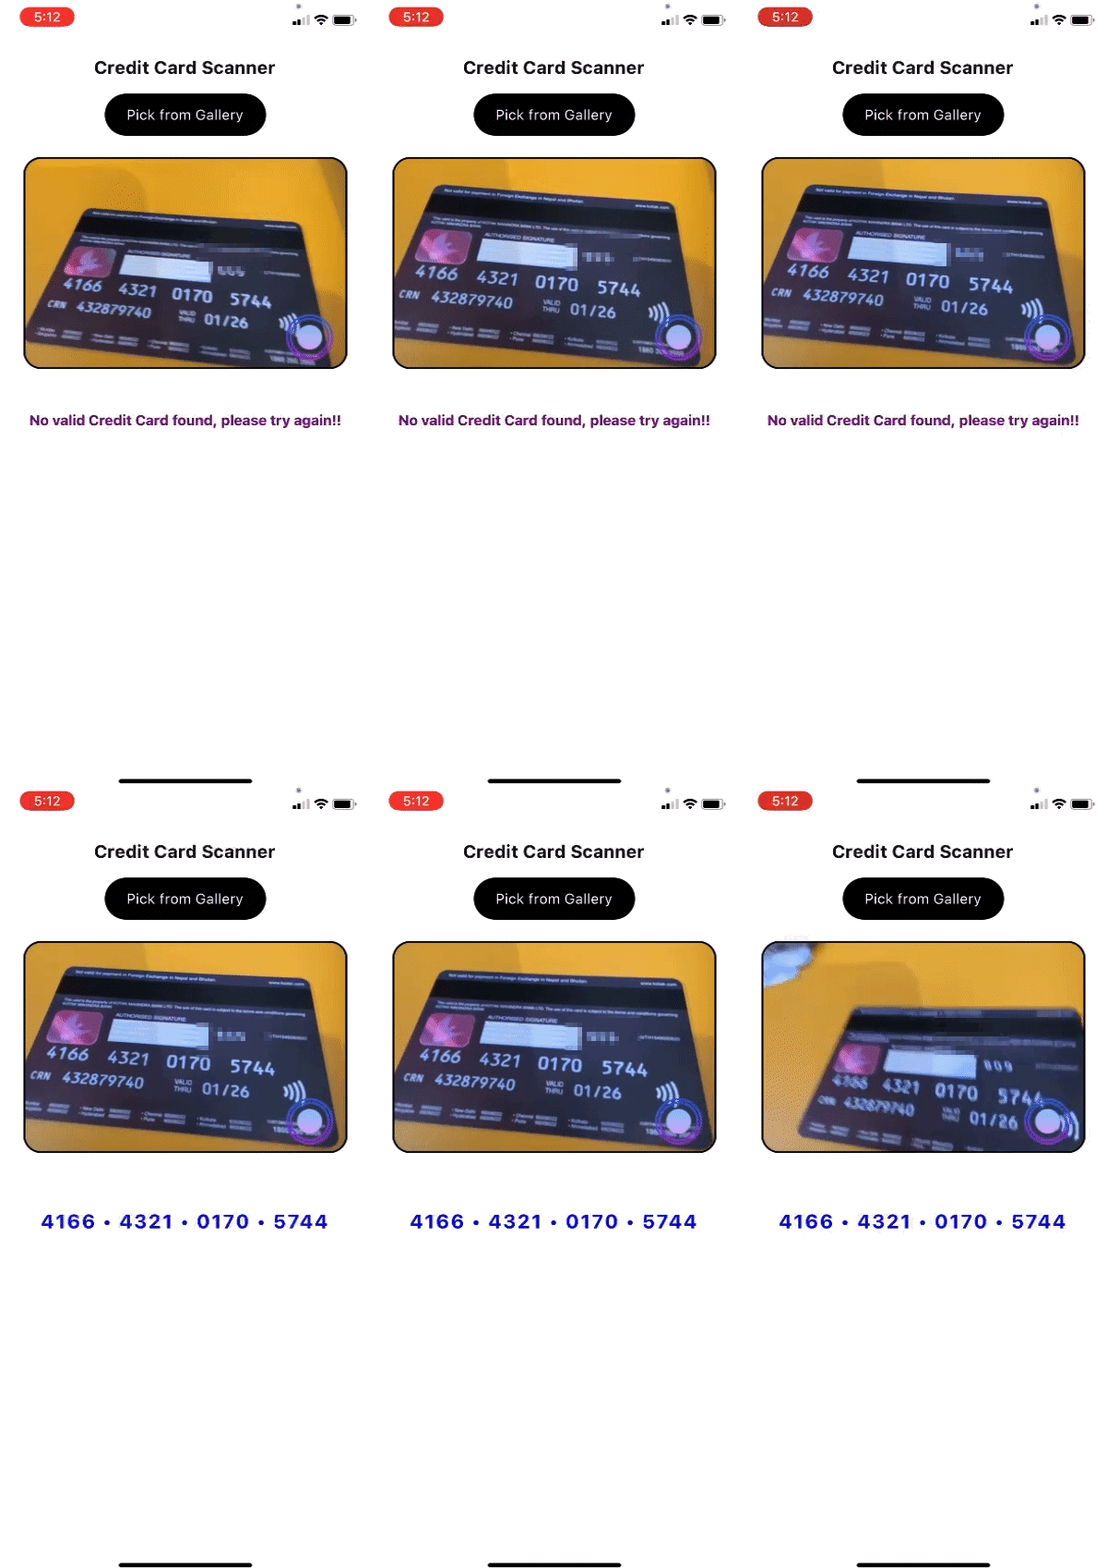
Our end output UI will look like the following:
In this article, we learned how to improve our mobile applications by adding a credit card scanning feature. Using the react-native-text-recognition library, we set up our application to capture a photo from our device’s camera and pick images from the phone gallery, recognizing a 16 digit credit card number.
Text recognition is not just limited to credit card scanning. You could use it to solve many other business problems, like automating data entry for specific tasks like receipts, business cards, and much more! Thank you for reading. I hope you enjoyed this article, and be sure to leave a comment if you have any questions.

LogRocket's Galileo AI watches sessions for you and and surfaces the technical and usability issues holding back your React Native apps.
LogRocket also helps you increase conversion rates and product usage by showing you exactly how users are interacting with your app. LogRocket's product analytics features surface the reasons why users don't complete a particular flow or don't adopt a new feature.
Start proactively monitoring your React Native apps — try LogRocket for free.

@container scroll-state: Replace JS scroll listeners nowCSS @container scroll-state lets you build sticky headers, snapping carousels, and scroll indicators without JavaScript. Here’s how to replace scroll listeners with clean, declarative state queries.

Explore 10 Web APIs that replace common JavaScript libraries and reduce npm dependencies, bundle size, and performance overhead.

Russ Miles, a software development expert and educator, joins the show to unpack why “developer productivity” platforms so often disappoint.

Discover what’s new in The Replay, LogRocket’s newsletter for dev and engineering leaders, in the February 18th issue.
Hey there, want to help make our blog better?
Join LogRocket’s Content Advisory Board. You’ll help inform the type of content we create and get access to exclusive meetups, social accreditation, and swag.
Sign up now