The latest trend to which developers must adapt is writing one codebase for multiple operating systems.

Electron is a JavaScript framework that enables you to create desktop applications with simple JavaScript and HTML and convert websites into executable applications that can make full use of all the features of a Windows, Mac, or Linux operating system.
Vue is a library designed for building interactive and progressive web applications. It provides data-reactive components with a simple and flexible API.
In this tutorial, we’ll walk through how to build a markdown preview app with Vue and Electron.
To follow along with this tutorial, you’ll need the following.
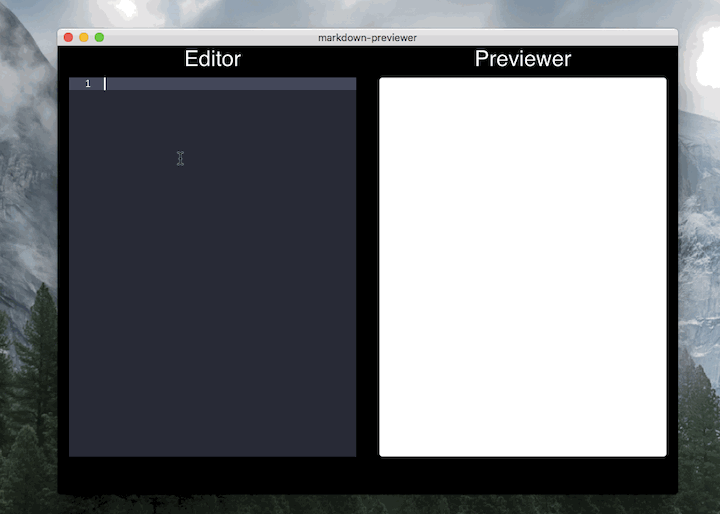
We’re going to build a desktop application that previews markdown codes. Basically, we’ll have a grid with two columns: one for the text editor and another for the preview.
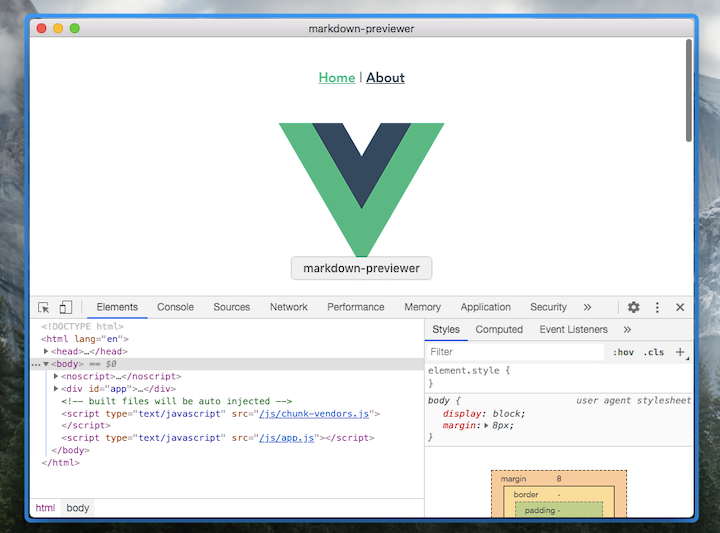
The finished result will look something like this:
Create a new Vuejs application using the Vue CLI. If you don’t have the Vue CLI installed on your development machine, you can install it using this command:
npm install -g @vue/cli
The -g flag will install it globally on your machine.
Next, create a new Vue application with the CLI. Use the vue create command followed by the name of the project.
The name of our application is markdown-previewer, so we can create it by running this command:
vue create markdown-previewer
Running the vue create markdown-previewer will create a new Vue application. But first, you’ll be prompted with some questions to set up the application.
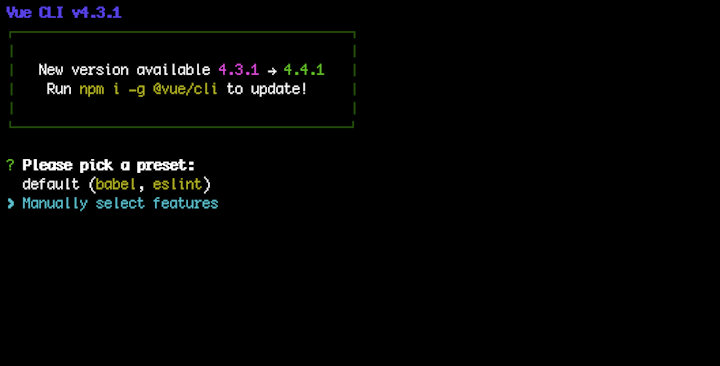
Choose Manually select features and hit enter. This will enable you to explicitly choose which libraries you want to include in your new project.
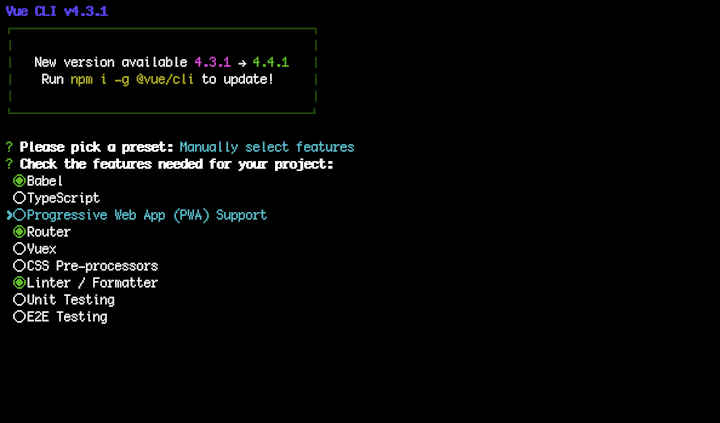
To select and control an item on the features list, your mouse won’t work here, so use your arrows to move up and down and then press the spacebar when you want to select/deselect a feature. Select Router, Babel, and Linter.
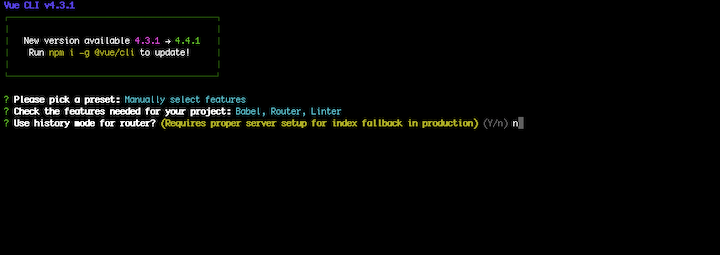
We won’t use history mode; instead, we’ll use hash mode.
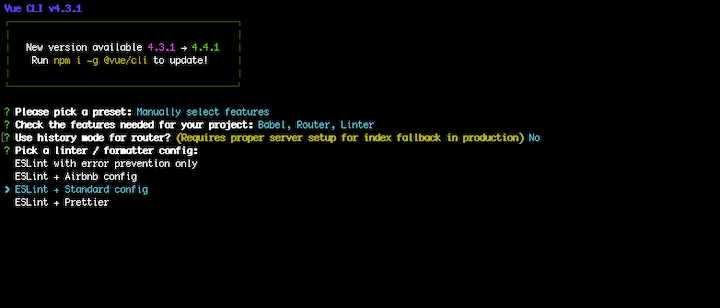
Select ESLint + standard config. This is basically a config for our linter. ESLint helps you maintain a pattern when writing code.
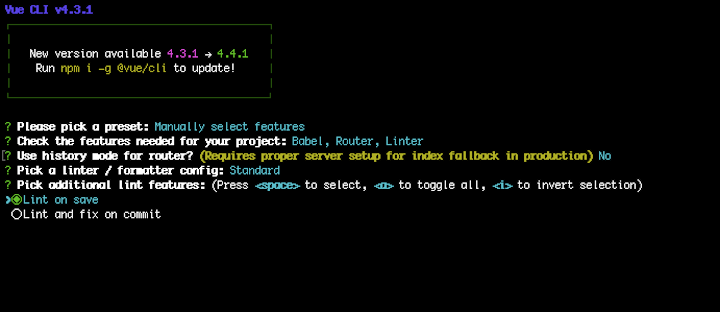
Click Lint on save. This will run lint on the codes when you save it.

Select package.json. This is where we’ll store all our project dependencies.
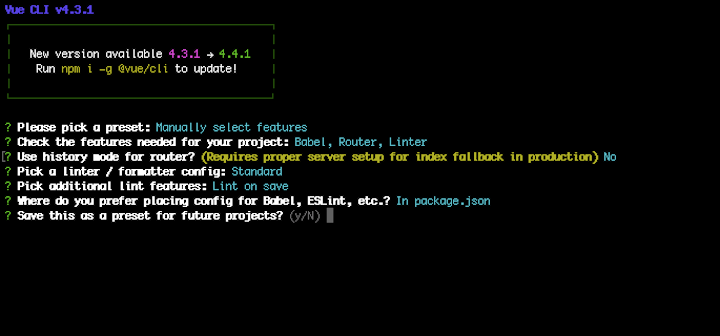
Type Y or N, depending on whether you want to save this as a preset. This saves you the time going through all these steps when creating a new Vue application.
Click enter to start scaffolding a new Vue application.
When the app has been created, you should see this on your terminal:
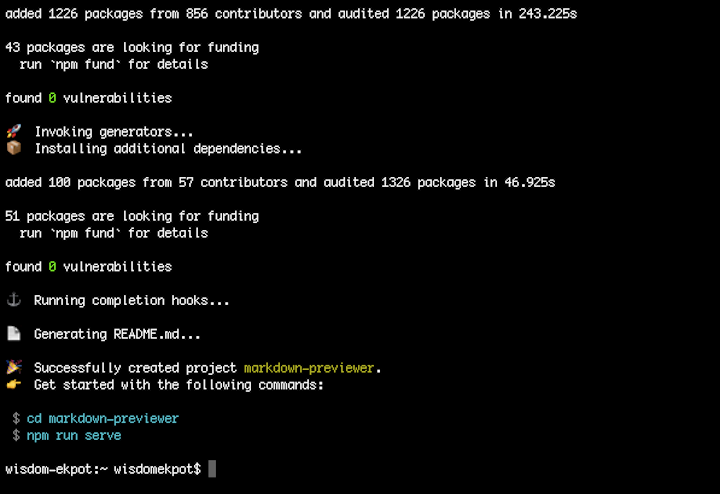
To run the application, move into the project directory and then run npm run serve.
cd markdown-previewer
code . && npm run serve
The code . command will open the project in VS Code, but you’re welcome to use any code editor of your choice.
After compiling, the app will be output on the terminal that the application is running on port http://localhost:8080/.
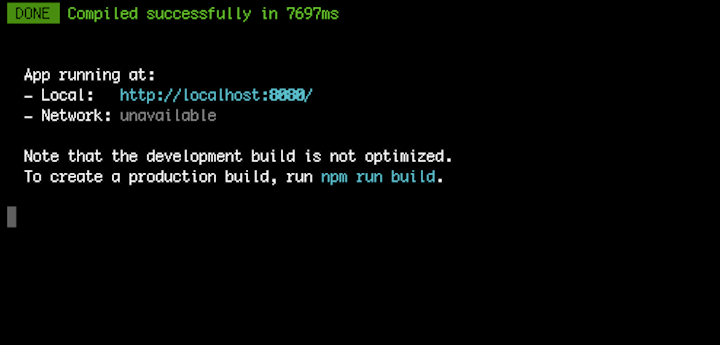
The port number might differ on some local machines. For instance, if you have an application already running on port 8080, Vue will use the closest port to serve your application.
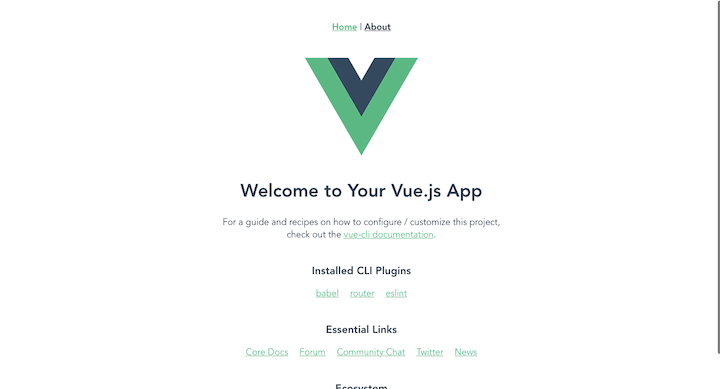
If you access http://localhost:8080/ on the browser, you should see the following.
Now that we have our Vue app up and running, it’s time to add the electron-builder package.
electron-builderThe electron-builder package helps you package and build a ready-for-distribution Electron app for macOS, Windows, and Linux with auto-update support out of the box. It takes care of the hard part of building for desktop.
To add this package to your application, use the Vue add command. This cool feature from Vue CLI automatically configures the package in the app.
To install the package, run the following.
vue add electron-builder
Next, you’ll be prompted to choose your preferred version. Choose the latest version (9.0.0 at the time of this writing) and hit enter to continue.
After running this command, a background.js file is created in the src directory. This is where Electron comes in. The main process creates the desktop window for the application.
After installing the electron-builder package, you’ll find some new scripts in the package.json file:
"electron:build": "vue-cli-service electron:build",
"electron:serve": "vue-cli-service electron:serve",
"postinstall": "electron-builder install-app-deps",
"postuninstall": "electron-builder install-app-deps"
Use the electron:serve command to run the application.
npm run electron:serve
This will open the Electron app on your desktop.
The next step is to install Bootstrap. This will help you set up the user interface more quickly.
Use the vue add command to install Bootstrap. Remember, the vue add command will handle the package registration in the main.js file. To install it, run the following.
vue add bootstrap-vue bootstrap
You’ll be asked whether you want to use babel or not. Type y and hit enter to continue.
Now we can set up our user interface (UI).
Before we set up the user interface, let’s tidy it up a bit.
First, replace the code in compoments/HelloWorld with the following.
<template>
  <section>
    <div class="container-fluid">
      <div class="row text-light">
        <div class="col-md-6">
          <h3>Editor</h3>
        </div>
        <div class="col-md-6">
            <h3>Previewer</h3>
        </div>
      </div>
    </div>
  </section>
</template>
<script>
export default {
  name: "HelloWorld"
};
</script>
This is a basic grid system in Bootstrap. You should encounter an error due to eslint-loader. To deactivate it, create a vue.config.js file and add the following.
module.exports = {
  lintOnSave: false
}
For these changes to occur, you’ll need to restart the server.
Now let’s set up our code editor. We’ll use the Ace package for this.
To install this package, open your terminal and type the following.
npm install --save-dev vue2-ace-editor
Next, define the ace package in the HelloWorld.vue component.
components: {
    editor: require("vue2-ace-editor")
  }
You must also define some states for the editor. For example, you’ll need to define the content state, which is where you’ll store all the markdown code. In addition, you should define the height of the editor using the state property.
  data() {
    return {
      content: "",
      height: window.innerHeight - 100
    };
  },
Now create a method that will bring in all the instances of the editor, such as the language type, themes, and mode.
 methods: {
    editorInit() {
       editorInit() {
      require("brace/ext/language_tools");
      require("brace/mode/markdown");
      require("brace/theme/dracula");
    }
    }
  }
You can now register the component in the template section.
 <editor
            v-model="content"
            ref="”aceeditor”"
            @init="editorInit"
            lang="”markdown”"
            theme="dracula"
            :height="height"
          ></editor>
The output should look like this:

Our user interface needs more cleaning up. Let’s remove the Vue logo and add a section for the preview.
To remove the Vue logo, head to the views/Home.vue file and replace the code with the following.
<template>
  <div>
    <HelloWorld />
  </div>
</template>
<script>
// @ is an alias to /src
import HelloWorld from "@/components/HelloWorld.vue";
export default {
  name: "Home",
  components: {
    HelloWorld
  }
};
</script>
We’ll also need to remove the nav link at the top of the application and change the background color. Open the root App.vue component and replace the code with the following.
<template>
  <div id="app">
    <router-view />
  </div>
</template>
<style>
body {
  background: #000000;
}
#app {
  font-family: helvetica;
  -webkit-font-smoothing: antialiased;
  -moz-osx-font-smoothing: grayscale;
  text-align: center;
  color: #2c3e50;
  height: 100%;
}
</style>
The result of the changes should look like this:
We can now add our preview section. We’ll use a card to preview the markdown.
Add a simple card to the template in your components/HelloWorld.vue file.
<div class="col-md-6">
  <h3>Previewer</h3>
  <div class="card text-left p-2" :style="styleObject">{{content}}</div>
</div>
Then, define a state to hold some styles for the data.
 styleObject: {
        height: window.innerHeight - 100 + "px",
        color: "black",
        overflowY: "auto"
      },
Here we’re adding some dynamic styles to the div with the class of card so that the height will always match that of the code editor.
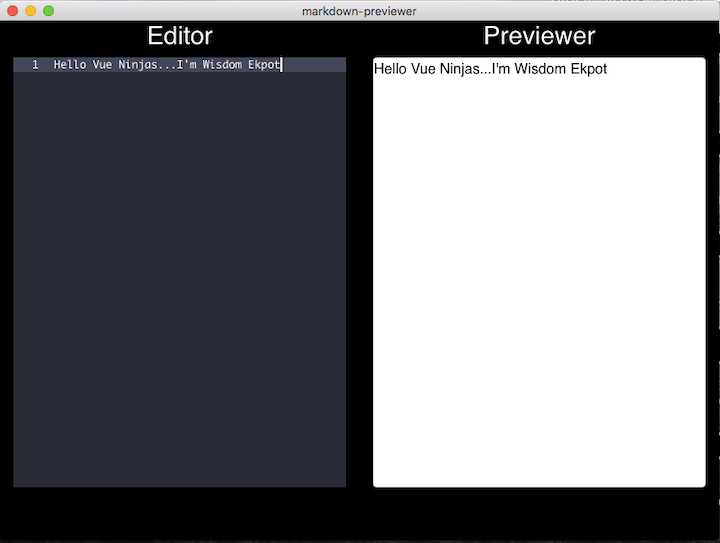
Anything you type on the code editor will be displayed on the preview card.
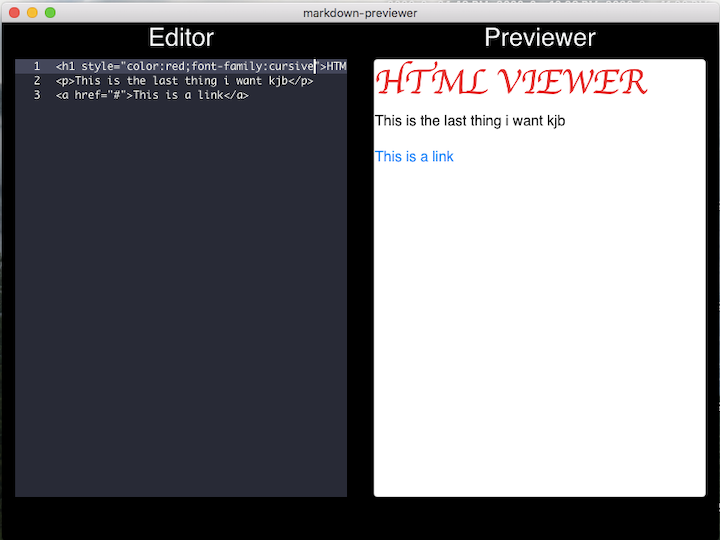
You can convert the codebase to an HTML previewer using the v-html directive.
<div class="card text-left p-2" :style="styleObject" v-html="content"></div>
This will convert the code in the editor to HTML.
We’ll demonstrate how to implement the markdown previewer in two ways: the easy way and the complex way.
The complex way entails writing your own custom markdown directive. The easy way involves simply installing a package from your markdown code.
Let’s start with the complex way.
We’re going to set up our own custom Vue directive for the markdown using regular expressions. This is a tedious process.
Start by creating a directive directory inside the src director, then create a decode.js file. This is where you’ll write all your markdown configs.
Next, register the markdown in the main.js file.
import decode from '@/directives/decode'
Vue.directive("decode", decode)
Set up the code code for your markdown. A custom Vue directive is wrapped in a bind() method and an element is passed as a param.
export default {
  bind: el => {
    console.log(el.innerHTML)
  }
}
You can now use the v-decode directive on your template.
<div v-markdown :key="content" class="card text-left p-2" :style="styleObject">{{content}}</div>
Pass the content as the key. Any time there is a keyup event on the editor, the directive will log the content on your console.
The next step is to start writing some regular expressions for the markdown.
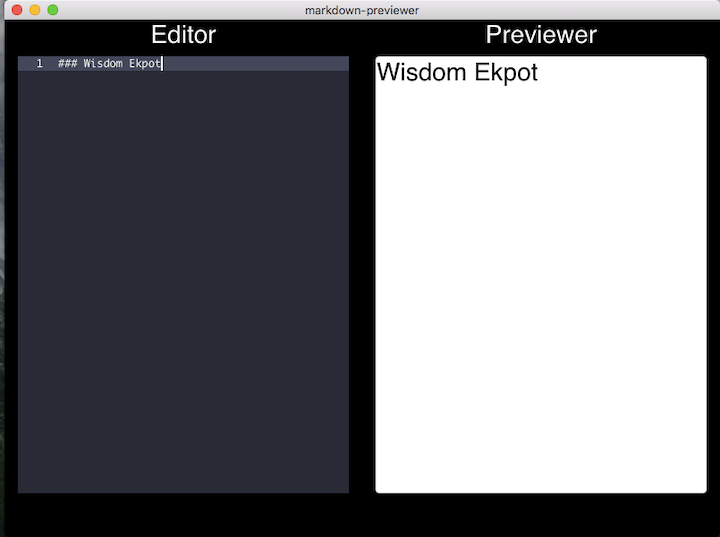
Create a custom rules array to hold all your regular expressions. Start with a simple header.
const rules = [
  [/^(?:######)\s*(.+?)[ \t]*$/gm, '<h6>$1</h6>'],
]
This simple rule will convert ###### to an HTML element.
Let’s break down what’s happening here:
^ asserts the position at the start of a line(?:######) matches the character ######\s* matches the white space characters(.+?) matches all characters except for line terminators. An example is the line terminator, which marks the end of a line in the input character sequence[ \t]* is a qualifier that matches between zero and unlimited and matches a space or tab characterg returns all matchesm Causes ^ and $ to match the start/end of each lineTo learn more about regular expressions, head to Regular Expressions 101.
Now that we have a regex for our element, we can do same for the rest of the header elements by modifying the expression.
const rules = [
  [/^(?:######)\s*(.+?)[ \t]*$/gm, '<h6>$1</h6>'],
  [/^(?:#####)\s*(.+?)[ \t]*$/gm, '<h5>$1</h5>'],
  [/^(?:####)\s*(.+?)[ \t]*$/gm, '<h4>$1</h4>'],
  [/^(?:###)\s*(.+?)[ \t]*$/gm, '<h3>$1</h3>'],
  [/^(?:##)\s*(.+?)[ \t]*$/gm, '<h2>$1</h2>'],
  [/^(?:#)\s*(.+?)[ \t]*$/gm, '<h1>$1</h1>']
]
Here we defined a regular expression for all header elements. To use them, we have to loop through and replace our custom input with the rule that matches the expression.
 bind(el) {
    let content = el.textContent
    rules.forEach(([rule, template]) => {
      content = content.replace(rule, template);
      console.log(content)
    })
    el.innerHTML = content
  }
}
With this defined, we can use the header elements in our editor.
Lets define some other simple rules.
[/^(?:-)\s*(.+?)[ \t]*$/gm, '<ul><li>$1</li></ul>']
[/^(?:>)\s*(.+?)[ \t]*$/gm, ' <blockquote>$1</blockquote>']
Writing all the expressions for our markdown can be confusing and time-consuming. But it’s always good to understand what is happening under the hood of all the packages. This leads us to the easy way of implementing the markdown previewer.
The simpler method is to install a package to help you manipulate your data.
We’ll use the vue-directive-markdown. To install it, open your terminal run the following.
npm install vue-directive-markdown --save-dev
Next, register and configure it in your main.js file so that you can access it globally in your application.
import VueDirectiveMarkdown from 'vue-directive-markdown'
Vue.directive('decode', VueDirectiveMarkdown)
You can access this by parsing v-decode in the template.
<div v-decode :key="content" class="card text-left p-2" :style="styleObject">{{content}}</div>
Lastly, pass the content as a key so that it updates whenever you’re typing.
Understanding how to write custom directives will really kick your Vue skills up a notch. The need to write one codebase for both desktop and web is something we all have to adapt to.
Head to GitHub for the complete source code.
Debugging Vue.js applications can be difficult, especially when users experience issues that are difficult to reproduce. If you’re interested in monitoring and tracking Vue mutations and actions for all of your users in production, try LogRocket.

LogRocket lets you replay user sessions, eliminating guesswork by showing exactly what users experienced. It captures console logs, errors, network requests, and pixel-perfect DOM recordings — compatible with all frameworks.
With Galileo AI, you can instantly identify and explain user struggles with automated monitoring of your entire product experience.
Modernize how you debug your Vue apps — start monitoring for free.

A guide for using JWT authentication to prevent basic security issues while understanding the shortcomings of JWTs.

Discover how to build, render, and automate product demo videos with Remotion, replacing traditional screen recordings with reusable React code.

Chrome’s Modern Web Guidance embeds modern web platform skills into AI coding agents, helping them choose native HTML, CSS, and browser APIs over legacy patterns.

Learn how to use Fallow to analyze AI-generated code, detect dead code, duplicate logic, and complexity issues, and integrate automated code quality checks into your AI-assisted development workflow.
Would you be interested in joining LogRocket's developer community?
Join LogRocket’s Content Advisory Board. You’ll help inform the type of content we create and get access to exclusive meetups, social accreditation, and swag.
Sign up now

