Editor’s note: This article was last reviewed and updated by Emmanuel Odioko in January 2025. It now includes guidance on inserting JavaScript code into existing iframes, addressing potential security risks of using iframe elements in React, and programmatically modifying iframe attributes to enhance security, edit functionality, or allow specific interactions like enabling forms or opening pop-ups.

When building webpages, developers often need to include resources from other webpages. Some common examples you may recognize from browsing the web include the share button from X, the like button on Facebook, and the map display on Google Maps.
A popular way to retrieve this type of data is with an iframe. Short for inline frame, an iframe is essentially a frame within a frame. Using the <iframe/> tag, you can easily embed external content from other sources directly into your webpage. Developers also use iframes to isolate certain resources from the same webpage, such as encapsulating and rendering components within iframes.
In this tutorial, we’ll explore iframes in React by looking at these two different use cases. But first, we’ll cover some background information about how iframes work. Let’s get started!
When a resource is rendered in an iframe, it functions independently of the parent component where it is embedded. Therefore, neither the parent component’s CSS styling nor its JavaScript will have any effect on the iframe.
In React, developers use iframes to create either a sandboxed component or an application that is isolated from its parent component. In an iframe, when a piece of content is embedded from an external source, it is completely controlled by the source instead of the website it is embedded in.
For this reason, it’s important to embed content only from trusted sources. Keep in mind also that iframes use up additional memory. If the content is too large, it can slow down your webpage load time, so you should use iframes carefully.
First, let’s learn how to embed pages from external sources, which is probably the more common use case of iframes. Nowadays, you rarely see a web app that doesn’t have any content loaded from an external source.
For example, consider how many YouTube videos you find on webpages, Instagram posts you see outside of the app, Facebook comment sections on blogs, and even ads on webpages. Each of these elements is embedded into the website, which can range in complexity from a single line of code to an entire code section.
In our example, we can use the following line of code to add an X post button to a React app:
<iframe src="https://platform.twitter.com/widgets/tweet_button.html" ></iframe>
We’ll use the code snippet above in the following code to generate a post button like the one seen in the screenshot below. When a user clicks the post button, the selected content will open in a new post on their X homepage:
function App() {
  return (
    <div className="App">
      <h3>Iframes in React</h3>
      <iframe src="https://platform.twitter.com/widgets/tweet_button.html"></iframe>
    </div>
  );
}

export default App;

Now, let’s review some useful attributes of the iframe tag, which will allow you to modify and customize your iframes. For one, src is used to set the address of the webpage that you want to embed. For example, we can use the src tag to embed a YouTube video as follows:
<iframe src="https://www.youtube.com/embed/uXWycyeTeCs" ></iframe>

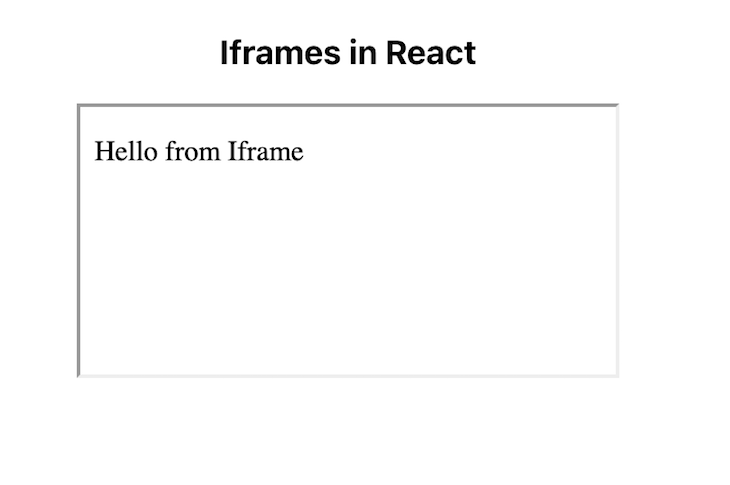
srcdoc is used to set an inline HTML to embed. Note that the srcdoc attribute will override the src attribute if both are present. In the code snippet below, we’ll override the src command for a YouTube video with the srcdoc command, which uses a hello message as a placeholder:
<iframe src="https://www.youtube.com/embed/uXWycyeTeCs" srcDoc='<p>Hello from Iframe</p>' ></iframe>
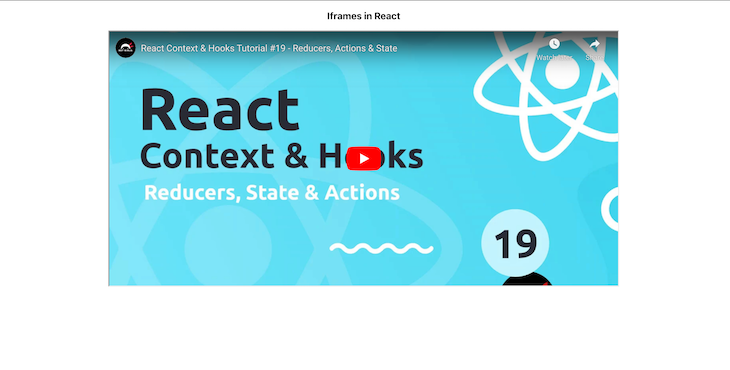
We’ll use height and width attributes to set the dimensions of our iframe. The default unit is pixels, but you can use other units as well. In the code snippet below, we’ll set the dimensions of an iframe that displays a YouTube video, as seen in the following screenshot:
<iframe src="https://www.youtube.com/embed/uXWycyeTeCs" width={1000} height={500} ></iframe>
The allow attribute sets the features available to the <iframe> based on the origin of the request, for example, accessing autoplay, microphone, and more.
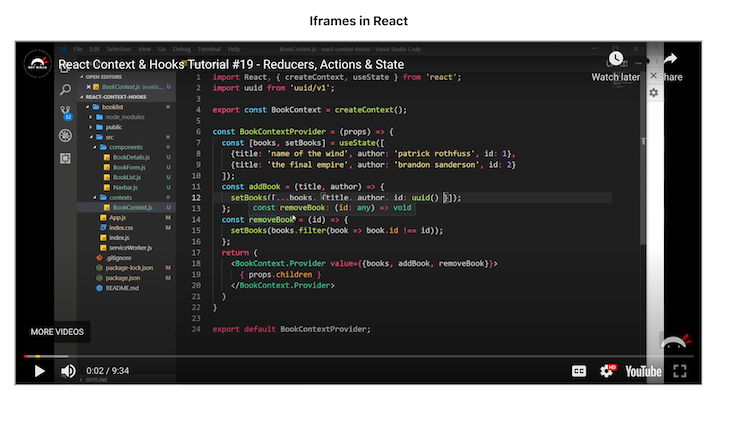
In the screenshot below, we set allow for our YouTube video with the following values: accelerometer, autoplay, clipboard-write, encrypted-media, gyroscope, and picture-in-picture full:
<iframe src="https://www.youtube.com/embed/uXWycyeTeCs" width={1000} height={500} allow="accelerometer; autoplay; clipboard-write; encrypted-media; gyroscope; picture-in-picture full"></iframe>
The title attribute is used to set a description for the content in the iframe. While the title attribute has no effect on the UI of the iframe, it is helpful for accessibility, providing valuable input to screen readers. In the code snippet below, we’re adding a title to our YouTube video:
<iframe src="https://www.youtube.com/embed/uXWycyeTeCs" width={1000} height={500} title='A youtube video on React hooks'></iframe>
Next, we’ll use the name attribute to set the iframe name and use it to reference the element in JavaScript. Similarly, you can also set the name attribute as the value of the target attribute of an a or form element or the value of the formtarget attribute of an input or button element.
To set restrictions on the content of the iframe, we use the Sandbox attribute. As mentioned earlier in this tutorial, we can’t control the content sent from an external source, but we can restrict what we accept in the iframe using Sandbox. To apply all restrictions, leave the value of the attribute empty. Or, you can add flags to relax the restrictions.
For example, allow-modals will allow the external page to open modals, and allow-scripts will allow the resource to run scripts:
<iframe src="https://www.youtube.com/embed/uXWycyeTeCs" width={1000} height={500} sandbox='allow-scripts allow-modal' ></iframe>
Properly using the Sandbox attribute and its flags can greatly improve your app’s security, especially if the resource you’re embedding is from a third party.
To set how the browser should load the iframe content, we’ll use the loading attribute; loading takes either eager or lazy. When set to eager, the iframe is loaded immediately, even if it is outside the visible viewport, which is the default value. lazy delays loading until it reaches a calculated distance from the viewport, as defined by the browser:
<iframe src="https://www.youtube.com/embed/uXWycyeTeCs" width={1000} height={500} sandbox='allow-scripts allow-modal' loading='eager'></iframe>
When you don’t need to control the content that is being rendered in an iframe, the method we just covered is a good strategy. If you want to show your page visitors a video on YouTube or a post on Instagram, you can simply add the URL to the src attribute.
But what if you are building a complex app, such as a CodeSandbox that allows users to build standalone apps on the same platform, or a chatbot that gets triggered when a user clicks a button? In both examples, you are in control of the content, but you also want to isolate them from the rest of the app.
In this section, we’ll explore rendering a React app or component in an iframe. This is a good strategy when you want to cut CSS excesses or use a full-fledged app in another app without any interferences, especially when you want the content of the iframe to share state with its parent.
Let’s try to render our iframe as a direct child of the iframe:
function App() {
  return (
    <div className="App">
      <p>Iframes in React</p>
      <iframe>
        <MyComponent />
      </iframe>
    </div>
  );
}

export default App;
However, when we run the code above, we get nothing:
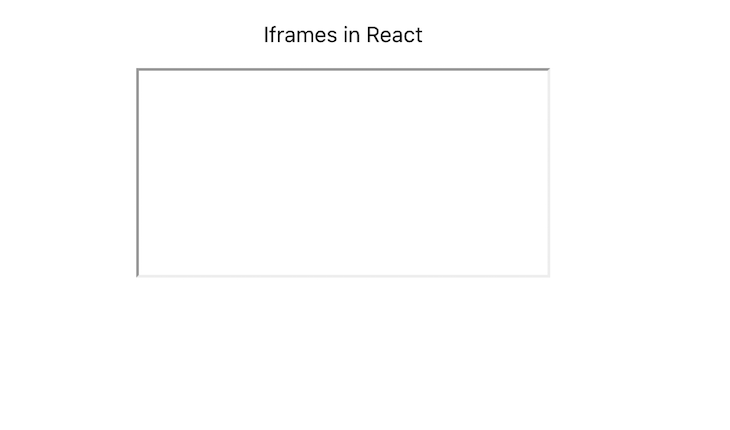
You can only use the src attribute to set the URL that we want to render. Because we are trying to render a component in the same app, the src attribute won’t work.
Alternatively, we could use the srcdoc attribute, which takes in an inline HTML to embed. However, we’re then trying to render an entire app or component, which uses extensive and verbose code. We need to find a way to render the component in the iframe body instead of as a child of it. For that, we’ll use a portal.
According to the React documentation, portals allow us to render children into a DOM node that exists outside of the parent component’s DOM hierarchy. Basically, portals let us render children wherever we want to.
You can create a portal with the following command:
ReactDOM.createPortal(children, domNode, key?)
In this case, the children parameter can be a piece of JSX, a React Fragment, a string, a number, or an array of these things. The domNode parameter is the DOM location or node to which the portal should be rendered. The optional key parameter is a unique string or number React will use as the portal’s key.
With a React portal, we can choose where to place a DOM node in the DOM hierarchy. To do so, we’ll first establish a reference to an existing and mounted DOM node. In this case, it would be in the contentWindow of a given <iframe>. Then, we’ll create a portal with it. The portal’s contents are also considered children of the parent’s virtual DOM.
Let’s say we have the following file called MyComponent.js:
import React from "react";

function MyComponent() {
  return (
    <div>
      <p style={{ color: "red" }}>Testing to see if my component renders!</p>
    </div>
  );
}

export default MyComponent;
Now, let’s create a file called CustomIframe.js and write the following code:
import React, { useState } from 'react'
import { createPortal } from 'react-dom'

const CustomIframe = ({
  children,
  ...props
}) => {
  const [contentRef, setContentRef] = useState(null)

  const mountNode =
    contentRef?.contentWindow?.document?.body

  return (
    <iframe {...props} ref={setContentRef}>
      {mountNode && createPortal(children, mountNode)}
    </iframe>
  )
}

export default CustomIframe;
We created a ref with the useState() Hook, therefore, once the state is updated, the component will re-render. We also got access to the iframe document body and then created a portal to render the children passed to iframe in its body instead:
import "./App.css";
import CustomIframe from "./CustomIframe";
import MyComponent from "./MyComponent";

function App() {
  return (
    <CustomIframe title="A custom made iframe">
      <MyComponent />
    </CustomIframe>
  );
}

export default App;
You can pass any React app or component as a child of CustomIframe, and it will work just fine! The React app or component will become encapsulated, meaning you can develop and maintain it independently.
You can also achieve the same encapsulation as above using a library called React component. To install it, run the following command:
npm install --save react-frame-component
Encapsulate your component as follows:
import Frame from 'react-frame-component';

function App() {
  return (
    <div className='App'>
        <p>Iframes in React</p>
        <Frame >
           <MyComponent />
        </Frame>
    </div>
  );
}

export default App;
As explained above, the content of an iframe is a complete document with its markup and static assets like JavaScript, images, videos, fonts, and styling. The default Material UI (MUI) settings will not apply styling to React components rendered inside an iframe out of the box. An iframe is an isolated environment, therefore you need to integrate MUI with the iframes in your React project.
By default, MUI uses Emotion as its styling engine under the hood, and the generated styles are injected into the parent frame’s head element. However, the styles aren’t inserted into the iframe out of the box because the iframe’s document is different.
You can use the @emotion/cache package with the <CacheProvider/> component to get Emotion to work within embedded contexts like iframes. The @emotion/cache package is not installed by default. You need to install it from the npm package registry like so:
npm i @emotion/cache
After installing @emotion/cache, you can add the changes below to the CustomIframe component wrapper we created while learning how to use the React portal to render a component in an iframe:
import React, { useState } from "react";
import { createPortal } from "react-dom";

import { CacheProvider } from "@emotion/react";
import createCache from "@emotion/cache";

const CustomIframe = ({ children, ...props }) => {
  const [contentRef, setContentRef] = useState(null);

  const cache = createCache({
    key: "css",
    container: contentRef?.contentWindow?.document?.head,
    prepend: true,
  });

  const mountNode = contentRef?.contentWindow?.document?.body;

  return (
    <CacheProvider value={cache}>
      <iframe {...props} ref={setContentRef}>
        {mountNode && createPortal(children, mountNode)}
      </iframe>
    </CacheProvider>
  );
};

export default CustomIframe;
In the code above, we wrapped the iframe inside the <CacheProvider/> component. The generated styles will be inserted into the iframe’s head element. You can also insert them into a DOM node other than the head element.
As explained above, communication between an iframe and its parent frame is subject to the same origin restriction because of security concerns. Therefore, most features are restricted if the iframe is from a different origin than the parent frame.
However, the parent frame can still communicate with an embedded iframe via events using the window.postMessage() API, though they may not be from the same origin.
For the same-origin frames, you can access the iframe from its parent. Similarly, you can also access the parent frame from the iframe.
An iframe is a document with assets like JavaScript, CSS, images, and audio. It will take a bit of time to load. Therefore, it’s good practice to render a loading indicator while the iframe is still loading to provide a good user experience.
A fully loaded iframe will emit the onLoad event. You can update the loading state in the onLoad event handler to remove the loading indicator when the iframe has finished loading:
function App() {
  const [loadingIframe, setLoadingIframe] = useState(true);

  return (
    <>
      <iframe
        src="https://www.youtube.com/embed/uXWycyeTeCs"
        onLoad={() => setLoadingIframe(false)}
      ></iframe>
      {loadingIframe ? <p> Loading iframe</p> : null}
    </>
  );
}
As hinted above, the content of an iframe is a complete document with markup and other static assets like images, styles, and JavaScript. These assets use bandwidth, take time to load, and use memory after loading. Therefore, it is necessary to optimize the iframe page load.
If your iframe renders a video, you can optimize it by rendering a simple thumbnail or placeholder image and loading the iframe after the user clicks it. It ensures faster page load, and the user only downloads and watches the video if it is necessary to do so.
Furthermore, you can optimize the iframe load by setting the iframe’s loading attribute to lazy. If you load all the iframe resources as soon as the page loads, you pay the ultimate penalty of loading off-screen content that the user may not see or interact with:
<iframe
  src="https://www.youtube.com/embed/uXWycyeTeCs"
  width={1000}
  height={500}
  loading="lazy"
></iframe>;
Doing so will defer loading off-screen iframes until the user scrolls near them. As a result, it increases page load speed, saves bandwidth, and reduces your site’s memory usage.
Omitting the loading attribute is equivalent to setting its value to eager. The browser eagerly loads the iframe as soon as the page loads, irrespective of whether the user will see or interact with it.
Inserting JavaScript into an iframe is a straightforward process. However, it’s important to note that the example below will only work if the iframe content is on the same domain. This restriction is in place because browsers block cross-domain scripting to protect user security and privacy. By preventing malicious scripts from accessing or manipulating data on a different domain, these measures help protect sensitive user information.
Let’s say you have an HTML file like this:
<!DOCTYPE html>
<html>
<head>
  <meta charset="UTF-8" />
  <title>iFrame Example</title>
</head>
<body>
  <!-- The iframe points to a page on the same domain: content.html -->
  <iframe id="my-iframe" src="content.html" width="600" height="200"></iframe>
  <script src="script.js"></script>
</body>
</html>
And another file, which we will name content.html , is supposed to be the page to be loaded within the iframe:
<!DOCTYPE html>
<html>
<head>
  <meta charset="UTF-8" />
  <title>Iframe Content</title>
</head>
<body>
  <h1>Hello from content.html: This is Logrocket</h1>
  <!-- The script we insert later will appear in the DOM and the console. -->
</body>
</html>
To insert vanilla JavaScript into the already existing iframe, we will run the following code:
// Wait until the main document is fully loaded
document.addEventListener('DOMContentLoaded', () => {
    // Find the iframe element
    const iframe = document.getElementById('my-iframe');

    // Make sure the iframe has loaded
    iframe.addEventListener('load', () => {
      // Access the iframe's document
      const iframeDoc = iframe.contentDocument || iframe.contentWindow.document;

      // Create a new script element
      const scriptEl = document.createElement('script');
      scriptEl.type = 'text/javascript';

      // The JS code you want to run inside the iframe
      scriptEl.text = `
        // Just a basic example: log a message and modify the iframe's DOM
        console.log('Hello from the parent script: this is Logrocket!');

        const newParagraph = document.createElement('p');
        newParagraph.textContent = 'This paragraph was inserted via parent script.';
        document.body.appendChild(newParagraph);
      `;

      // Insert the script into the iframe's <head> or <body>
      iframeDoc.head.appendChild(scriptEl);
    });
  });
In the code above, we did four major things. First, we were able to get the iframe reference:
const iframe = document.getElementById('my-iframe');
Then, we waited for the iframe to load to ensure we only manipulated the iframe’s document after it had successfully loaded:
iframe.addEventListener('load', () => { ... });
Then we created a <script> element and we set its .text property to the JavaScript code we wanted to display.
Finally, we appended the script to the head of the iframe’s document, and voilà, we had our job done!
iframes are commonly used for displaying ads, sharing external content, creating dynamic features, and enhancing user experience. However, they are also frequently exploited for malicious hacking techniques.
Hacking techniques, such as cross-site scripting (XSS) attacks, allow attackers to perform various malicious actions, including redirecting users to harmful websites or tracking and manipulating user behavior.
On top of that, harmful browser extensions or other malicious software can sneak iframes into legitimate pages, creating further security risks. To prevent such attacks, developers are advised to make use of the sandbox attributes.
Sandboxing an iframe places restrictions on what the embedded content can do. By assigning sandbox attributes, you limit the use of potentially dangerous features, like forms, scripts, cookies, and local storage, and prevent them from interacting with the host site in unintended ways.
To modify an iframe attribute programmatically, we can either remove or adjust the sandbox attribute.
In the example below, we will add these sandbox permissions: sandbox="allow-scripts allow-popups", which will allow the iframe to run scripts and open pop-up windows but is otherwise restricted.
Our HTML setup will look like this:
<!DOCTYPE html>
<html>
<head>
  <meta charset="UTF-8" />
  <title>Modify iFrame Sandbox Example</title>
</head>
<body>
  <!-- An example iframe with sandbox enabled -->
  <iframe
    id="my-iframe"
    src="content.html"
    width="600"
    height="200"
    sandbox="allow-scripts allow-popups"
  ></iframe>

  <button id="remove-sandbox-btn">Remove Sandbox</button>
  <button id="modify-sandbox-btn">Allow Forms</button>

  <script src="script.js"></script>
</body>
</html>
To remove the sandbox attribute, we will use removeAttribute():
document.addEventListener('DOMContentLoaded', () => {
  const iframe = document.getElementById('my-iframe');
  const removeSandboxBtn = document.getElementById('remove-sandbox-btn');

  removeSandboxBtn.addEventListener('click', () => {
    // Removes the sandbox attribute from the iframe
    iframe.removeAttribute('sandbox');
    iframe.src = iframe.src; //This force reloads the iframe, to ensure the new policies are working already.
    console.log('Sandbox attribute removed.');
  });
});
Now, instead of removing the iframe entirely, you might want to modify it — such as adding or removing specific permissions within the sandbox. For example, you might want to add allow-forms to an existing set of sandbox tokens. Here’s how you can do that easily:
document.addEventListener("DOMContentLoaded", () => {
  const iframe = document.getElementById("my-iframe");
  const modifySandboxBtn = document.getElementById("modify-sandbox-btn");
  modifySandboxBtn.addEventListener("click", () => {
    // Get current sandbox settings
    const existingSandbox = iframe.getAttribute("sandbox") || "";
    // Convert to an array of tokens (like ["allow-scripts", "allow-popups"])
    let sandboxTokens = existingSandbox.split(" ").filter(Boolean);
    // If "allow-forms" is not already in there, add it
    if (!sandboxTokens.includes("allow-forms")) {
      sandboxTokens.push("allow-forms");
    }
    // Rejoin and set it back
    const newSandboxValue = sandboxTokens.join(" ");
    iframe.setAttribute("sandbox", newSandboxValue);
    console.log("Sandbox modified:", newSandboxValue);
    iframe.src = iframe.src;
  });
});
It’s important to note that removing the sandbox attribute entirely can expose your application to risks, which we mentioned in the previous section. Always ensure that the source of the iframe content is well-trusted.
In this tutorial, we explored two different use cases for iframes in React. First, we learned how to embed external content from a webpage into a web application using an iframe, separating the JavaScript and CSS of the parent and child elements. Second, we learned how to isolate specific parts of our app within an iframe.
iframes are a valuable tool that every developer should understand. I hope you found this tutorial helpful!
Install LogRocket via npm or script tag. LogRocket.init() must be called client-side, not
server-side
$ npm i --save logrocket

// Code:

import LogRocket from 'logrocket';
LogRocket.init('app/id');
// Add to your HTML:

<script src="https://cdn.lr-ingest.com/LogRocket.min.js"></script>
<script>window.LogRocket && window.LogRocket.init('app/id');</script>

Discover how React Fiber works under the hood. Learn how React builds the DOM, handles concurrent rendering, and works alongside React 19 features and the new React Compiler.

Learn how to use Skybridge, an open-source React framework, to build and deploy cross-platform AI apps and interactive UI widgets for ChatGPT, Claude, and MCP clients from a single codebase.

Learn how to set up Meilisearch, index documents, and build keyword, semantic, and hybrid search with AI-powered retrieval.

Compare pnpm and npm across security defaults, disk usage, dependency strictness, and workspace policy to decide which package manager fits your project.
Hey there, want to help make our blog better?
Join LogRocket’s Content Advisory Board. You’ll help inform the type of content we create and get access to exclusive meetups, social accreditation, and swag.
Sign up now

