Editor’s note: This article was updated on 3 March 2022 to include information about Apache Kafka version 3.1.0, as well as an overview of KRaft.

A study from the McKinsey Global Institute reveals that data-driven organizations are 23 times more likely to acquire customers, six times as likely to retain customers, and 19 times as likely to be profitable.
In an intelligible and usable format, data can help drive business needs. However, large tech companies collect user data in raw form. So, the challenge is to process and, if necessary, transform or clean the data to make sense of it.
Basic data streaming applications move data from a source bucket to a destination bucket. More complex applications that involve streams perform some magic on the fly, like altering the structure of the output data or enriching it with new attributes or fields.
In this article, we’ll review Apache Kafka’s key concepts and terms and will demonstrate how to use Kafka to build a minimal real-time data streaming application.
Our tutorial will follow these steps:
To follow along with this tutorial, the following prerequisites are required:
Data transformation and/or enrichment is mostly handled as it is consumed from an input topic to be used by another application or an output topic. This is a very common scenario in data engineering, as there is always a need to clean up, transform, aggregate, or even reprocess usually raw and temporarily stored data in a Kafka topic to make it conform to a particular standard or format.
According to its website, Kafka is an open-source, highly distributed streaming platform. Built by the engineers at LinkedIn (now part of the Apache software foundation), Kafka is a reliable, resilient, and scalable system that supports streaming events/applications. It is horizontally scalable, fault-tolerant by default, and offers high speed. Kafka has a variety of use cases, one of which is to build data pipelines or applications that handle streaming events and/or processing of batch data in real time. At the time of writing, the latest Kafka version is 3.1.0.
Here are some of Kafka’s basic concepts and terms:

For more detailed information on all these important concepts, check out the Apache Kafka documentation.
In this article, you’ll learn how to use Apache Kafka to build a data pipeline to move batch data. As a demo, we’ll simulate a large JSON data store generated at a source. Then, we’ll write a produced script that writes this JSON data from a source at, say, point A to a particular topic on our local broker/cluster Kafka setup. Finally, we’ll write a consumer script that consumes the stored data from the specified Kafka topic.
To install Kafka, download the latest version here and extract it with the following commands:
tar -xzf kafka_2.13-3.1.0.tgz
cd kafka_2.13-3.1.0
The tar command extracts the downloaded Kafka binary. The Kafka binaries can be downloaded on any path we desire.
Next, navigate to the directory where Kafka is installed and run the ls command. Then, cd into the bin directory and run ls again:

bin folder.If we go a level up with the cd .. command and run ls, we’ll find a config folder.
The config folder contains a server.properties file that we’ll use to configure the Kafka server and include any desired changes or configurations.
Now, run the following commands:
cd ..
ls
cd config
ls
nano server.properties

config directory.KRaft’s controllers are used to store all metadata inside Kafka. The lead KRaft controller is responsible for providing the latest state for the Kafka brokers. The other KRaft controllers are always on standby in case the lead controller ever fails.
Now, we’ll start writing the configurations for our Kafka server to set up the Kafka cluster.
Here, we’ll set up our Kafka cluster, which will consist of the Kafka brokers (servers) that are running. All configurations will be done in the config directory and in the server.properties file.
First, we’ll ensure that we’re still in the config directory. Then, we’ll run these commands:
cd kraft
ls

Next, copy the server.properties into a new file called server1.properties and start editing the file using the following commands:
cp server.properties server1.properties
nano server1.properties
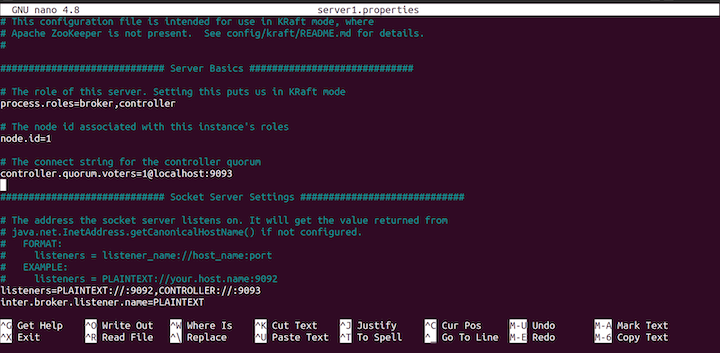
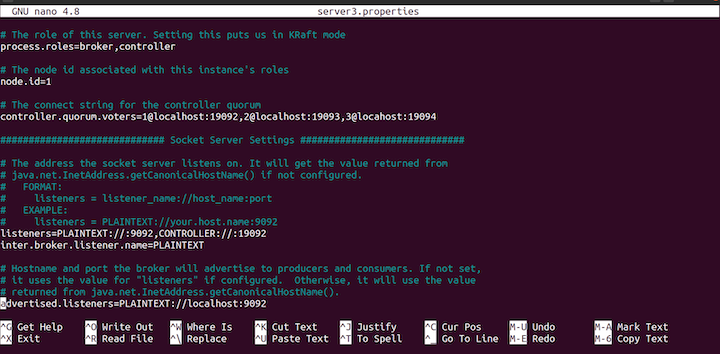
config file.In this code, process.roles is set to both broker and controller. This means that the same server will act as both the broker and the controller.
We’ll have three servers with id: 1, 2, and 3 and three controllers running on port localhost:19092, localhost:19093, and locahost:19094. The following Kafka brokers will be running in the port: 9092, 9093, 9094.
Now, with the KRaft config file open, set the controller.qorum.voters to the following:
controller.quorum.voters=1@localhost:19092,2@localhost:19093,3@locahost:19094
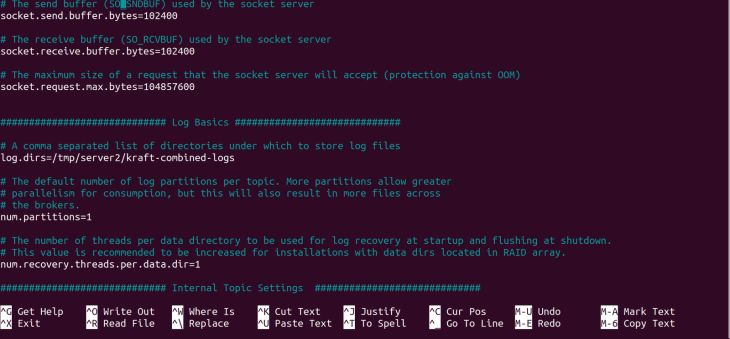
Next, scroll down and set the listeners like so:
listeners=PLAINTEXT://:9092,CONTROLLER://:19092
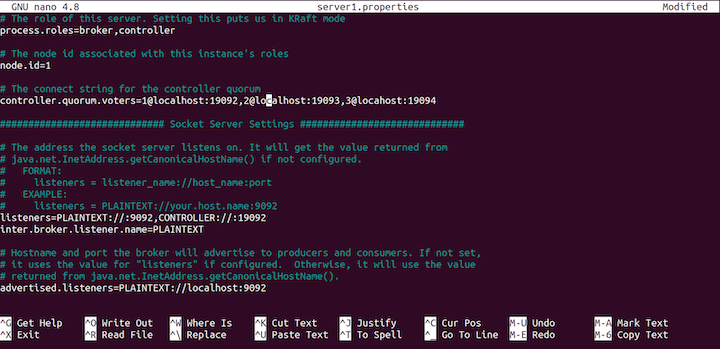
config file.We’ll need to change the destination of the log files, as follows:
log.dirs=/tmp/server1/kraft-combined-logs

Finally, type CTRL X and yes at the prompt to save our configurations.
Now, we’ve successfully created a copy of one server and configured the copy. Next, we’ll create two additional copies of the server from the server1.properties. Run the following commands:
cp server1.properties server2.properties
cp server1.properties server3.properties
ls

Next, you’ll add configurations to server2.properties by running this command:
nano server2.properties
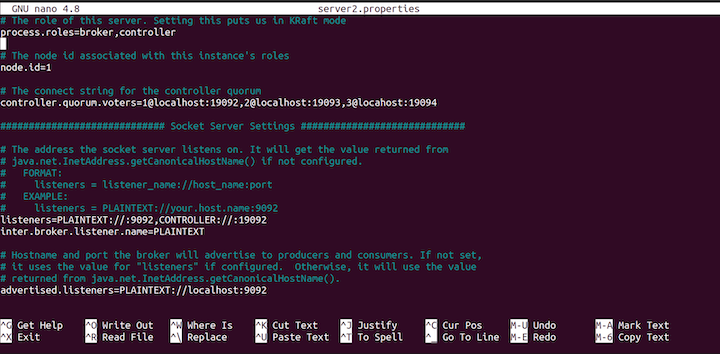
server2.properties file.Change the node.id to 2:
node.id=2
Then, change the listeners, as follows:
listeners=PLAINTEXT://:9093,CONTROLLER://:19093
Change the advertised.listeners, as well:
advertised.listeners=PLAINTEXT://localhost:9093
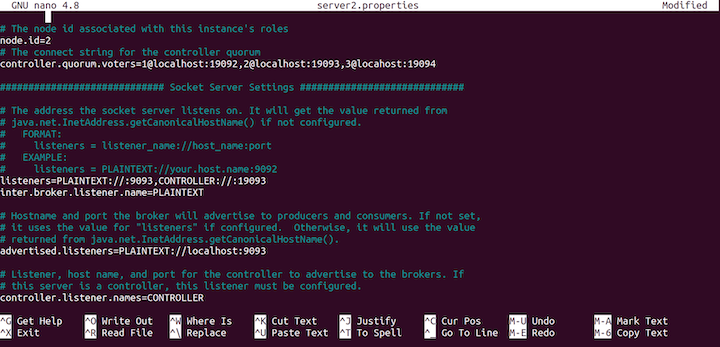
server2.properties.Next, change the log directory log.dirs:
log.dirs=/tmp/server2/kraft-combined-logs
server2.properties.That’s all the configuration for the server2.properties server. Type CTRL X and yes at the prompt to save our configurations.
Next, we’ll configure the third server, server3.properties.
Run the following command to start configuring the file:
nano server3.properties
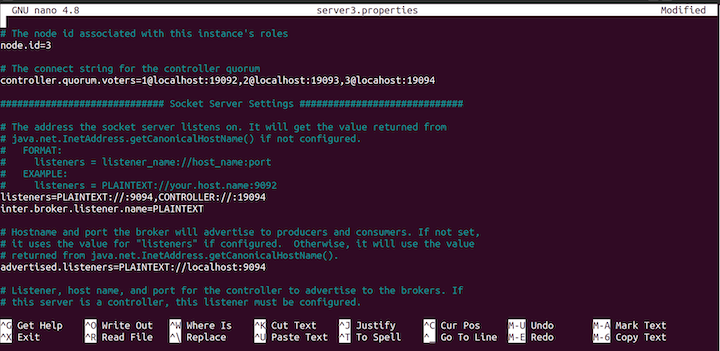
server3.properties file.Update the node.id to 3 as follows:
node.id=3
Then, change the listeners, like so:
listeners=PLAINTEXT://:9094,CONTROLLER://:19094
Change the advertised.listeners to the following:
advertised.listeners=PLAINTEXT://localhost:9094
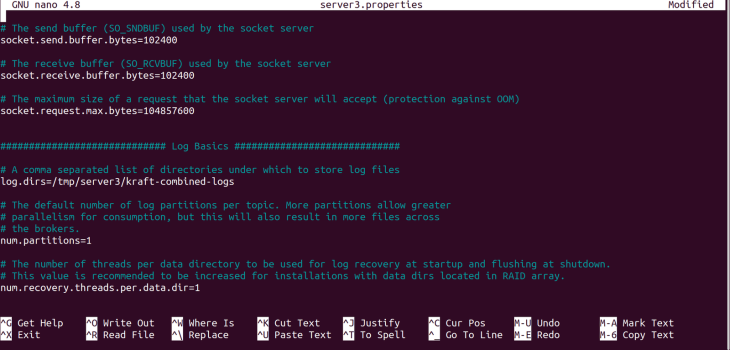
server3.properties file.Change the log directory, log.dirs, with the following command:
log.dirs=/tmp/server3/kraft-combined-logs
server3.properties.Next, use the following command to create an ID for our cluster:
cd ..
cd ..
./bin/kafka-storage.sh random-uuid
Once you run the commands, a unique ID will be logged out. Ensure you copy the ID, as we’ll use it later:

Next, we’ll format the location of the log directories to allow Kafka to store the logs:
./bin/kafka-storage.sh format -t iKDSfyiITuqsq1u8b9hEQQ -c ./config/kraft/server1.properties

./bin/kafka-storage.sh format -t iKDSfyiITuqsq1u8b9hEQQ -c ./config/kraft/server2.properties

./bin/kafka-storage.sh format -t iKDSfyiITuqsq1u8b9hEQQ -c ./config/kraft/server3.properties
Here’s the output:

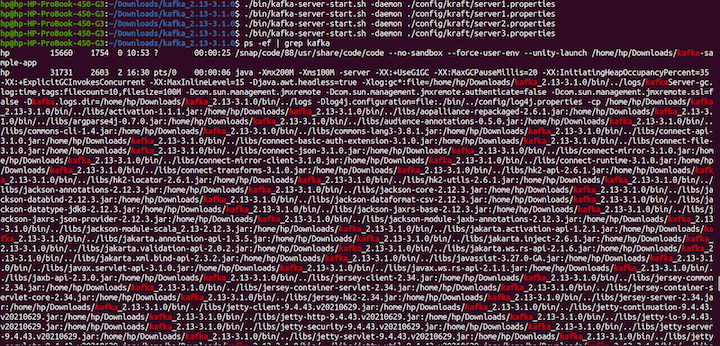
At this point, our severs are not running. Start the servers with the following command:
export KAFKA_HEAP_OPTS="-Xmx200M -Xms100M"
./bin/kafka-server-start.sh -daemon ./config/kraft/server1.properties
./bin/kafka-server-start.sh -daemon ./config/kraft/server2.properties
./bin/kafka-server-start.sh -daemon ./config/kraft/server3.properties
ps -ef | grep kafka
Now that we know how to configure the Kafka server, it is time to learn how to create topics.
Run the following command:
./bin/kafka-topics.sh --create --topic kraft-test --partitions 3 --replication-factor 3 --bootstrap-server localhost:9092
In this tutorial, we’ll be using the kafka-node client library for Node.js. Kafka has other clients for other programming languages as well, so feel free to use Kafka for any language of your choosing. At the time of this writing, KRaft is not production-ready and may only be used in development mode. For this tutorial, we will use ZooKeeper.
Since we’re using Node.js in this exercise, we’ll begin by bootstrapping a basic application with a minimal structure.
To start, we’ll create a new directory to house the project and navigate into it, like so:
mkdir kafka-sample-app
cd kafka-sample-app
Next, we’ll create a package.json file by running the npm init command. Then, we’ll follow the instructions to set up the project as usual.
The package.json file should look like this after the project is set up:
{
  "name": "kafka-producer_consumer_tutorial",
  "version": "1.0.0",
  "description": "Building a real-time data streaming application pipeline with Apache Kafka\"",
  "main": "app.js",
  "scripts": {
    "test": "echo \"Error: no test specified\" && exit 1",
    "start": "node producer.js"
  },
  "author": "Deborah Emeni",
  "license": "ISC",
  "dependencies": {
    "dotenv": "^16.0.0",
    "kafka-node": "^5.0.0"
  }
}
We’ve installed two dependencies that we’ll need later. To install the kafka-node client, we run npm install kafka-node on the terminal. The documentation for kafka-node is available on npm. The dotenv package is used for setting up environment variables for the app.
We can install the package by running npm install dotenv.
Now that we’re finished installing the dependencies, let’s create all the necessary files as shown in the figure below:
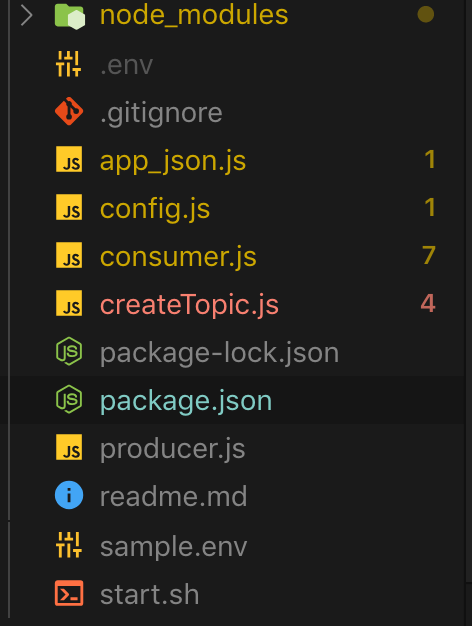
The above figure shows all the necessary files required by the application. Let’s take a closer look at each file to understand what’s going on.
First, let’s manually create a new topic from the terminal with three partitions and replicas with the following command:
./kafka-topics.sh --create --zookeeper --replication-factor --partitions --topic
In an actual application, we should always update the <ZOOKEEPER_URL:PORT>, <NO_OF_REPLICATIONS>, <NO_OF_PARTITIONS>, and <TOPIC_NAME> with real values. However, for the purpose of this tutorial, we’ll handle that with a script. The code for creating a new topic can be found in the [createTopic.js] file.
Here’s the code:
const kafka = require('kafka-node');
const config  = require('./config');

const client = new kafka.KafkaClient({kafkaHost: config.KafkaHost});

const topicToCreate = [{
  topic: config.KafkaTopic,
  partitions: 1,
  replicationFactor: 1
}
];

client.createTopics(topicToCreate, (error, result) => {
  // result is an array of any errors if a given topic could not be created
  console.log(result, 'topic created successfully');
});
Here, we import the Kafka client and connect to the Kafka setup. You’ll notice that we never configured a replication factor in our use case. However, this does not mirror a real-life scenario.
In production use cases, we can set up multiple Kafka brokers based on the volume of data or messages we intend to process. Let’s see how we can accomplish that in the local set up.
Now that we’ve created a topic, we can produce (or write) data (or content) to the topic. The code for writing to a topic is found in the [producer.js] file.
Here’s the code:
const Kafka = require('kafka-node');
const config  = require('./config');

const Producer = Kafka.Producer;
const client = new Kafka.KafkaClient({kafkaHost: config.KafkaHost});
const producer = new Producer(client,  {requireAcks: 0, partitionerType: 2});

const pushDataToKafka =(dataToPush) => {

  try {
  let payloadToKafkaTopic = [{topic: config.KafkaTopic, messages: JSON.stringify(dataToPush) }];
  console.log(payloadToKafkaTopic);
  producer.on('ready', async function() {
    producer.send(payloadToKafkaTopic, (err, data) => {
          console.log('data: ', data);
  });

  producer.on('error', function(err) {
    //  handle error cases here
  })
  })
  }
catch(error) {
  console.log(error);
}

};

const jsonData = require('./app_json.js');

pushDataToKafka(jsonData);
Here, we imported the kafka-node library and set up the client to receive a connection from the Kafka producer or broker. Once that connection is set up, we produce data to the specified KafkaTopic. Note that in real-world applications, the client’s connection should always be closed once the publish task is complete by calling the client.close() method.
Now, if we run the start script using the ./start.sh command, we’ll get the data written to our Kafka topic:
npm start
To read the topic data (or content), we can use the Consumer script in the [consumer.js] file.
If we run node ./consumer.js, we’ll get the following output:
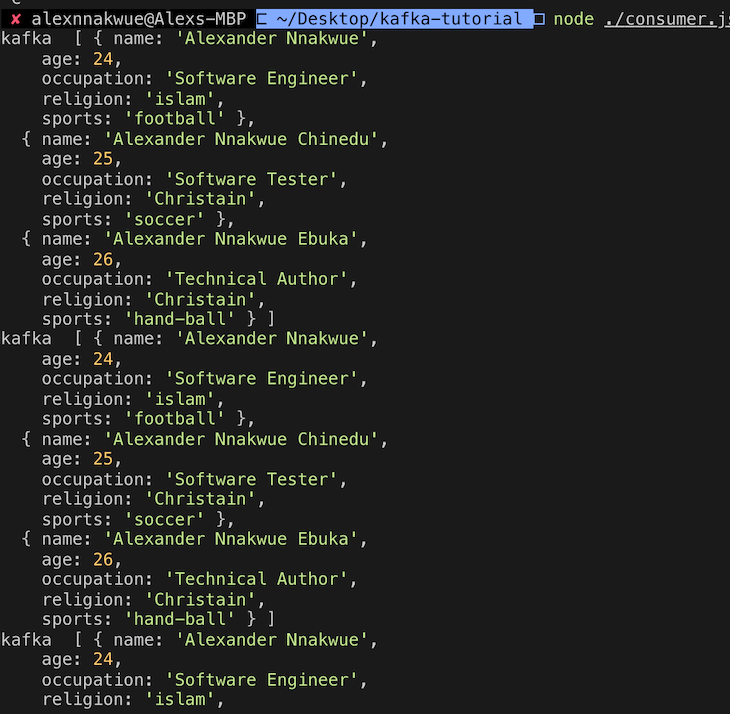
Here’s the code for the consumer.js file:
const kafka = require('kafka-node');
const config = require('./config');

try {
 const Consumer = kafka.Consumer;
 const client = new kafka.KafkaClient({idleConnection: 24 * 60 * 60 * 1000,  kafkaHost: config.KafkaHost});

 let consumer = new Consumer(
    client,
    [{ topic: config.KafkaTopic, partition: 0 }],
    {
      autoCommit: true,
      fetchMaxWaitMs: 1000,
      fetchMaxBytes: 1024 * 1024,
      encoding: 'utf8',
      // fromOffset: false
    }
  );
  consumer.on('message', async function(message) {
    console.log(
      'kafka ',
      JSON.parse(message.value)
    );
  })
  consumer.on('error', function(error) {
    //  handle error
    console.log('error', error);
  });
}
catch(error) {
  // catch error trace
  console.log(error);
}
Here, we connect to the Kafka client and consume data from the predefined Kafka topic.
Now that we’ve completed the setup, we need to start the ZooKeeper server before we can run the application. This step is necessary because the Kafka server depends on the ZooKeeper server to run.
To start the ZooKeeper server, run the following command:
bin/zookeeper-server-start.sh config/zookeeper.properties
Next, run this command to start up the Kafka server:
bin/Kafka-server-start.sh config/server.properties
We can check the number of available Kafka topics in the broker by running this command:
bin/Kafka-topics.sh --list --zookeeper localhost:2181
We can also consume data from a Kafka topic by running the console-consumer command:
bin/kafka-console-consumer.sh --bootstrap-server localhost:9092 --topic kafka-example-topic --from-beginning
Additionally, Kafka provides a create script that allows developers to manually create a topic on their cluster:
./kafka-topics.sh --create --zookeeper --replication-factor --partitions --topic
It’s important to note that we need to compulsorily start the ZooKeeper and Kafka servers respectively on separate terminal windows before we can create a Kafka topic.
Kafka can act as a publisher/subscriber type of system, used for building a read-and-write stream for batch data similar to RabbitMQ. It can also be used for building highly resilient, scalable, real-time streaming and processing applications.
Note that this type of stream processing can be done on the fly based on some predefined events. Additionally, just like messaging systems, Kafka has a storage mechanism comprised of highly tolerant clusters, which are replicated and highly distributed. By replication, we mean that data can be spread across multiple different clusters, minimizing data loss throughout the entire chain.
Kafka can be incorporated into other systems as a standalone plugin. In this case, it can independently scale based on need. This means that we can scale producers and consumers independently, without causing any side effects for the entire application.
We’ve seen that building a data pipeline involves moving data from a source point, where it is generated to a destination point, where it is needed or consumed by another application. The source point can also refer to data output from another application,
The code for this tutorial is available on this GitHub repo. To get a feel of the design philosophy used for Kafka, you can check this section of the documentation. In a future tutorial, we can look at other tools made available via the Kafka API, like Kafka streams and Kafka connect. For an introduction, you can check this section of the documentation.
Hopefully, you’re now ready to explore more complex use cases. If you have any questions, don’t hesitate to engage me in the comment section below or hit me up on Twitter.
 Monitor failed and slow network requests in production
Deploying a Node-based web app or website is the easy part. Making sure your Node instance continues to serve resources to your app is where things get tougher. If you’re interested in ensuring requests to the backend or third-party services are successful, try LogRocket.

LogRocket lets you replay user sessions, eliminating guesswork around why bugs happen by showing exactly what users experienced. It captures console logs, errors, network requests, and pixel-perfect DOM recordings — compatible with all frameworks.
LogRocket's Galileo AI watches sessions for you, instantly identifying and explaining user struggles with automated monitoring of your entire product experience.
LogRocket instruments your app to record baseline performance timings such as page load time, time to first byte, slow network requests, and also logs Redux, NgRx, and Vuex actions/state. Start monitoring for free.

Explore 15 essential MCP servers for web developers to enhance AI workflows with tools, data, and automation.

Learn how contrast-color() automatically picks accessible text colors using native CSS, without JavaScript.

Learn how to build a harness-style AI workflow using Claude Code with specialized Dev, QE, and Ops subagents, gated handoffs, MCP telemetry, and LEARNING.md.

Learn how to build smooth staggered animations in CSS using modern features like sibling-index(), complete with practical examples, fallbacks, and accessibility tips.
Hey there, want to help make our blog better?
Join LogRocket’s Content Advisory Board. You’ll help inform the type of content we create and get access to exclusive meetups, social accreditation, and swag.
Sign up now

