
Data tables were introduced to simplify the process of visualizing, grouping, querying, and sorting data. Normally, a table is just a tabular form of data and has nothing special about it. But a data table may offer multiple features, including data sorting, data querying, updating of data, pagination, printing, and data exports, and more.

Making use of a data table in a framework like Angular, which makes constant updates to its codebase, presents a few complications:
The Replay is a weekly newsletter for dev and engineering leaders.
Delivered once a week, it's your curated guide to the most important conversations around frontend dev, emerging AI tools, and the state of modern software.
Angular DataTables is a library for building complex HTML tables that uses jQuery’s DataTables plugin. It is configured to support TypeScript and optimized for Angular 2+.
Angular DataTables will come in handy when:
Angular DataTables features can be broadly grouped into two sets: basic and advanced. From there, Angular DataTables also supports a number of extensions.
dtTriggerLet’s now dive into installing and using Angular DataTables. To start, we will install our Angular application, then install DataTables into the application:
ng new angular-datatable
When the Angular installation is done, you can then step into the directory in your terminal and install DataTables:
cd angular-datable

ng add angular-datatables
This will add jQuery and the DataTables plugin to your angular.json file and your application. When the installation is done, you can then import your data table module in app.module.ts to use it globally across the application:
// src/app/app.module.ts

import {DataTablesModule} from 'angular-datatables';

imports: [
  BrowserModule,
  AppRoutingModule,
  DataTablesModule,
],
We’ll use the JSONPlaceholder API to populate our data table with information to take Angular DataTables for a spin.
To do that, we will first have to add the HttpClient module in our app.module.ts file to make it accessible in our services for HTTP requests. We do so by importing it and calling it in the imports array:
// src/app/app.module.ts

import { HttpClientModule } from '@angular/common/http';

imports: [
  BrowserModule,
  AppRoutingModule,
  DataTablesModule,
  HttpClientModule
],
We’ll create an Angular service that will communicate with our HTTP module to fetch data from our API. To generate the service, we’ll run the below command in the terminal:
ng generate service services/users/users
This will create a new file directory in our src/app folder containing our users.services.ts file:
-| Users/
    users.service.spec.ts
    users.services.ts
We can then import our HttpClient in our users.service.ts file:
// src/app/services/users/users.service.ts

import { HttpClient } from '@angular/common/http';

constructor(private http: HttpClient) { }
Next, we add our function, which will get users from the API link:
users() {
  this.http.get('https://jsonplaceholder.typicode.com/users');
}
After creating the service, we then generate a component with the name users, which will hold the data we get from the service we just created and display it in our HTML page. We’ll also use the users component to create our data table and all the functionalities.
To create a component, simply run the following command:
ng generate component components/users
In our users components, we will consume the API data fetched from the service we created and store it in an array named allUsers:
import { UsersService } from '../../services/users/users.service';

export class UsersComponent implements OnInit {

  allUsers: any = [];
  constructor(private service: UsersService) { }

  ngOnInit(): void {
    this.users();
  }

  users(): void {
    this.service
        .users()
        .subscribe((response: any) => {
          this.allUsers = response.data;
        });
  }

}
Then we populate our users.component.html with our fetched users:
<div class="container">
    <div class="card m-5 p-3">
        <div class="card-body">
            <table class="table table-bordered table-striped table-hover">
                <thead>
                <tr>
                    <th>ID</th>
                    <th>Name</th>
                    <th>Username</th>
                    <th>Email</th>
                    <th>Phone number</th>
                    <th>Address</th>
                </tr>
                </thead>
                <tbody>
                <tr *ngFor="let user of allUsers">
                    <td>{{ user.id }}</td>
                    <td>{{ user.name }}</td>
                    <td>{{ user.username }}</td>
                    <td>{{ user.email }}</td>
                    <td>{{ user.phone }}</td>
                    <td>{{ user.address.street }}, {{ user.address.city }}</td>
                </tr>
                </tbody>
            </table>
        </div>

    </div>
</div>
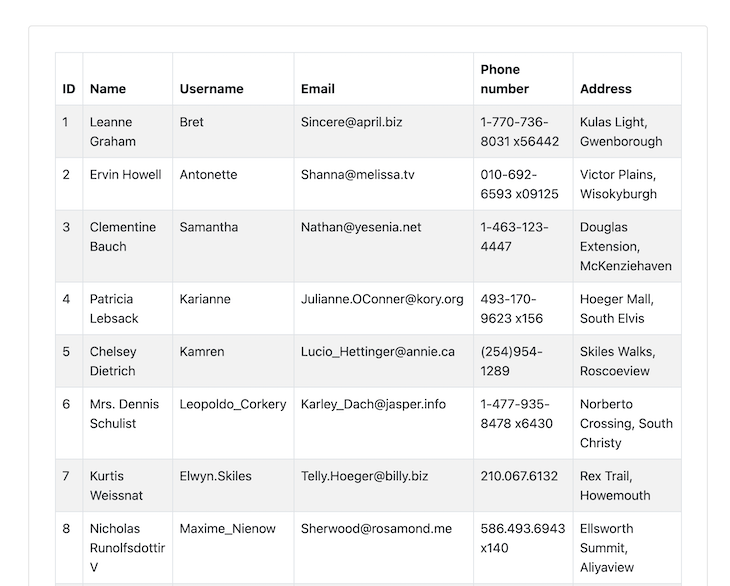
It will display something like this:
Now that this is done, crack your fingers because we’re about to dive into data table usage and manipulation! 😋
Since we already added our data table module in app.module.ts, we won’t have to import it in our component; we simply call it as a subject using rxjs:
// src/app/components/users/users.components.ts
import {Subject} from 'rxjs';
...

export class UsersComponent implements OnInit {

  dtOptions: DataTables.Settings = {};
  dtTrigger: Subject<any> = new Subject<any>();

}
Then we add our unsubscribe function to the Angular OnDestroy module:
import { Component, OnInit, OnDestroy } from '@angular/core';

export class UsersComponent implements OnInit, OnDestroy {
  ...
}

ngOnDestroy(): void {
  this.dtTrigger.unsubscribe();
}
This will reset the data table every time we leave the page attached to the component.
With that, we will now add a data table to our users function and a users table in our component HTML:
users(): void {
  this.service
      .users()
      .subscribe((response: any) => {
        this.allUsers = response;
        // initiate our data table
        this.dtTrigger.next();
      });
}
<table class="table table-bordered table-striped table-hover" datatable [dtOptions]="dtOptions" [dtTrigger]="dtTrigger">
  ...
</table>
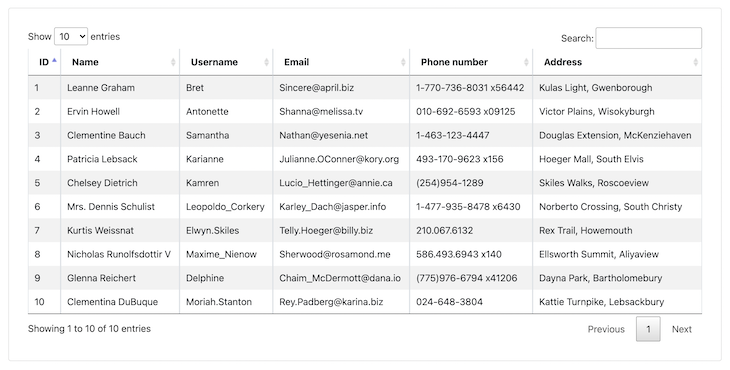
Filtering and pagination have been added to the table, as you can notice in the image below:
There may be times when we wish to search data presented to the end user in our own manner. Common examples include number range searches (in between two numbers) and date range searches. Angular DataTables allows you to make those custom searches easily and effortlessly.
N.B., the documentation for custom filtering in Angular DataTables is faulty, mainly because of updates in TypeScript with Angular, so follow my examples instead.
To initiate custom filtering, we will first import a @ViewChild decorator, which allows us to inject into a component class references to elements used inside its template:
import {Component, OnInit, OnDestroy, ViewChild} from '@angular/core';
Then, we import DataTableDirective in our component:
import {DataTableDirective} from 'angular-datatables';
We then reference our DataTableDirective and assign it to a new variable datatableElement. After that, we will create max and min variables, which will take the maximum and minimum numbers for our custom filtering.
Let’s begin with the referencing:
@ViewChild(DataTableDirective, {static: false})
datatableElement: any = DataTableDirective;
min: any = 0;
max: any = 0;
Next, we use the custom function for filtering in our ngOnInit:
ngOnInit(): void {
  ...

  $.fn.dataTable.ext.search.push((settings: any, data: string[], dataIndex: any) => {
    const id = parseFloat(data[0]) || 0; // use data for the id column
    return (Number.isNaN(this.min) && Number.isNaN(this.max)) ||
        (Number.isNaN(this.min) && id <= this.max) ||
        (this.min <= id && Number.isNaN(this.max)) ||
        (this.min <= id && id <= this.max);
  });
}
This will get the max and min numbers, fetch the data, then update the data table. Next, we create a function to filter the data table by id:
filterById(): void {
  this.datatableElement.dtInstance.then((dtInstance: DataTables.Api) => {
    dtInstance.draw();
  });
}
Now it restarts the data table when we exit the page:
ngOnDestroy(): void {
  ...
  $.fn.dataTable.ext.search.pop();
}
With all this done, we then update our users.components.html page to initiate our filterById function:
<form (submit)="filterById()">
    <label>
        Min
        <input type="number" name="min" id="min" [(ngModel)]="min" />
    </label>
    <label>
        Max
        <input type="number" name="max" id="max" [(ngModel)]="max" />
    </label>
    <button class="btn btn-primary" type="submit">Filter by ID</button>
</form>
<br />
And that’s it — we can use custom filtering by id.
As mentioned above, Angular DataTables supports a number of extensions, one of which is a buttons extension. The buttons extension allows us to export and copy our table data as a file. This is especially useful when we want to share data without giving access to the application.
To use the DataTables buttons extension, install its plugin using the below command:
# If you want to export excel files
npm install jszip --save
# JS file
npm install datatables.net-buttons --save
# CSS file
npm install datatables.net-buttons-dt --save
# Typings
npm install @types/datatables.net-buttons --save-dev
Then add the dependencies in the scripts and styles attributes:
{
  "projects": {
    "your-app-name": {
      "architect": {
        "build": {
          "options": {
            "styles": [
              ...
              "node_modules/datatables.net-buttons-dt/css/buttons.dataTables.css"
            ],
            "scripts": [
              ...
              "node_modules/jszip/dist/jszip.js",
              "node_modules/datatables.net-buttons/js/dataTables.buttons.js",
              "node_modules/datatables.net-buttons/js/buttons.colVis.js",
              "node_modules/datatables.net-buttons/js/buttons.flash.js",
              "node_modules/datatables.net-buttons/js/buttons.html5.js",
              "node_modules/datatables.net-buttons/js/buttons.print.js"
            ],
            ...
}
Then we include the configurations in our ngOnInit:
ngOnInit(): void {
  this.dtOptions = {
    // Declare the use of the extension in the dom parameter
    dom: 'Bfrtip',
  };
}
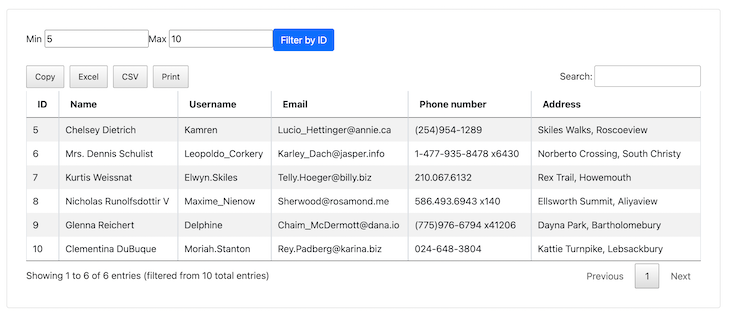
And here’s the result — the buttons Copy, Excel, CSV, and Print have been added:
There are many more options to choose from when it comes to customizing your data table. With a few tweaks, you can shape it to your specifications and it will come out perfect for whatever you’re building.
And with that, we’ve introduced Angular DataTables and its features. We also applied it to an application, used some of its features, and explored the buttons extension. I made a few modifications to the original documentation because of the updates in Angular TypeScript. I hope this tutorial gave you a simple and easy-to-follow breakdown of how to use Angular DataTables in your Angular application.
Debugging Angular applications can be difficult, especially when users experience issues that are difficult to reproduce. If you’re interested in monitoring and tracking Angular state and actions for all of your users in production, try LogRocket.
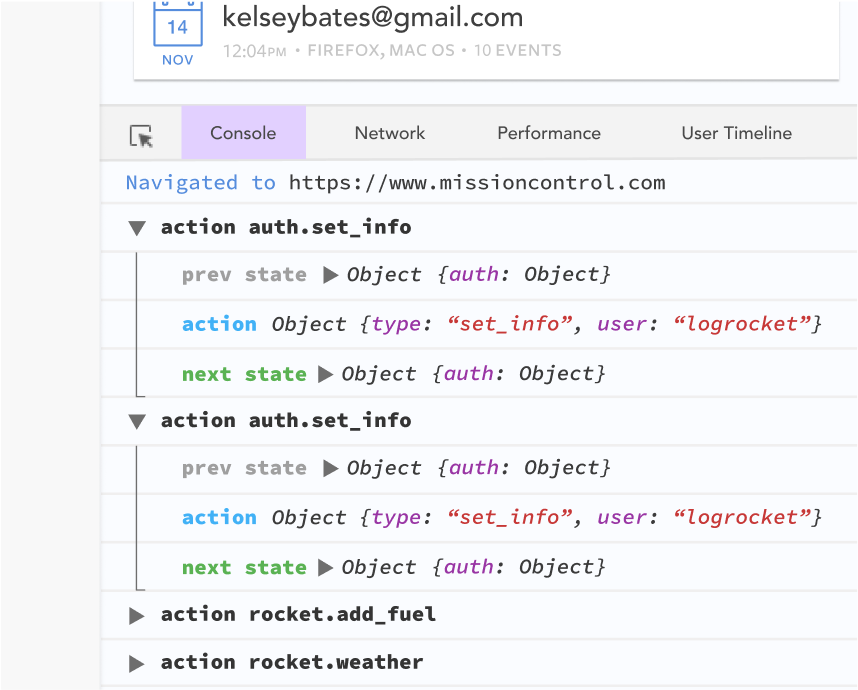
LogRocket lets you replay user sessions, eliminating guesswork by showing exactly what users experienced. It captures console logs, errors, network requests, and pixel-perfect DOM recordings—compatible with all frameworks.
With Galileo AI, you can instantly identify and explain user struggles with automated monitoring of your entire product experience.
The LogRocket NgRx plugin logs Angular state and actions to the LogRocket console, giving you context around what led to an error, and what state the application was in when an issue occurred.
Modernize how you debug your Angular apps — start monitoring for free.

React Server Components and the Next.js App Router enable streaming and smaller client bundles, but only when used correctly. This article explores six common mistakes that block streaming, bloat hydration, and create stale UI in production.

Gil Fink (SparXis CEO) joins PodRocket to break down today’s most common web rendering patterns: SSR, CSR, static rednering, and islands/resumability.

@container scroll-state: Replace JS scroll listeners nowCSS @container scroll-state lets you build sticky headers, snapping carousels, and scroll indicators without JavaScript. Here’s how to replace scroll listeners with clean, declarative state queries.

Explore 10 Web APIs that replace common JavaScript libraries and reduce npm dependencies, bundle size, and performance overhead.
Would you be interested in joining LogRocket's developer community?
Join LogRocket’s Content Advisory Board. You’ll help inform the type of content we create and get access to exclusive meetups, social accreditation, and swag.
Sign up now
11 Replies to "Using Angular DataTables to build feature-rich tables"
Great stuff
Awesome post…
Very useful, Thank you.
How can we customize the language, from english to french as example ?
Thanks
ERROR TypeError: Cannot read properties of undefined (reading ‘ext’)
I got this error in ngOnInit() at $.fn.dataTable.ext.search.push(…
I am also getting this error, could you resolve it?
I am trying to implement custom filtering. But getting error on $.fn.dataTable.ext.search.push()
Awsome, it works in a go
I use a default data as a test…then update de data and it draw properly…. but when I try to filter the data showed is the old data.. It seams that node update the html but not the DOM datatable so the filter follow working with the old data. it look like $().DataTable().rows().data is not updated with the new data…
In Angular 14 and RXJS 7, had to feed this.dtTrigger.next(); the array that contains the response list from the API call, so : this.dtTrigger.next(this.reports); for me, replace this.reports with your custom array
Buttons are not displaying for me.
ngOnInit(): void {
this.dtOptions = {
dom:’Bfrtip’,
}
this.fetchData()
}
html:
…..table data……..
Currently, this tutorial is not working. I did it exactly the way you explain it, but
1- I don’t get the users.
2- I get a lot of syntax errors.
3- The table doesn’t even show any style, it just displays the name of the columns.